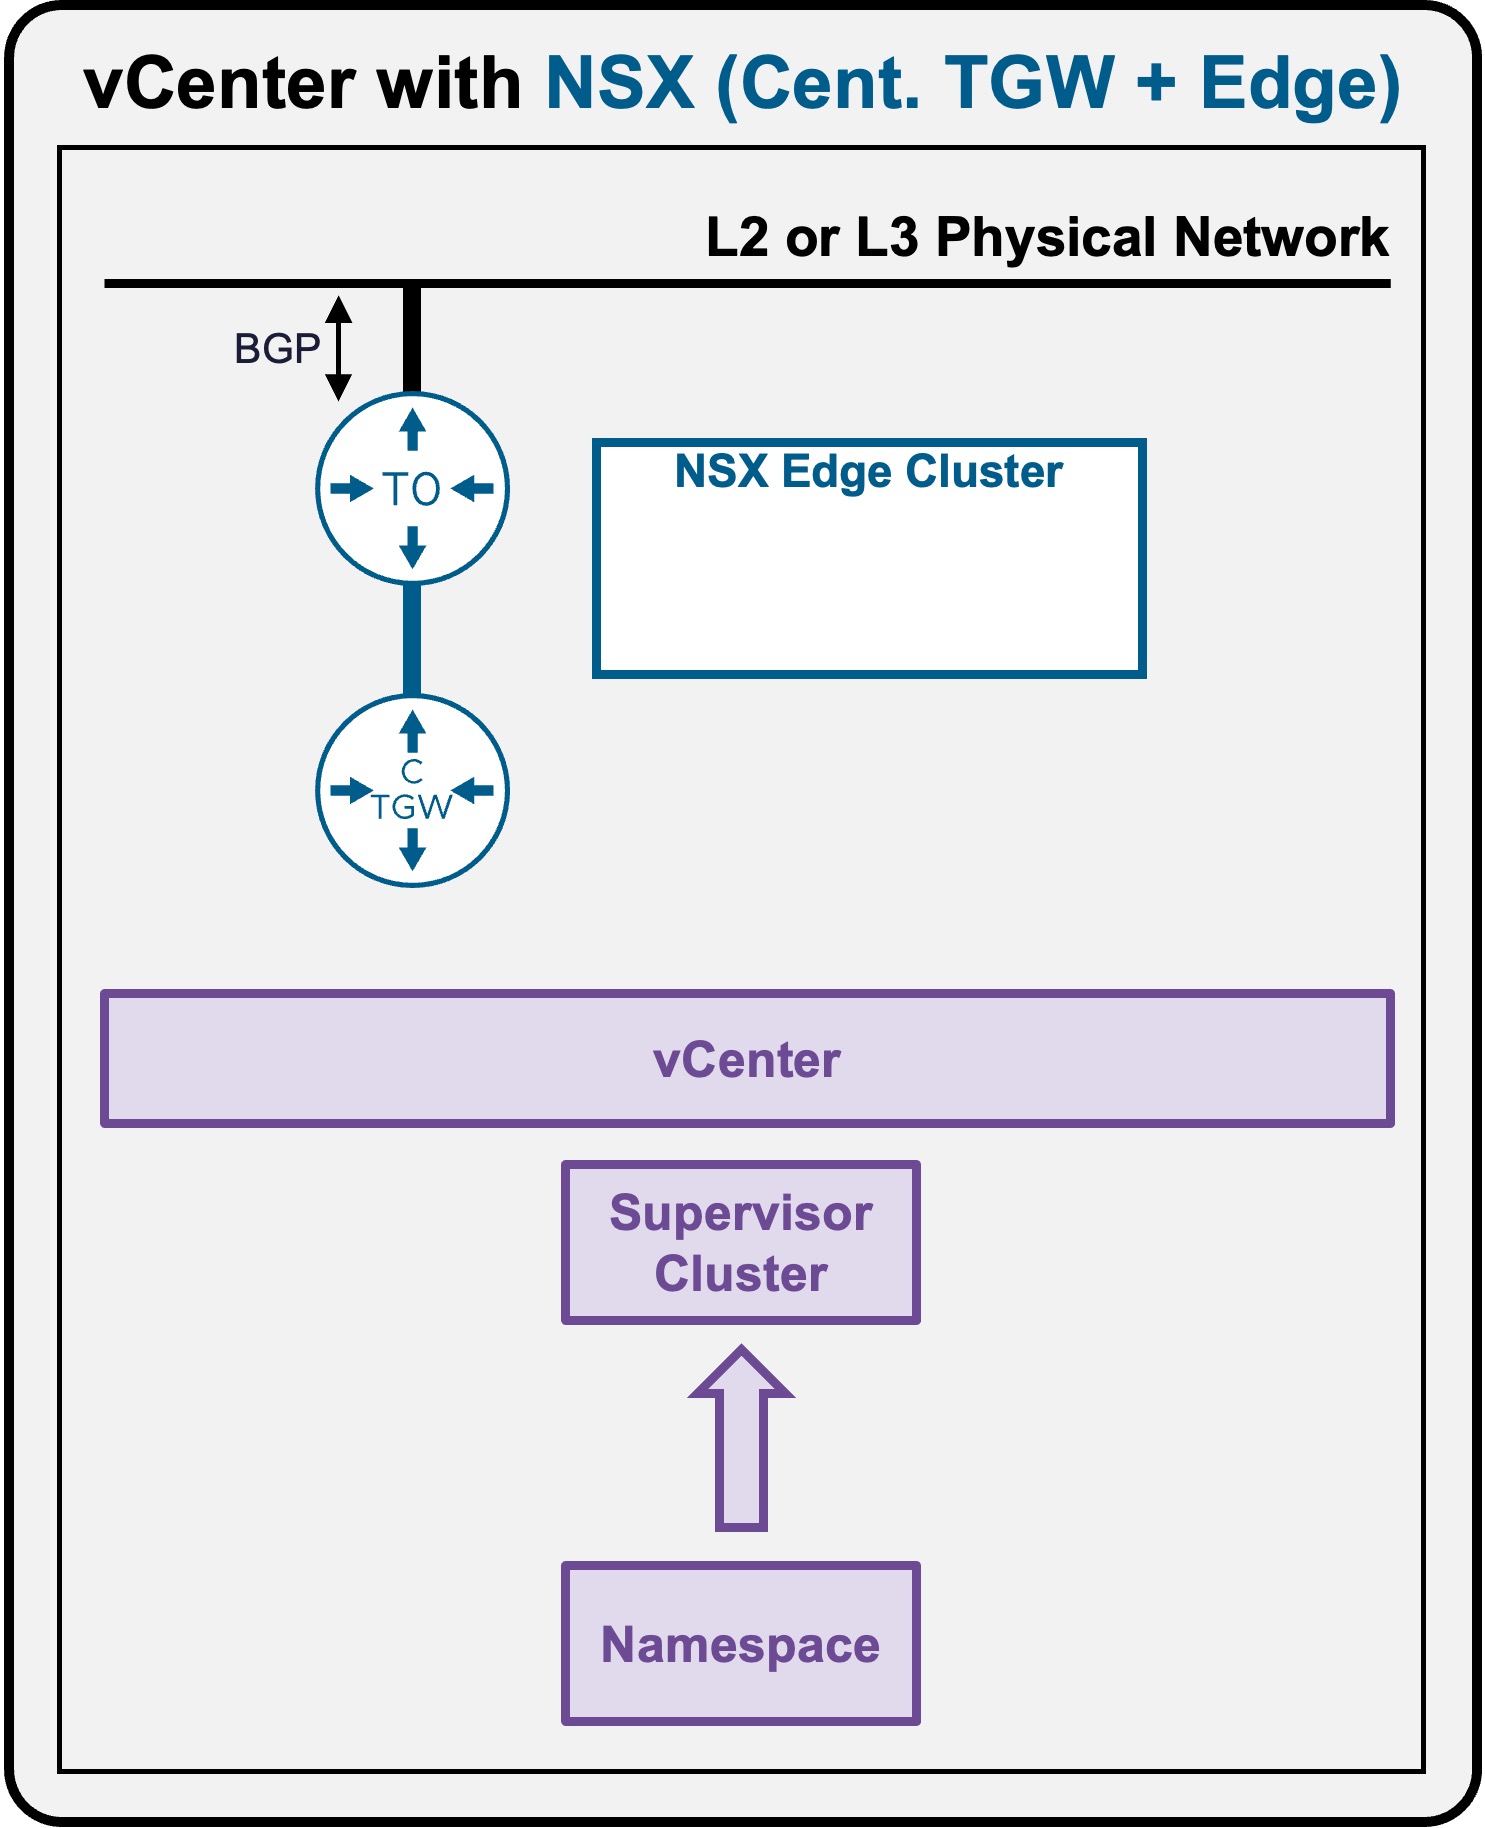
 Supervisor with "NSX + CTGW/Edge/T0"
This section describes the requirements for deploying the Supervisor Namespace utilizing an "NSX + CTGW/Edge/T0" architecture inside a vSphere environment.
- Namespace
Namespace Deployment
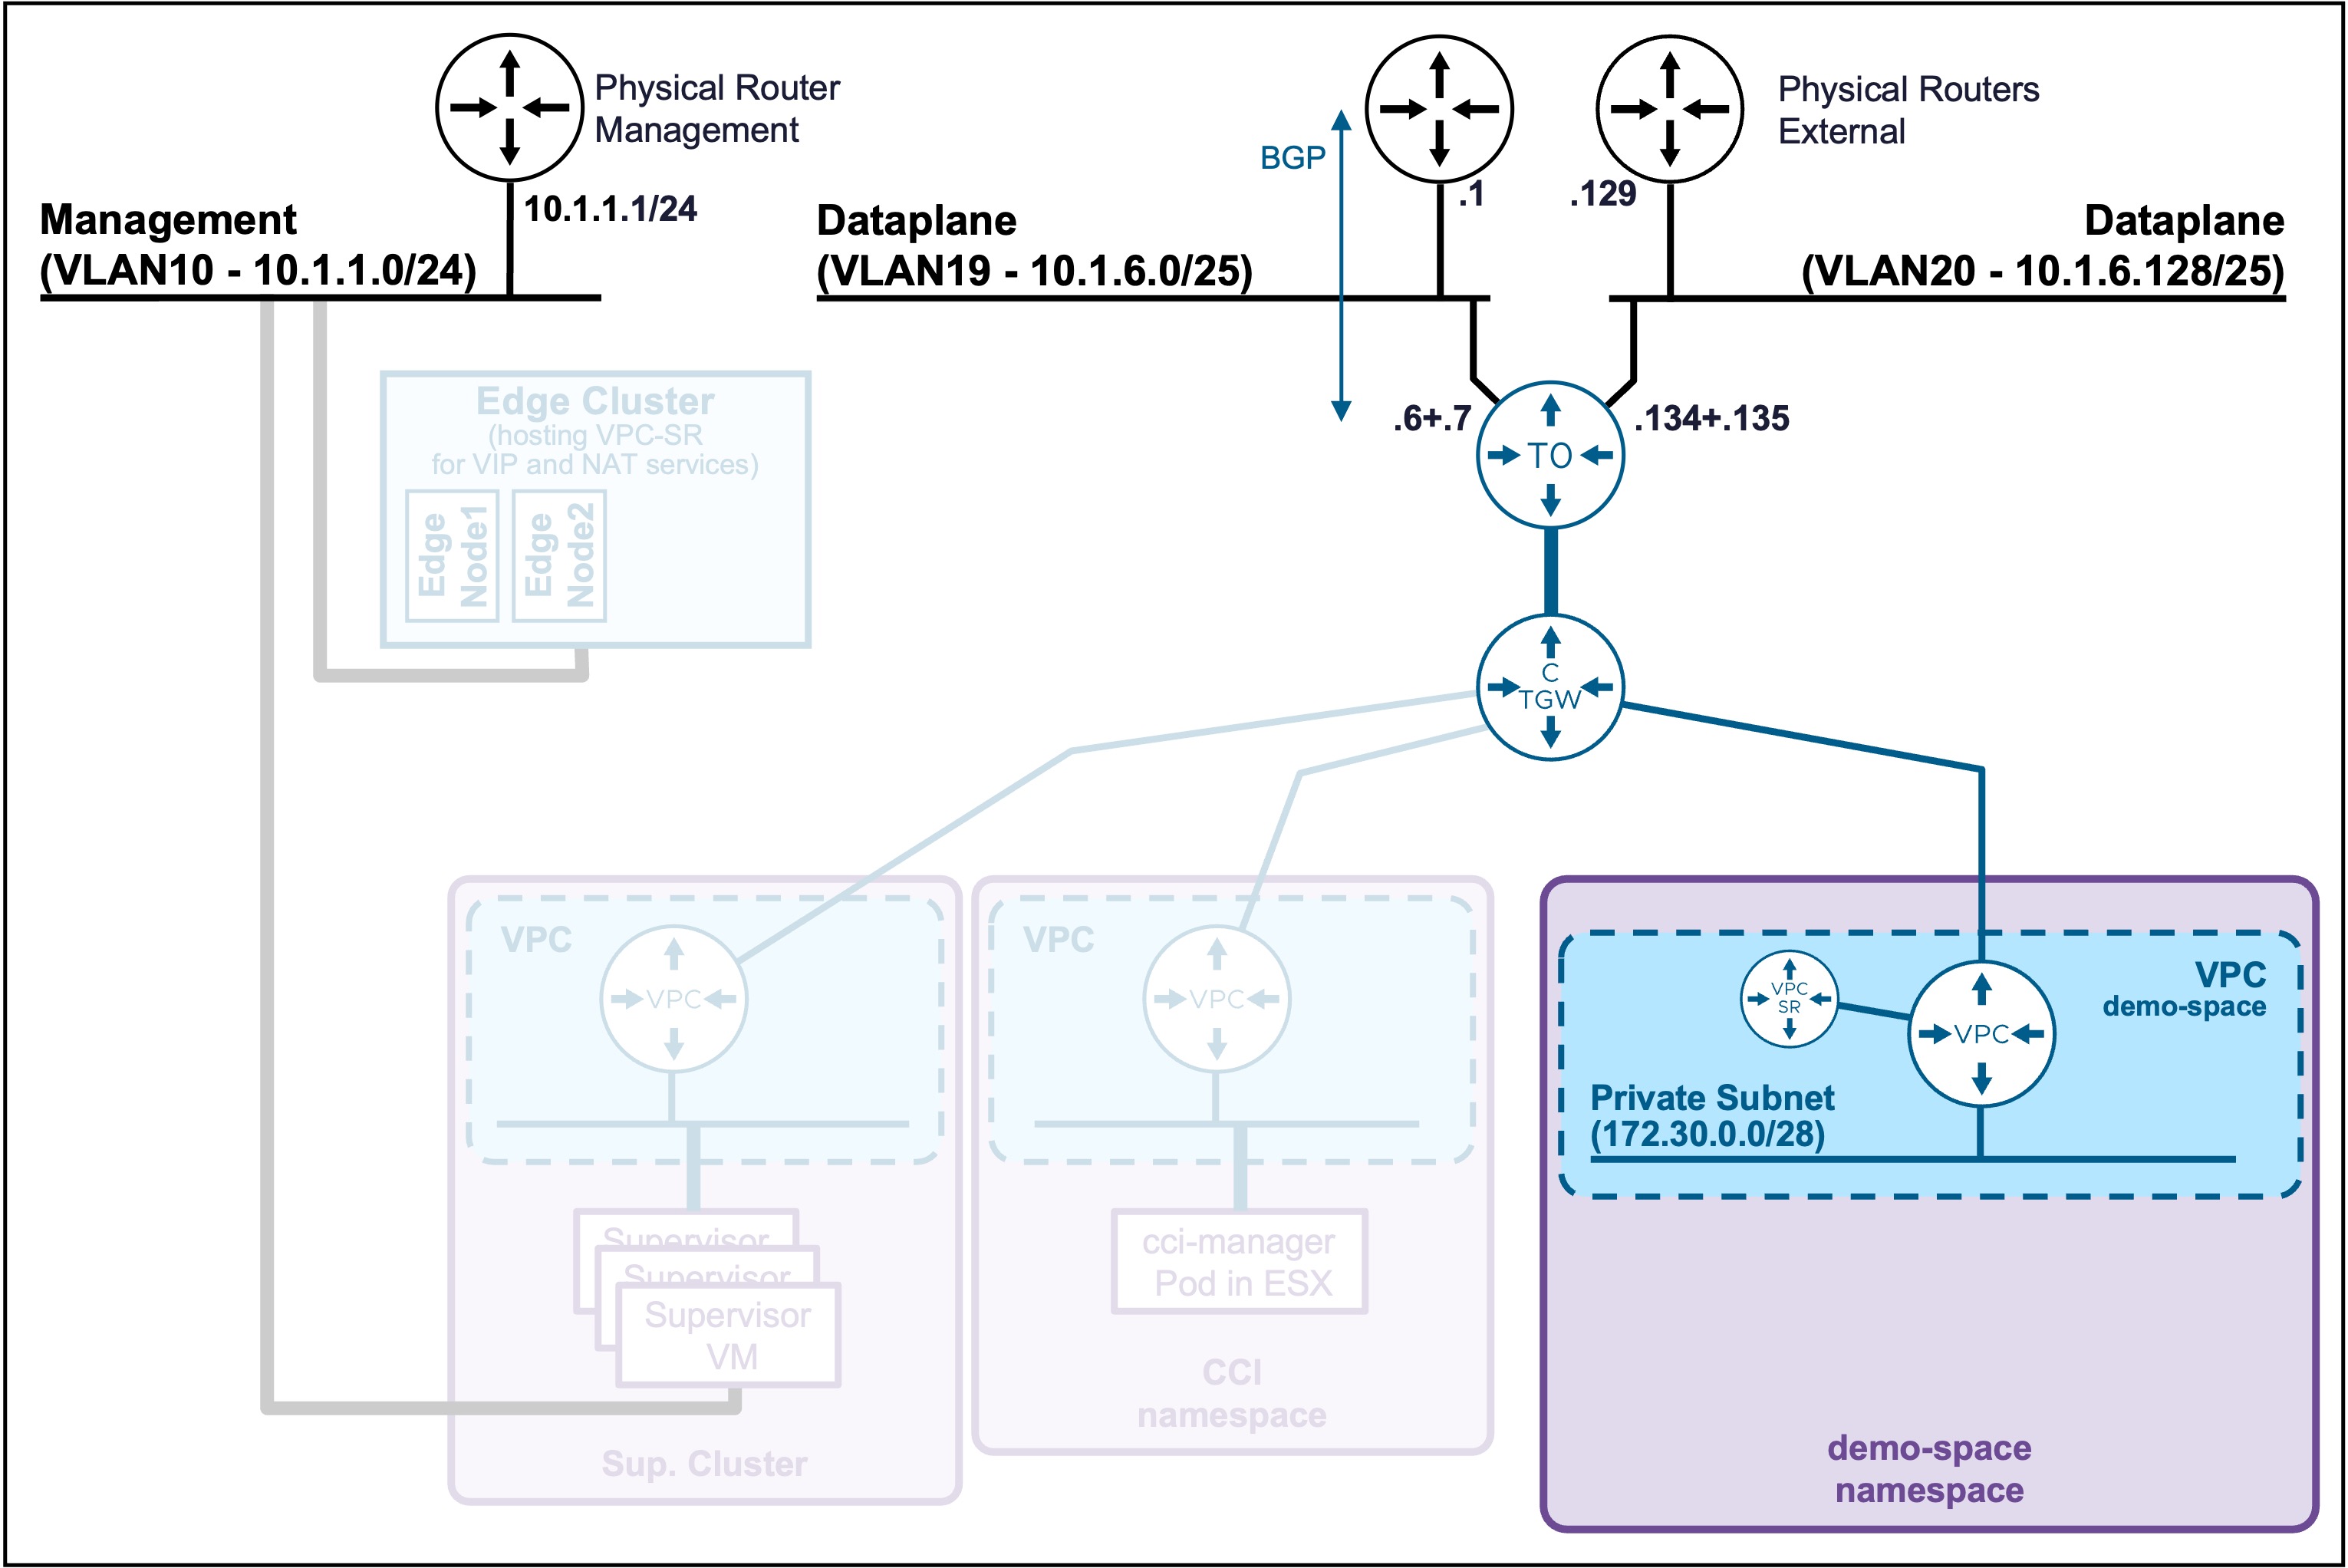
Create Namespace
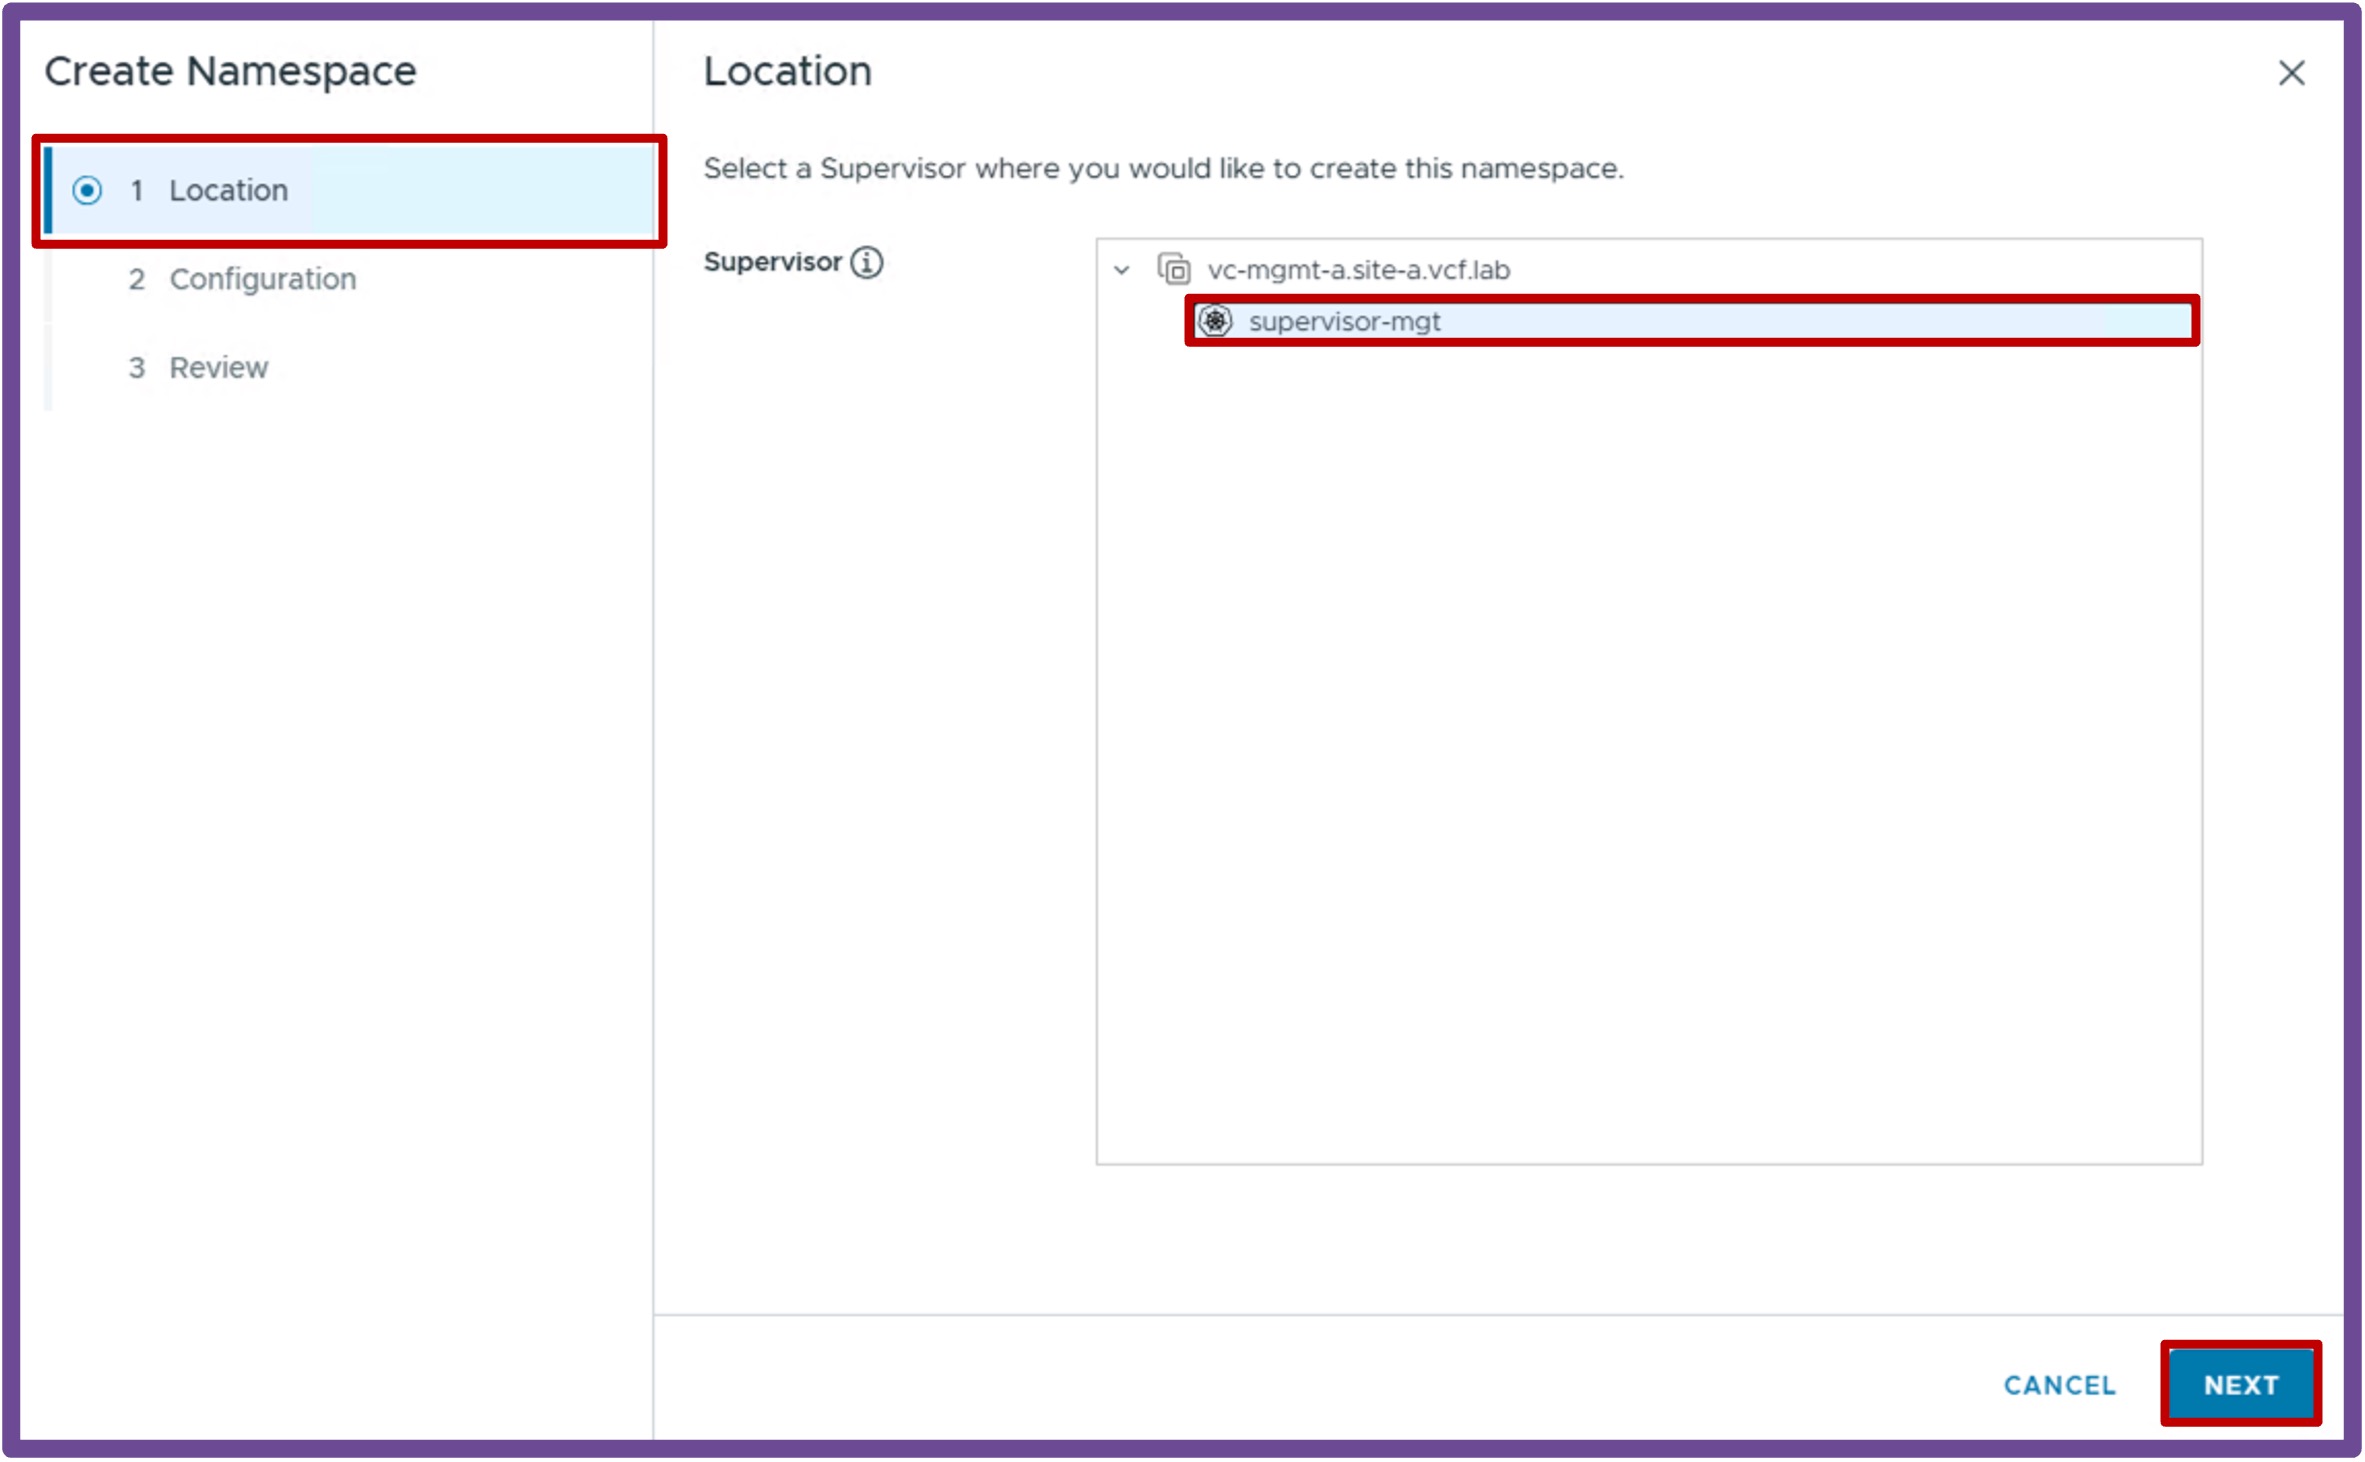
Navigate to vCenter > Supervisor Management > Namespaces, and click NEW NAMESPACE.

-
Location
Select the Supervisor, and click Next.
-
Configuration
Give a name to the Namespace, and click Next.
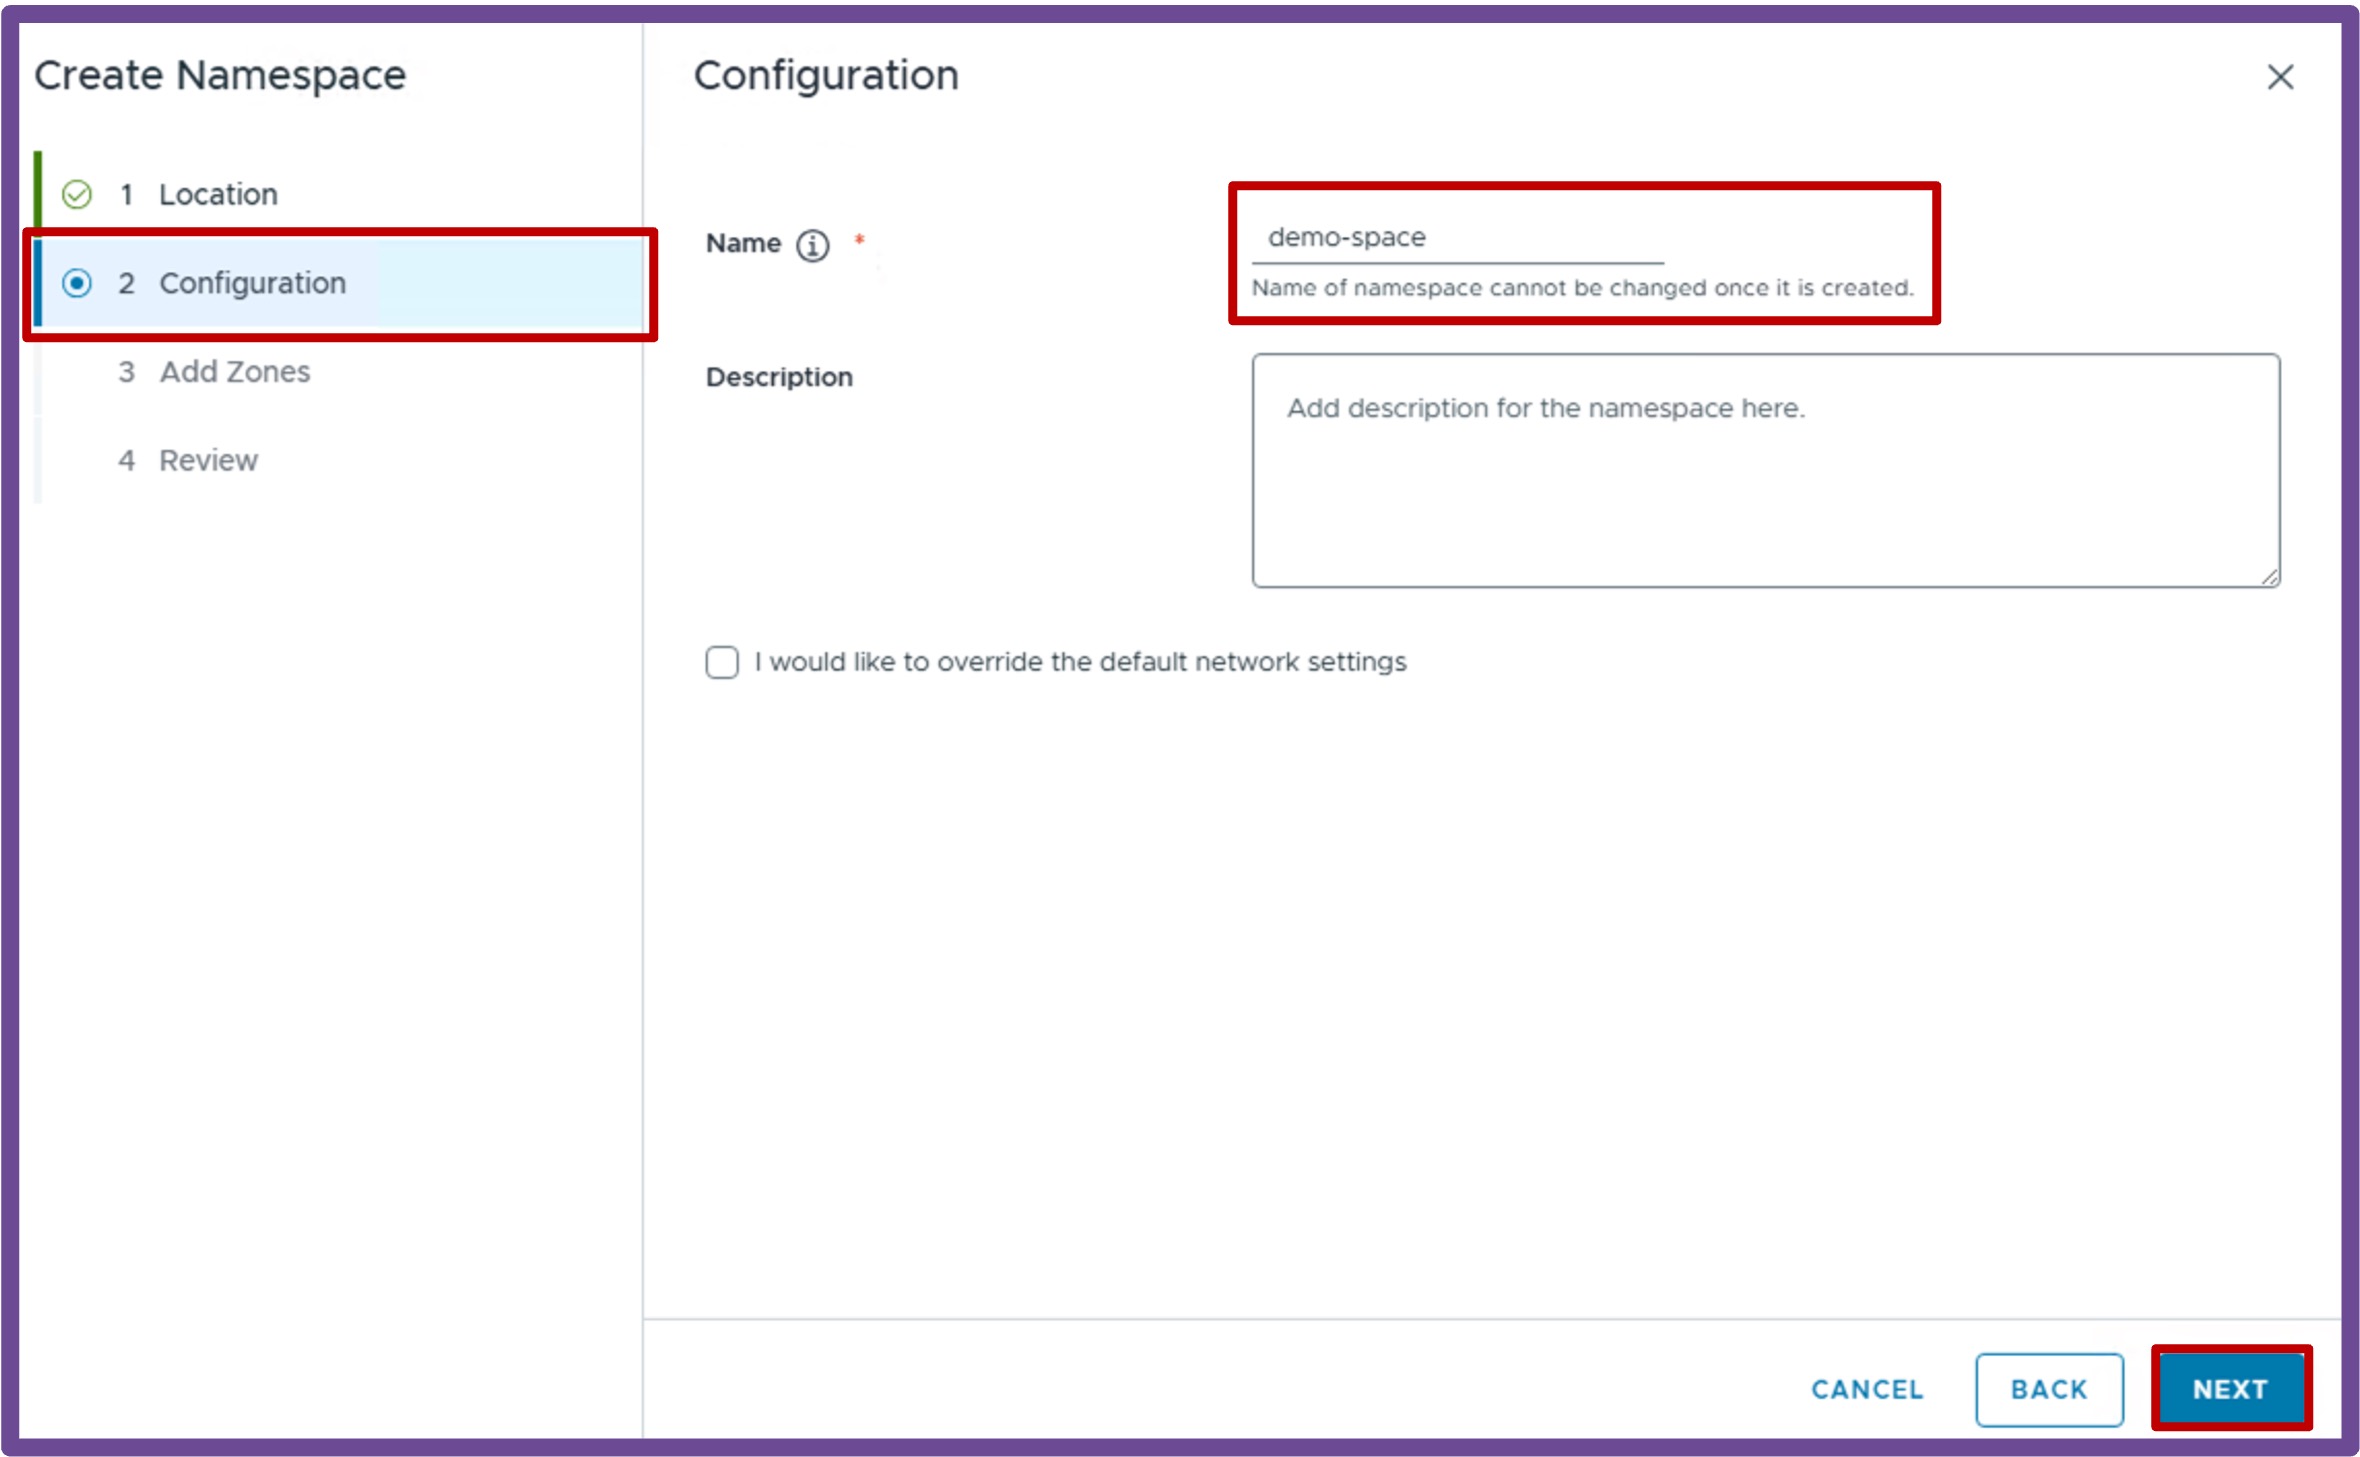
-
Add Zones
Select the Workload Zone (one or more vCenter Clusters), and click Next.
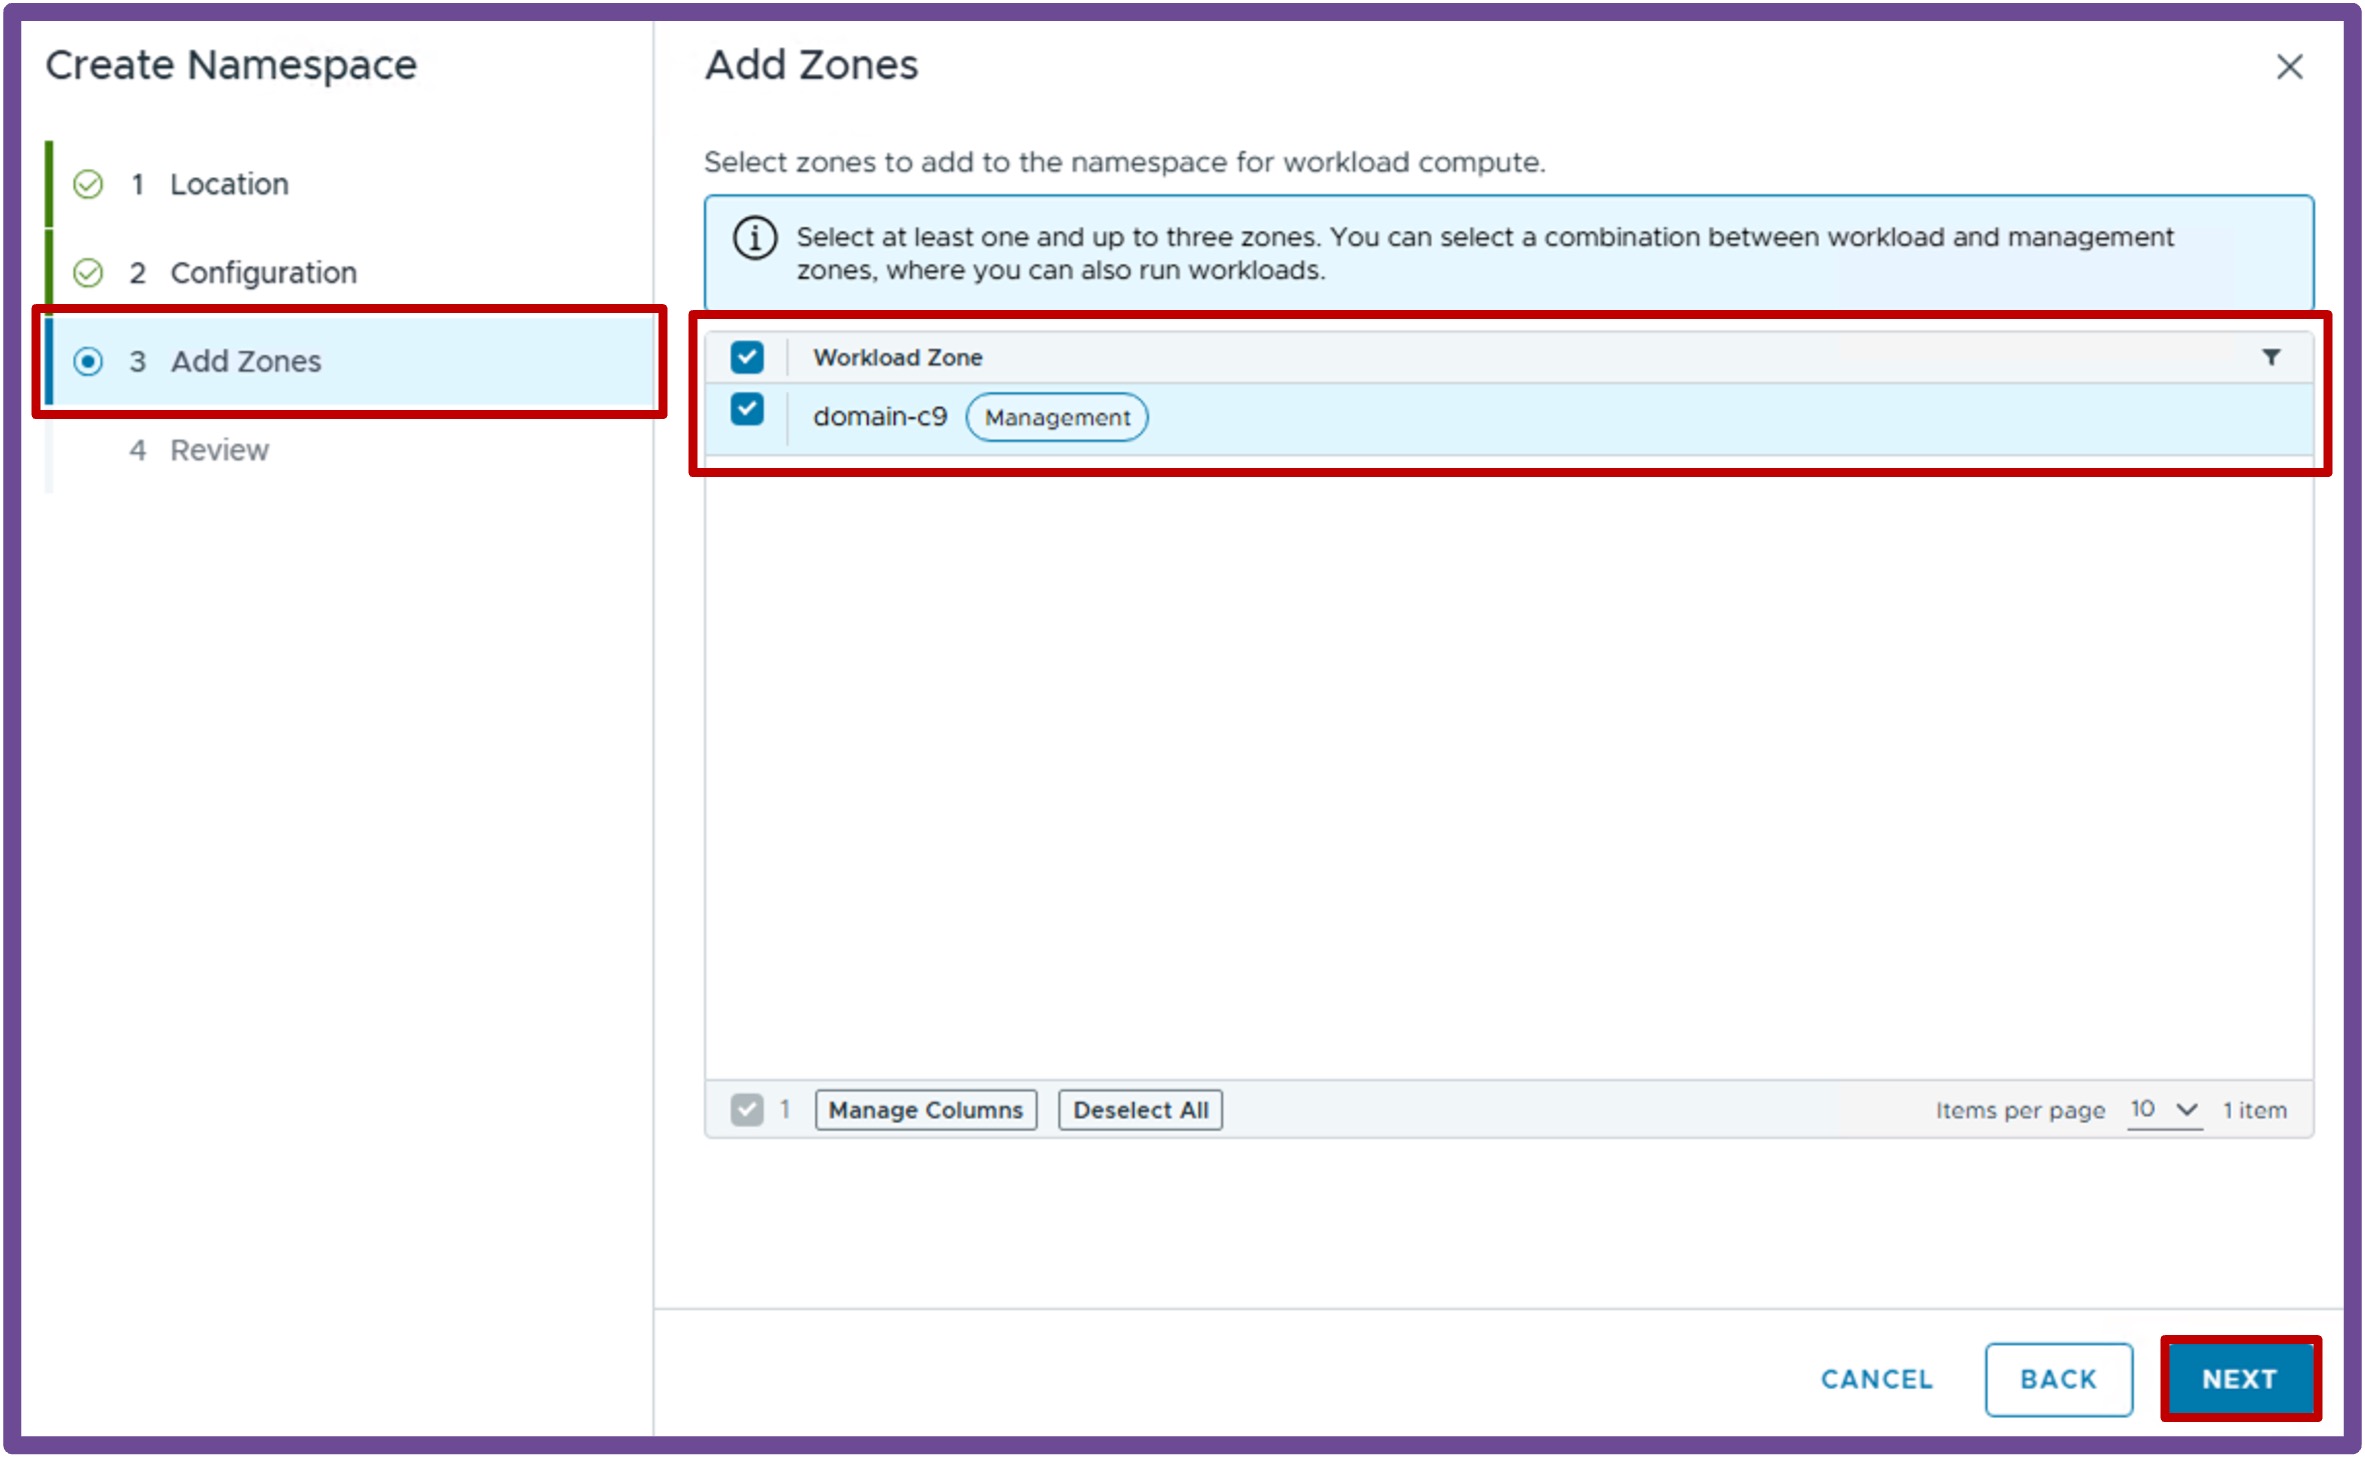
-
Review
Review the Namespace settings, and click Finish.
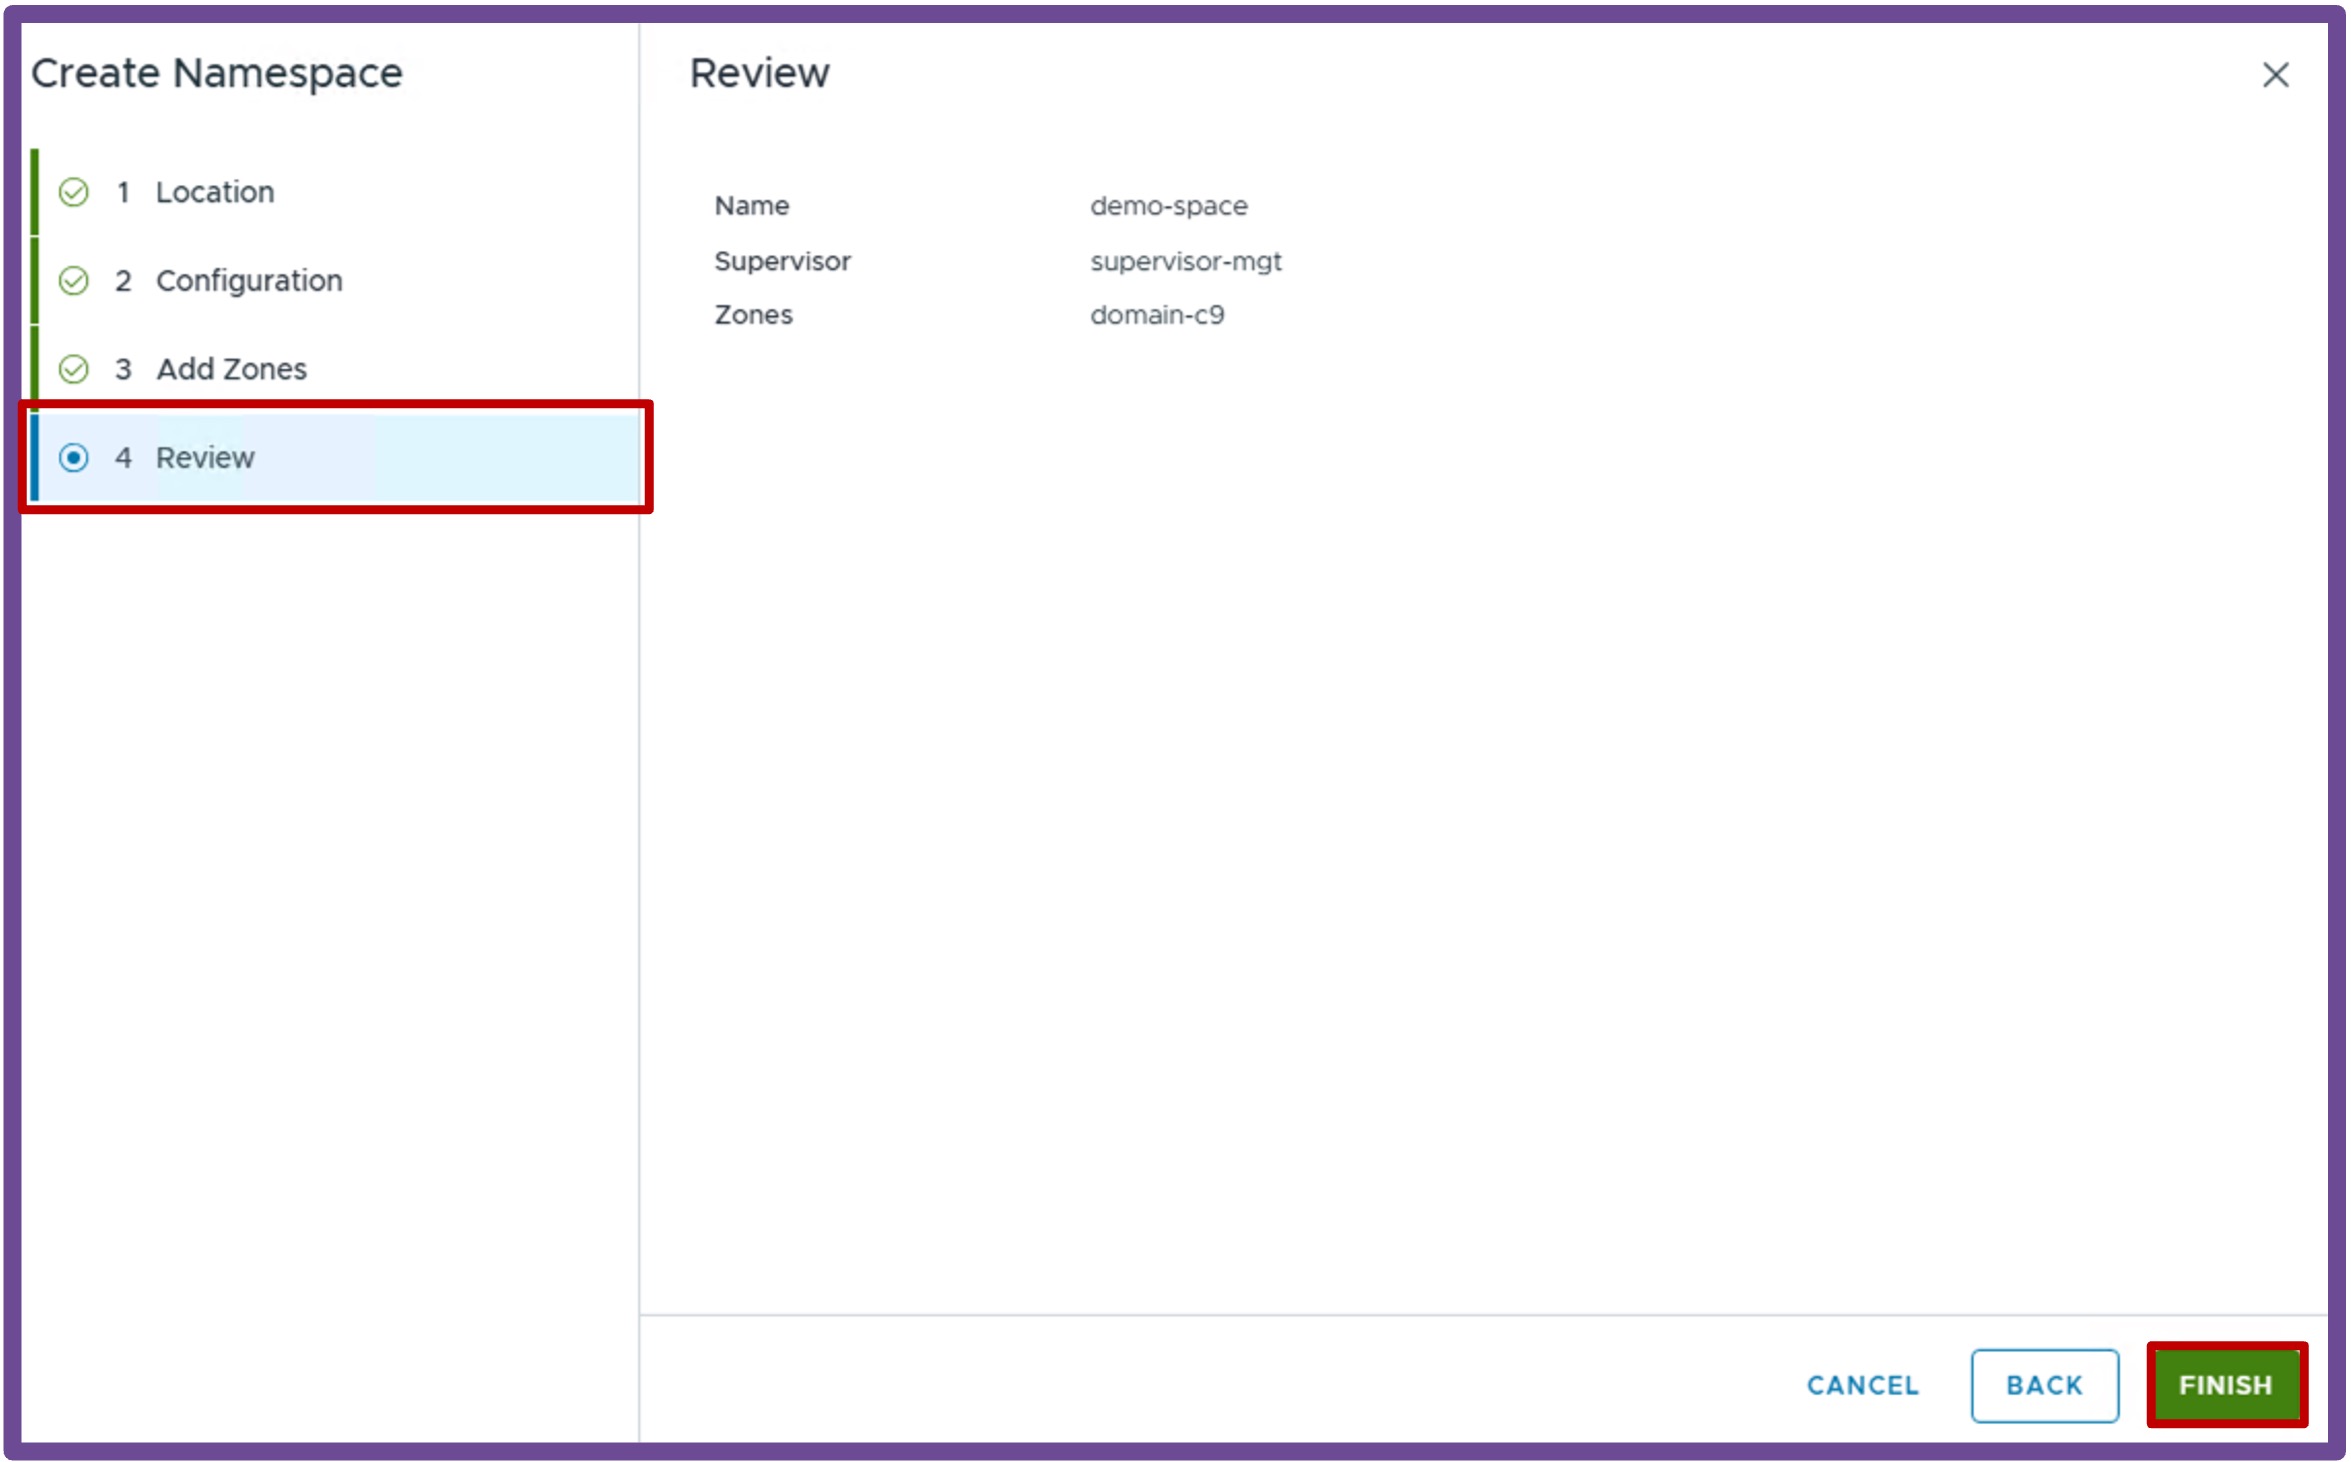
Finish Namespace Creation for future Applications
Create a Content Library for future VMs
If you plan to deploy VMs, create a Content Library with VM images.
Navigate to vCenter > Content Libraries > and click Create.

-
Name and Location Give it a Name and select the vCenter hosting that Content Library, and click Next.
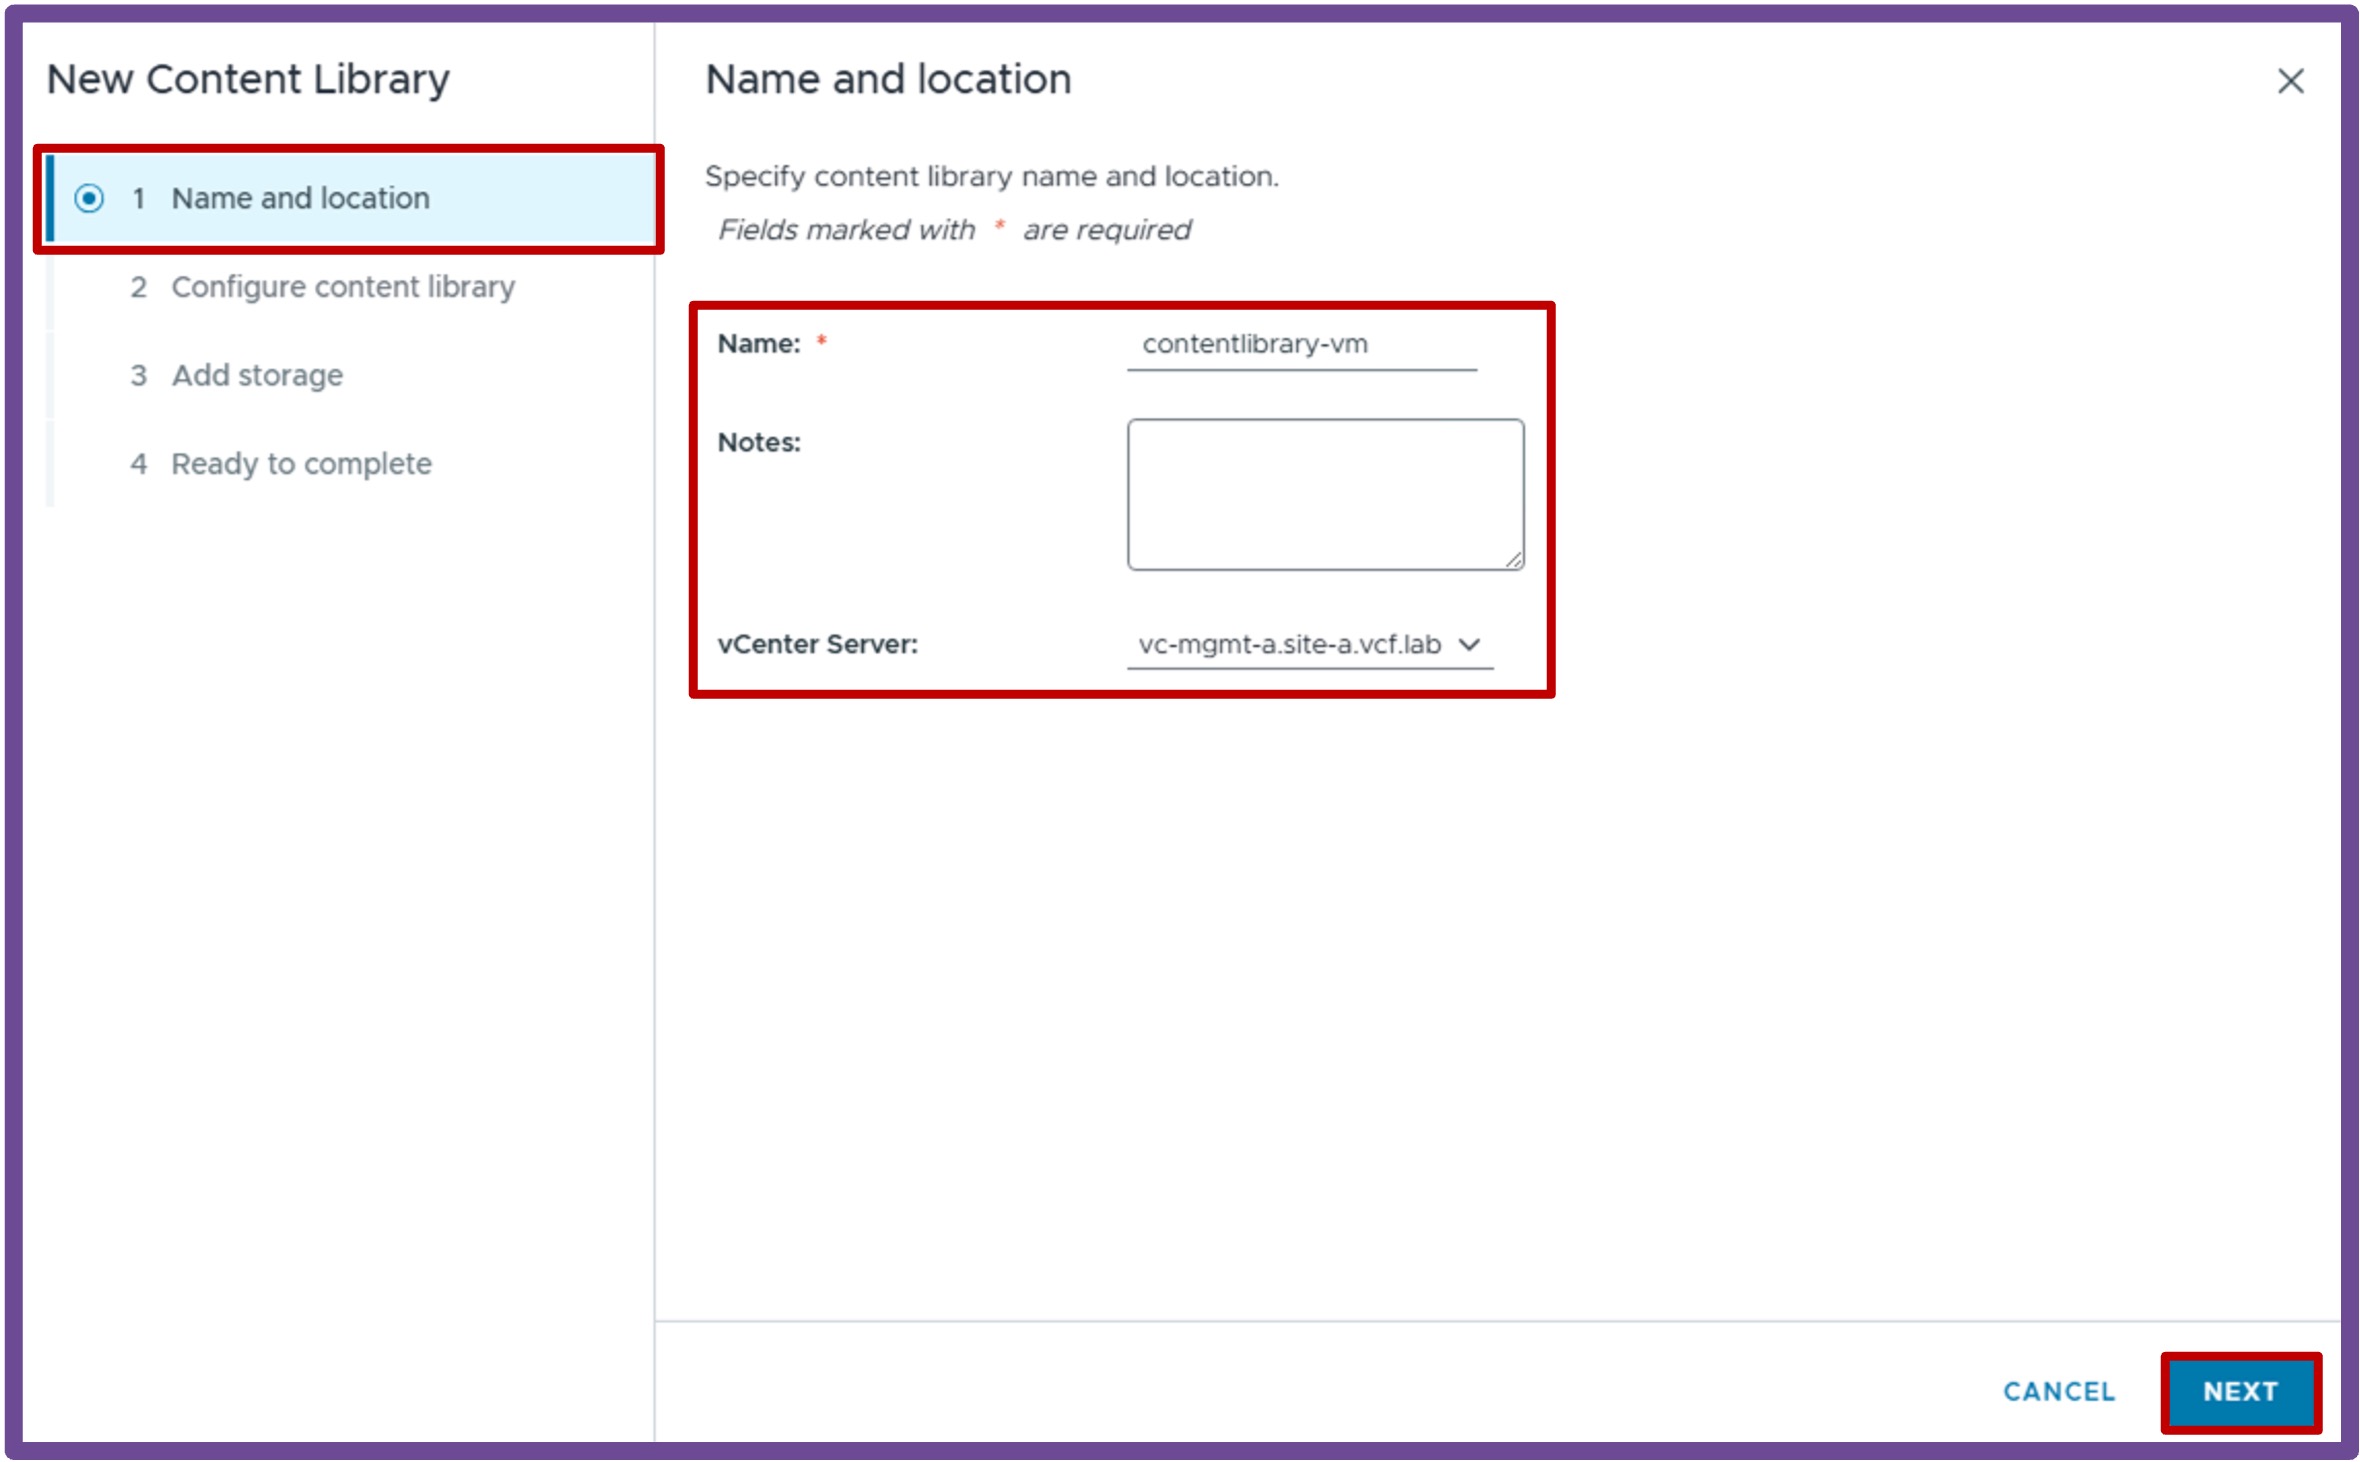
-
Configure Content Library Choose between Local content library (you upload VM images) and Subscribed content library (vCenter downloads VM images from a repository), and click Next.
I'm using here Local content library.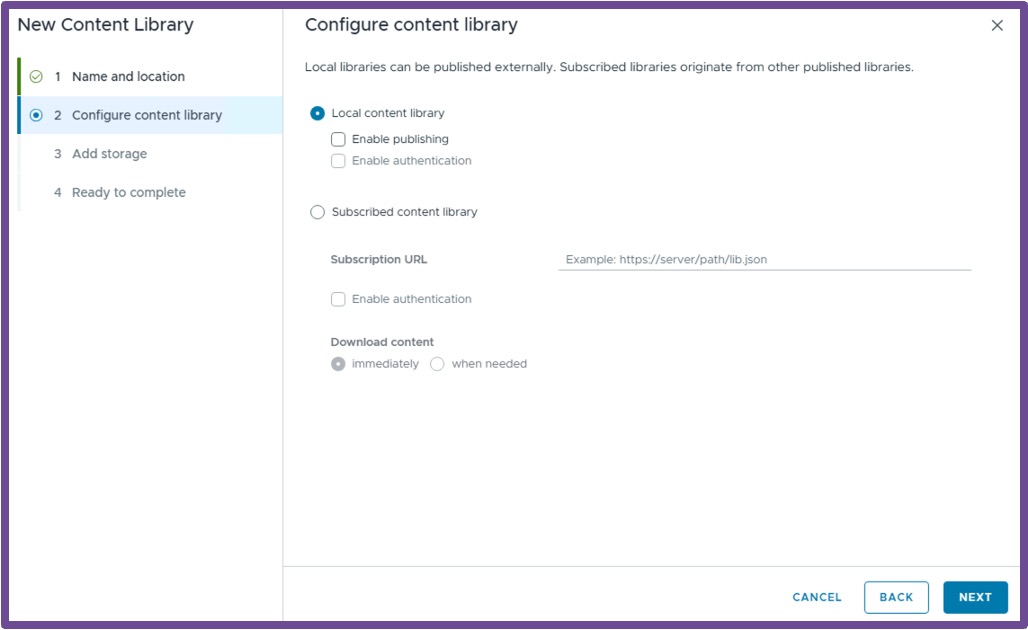
-
Apply Security Policy Apply security policy if you choose to, and click Next.
I'm using here no security policy.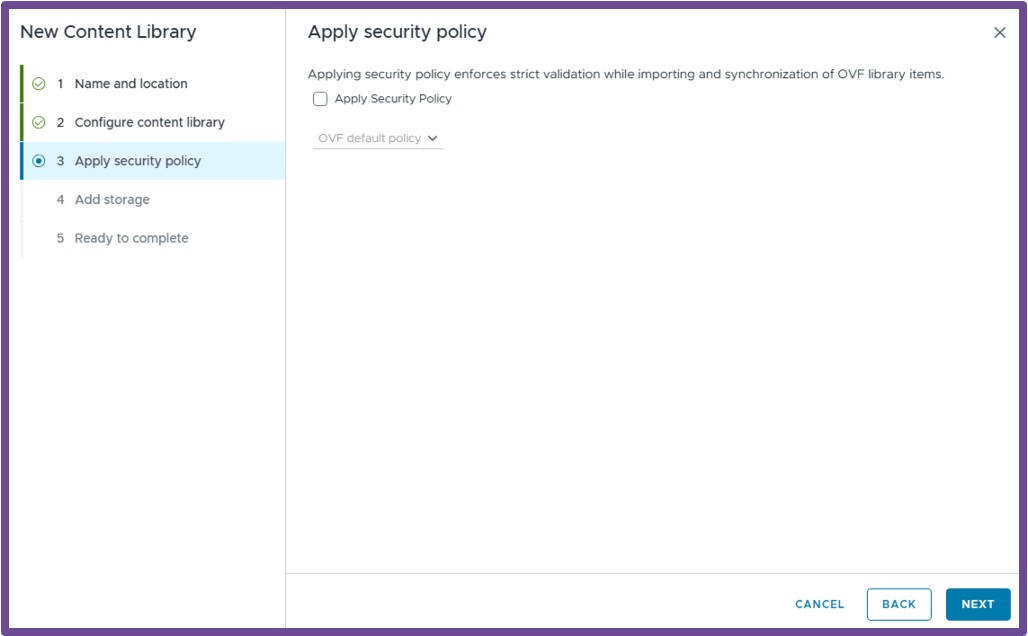
-
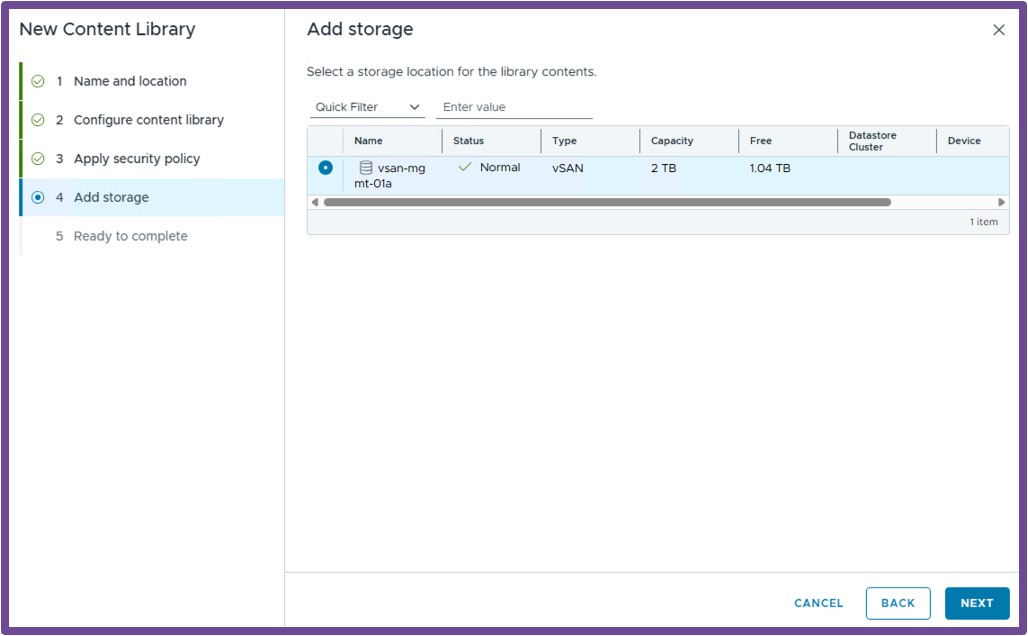
Add Storage Select a storage to host the content library images, and click Next.
-
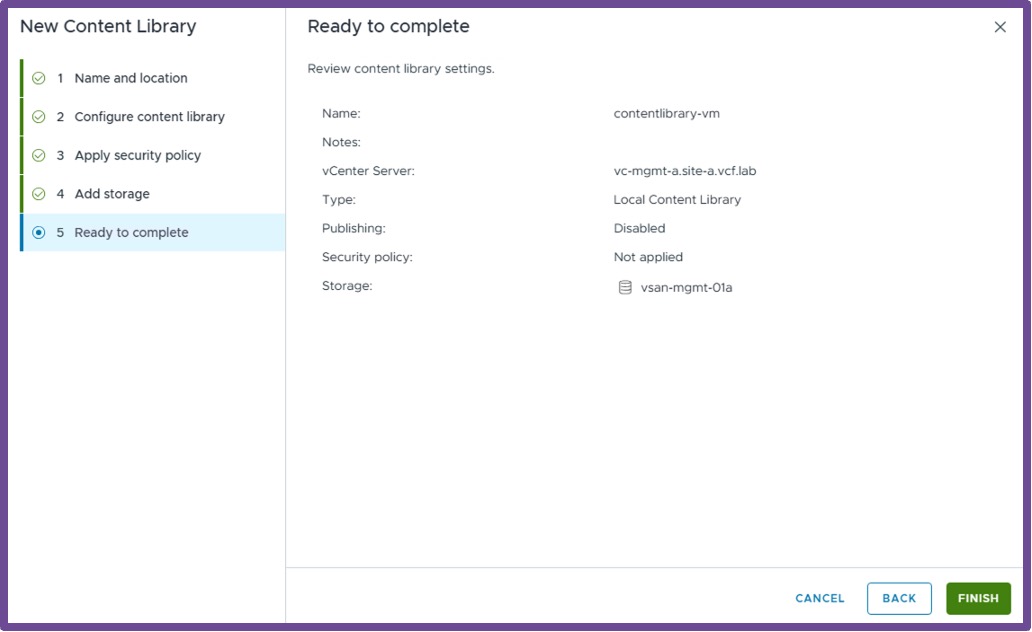
Ready to complete Review the content library, and click Finish.
-
Import VM Image In the Content Library created, import a VM Image, click on Import Item.
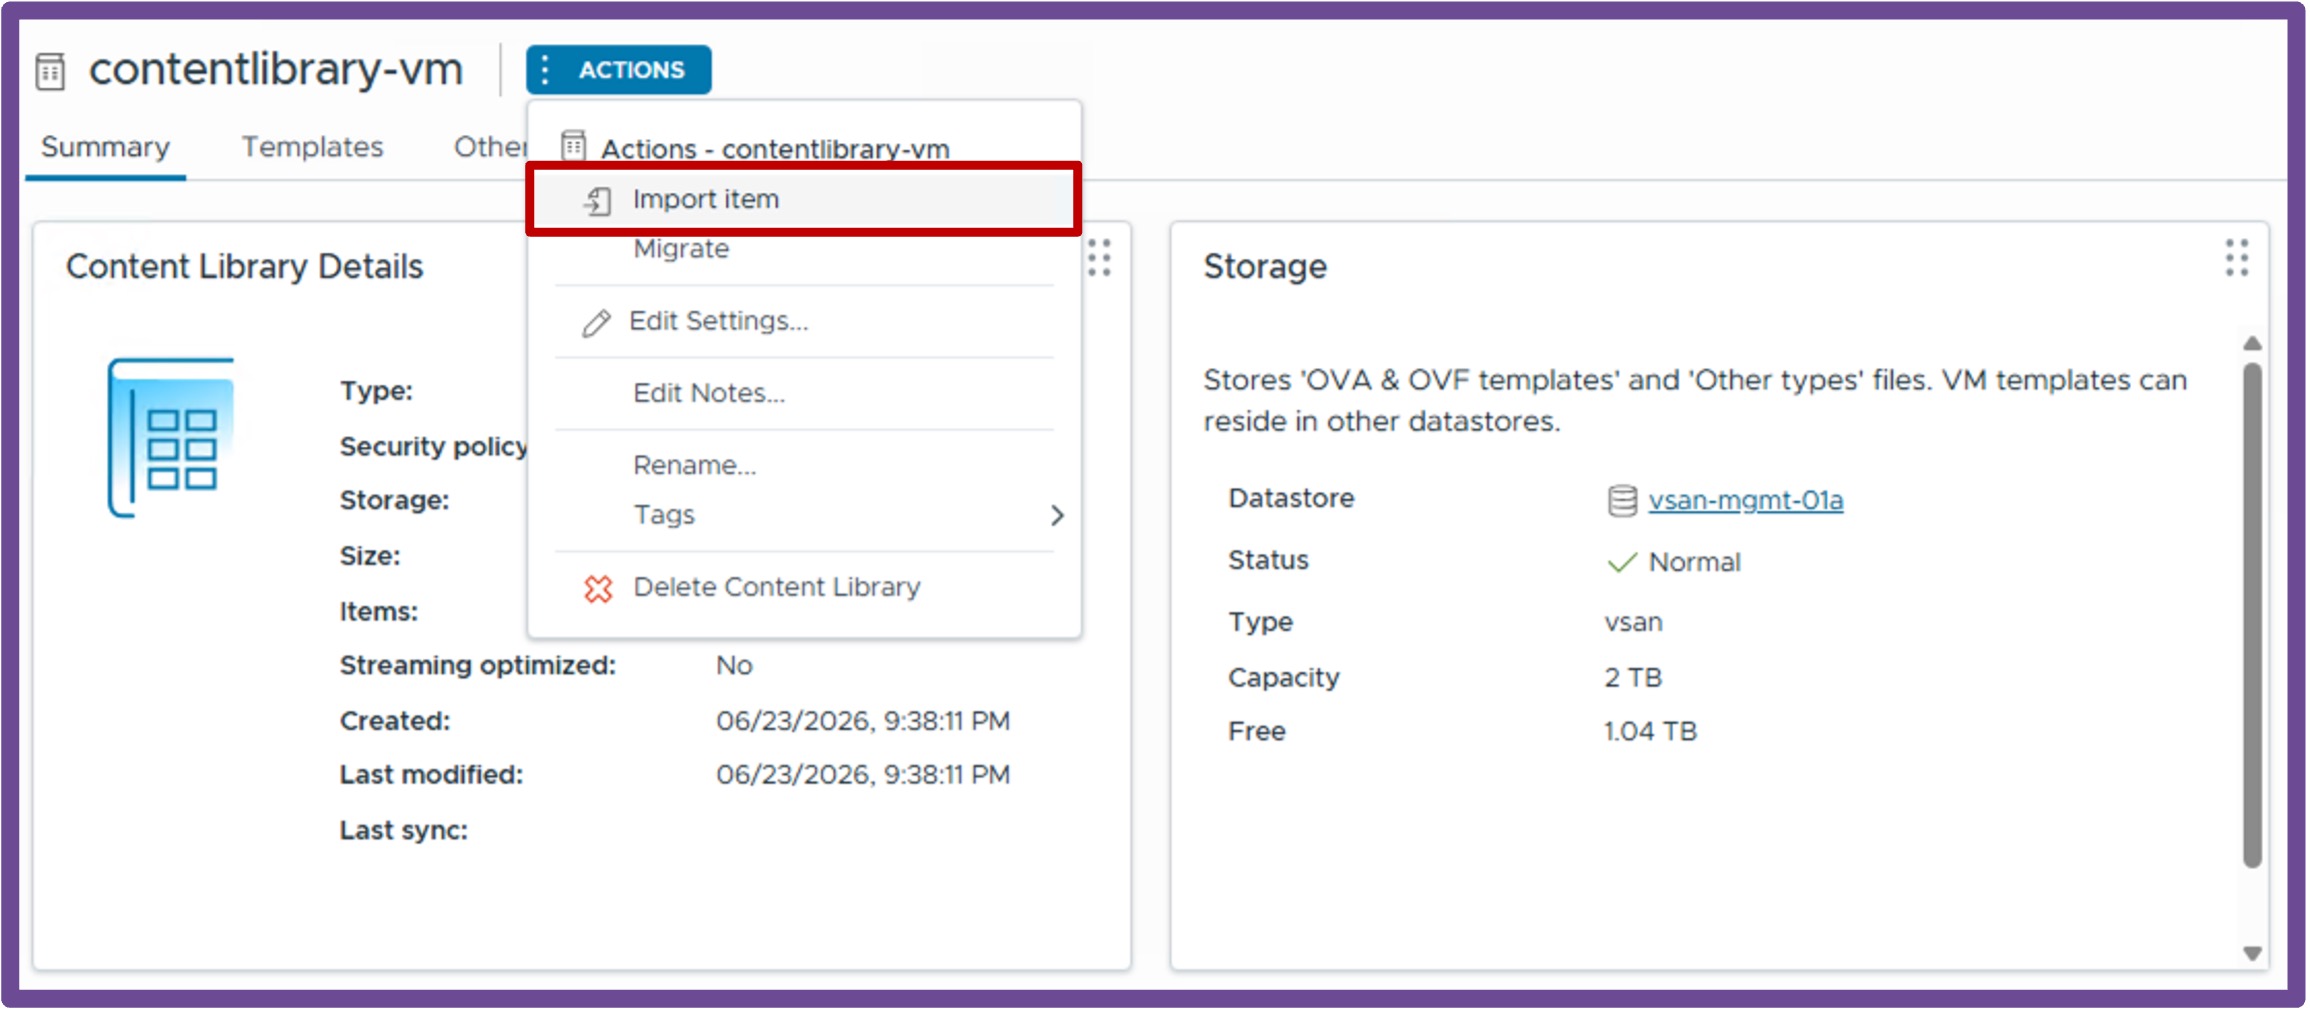
-
Choose VM Image Choose a Source file via URL or Local file, and click Import.
I'm using here the URL https://cloud-images.ubuntu.com/noble/current/noble-server-cloudimg-amd64.ova to download Ubuntu 24.04.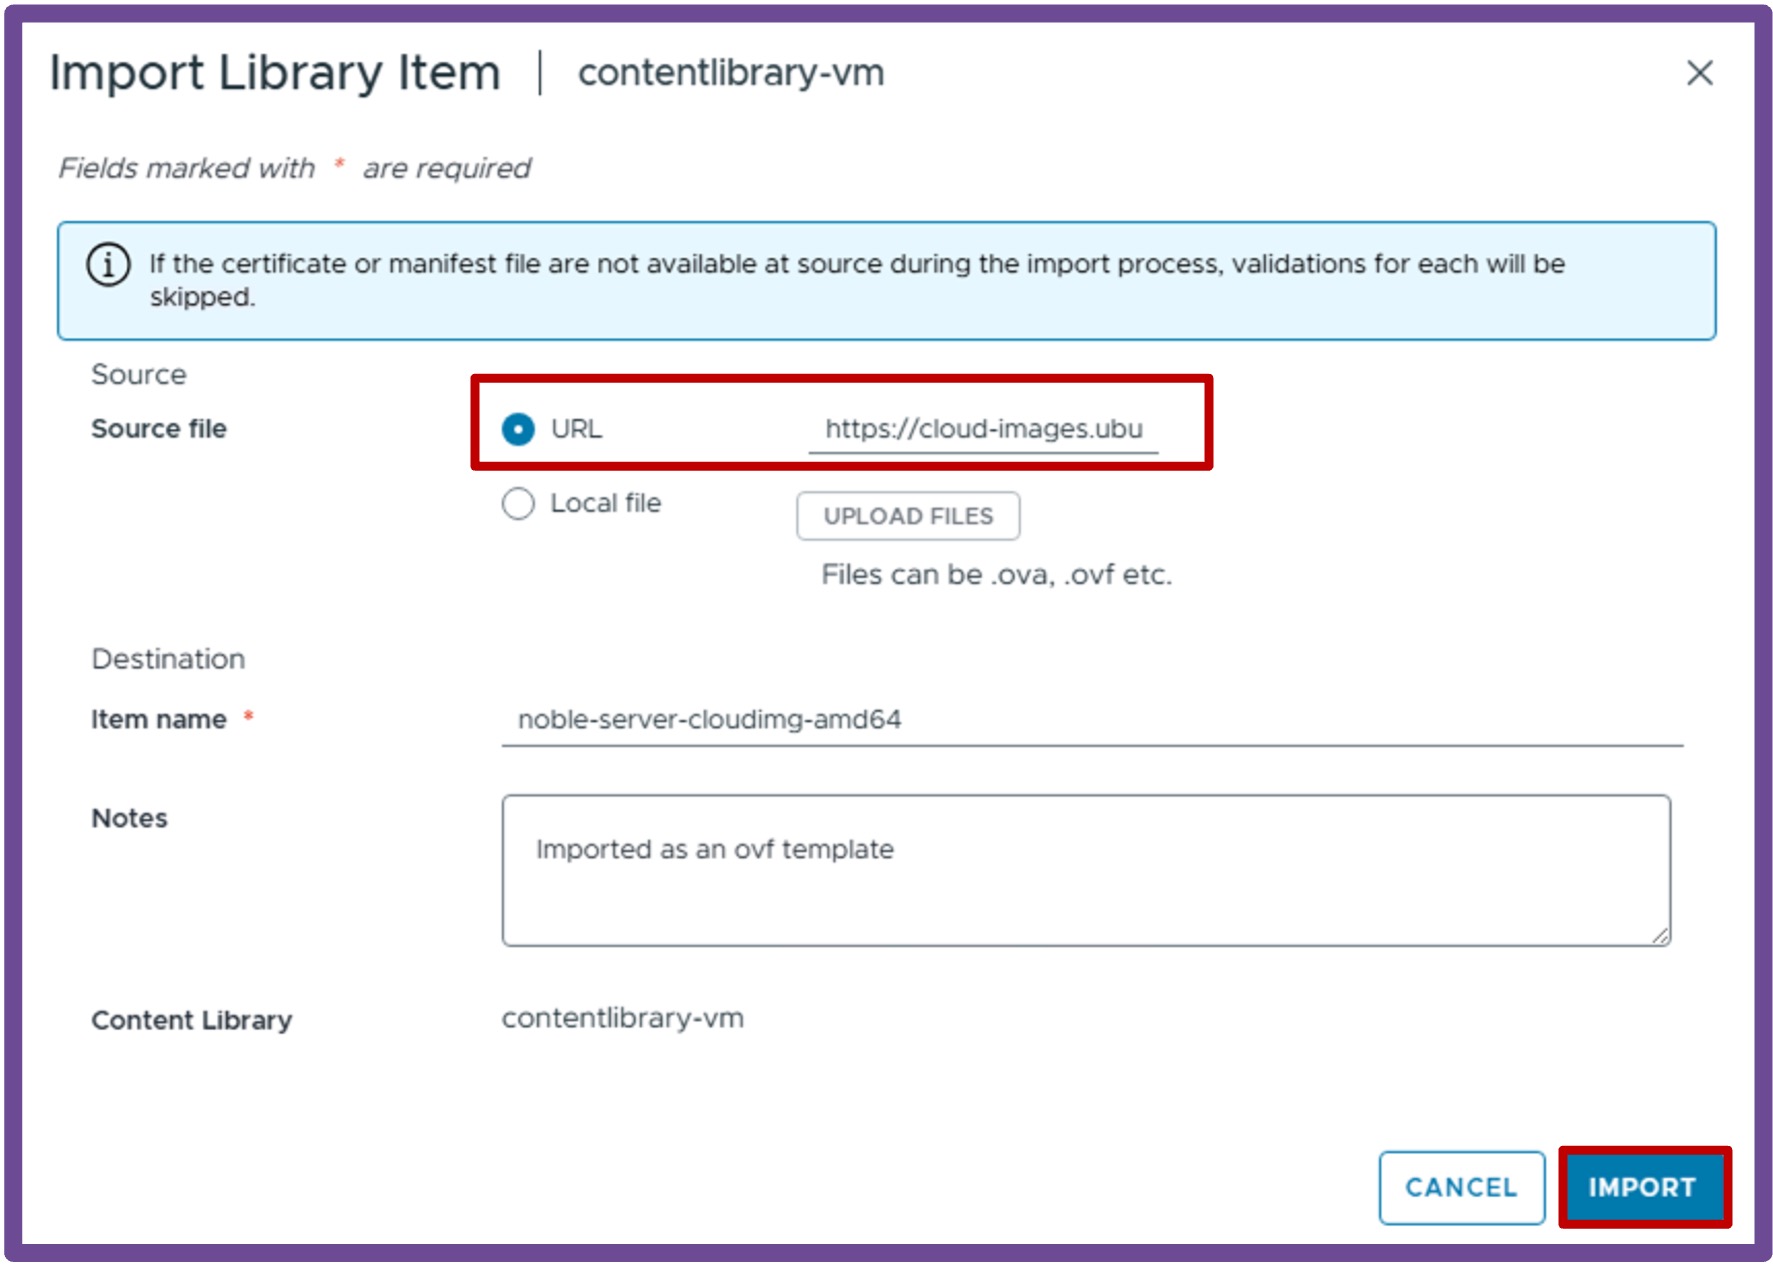
Associate the Content Library to the Namespace
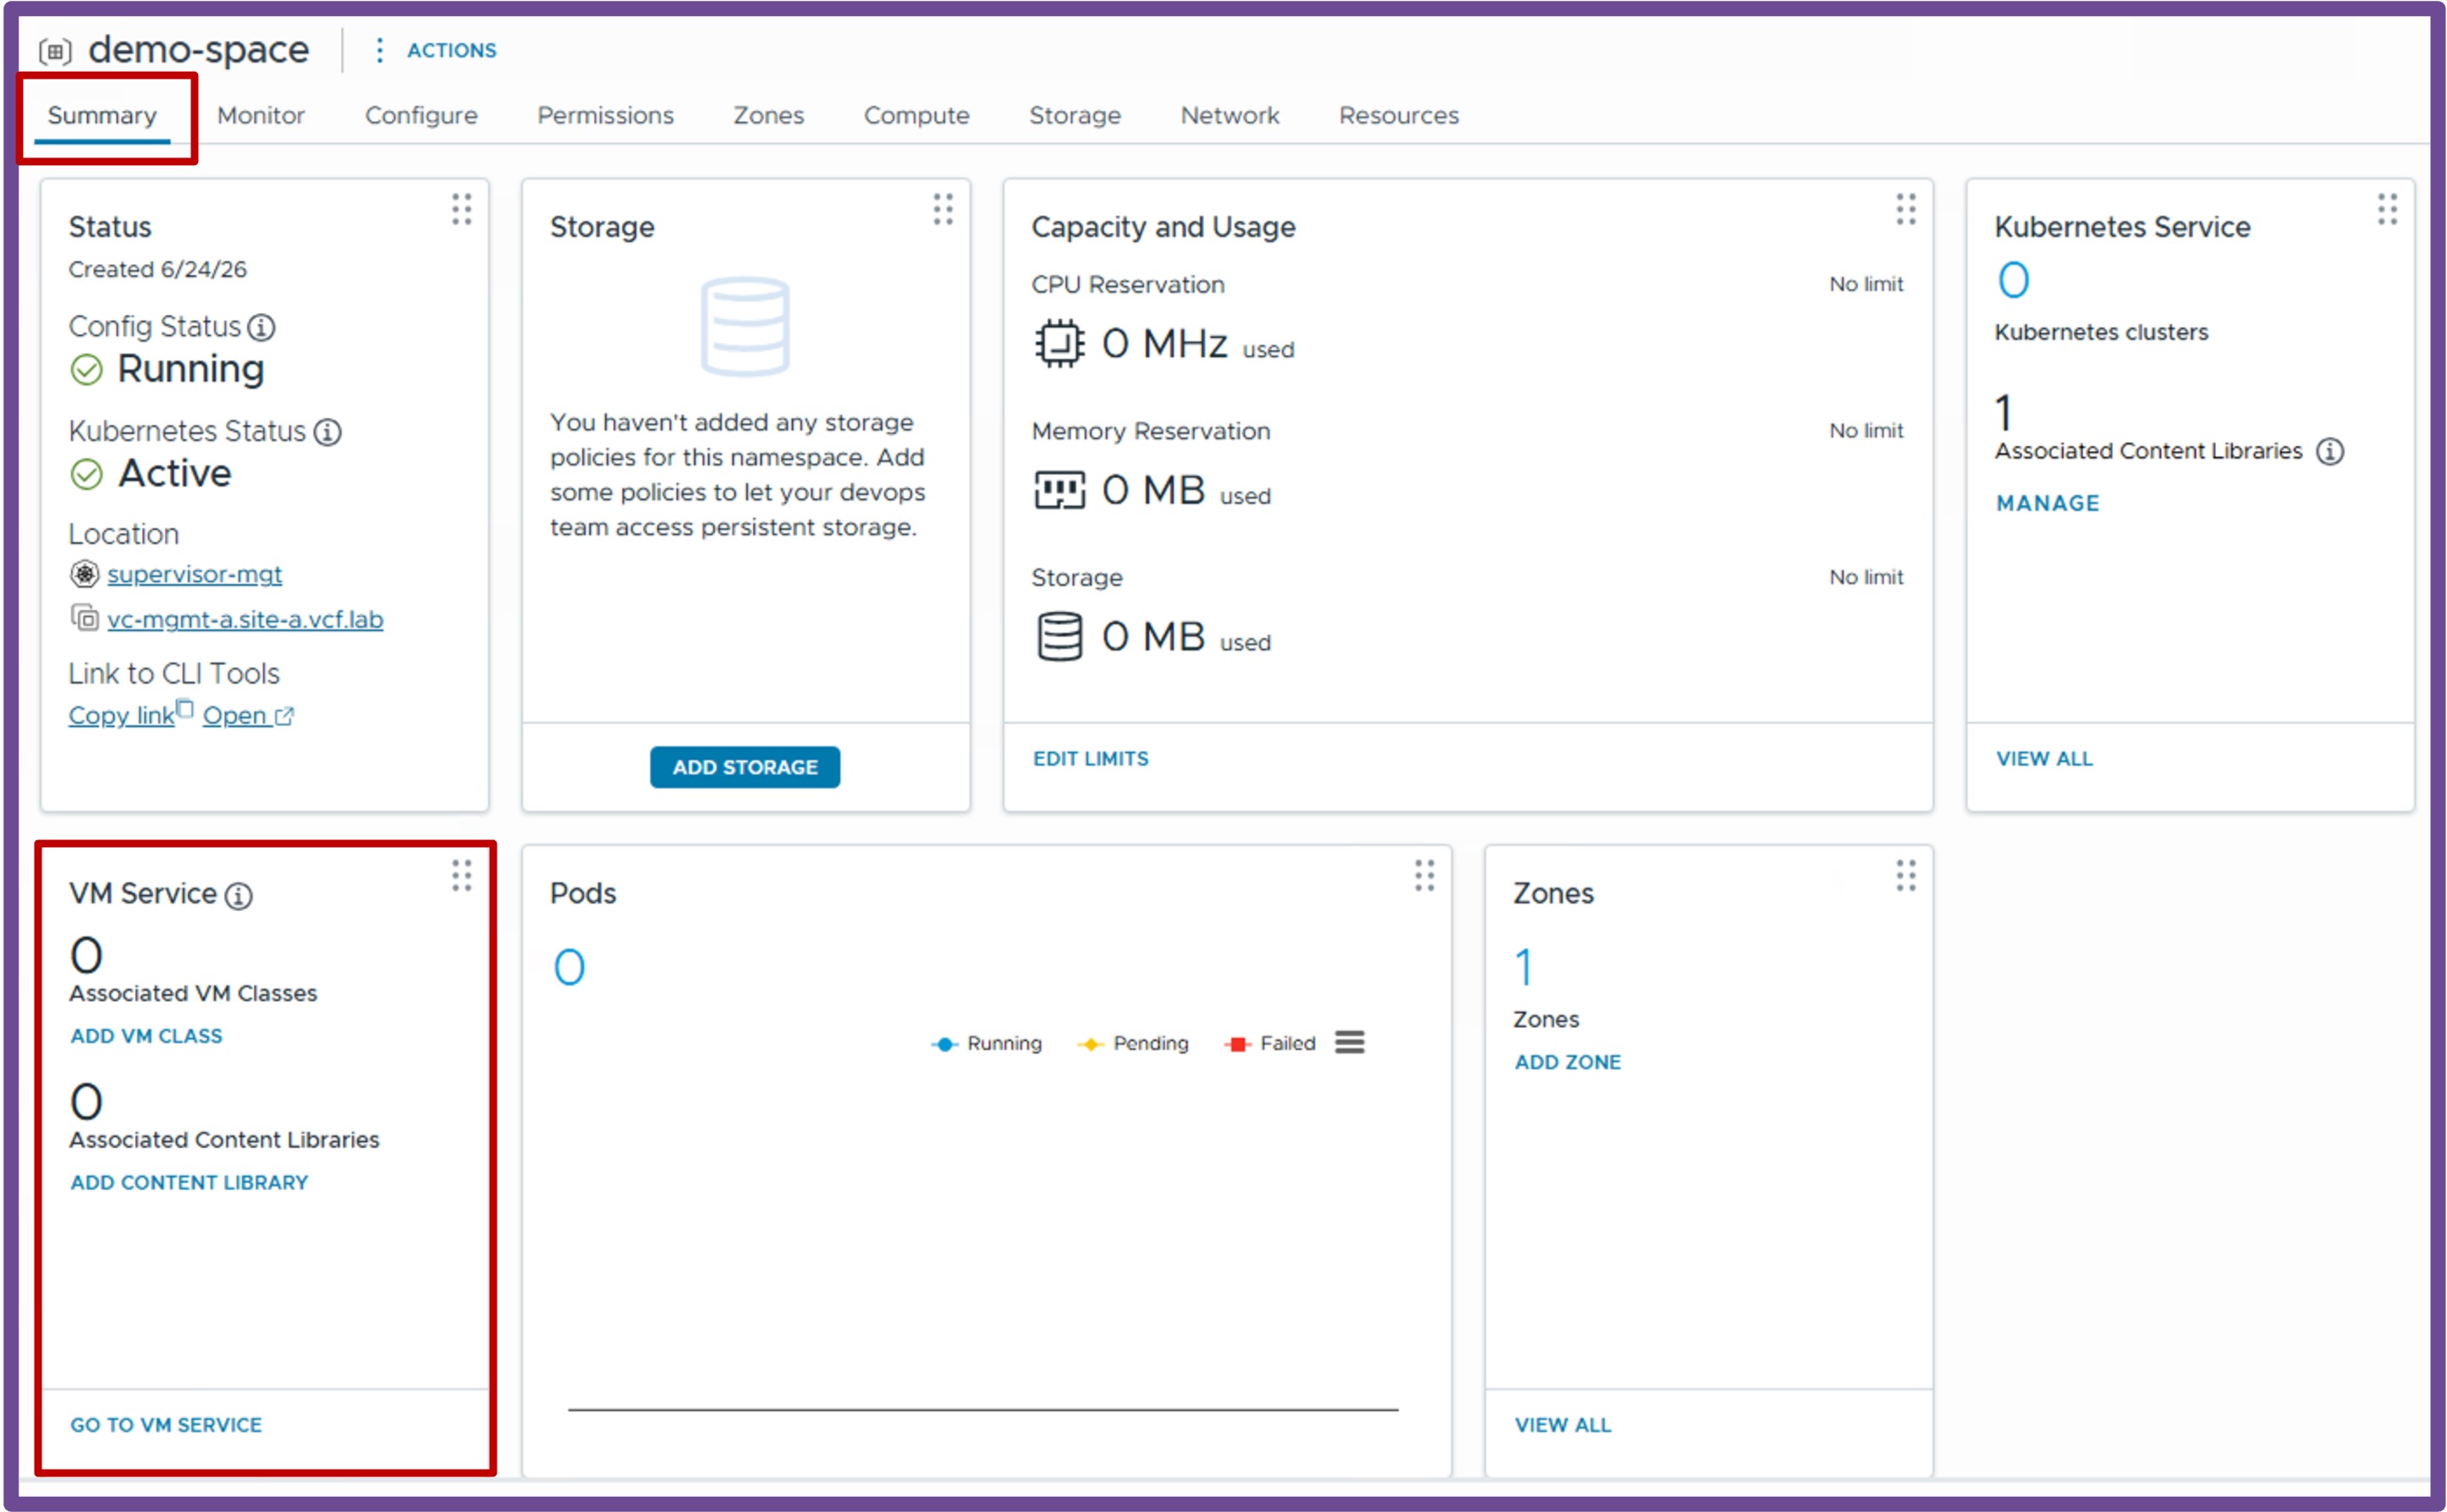
Navigate to vCenter > Supervisor Management > Supervisors, select [your supervisor], navigate to Namespaces, and select [your namespace], and click on VM Service - Add Content Library.
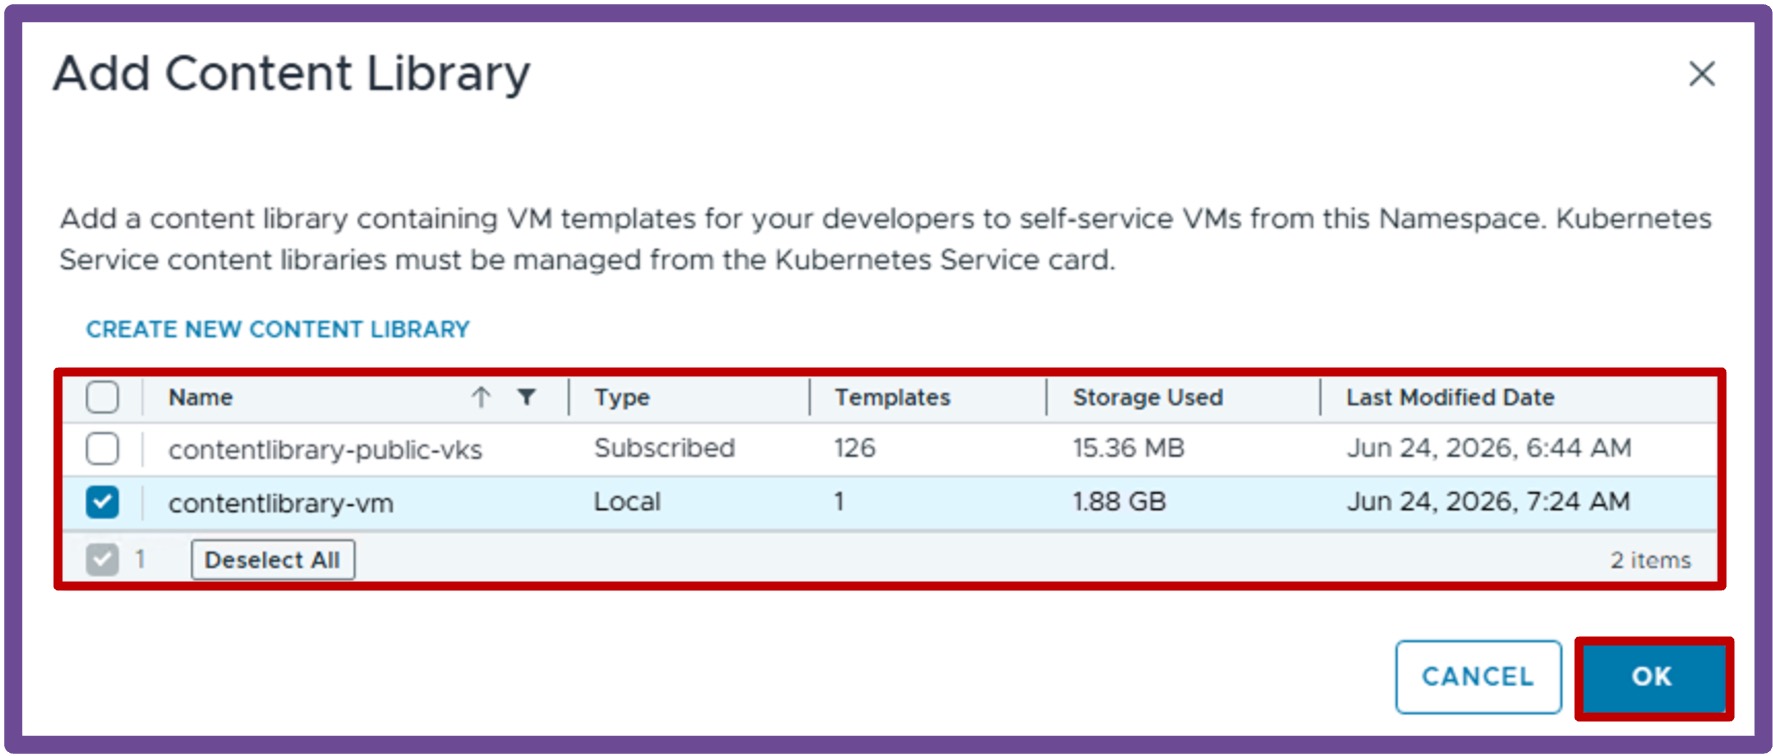
- Add Content Library Select Content Library with VM images, and click OK.
Associate Storage Policy to the Namespace
Navigate to vCenter > Supervisor Management > Supervisors, select [your supervisor], navigate to Namespaces, and select [your namespace], and click on Storage - Add Storage.
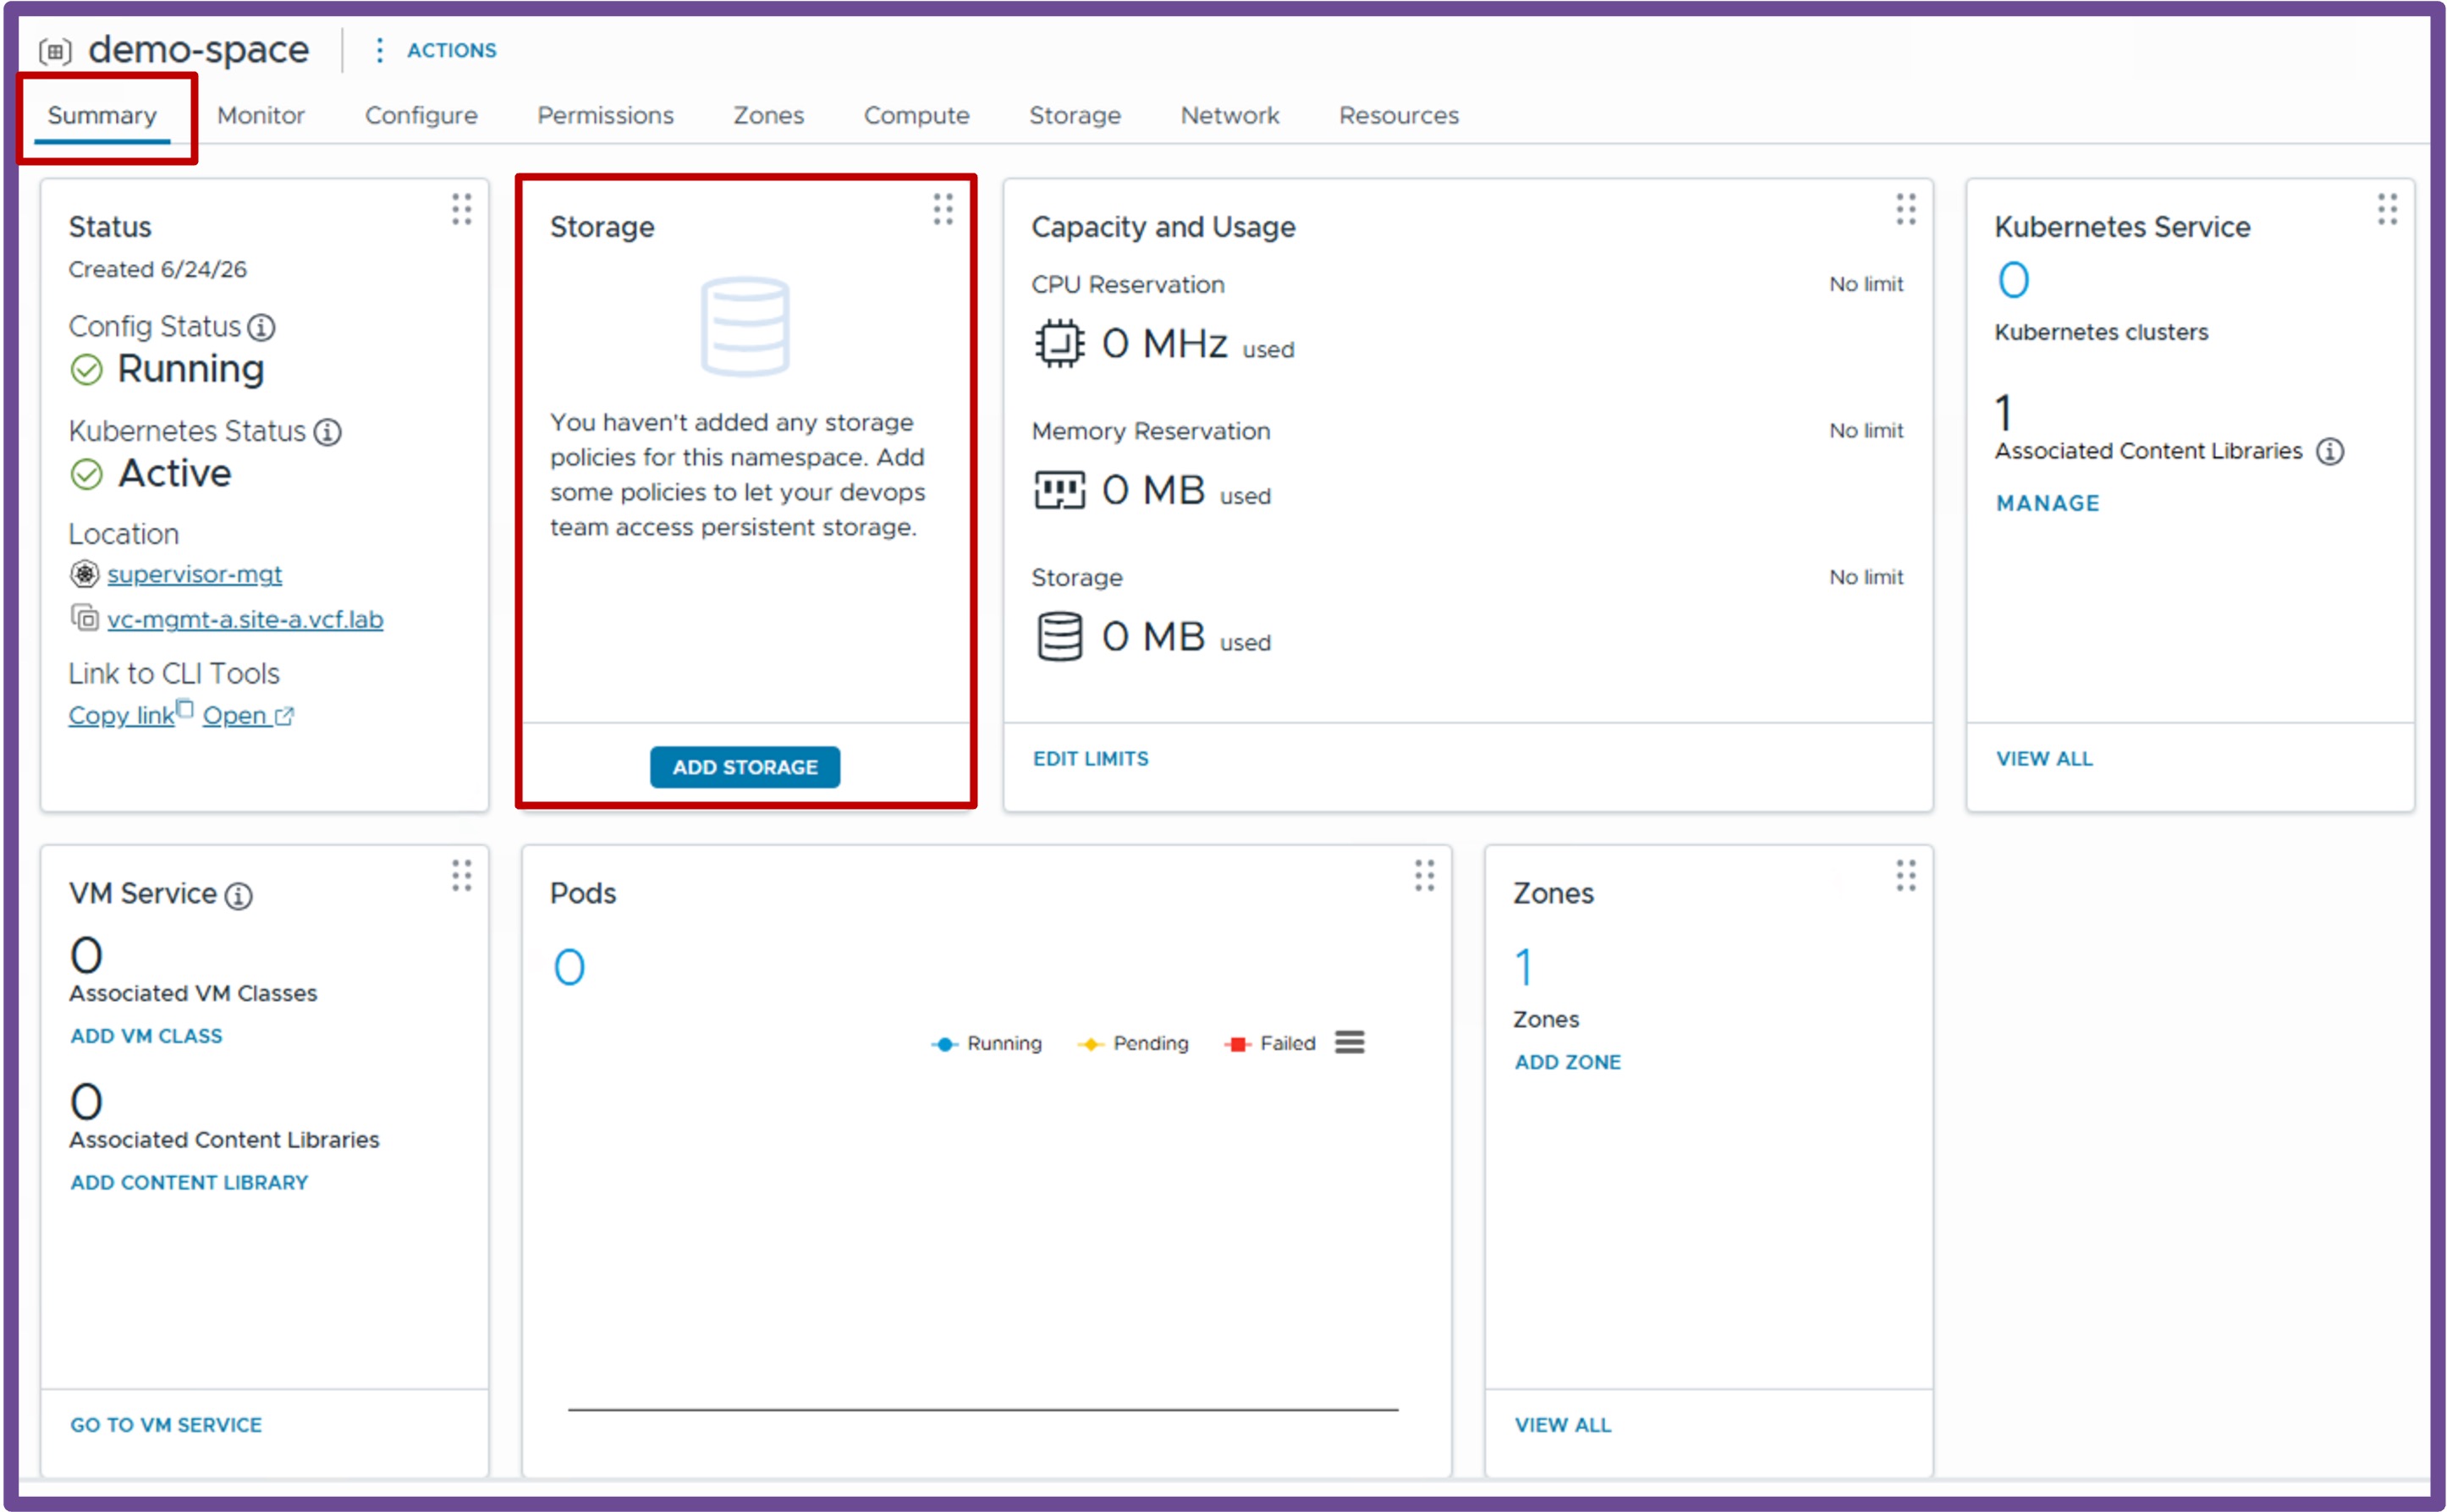
- Add Storage Policy Select Storage Policy, and click OK.
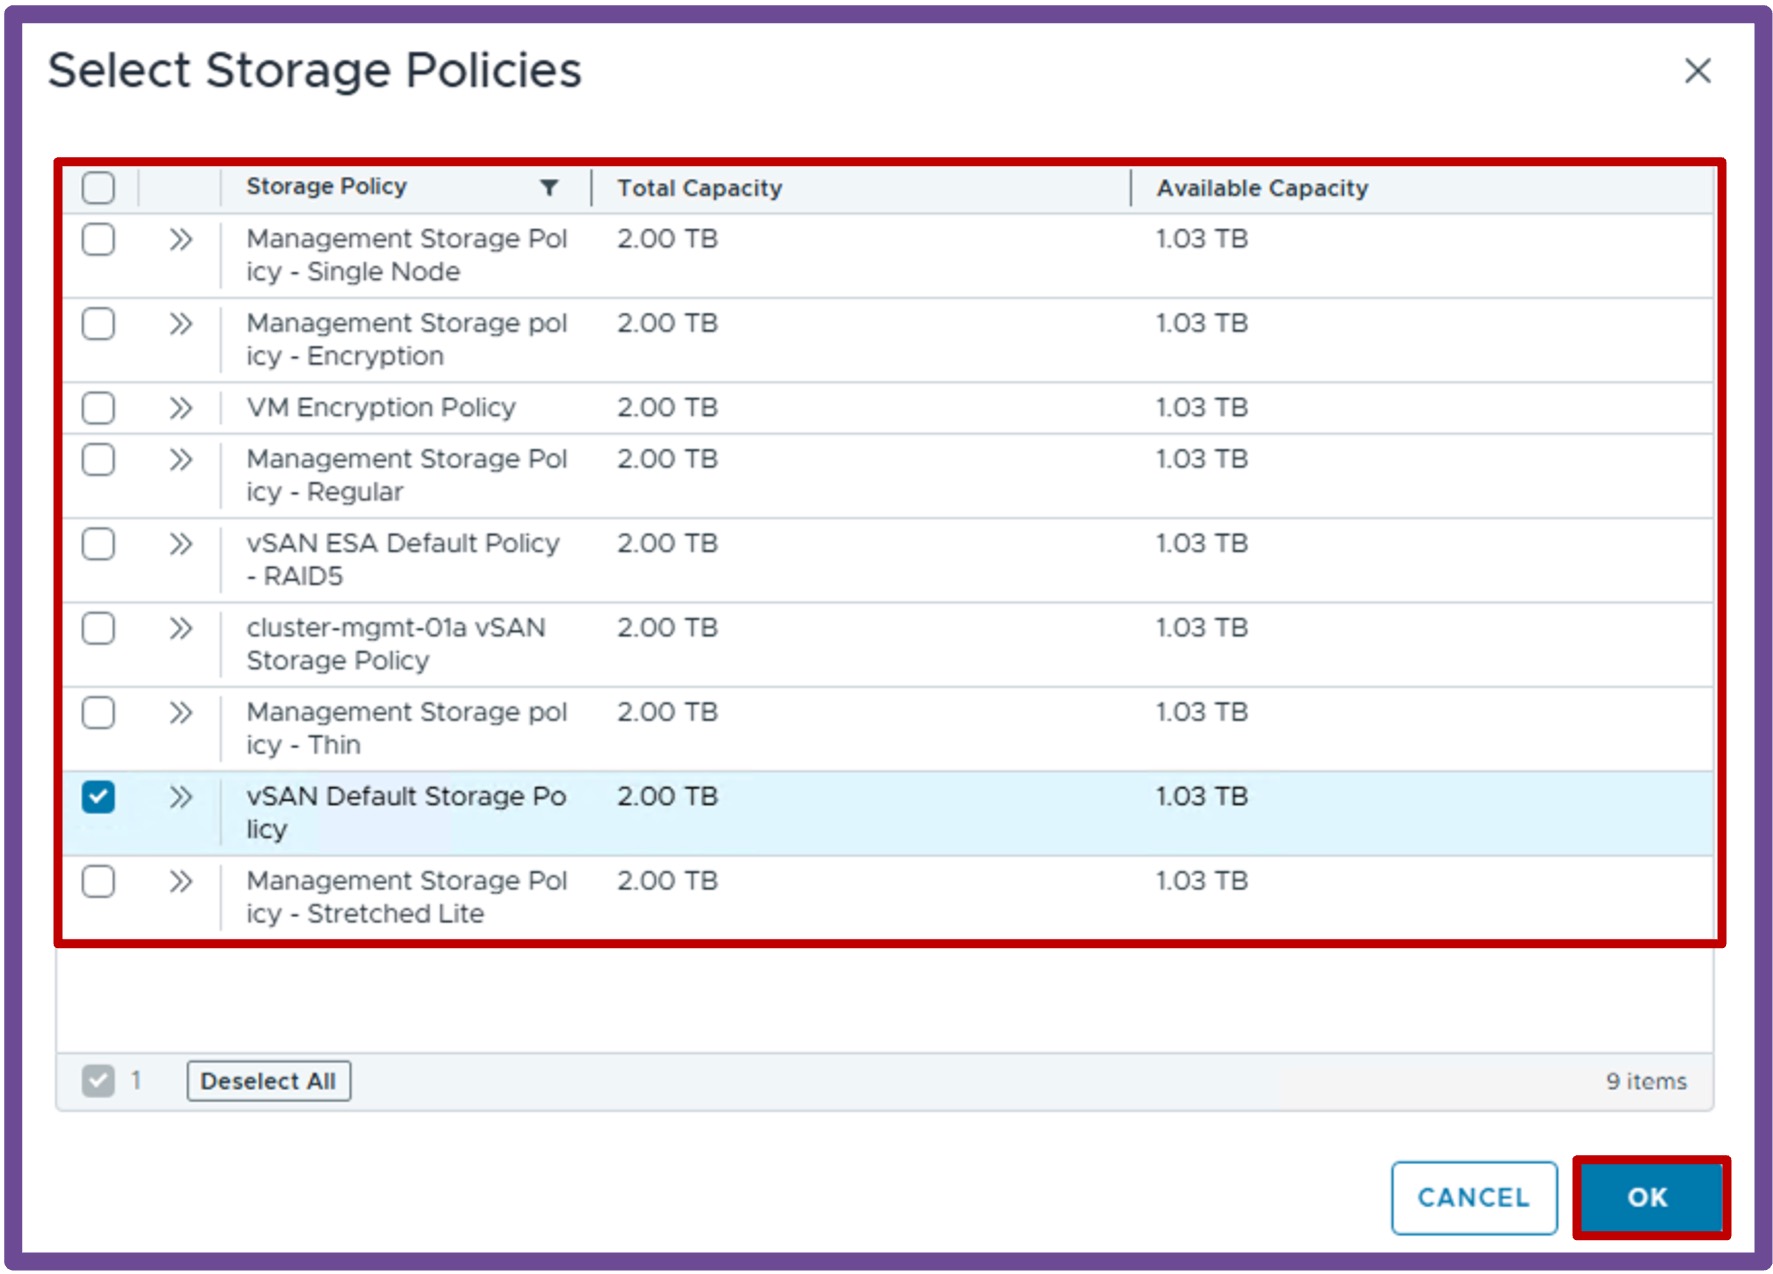
Associate VM Class to the Namespace
Navigate to vCenter > Supervisor Management > Supervisors, select [your supervisor], navigate to Namespaces, and select [your namespace], and click on VM Service - Add VM Class.
- Add VM Classes Select VM Classes, and click OK.
I selected here all VM Classes type "small" and "medium".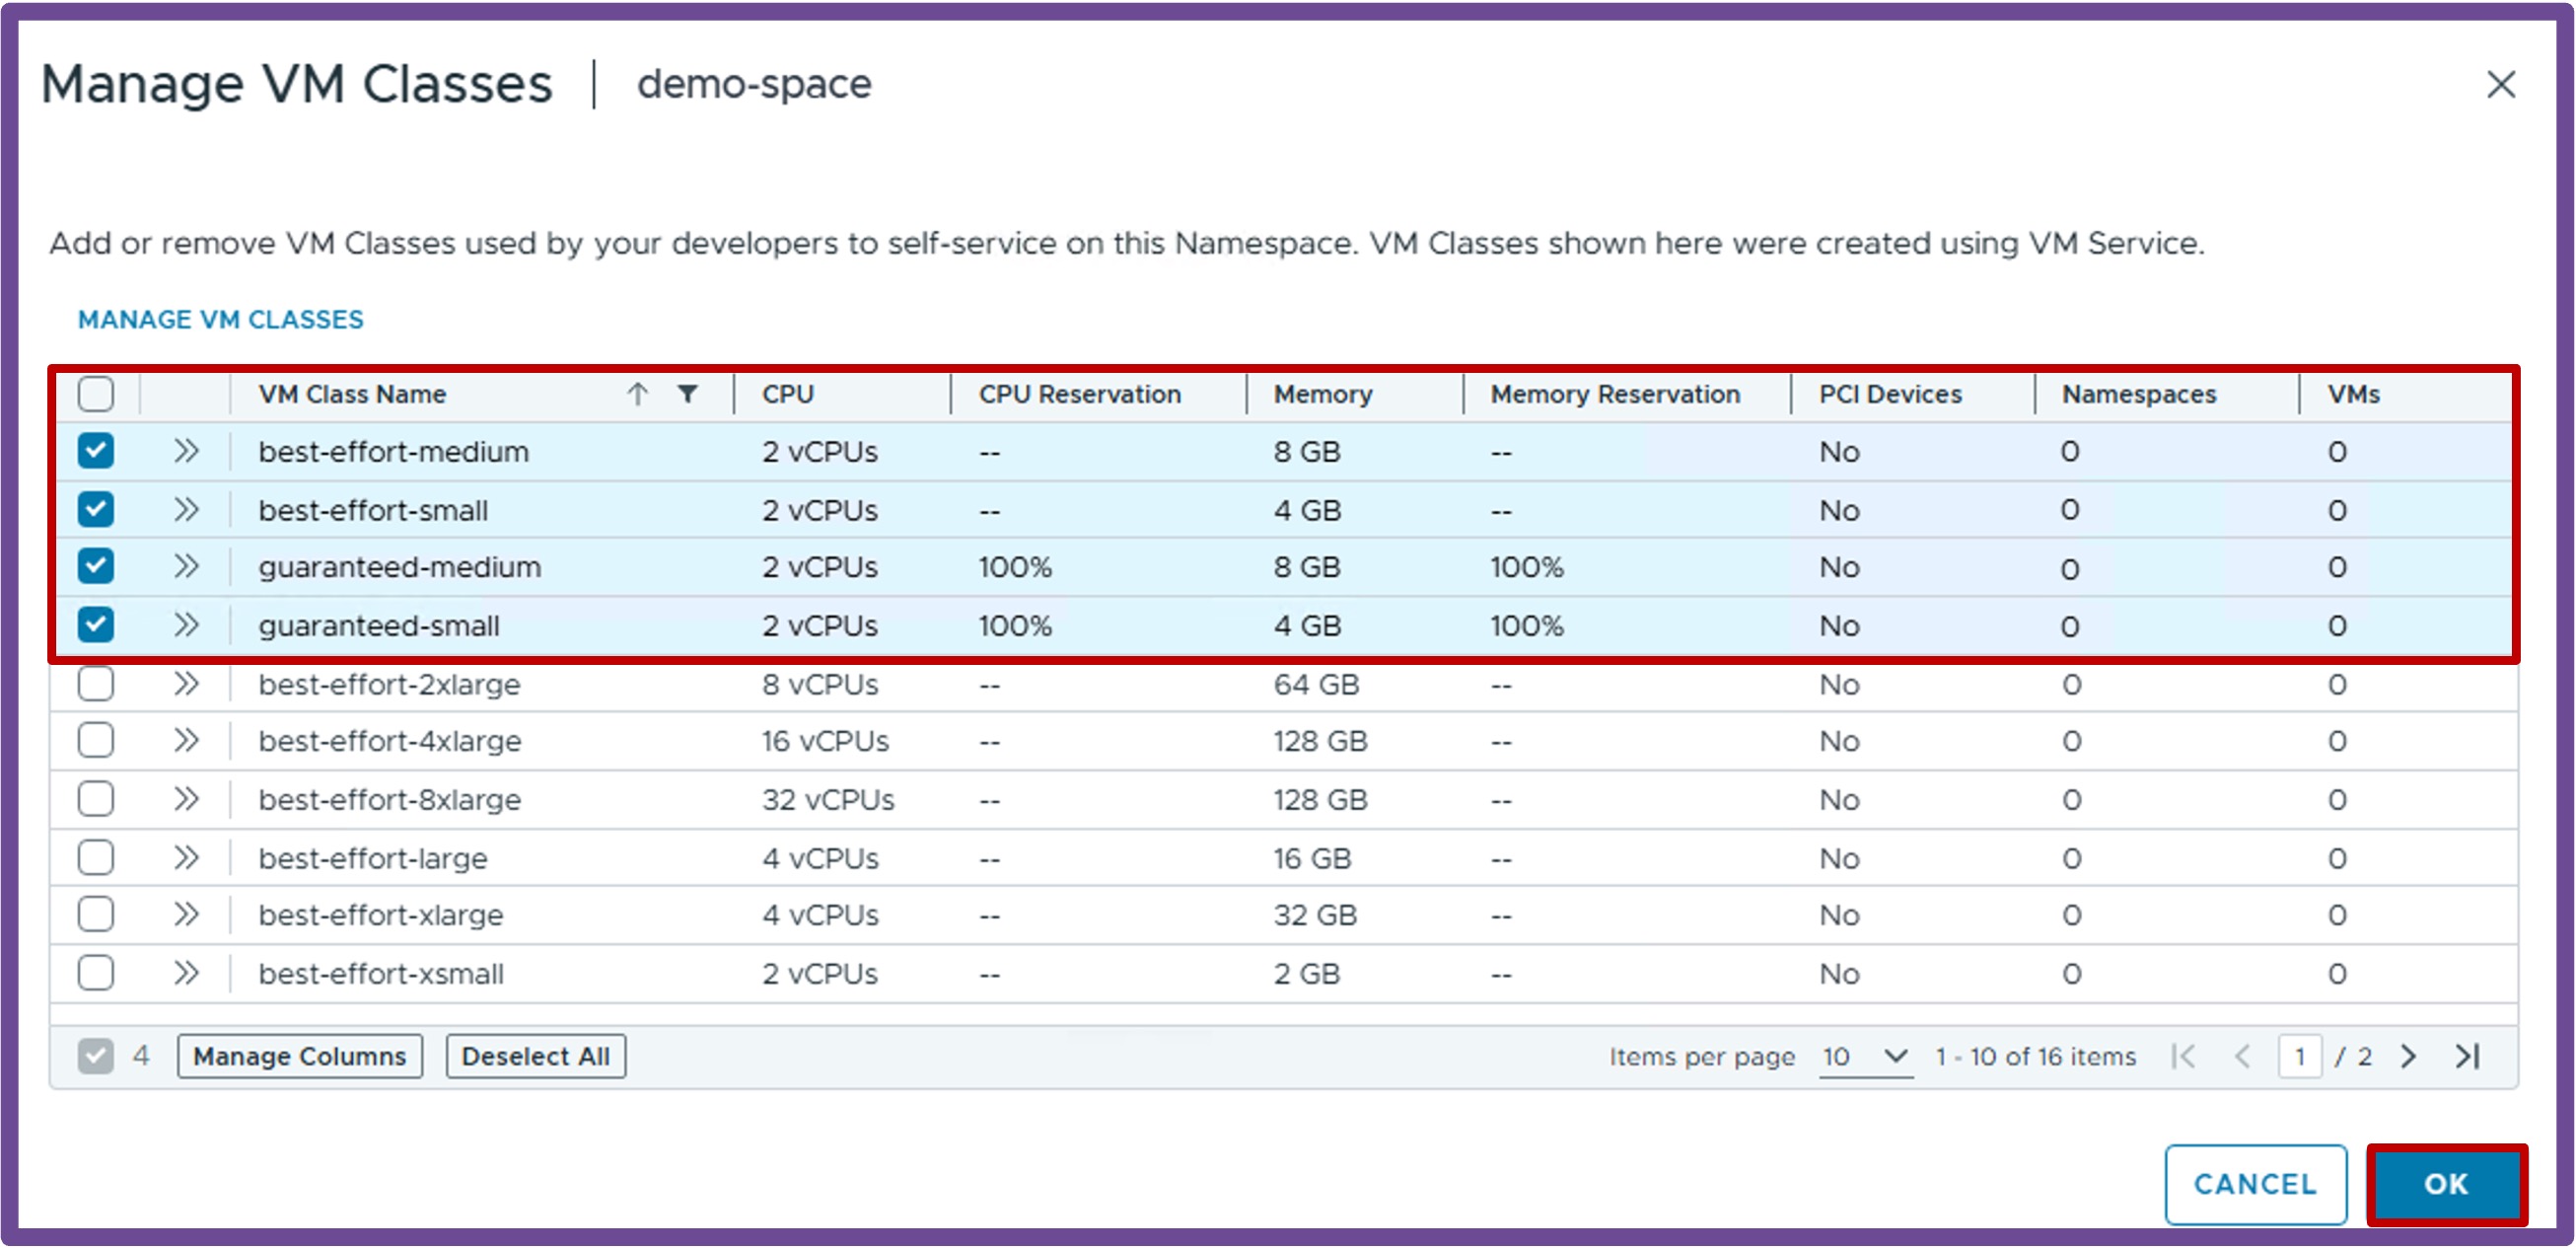
Validate Deployment
Validate Namespace Status
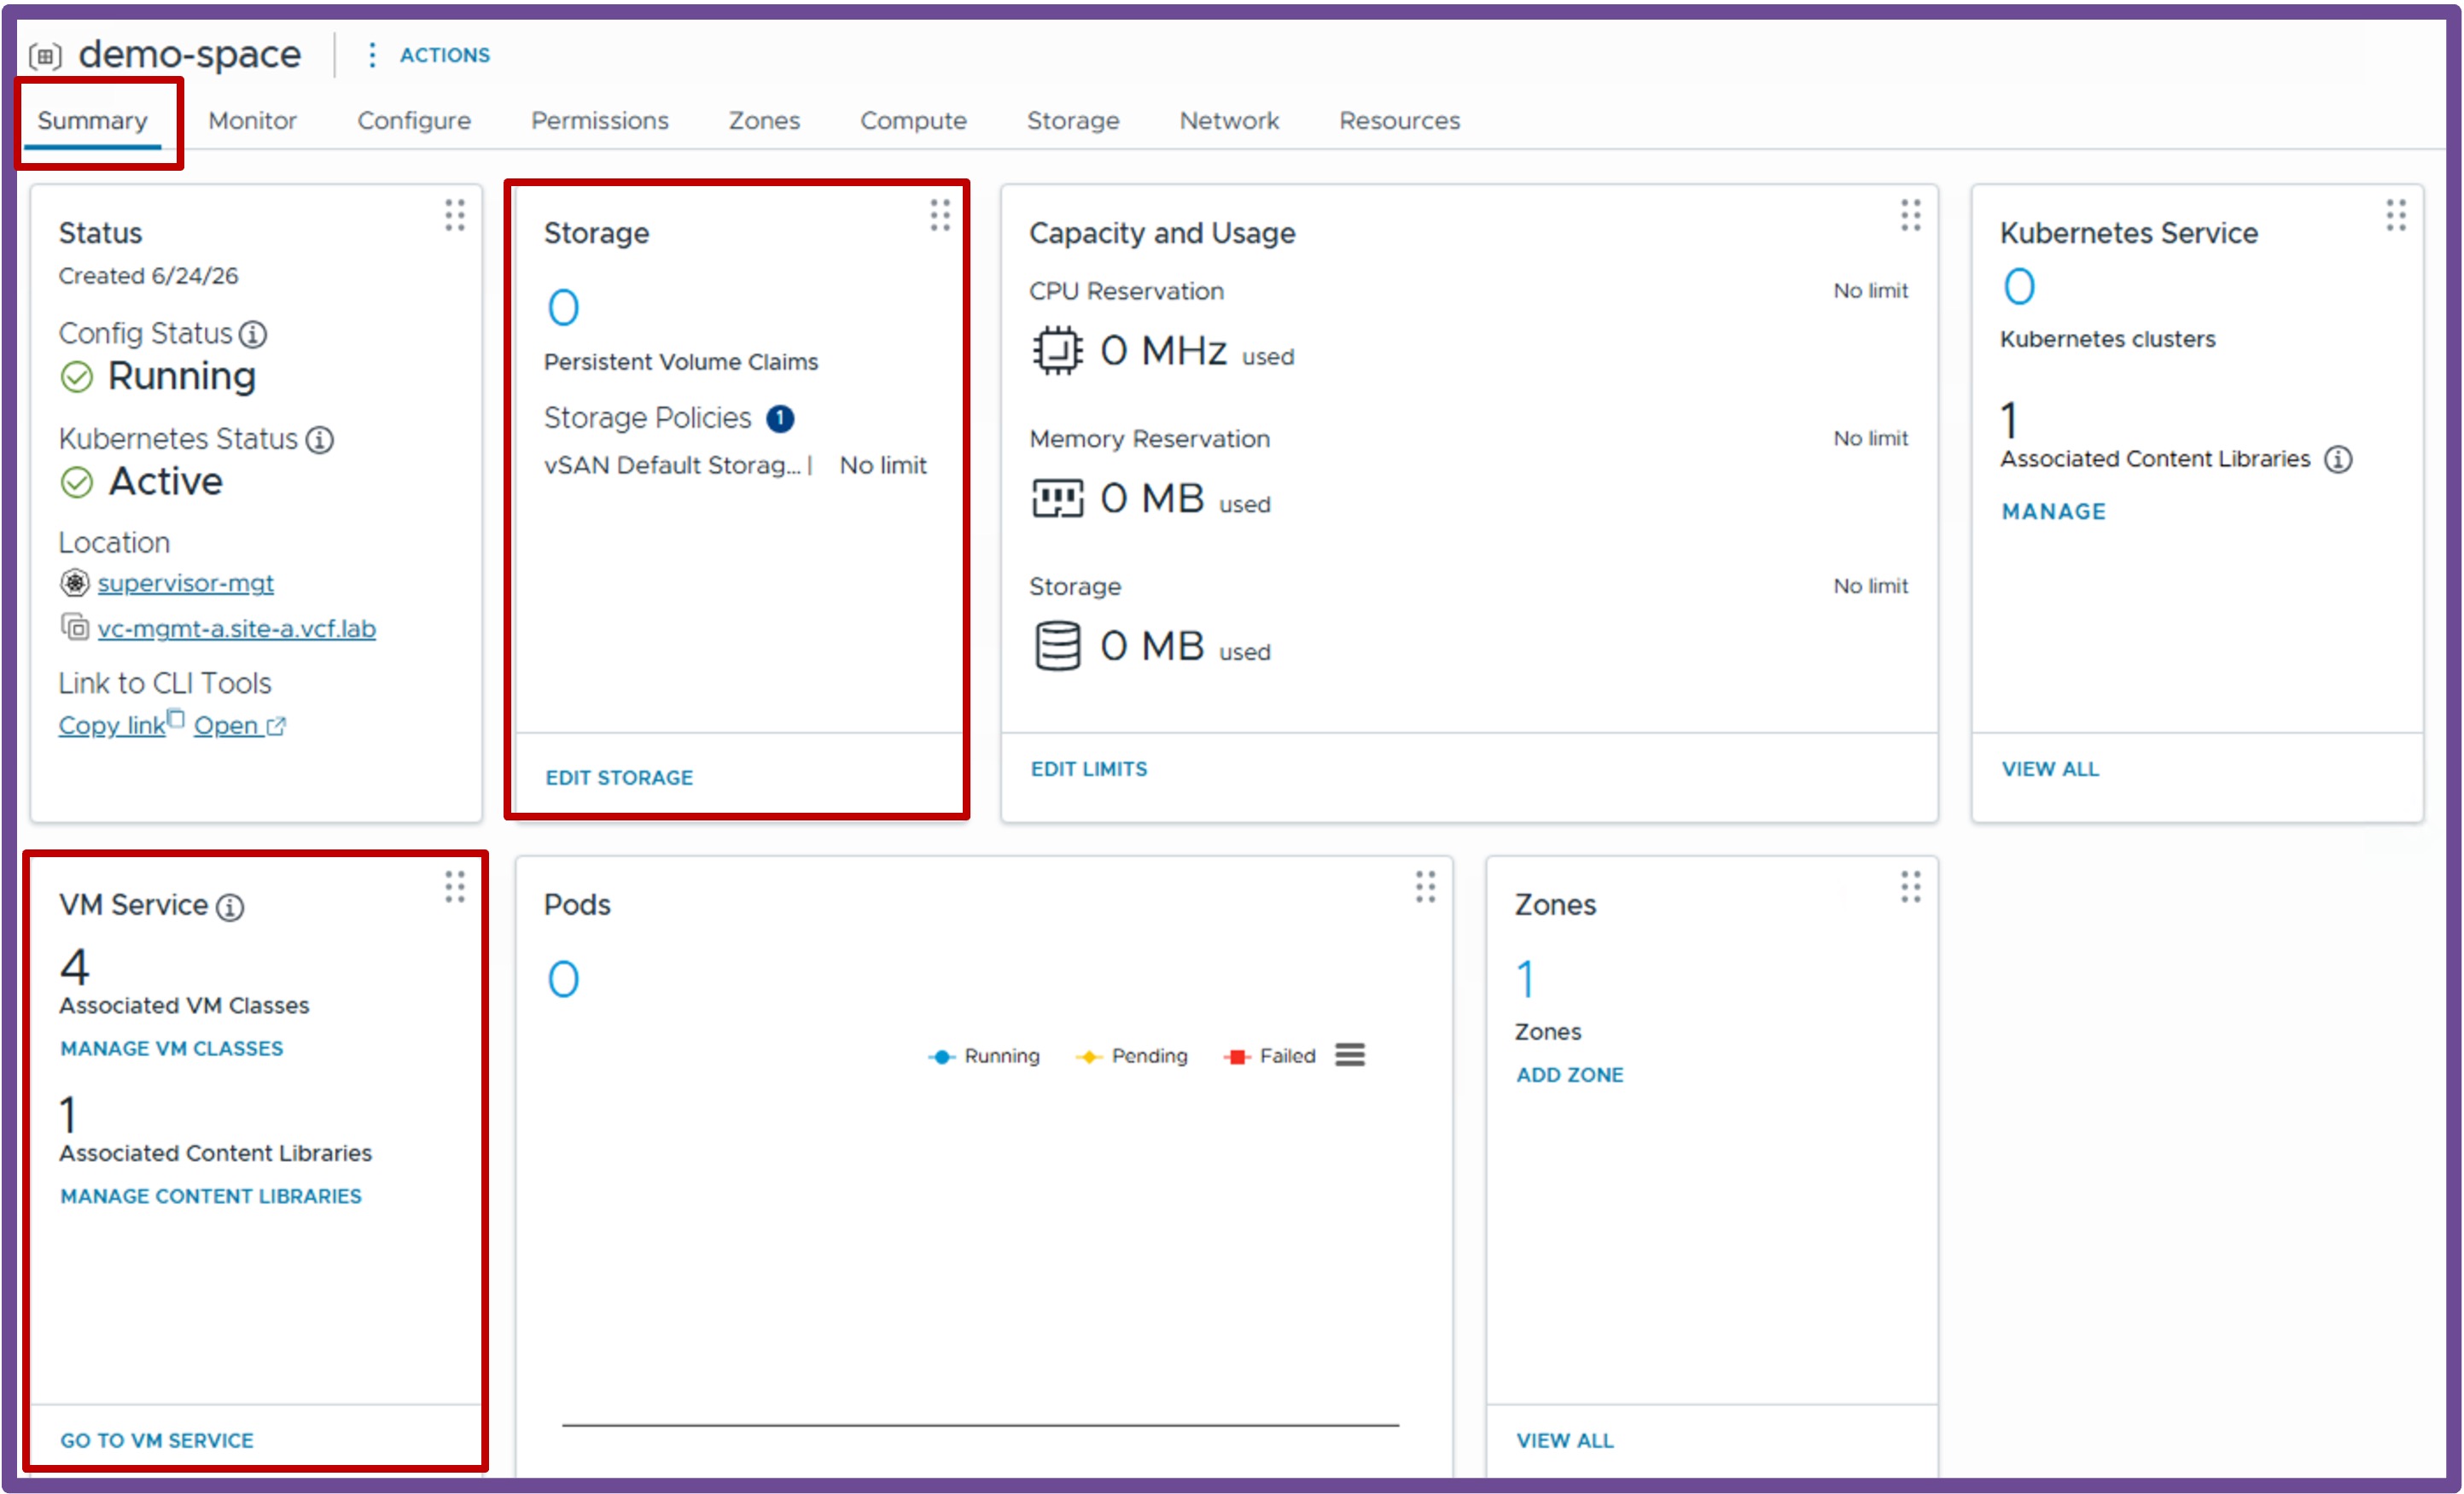
Once the wizard completes, verify the deployment was successful by navigating to vCenter > Supervisor Management > Supervisors, select [your supervisor], and navigate to Namespaces.
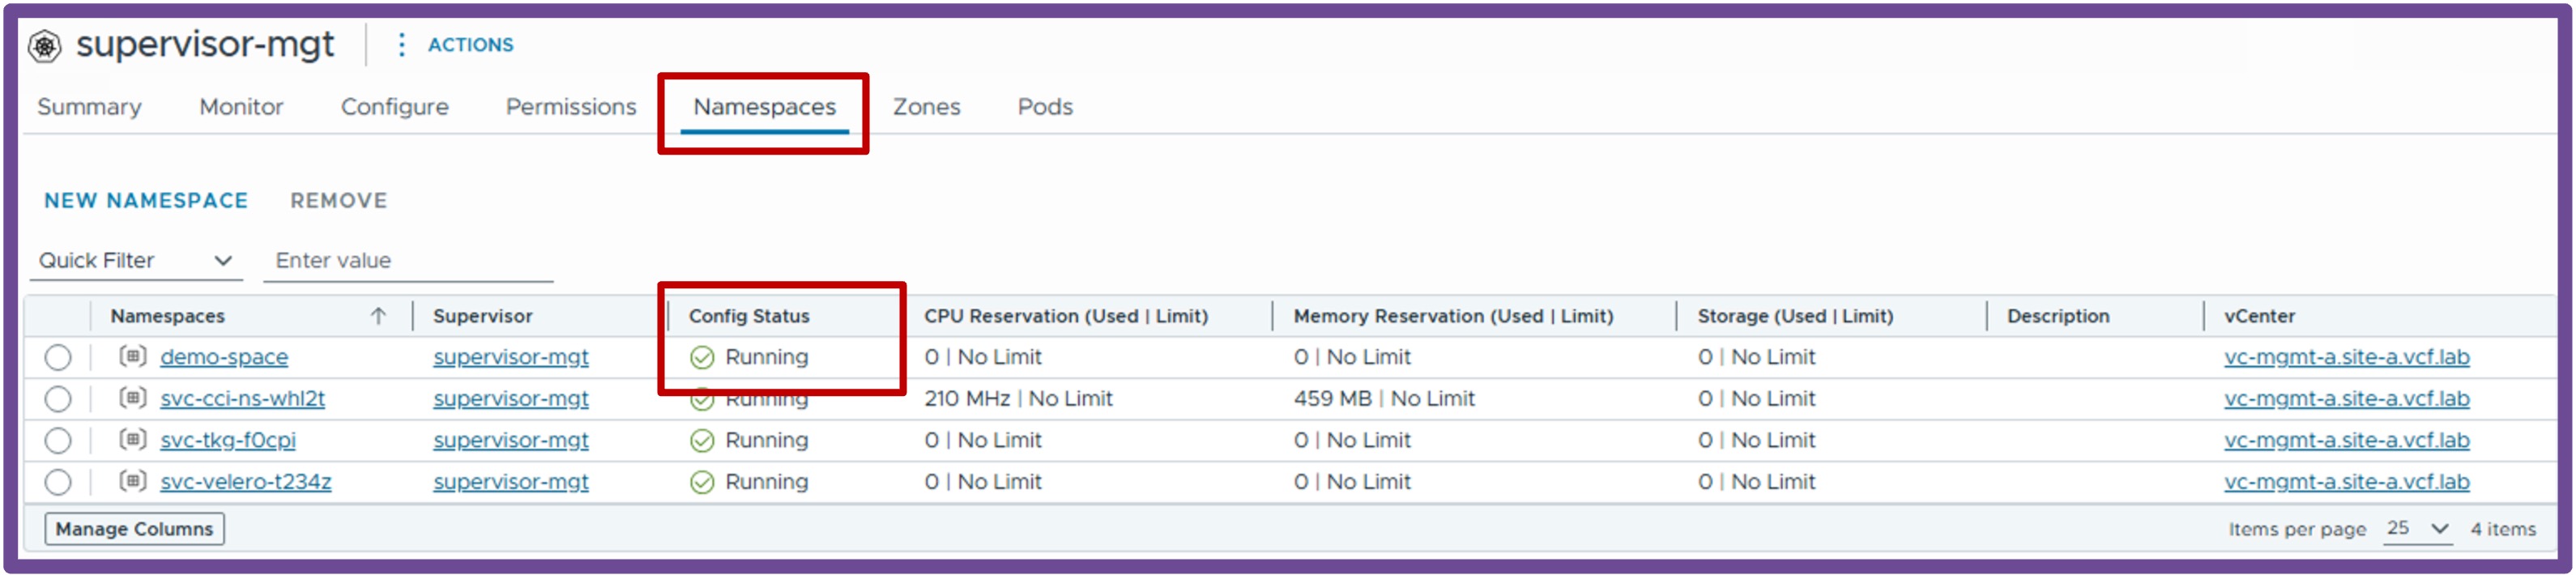
Validate Namespace Storage and Content Library
Verify the Namespace has at least a Content Library, VM Classes, and Storage by navigating to vCenter > Supervisor Management > Supervisors, select [your supervisor], navigate to Namespaces, and select [your namespace].