 Supervisor with "VDS + FLB"
This section describes the procedures for deploying the Supervisor utilizing a "VDS + FLB" architecture inside a vSphere environment.
- Supervisor
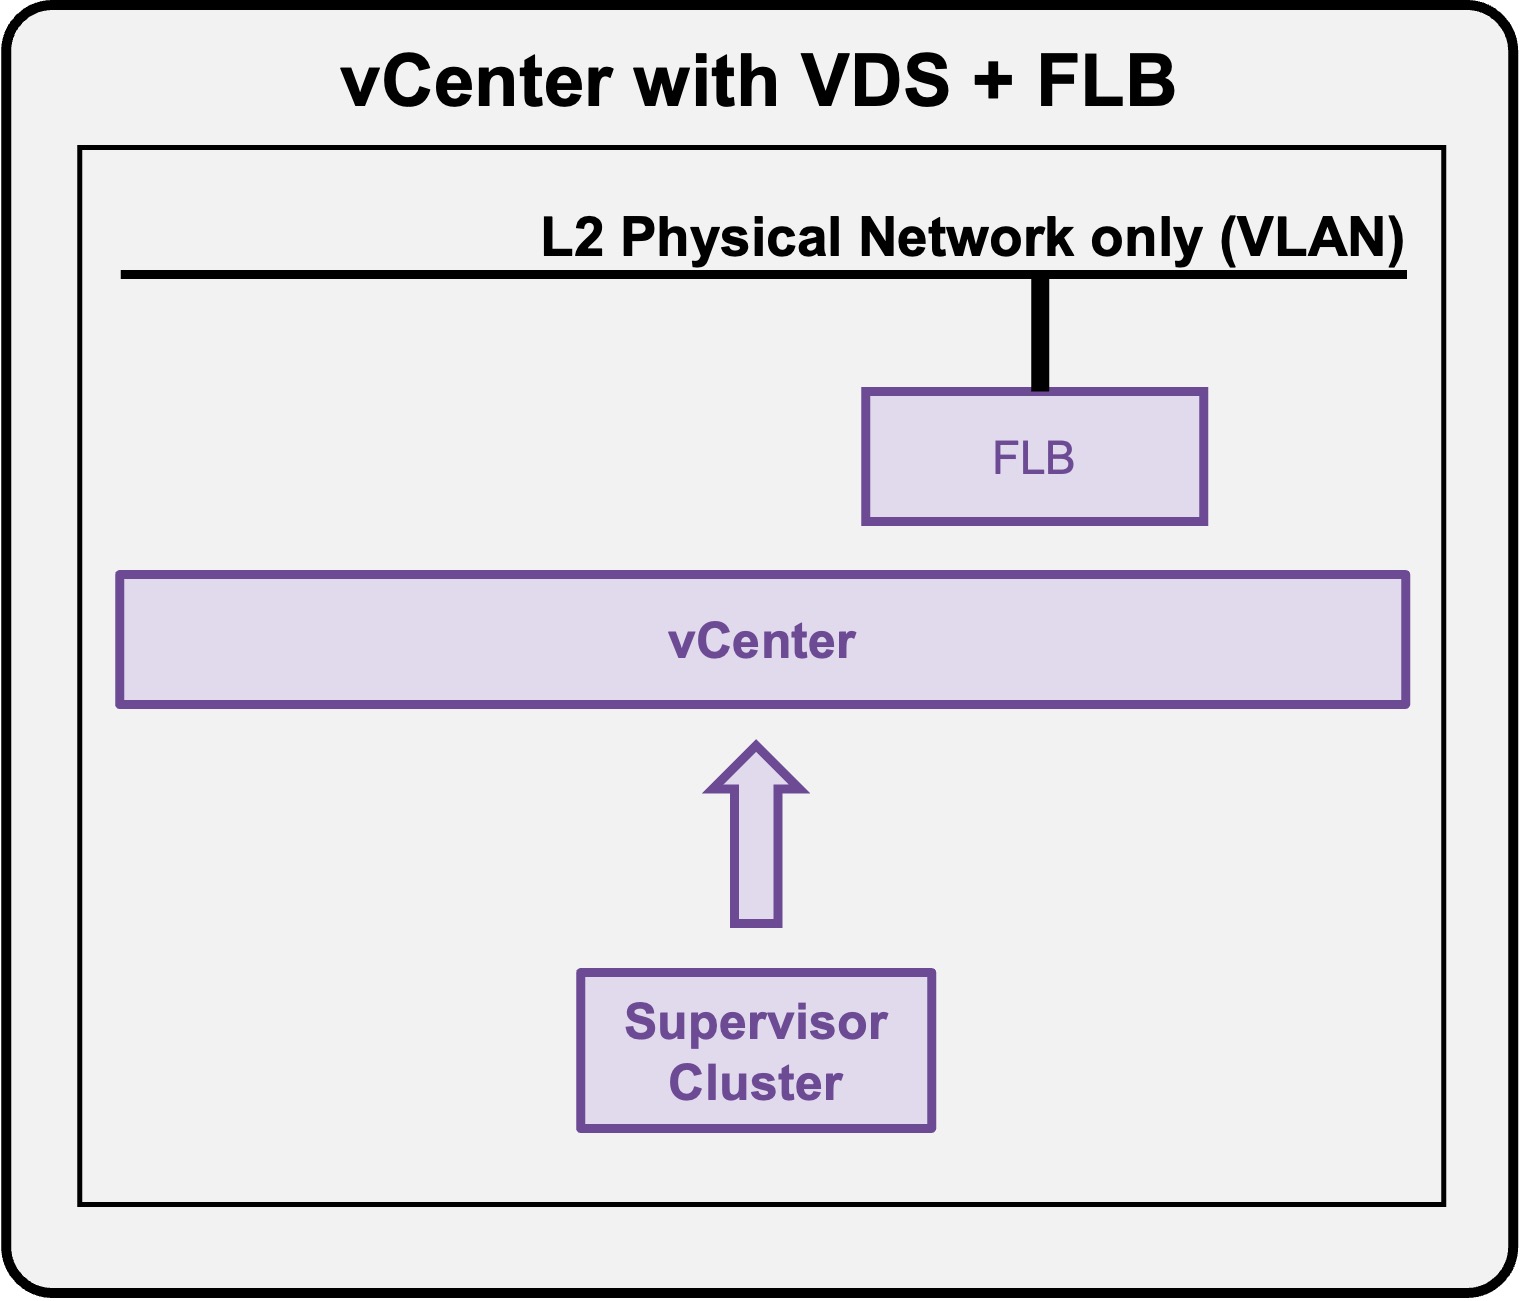
Supervisor Deployment
Create Supervisor
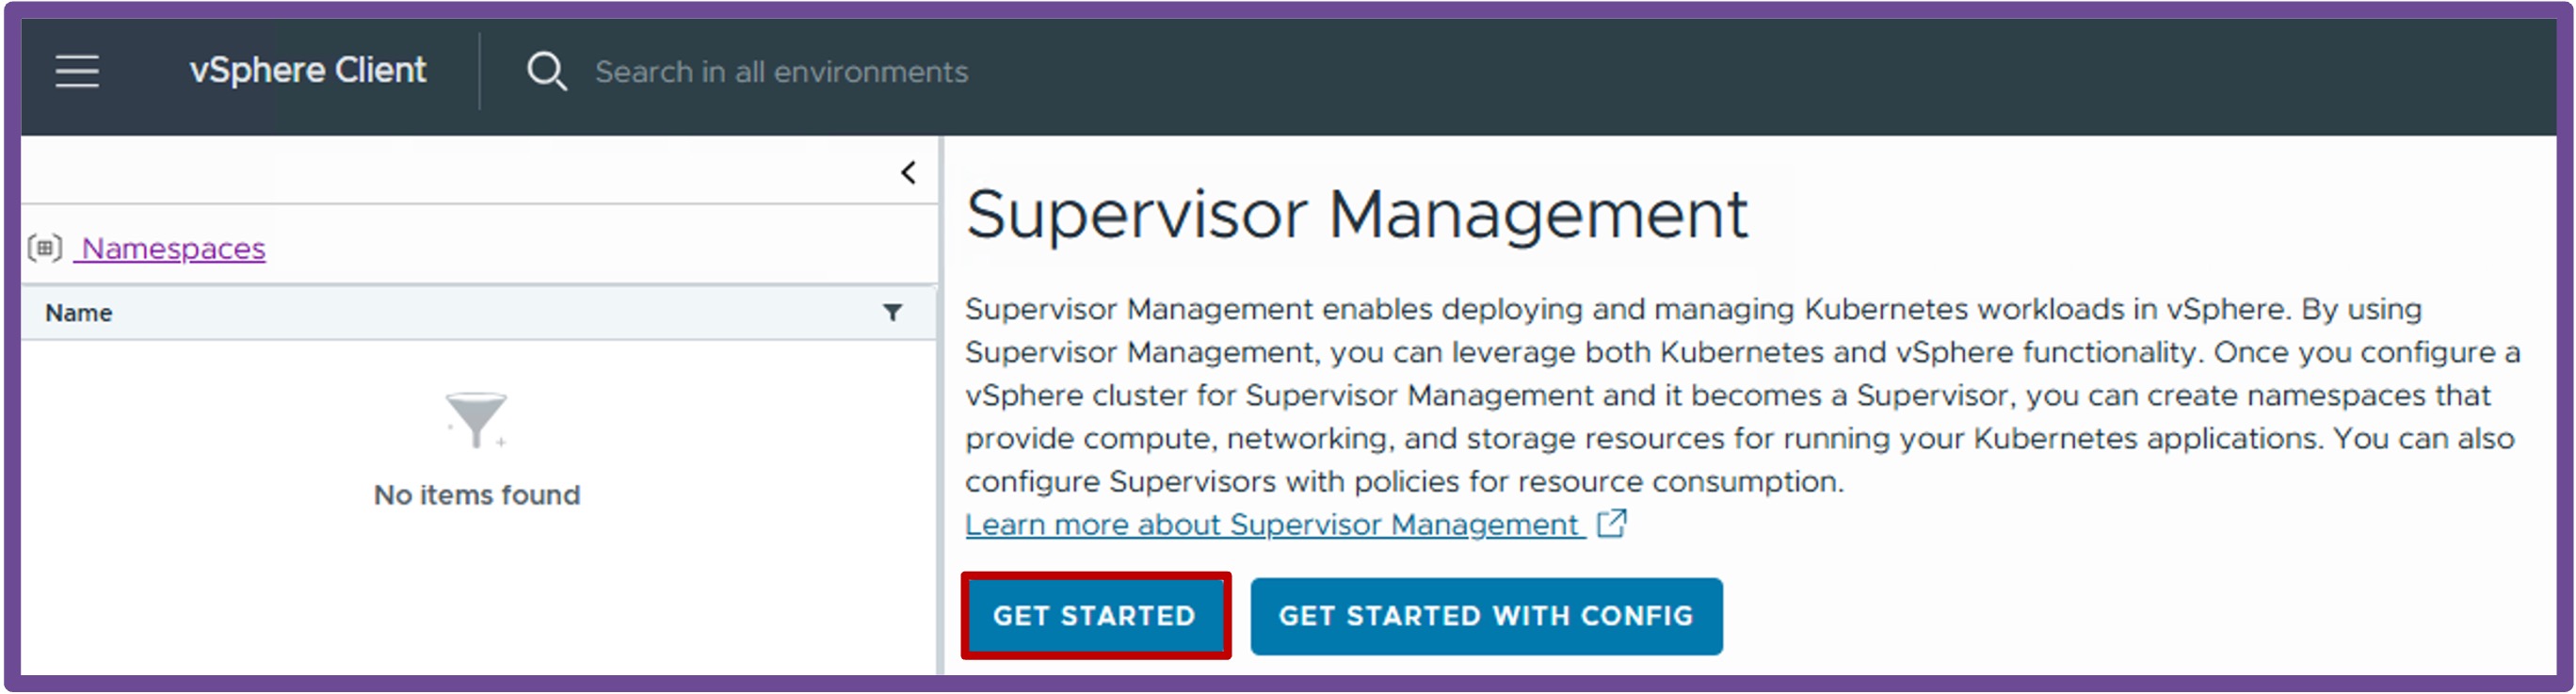
Navigate to vCenter > Supervisor Management, and click Get Started.
-
vCenter Server and Network
- Select the network stack vSphere Distributed Switch (VDS) with Load Balancer Type "Foundation Load Balancer", and click Next.
-
Supervisor Location
- Select the Cluster Deployment, and click Next.
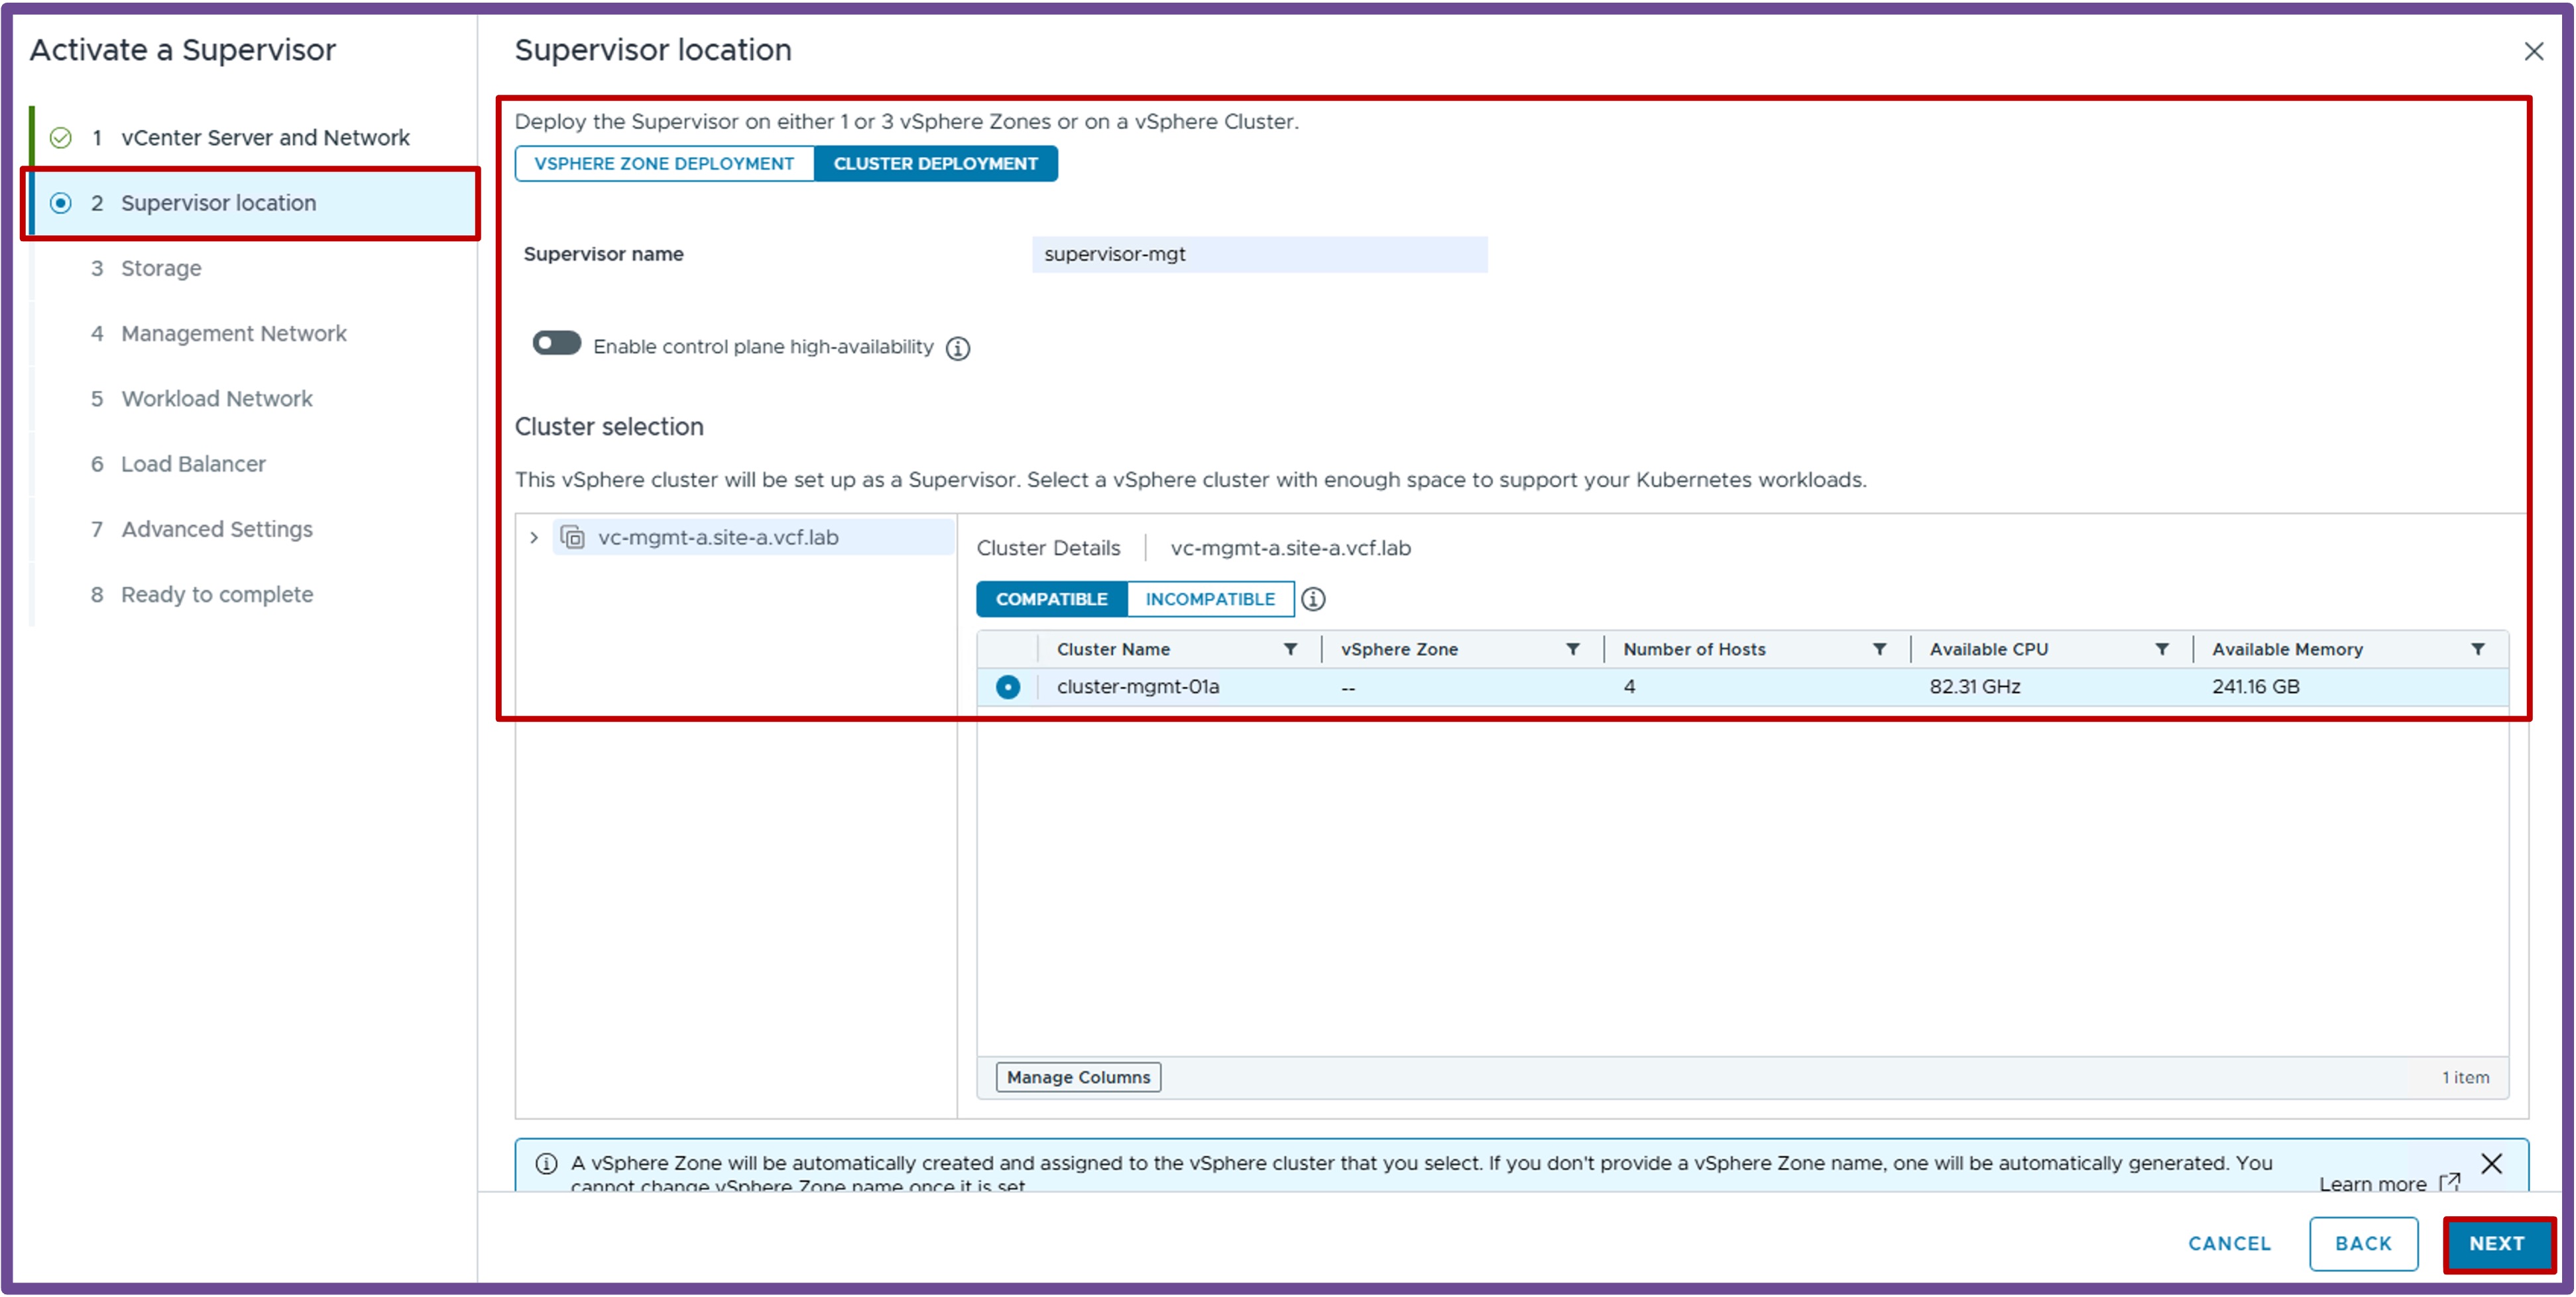
- Select the Cluster Deployment, and click Next.
-
Storage
- Select the different Storage Policies, and click Next.
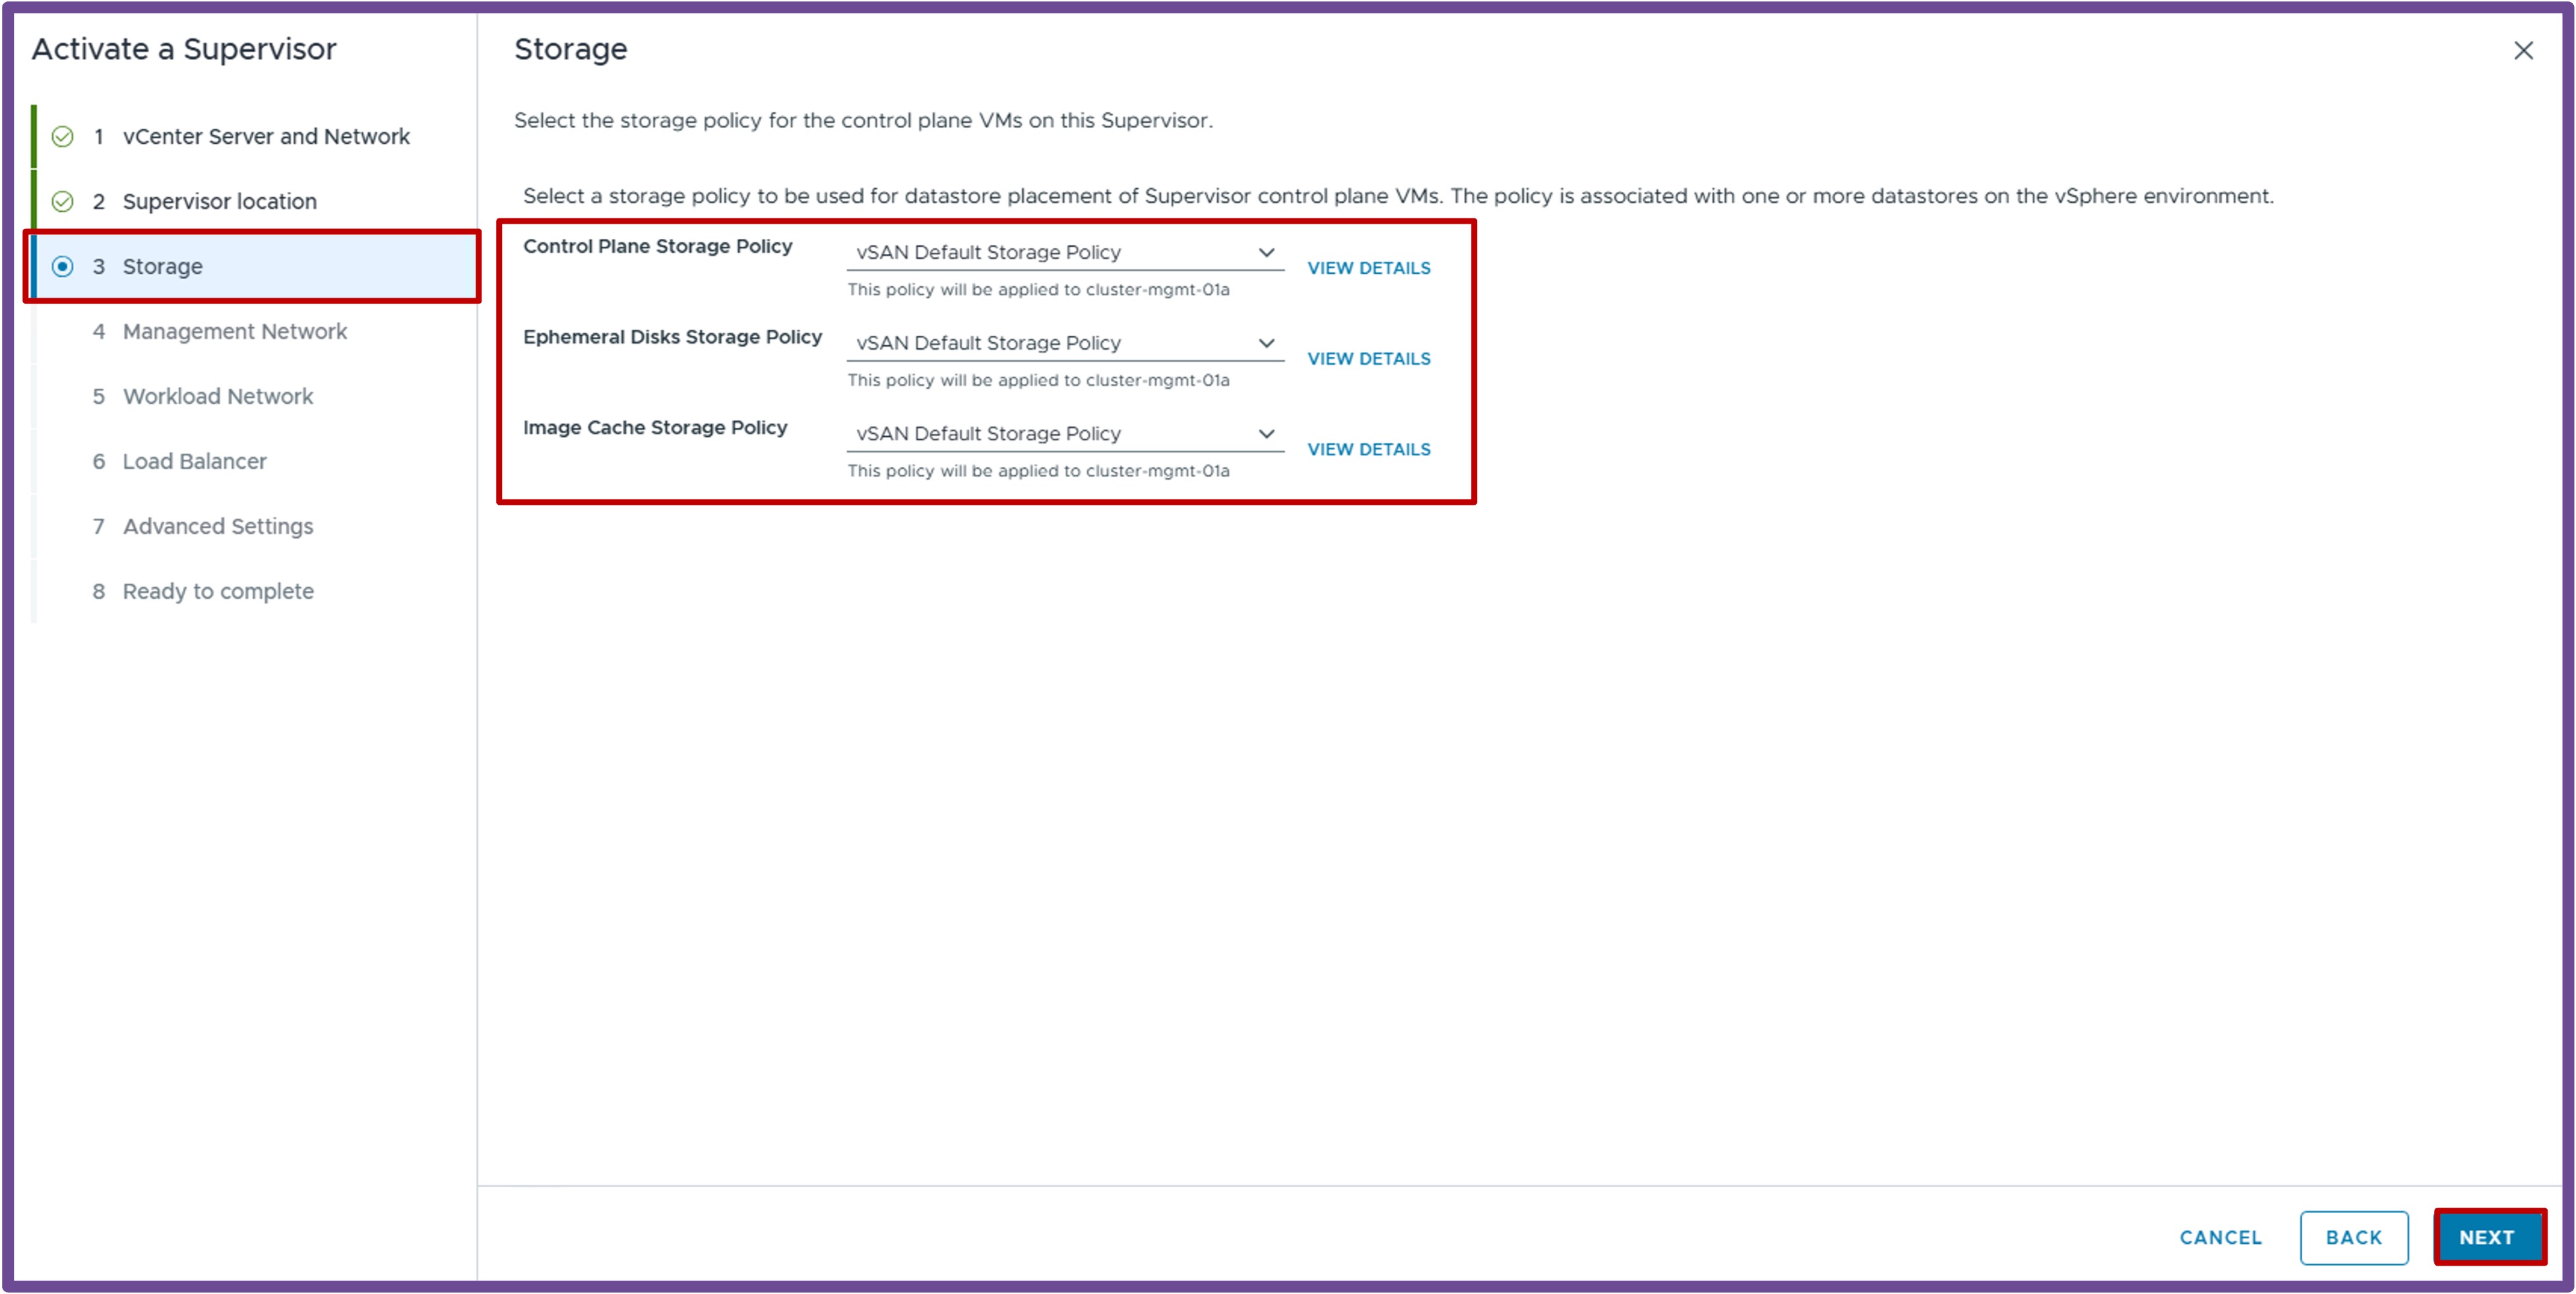
- Select the different Storage Policies, and click Next.
-
Management Network
- Configure the Supervisor Management IP Settings, and click Next.
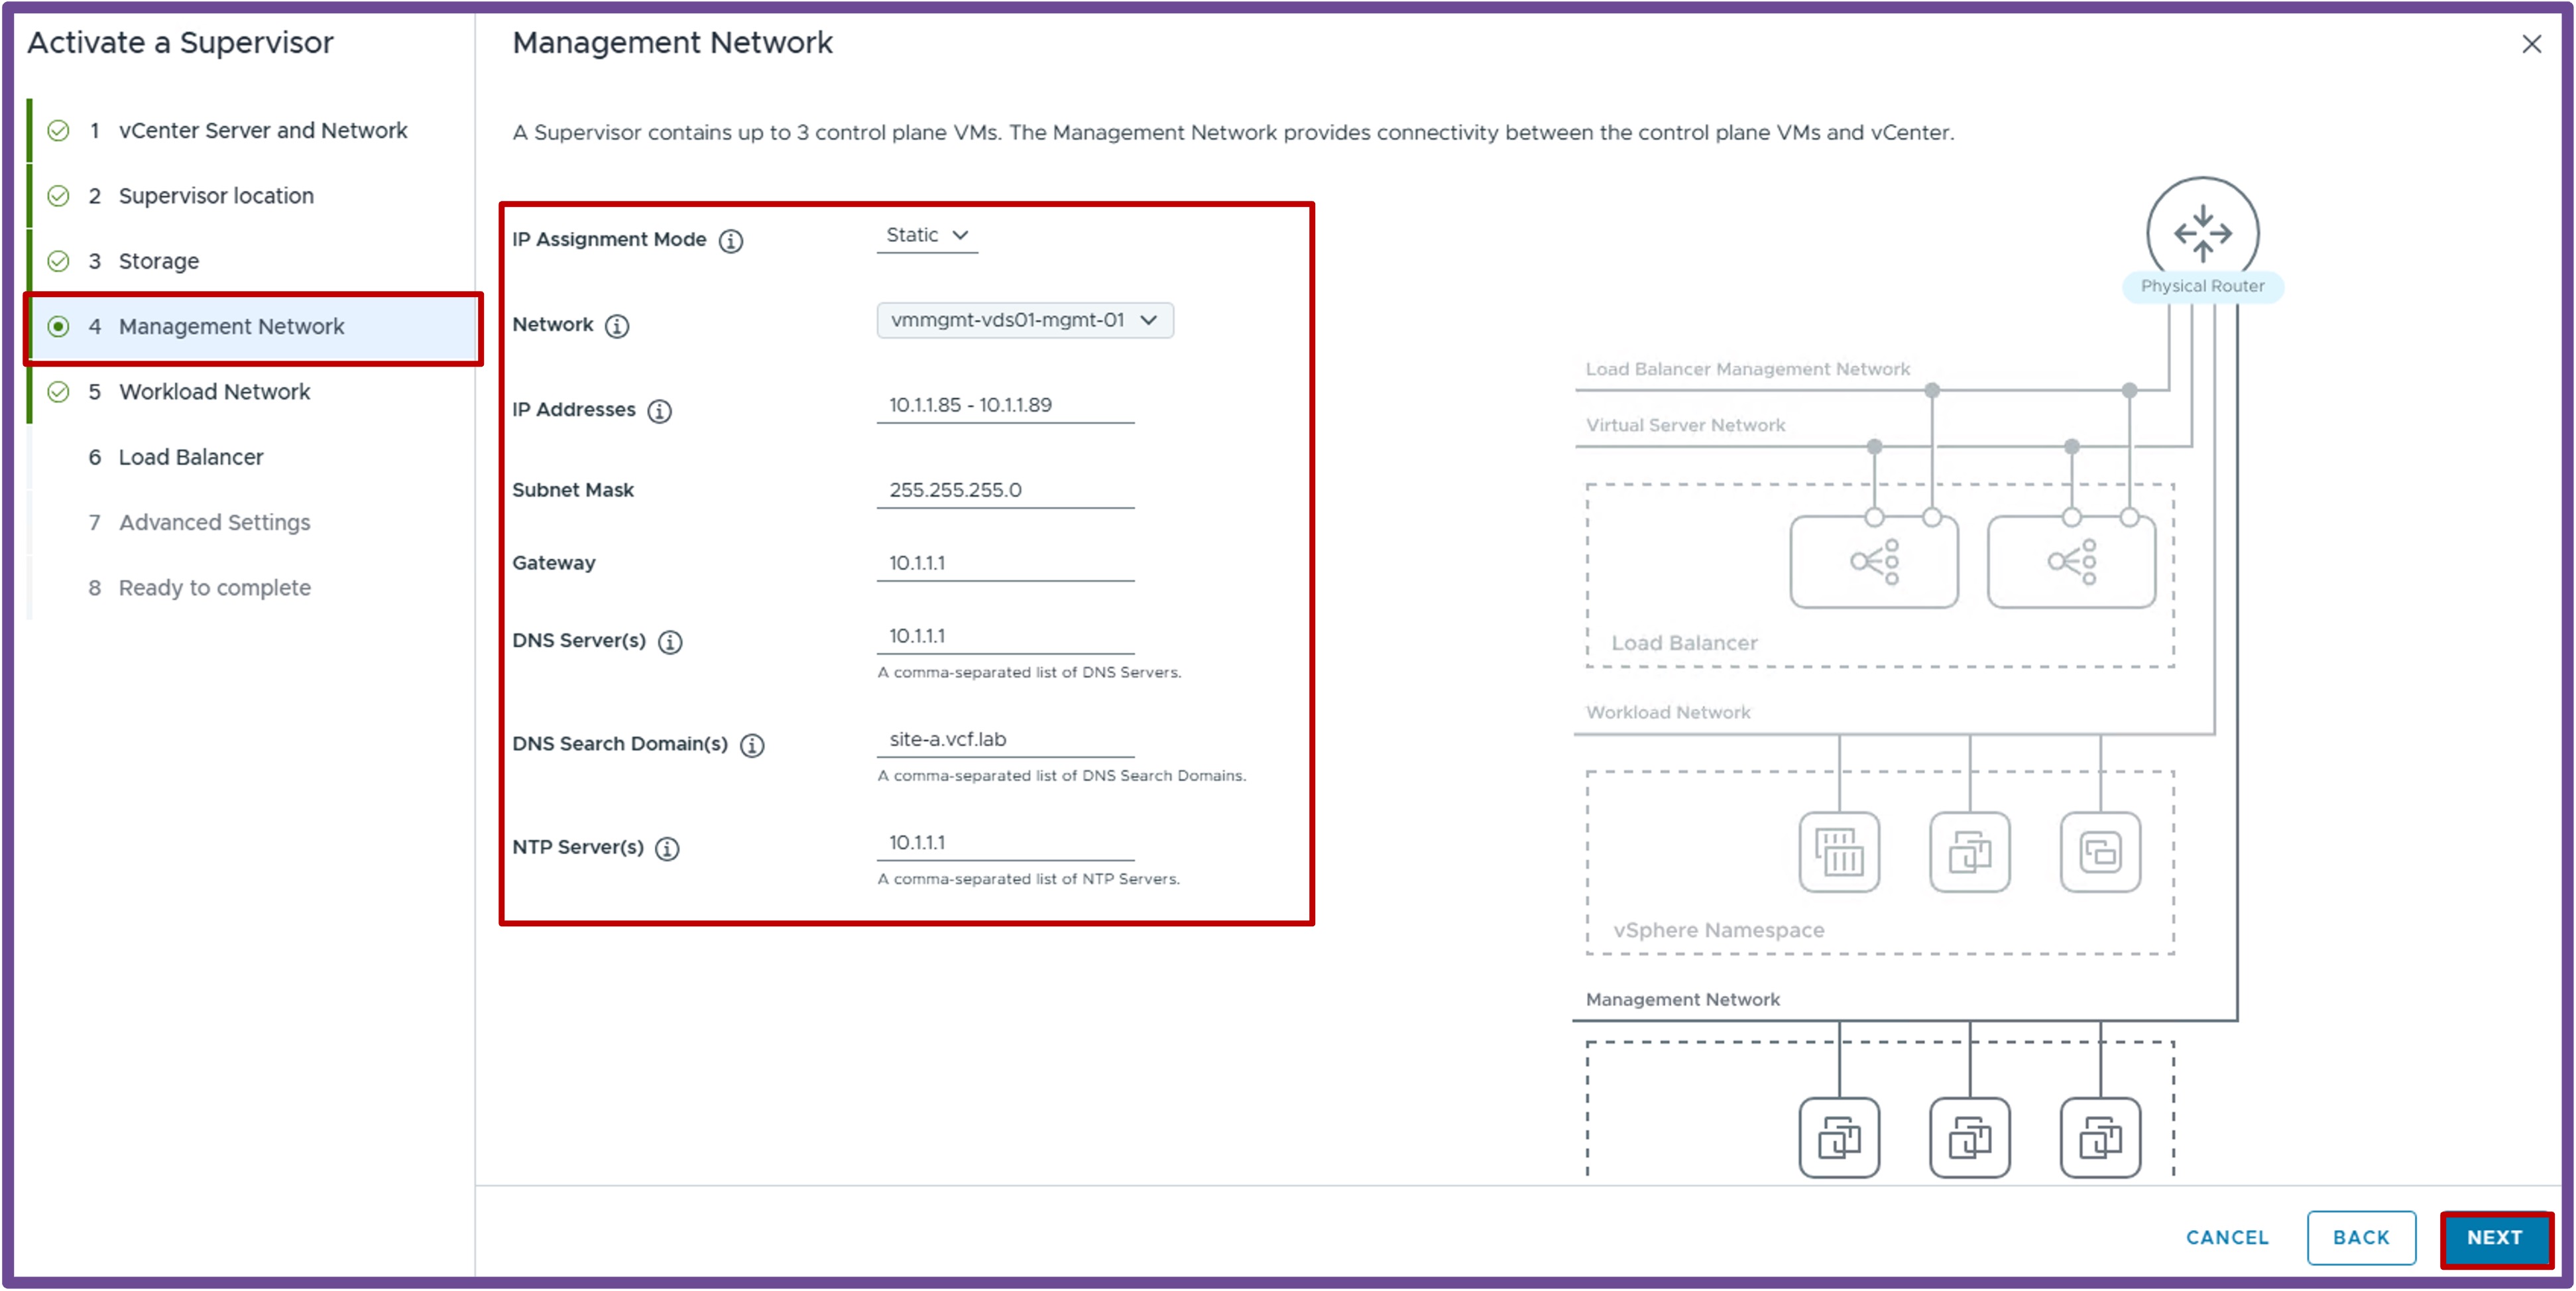
- Configure the Supervisor Management IP Settings, and click Next.
-
Workload Network
-
Configure the Workload Network, and click Next.
Choose the Port Group to host the K8s Nodes and configure the Layer 3 Routing Configuration for the Supervisor and future K8s Nodes and VMs.Note: The Internal Network for Kubernetes Services is pre-populated with the subnet
10.96.0.0/23.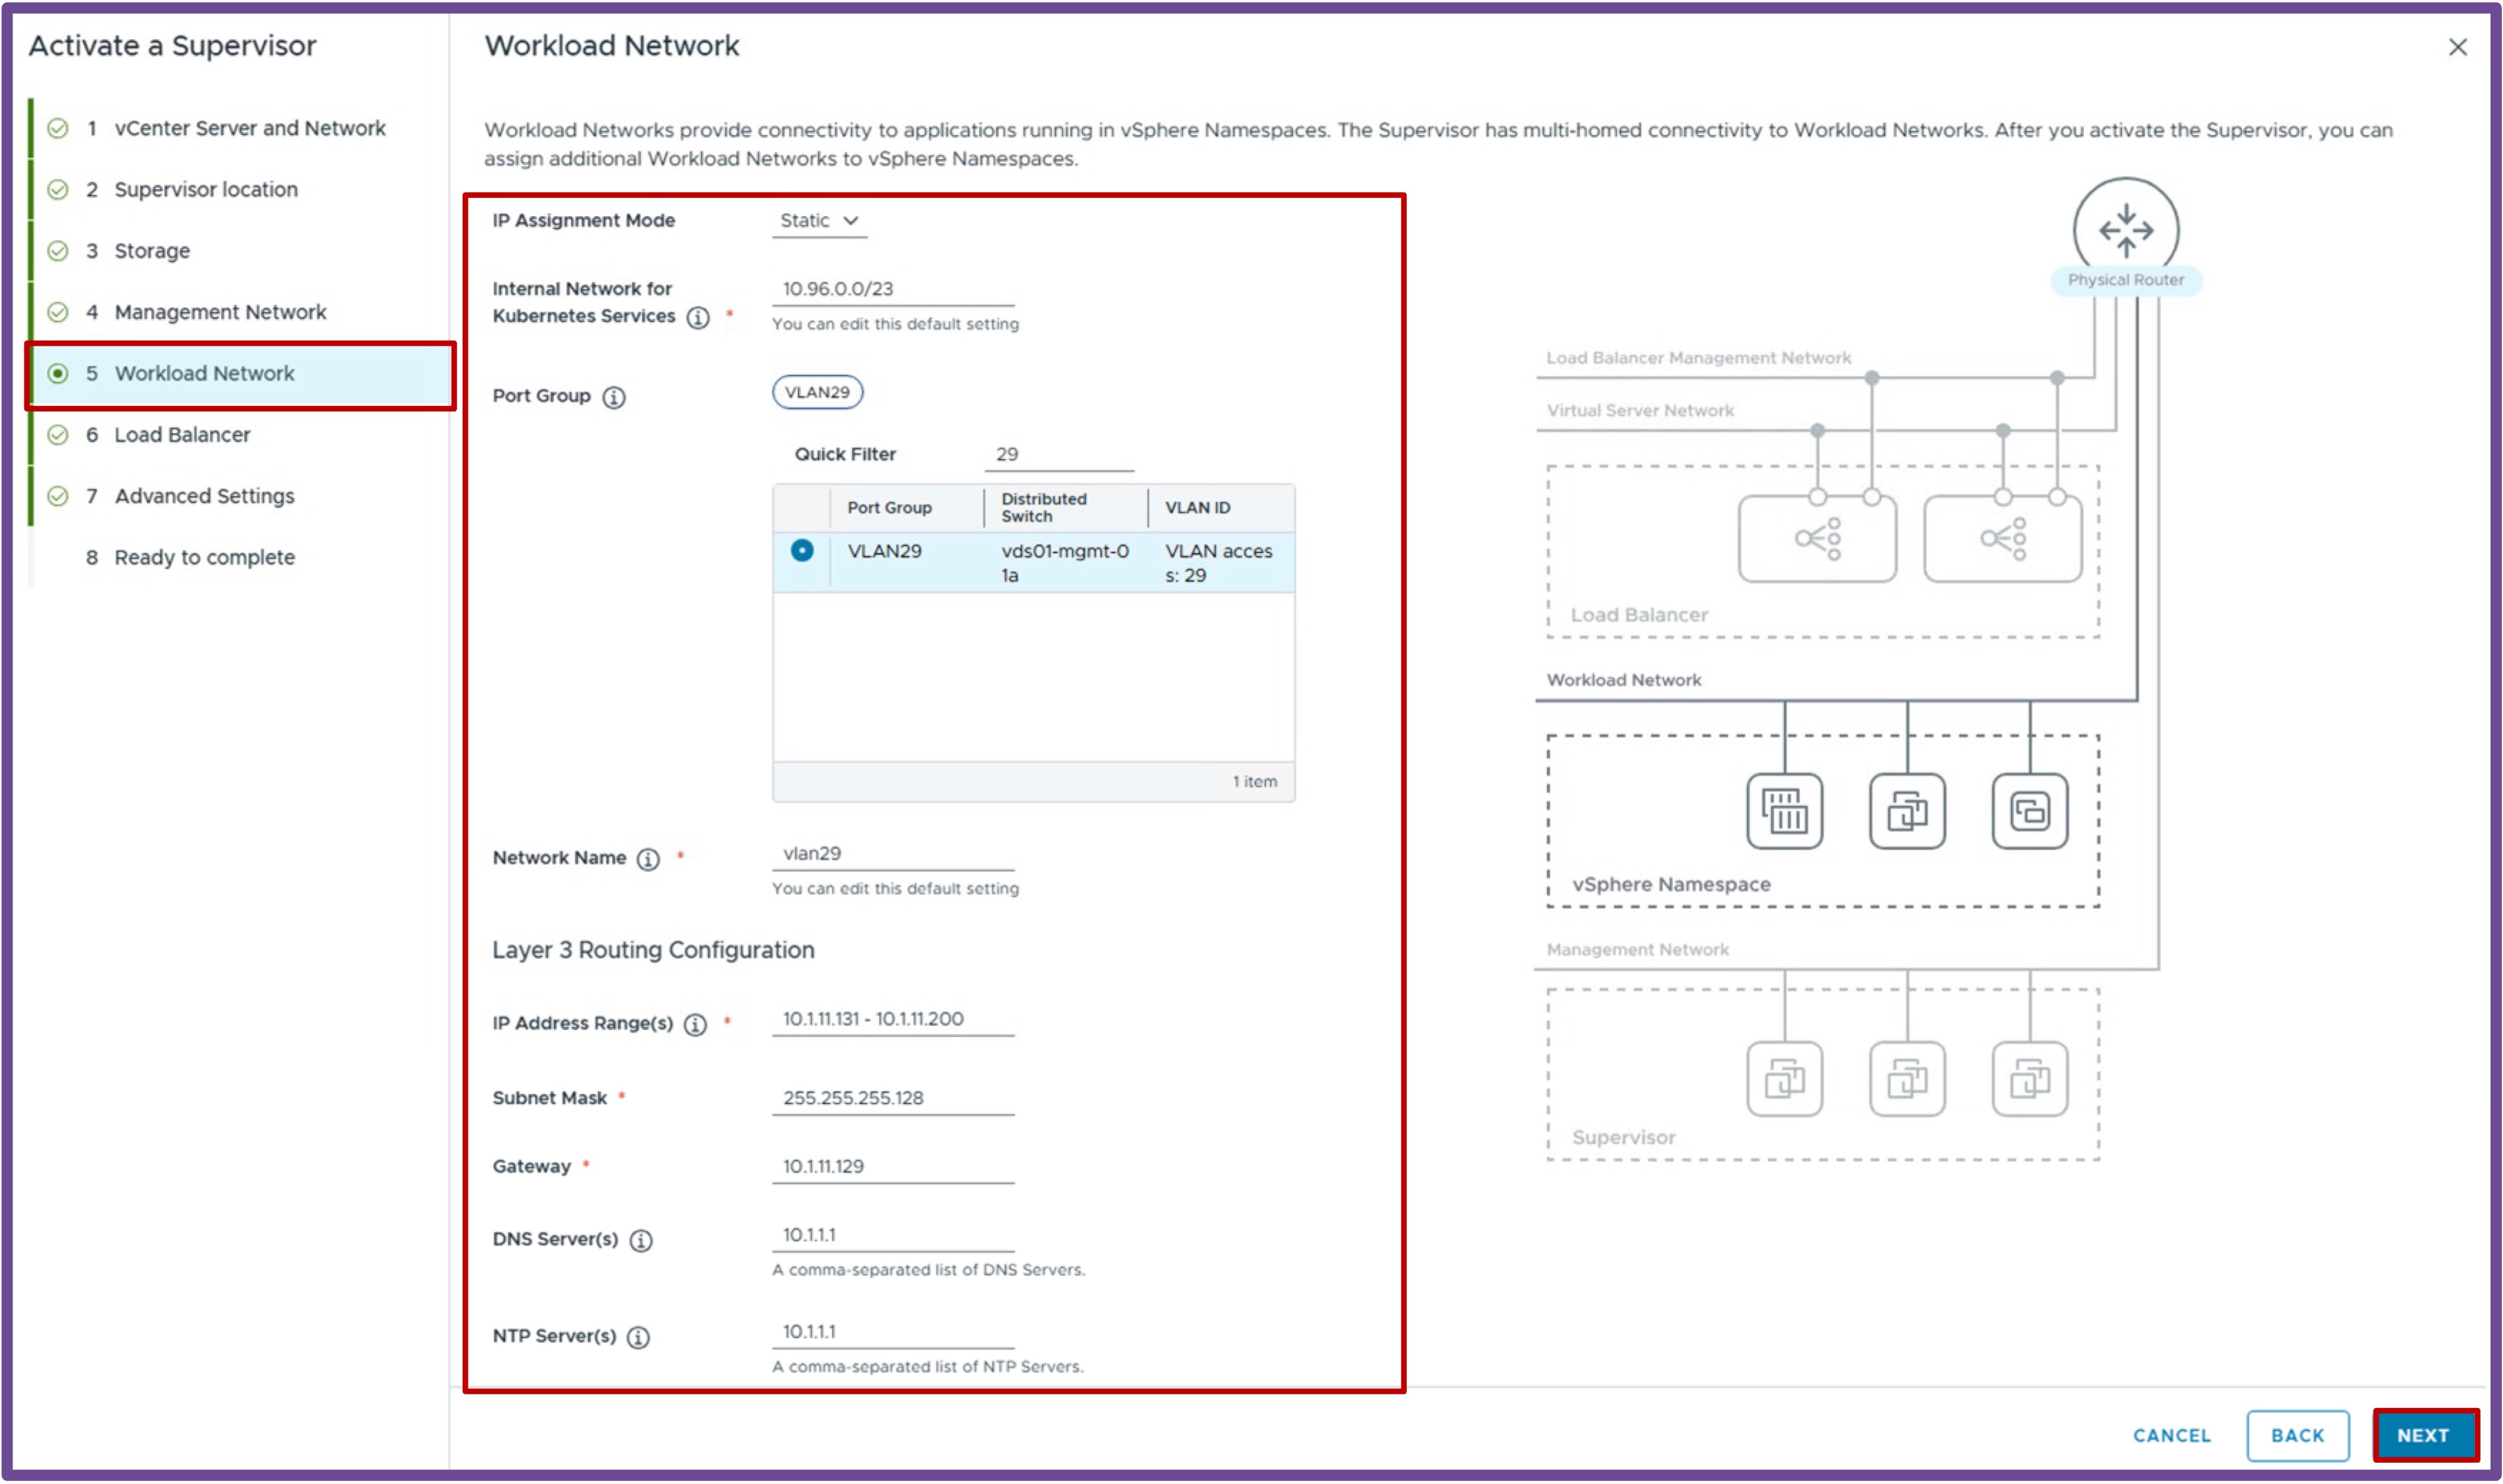
-
-
Load Balancer
- Configure the Foundation Load Balancer, and click Next.
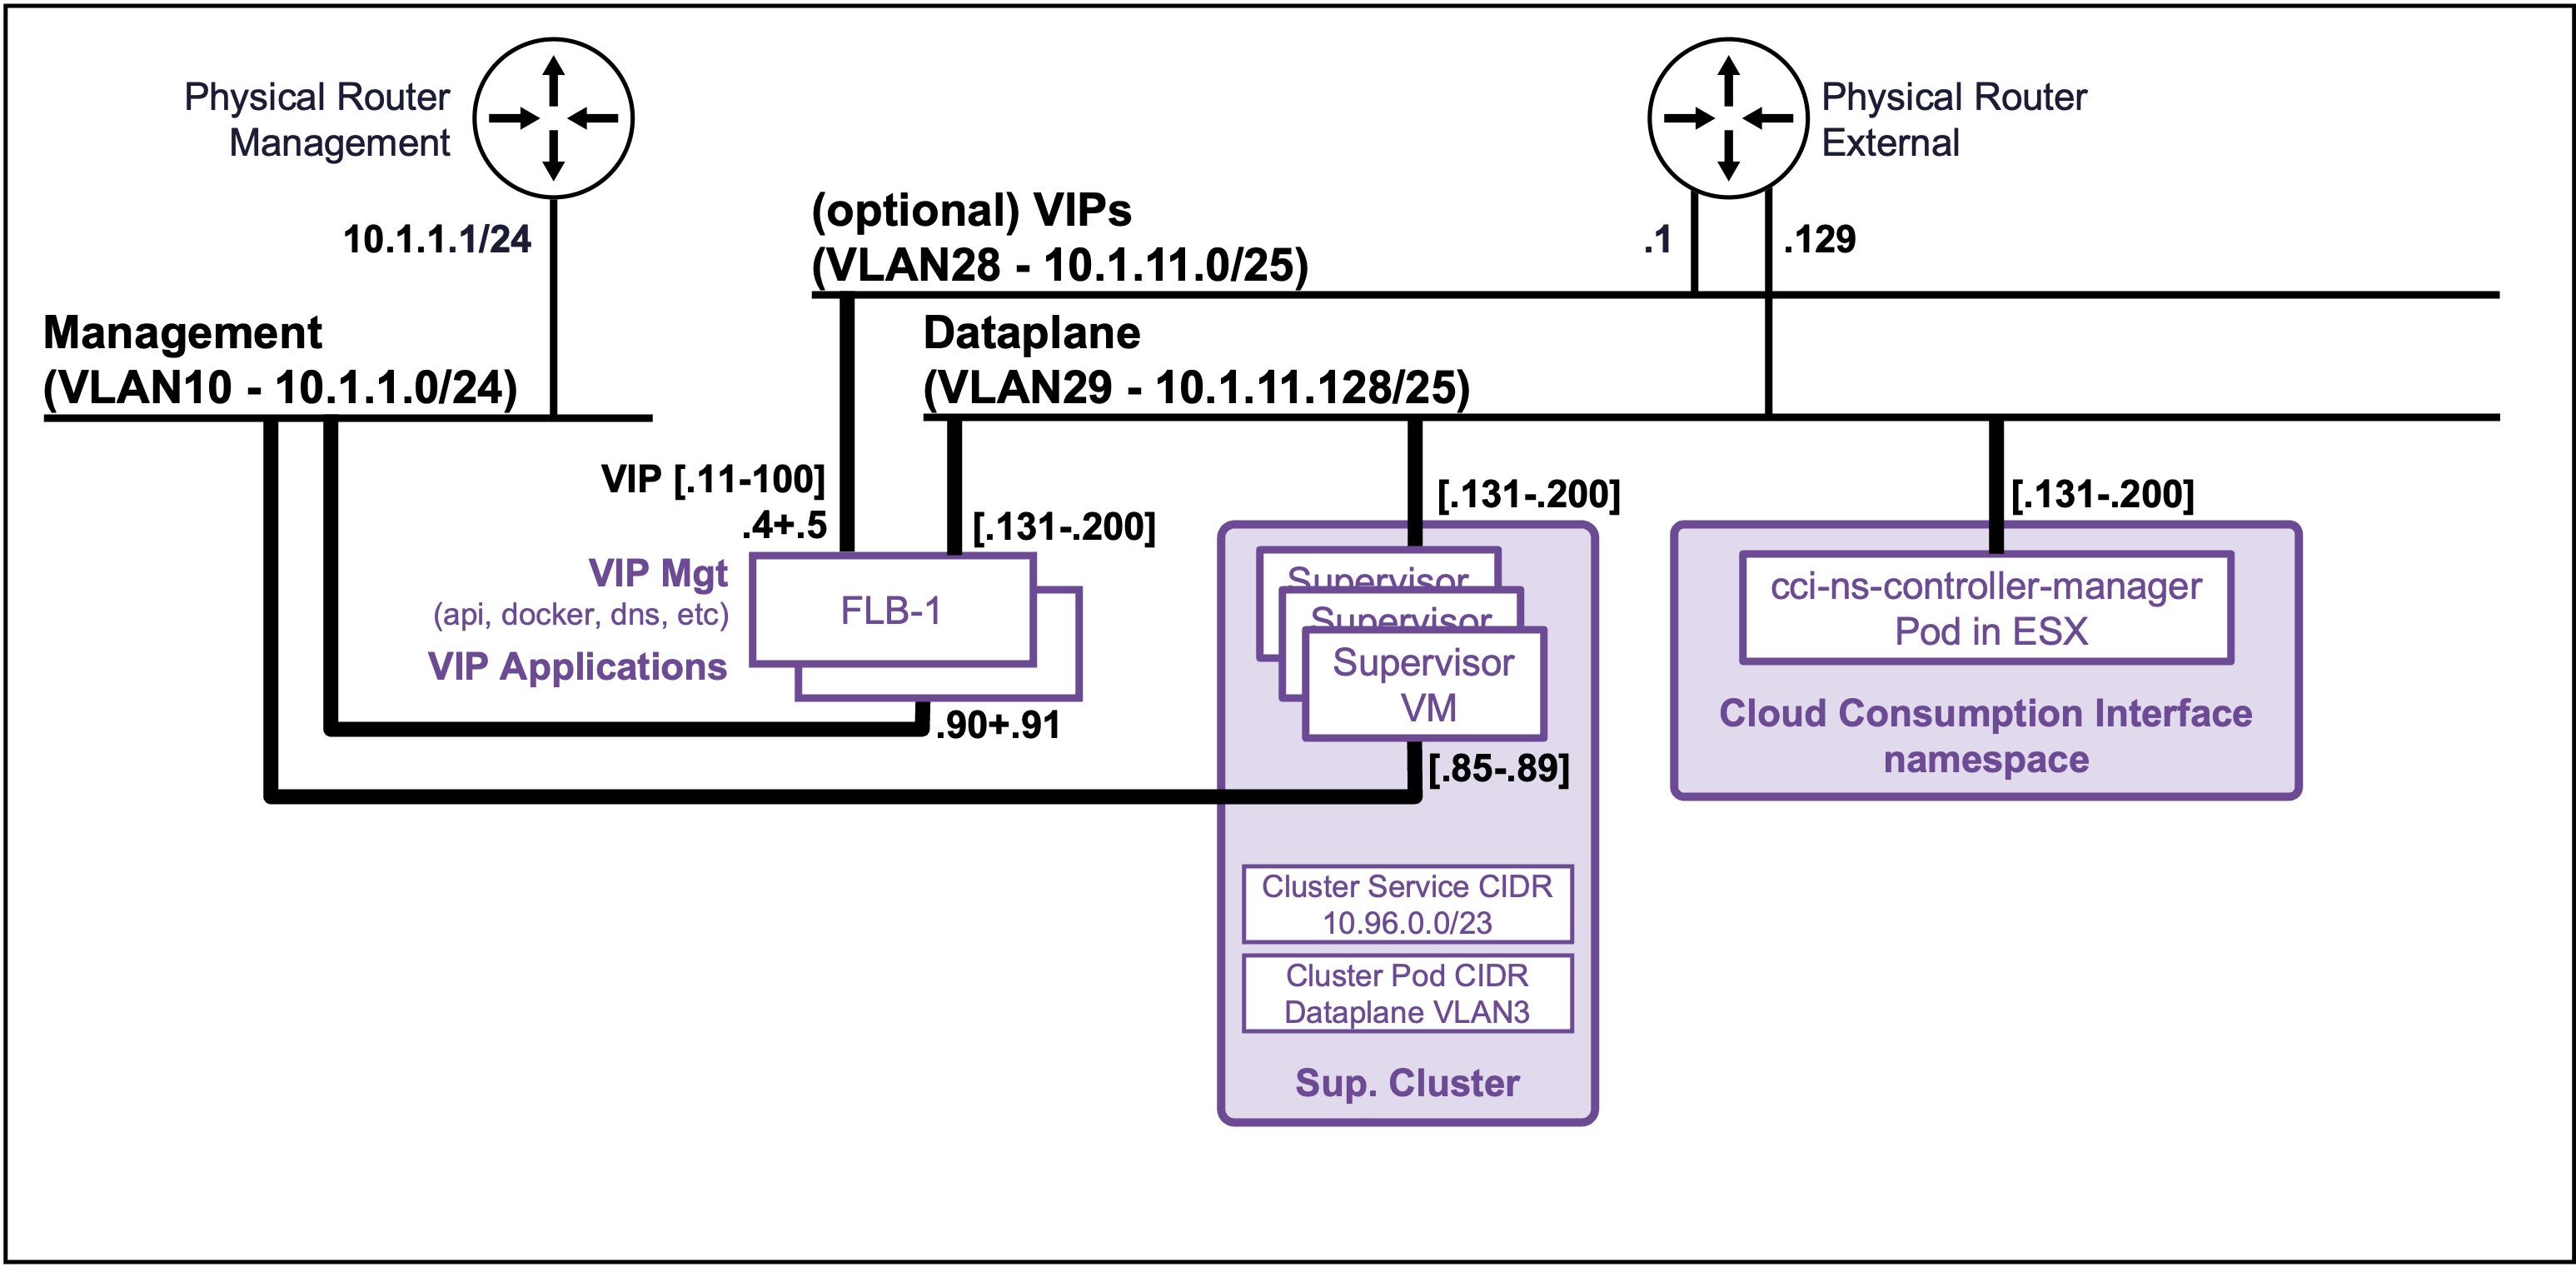
Choose its Network Topology (One-Arm or Two-Arm), its Size, High-Availability architecture (1 FLB Active, or 2 FLB Active/Standby VMs), and configure the following networks:- Management Network (see picture "1" below)
Choose the Port Group to host the FLB Node(s) Management vNIC and specify its Layer 3 routing configuration. - Virtual Server Network (see picture "2" below)
Choose the Port Group to host the FLB Node(s) VIP vNIC and specify its Layer 3 routing configuration. - Transit Network By default, the same Port Group used by the Supervisor and future K8s Nodes/VMs is selected, but this can be changed. This is the FLB(s) vNIC used to communicate with the Supervisor and workloads.
- Management Network (see picture "1" below)
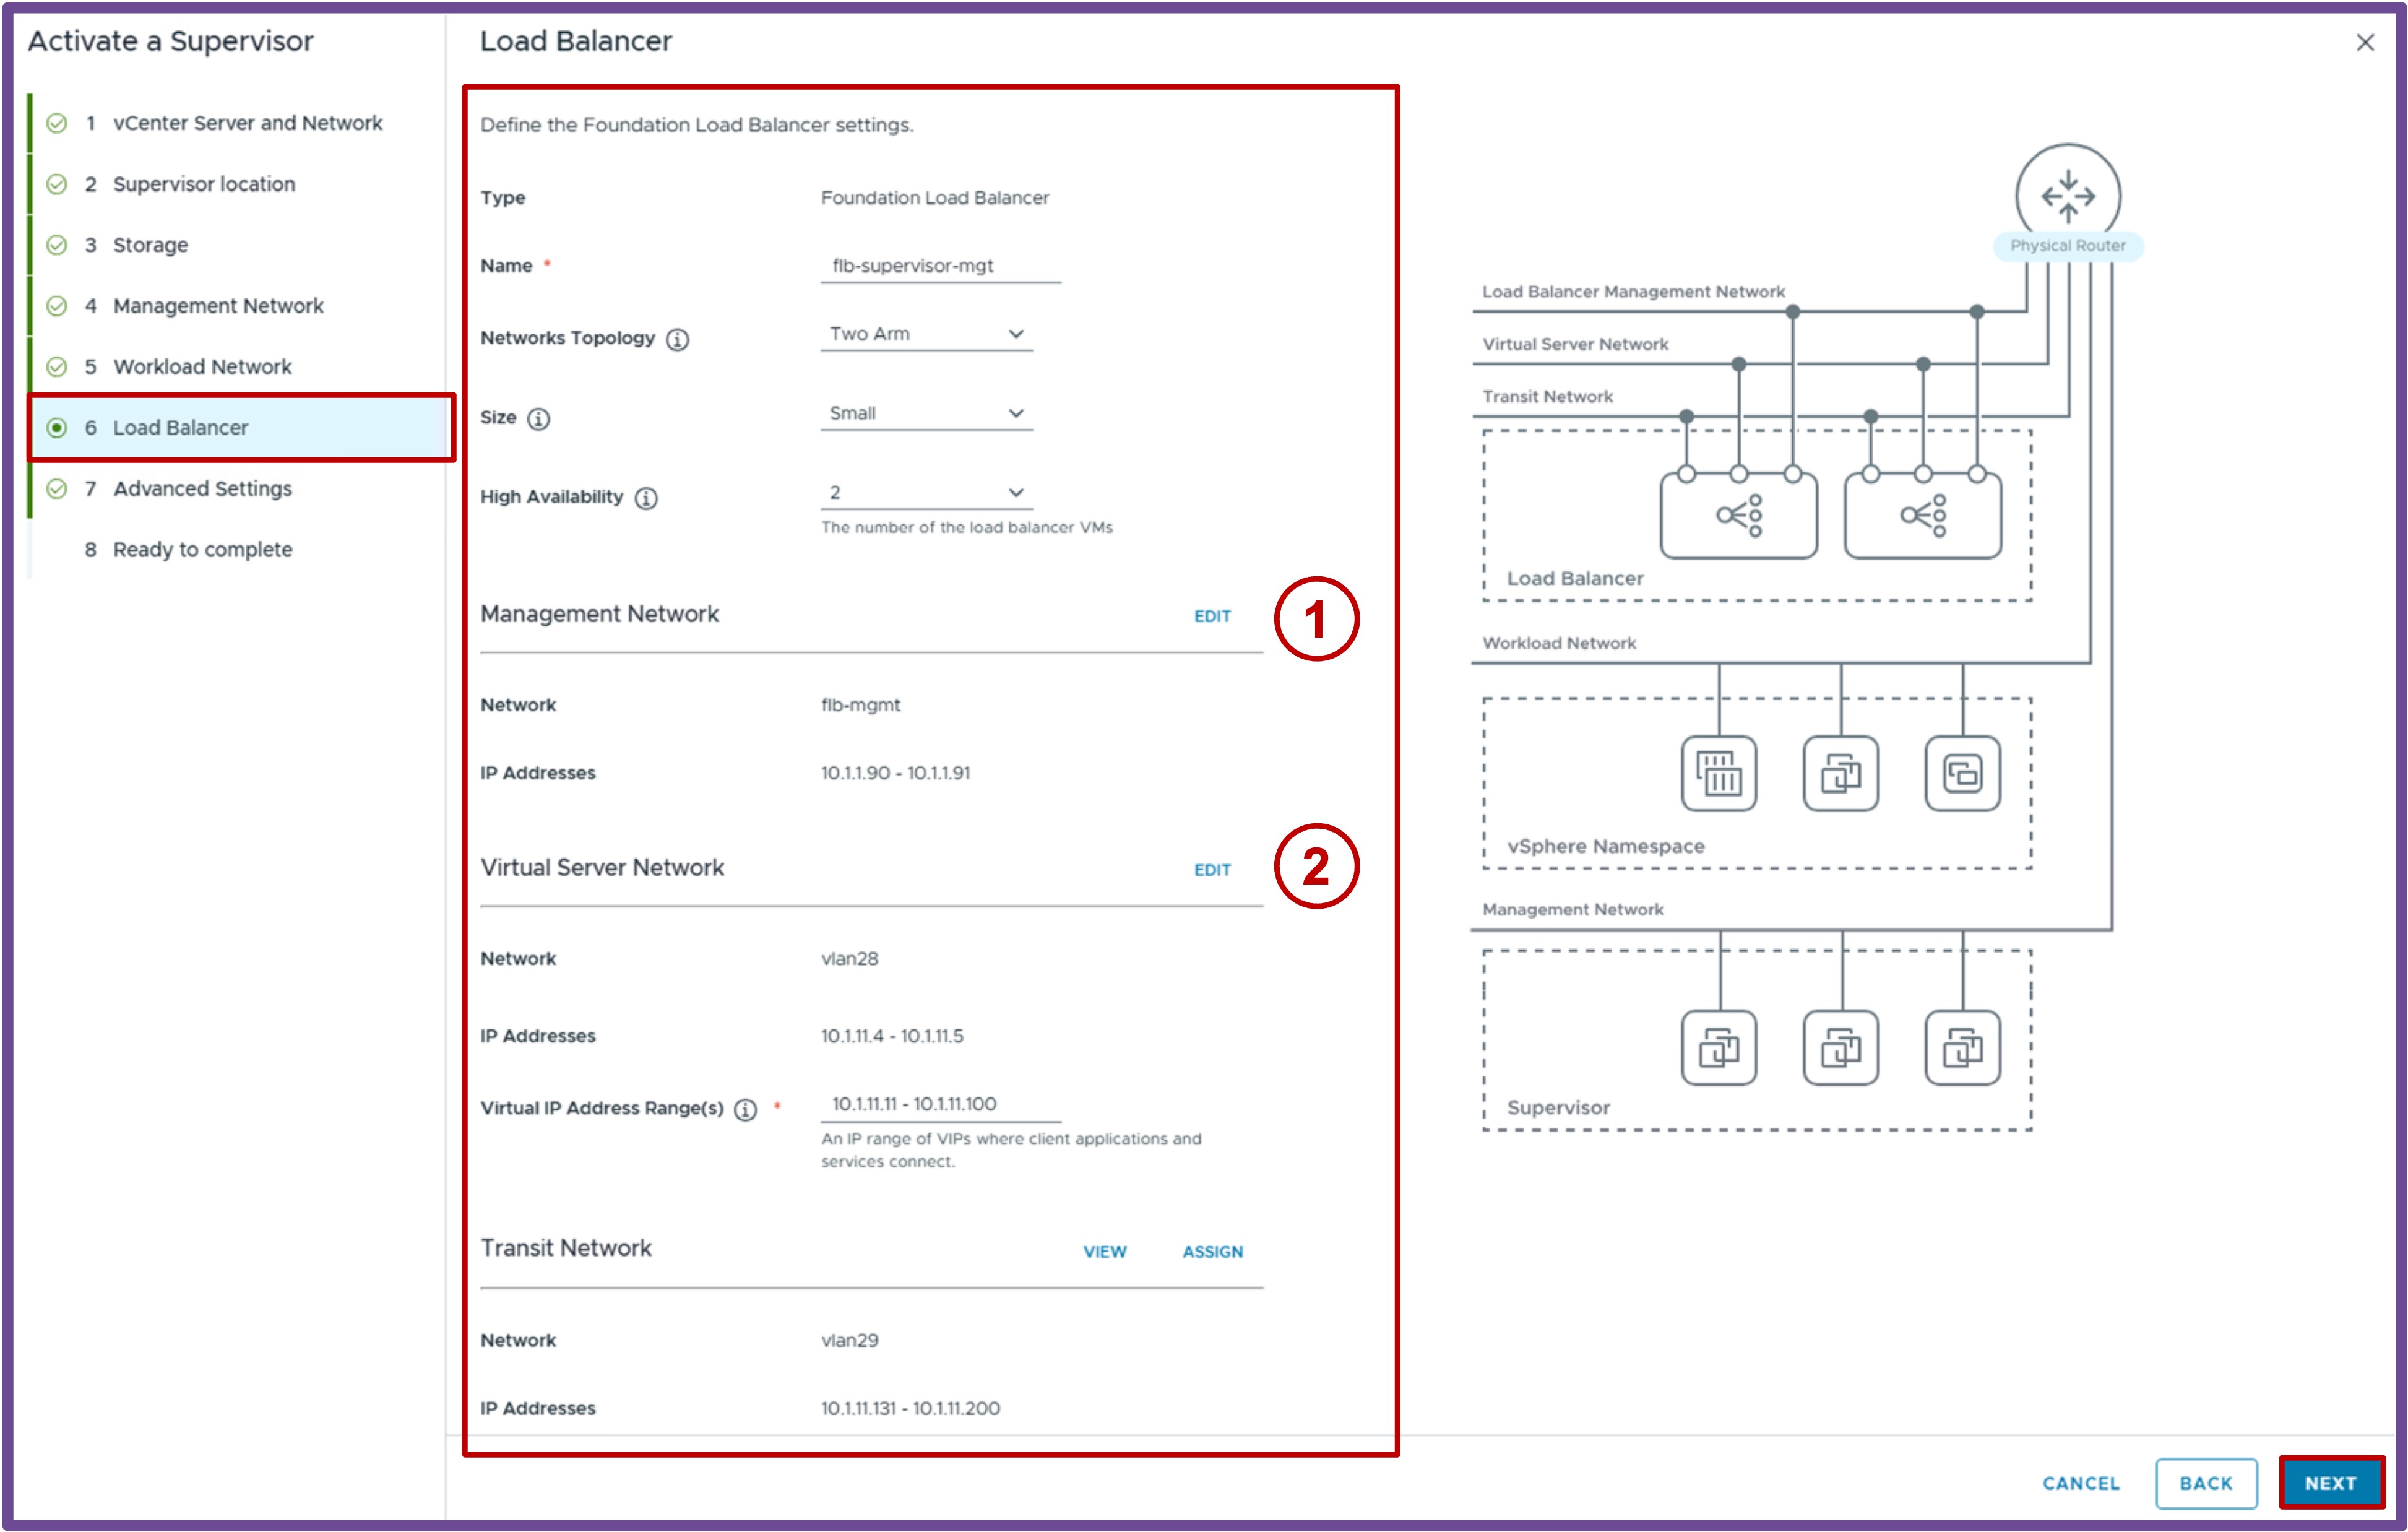
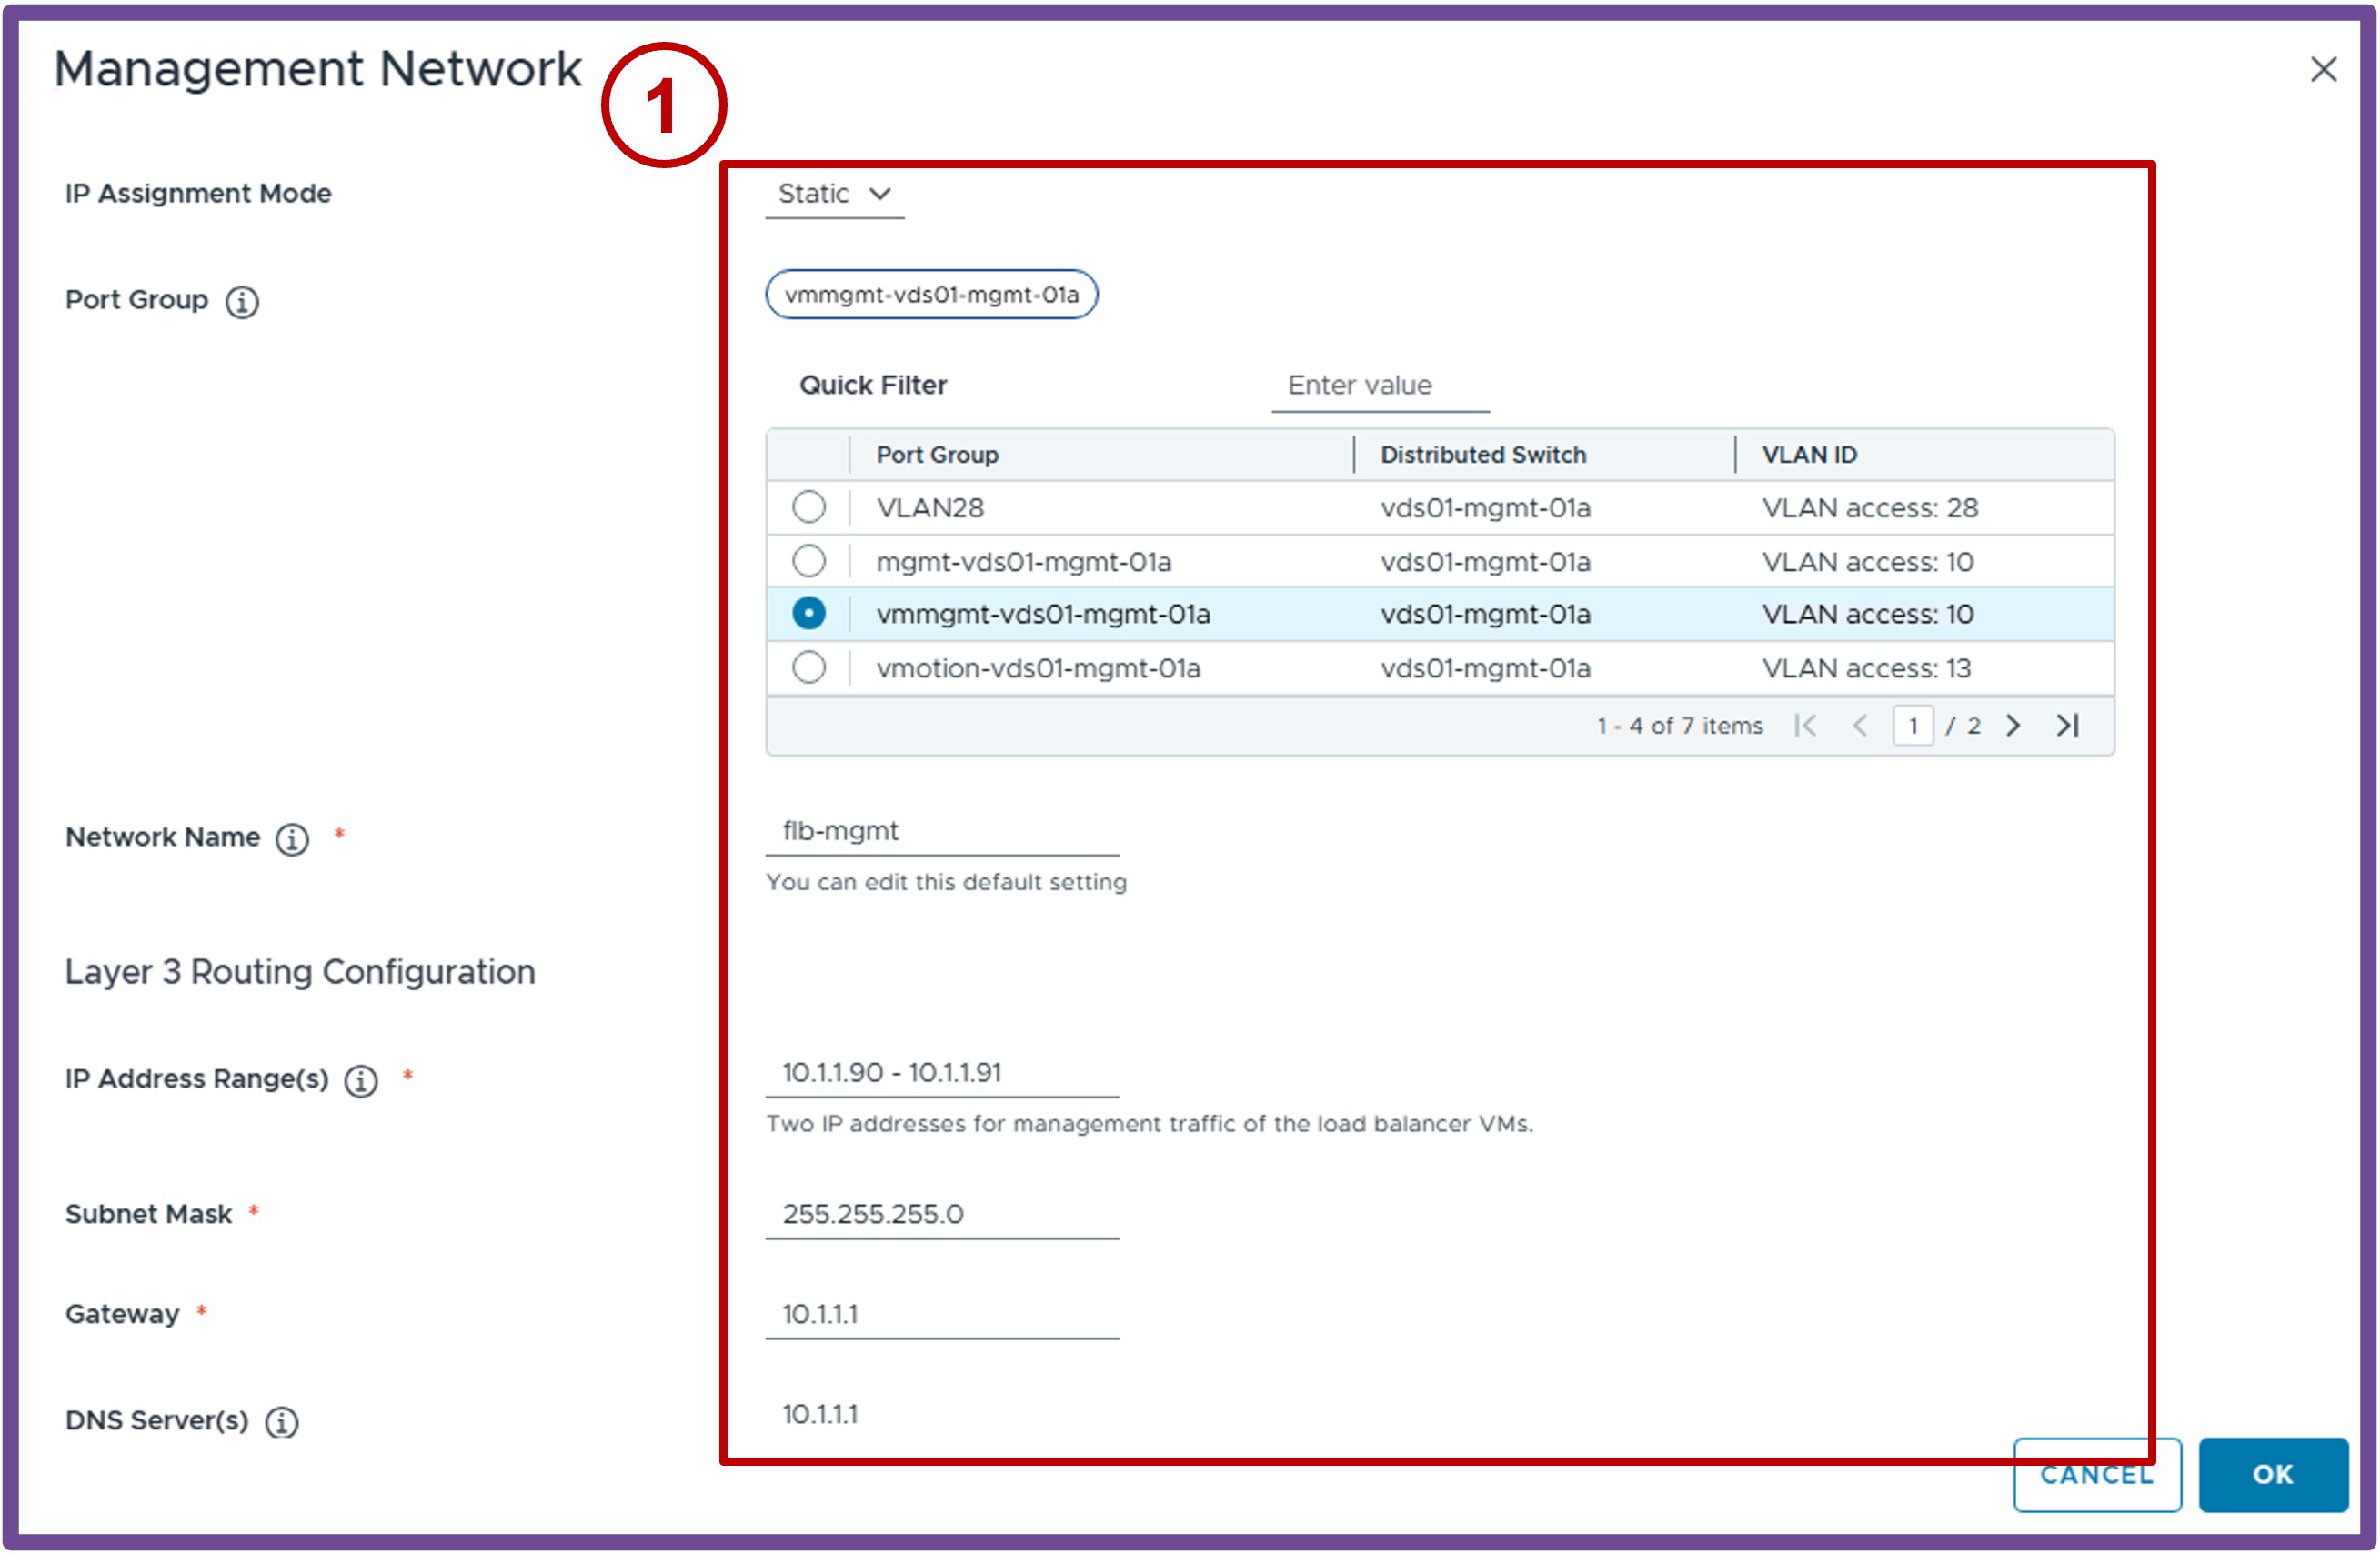
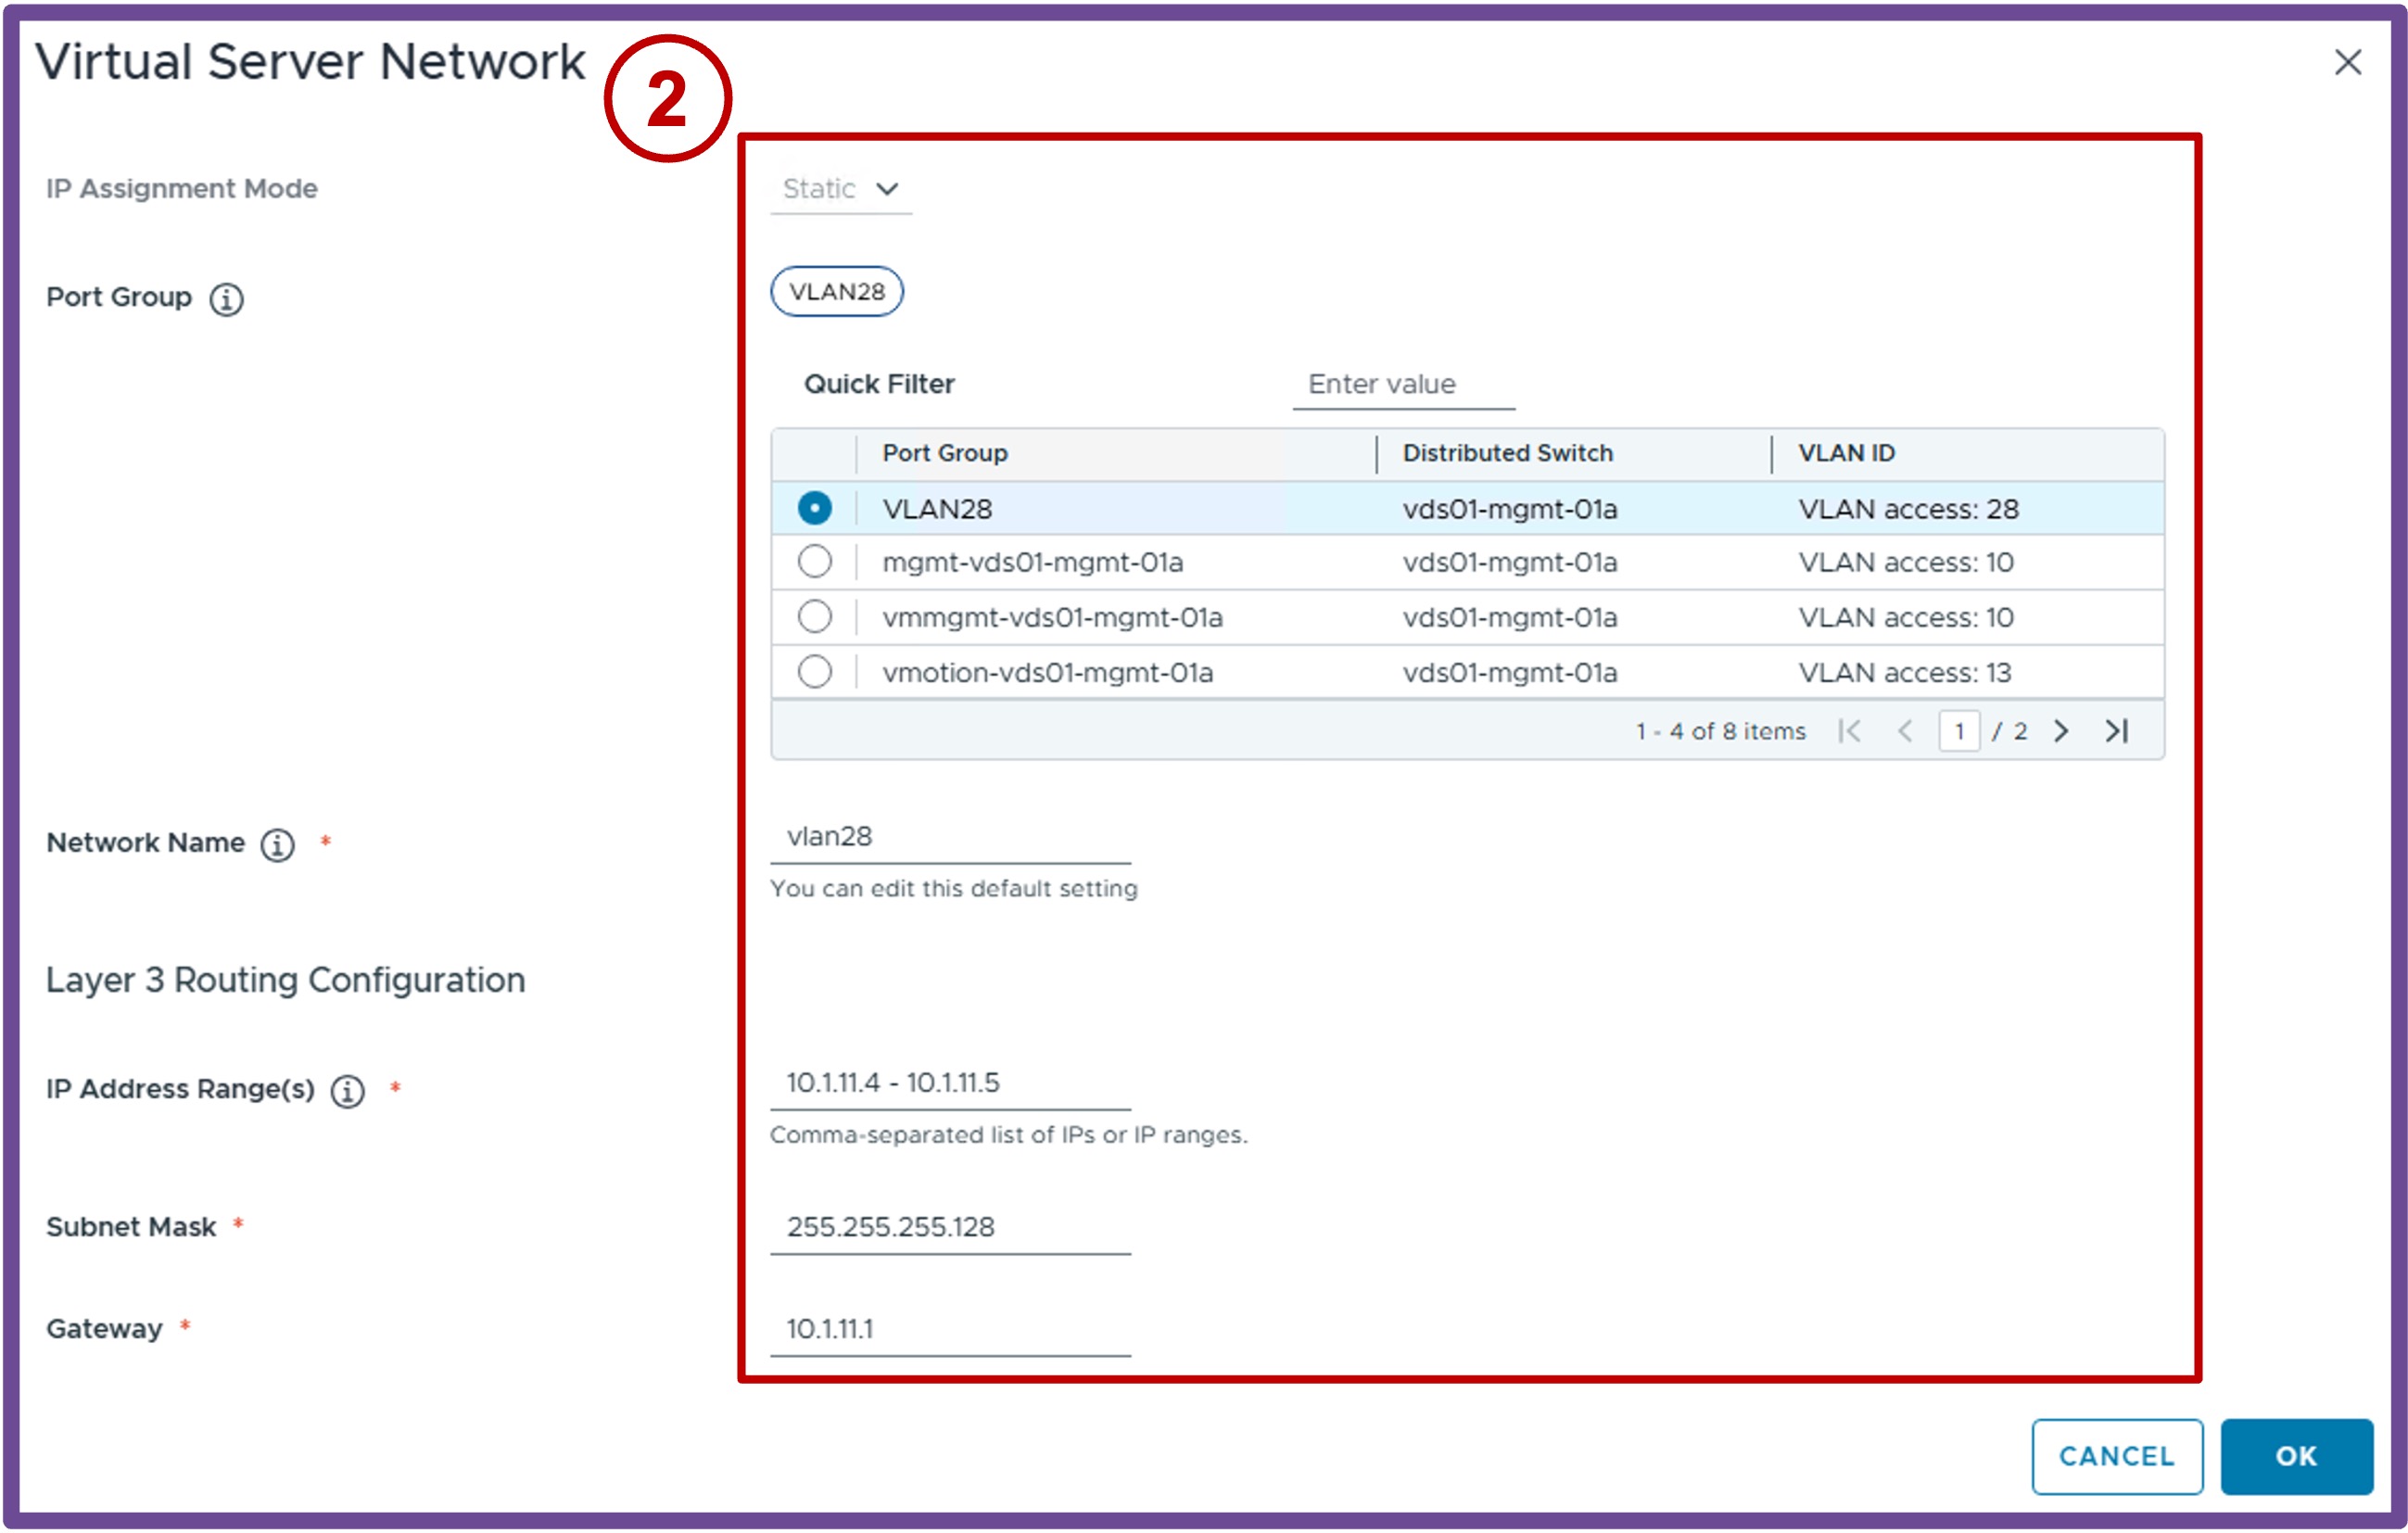
- Configure the Foundation Load Balancer, and click Next.
-
Advanced Settings
- Select the Supervisor Control Plane Size, and click Next.
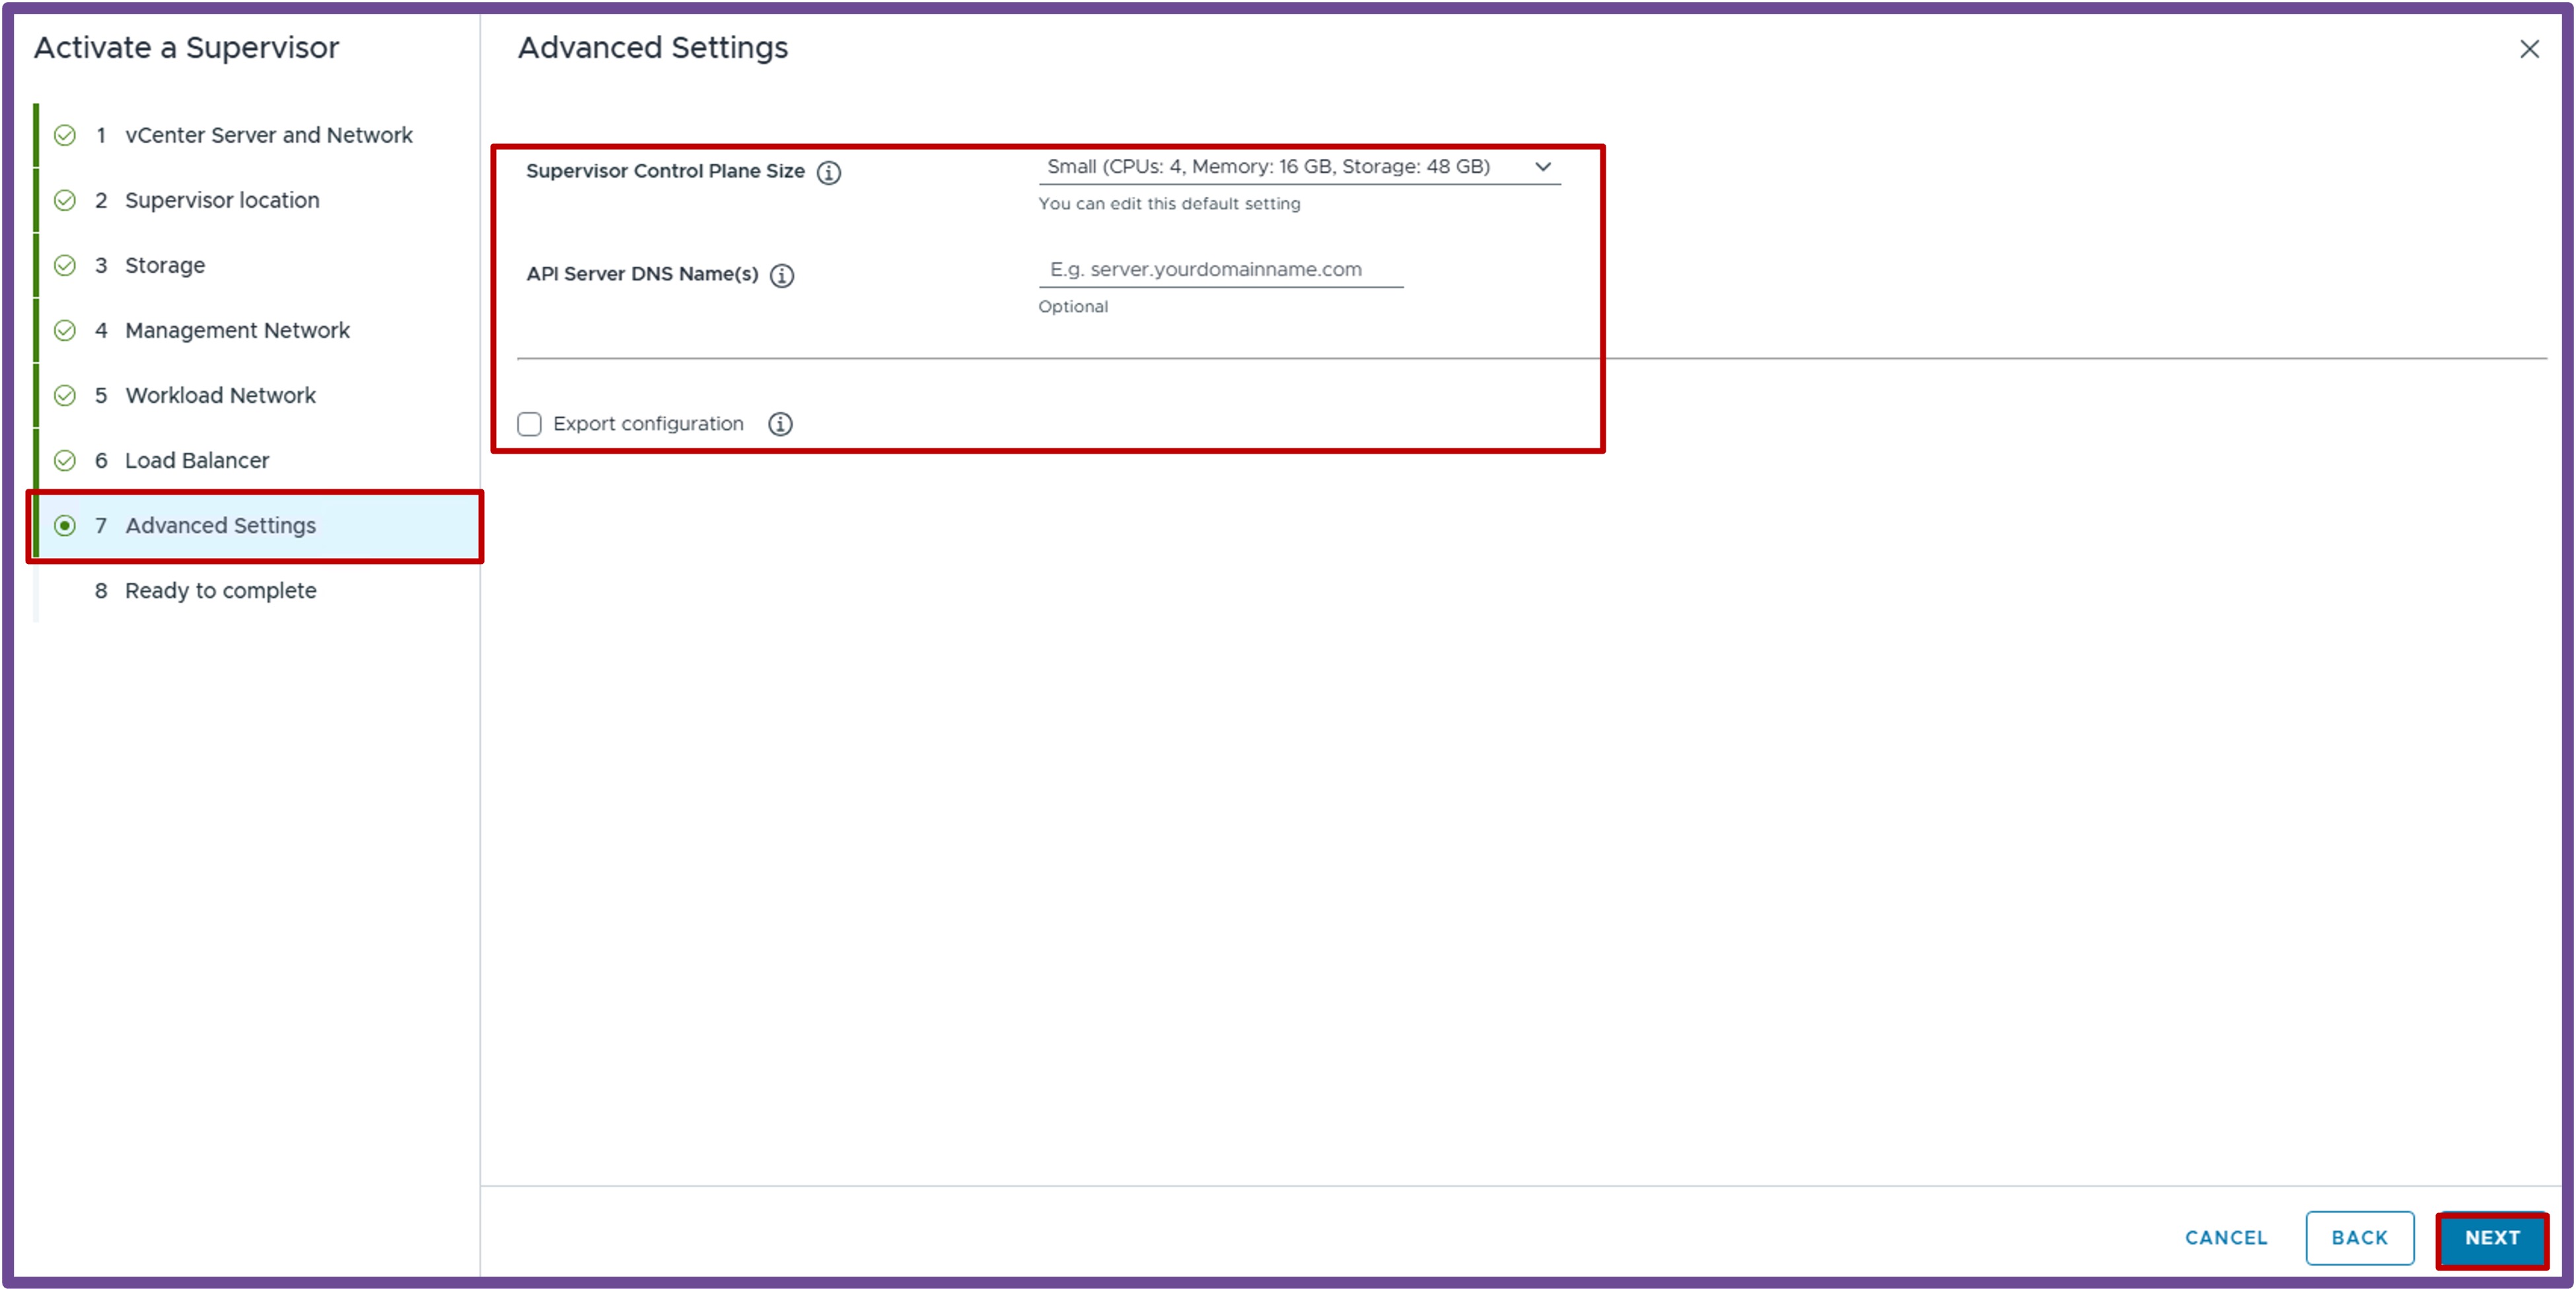
- Select the Supervisor Control Plane Size, and click Next.
-
Ready to Complete
- Review your configuration and click Finish.
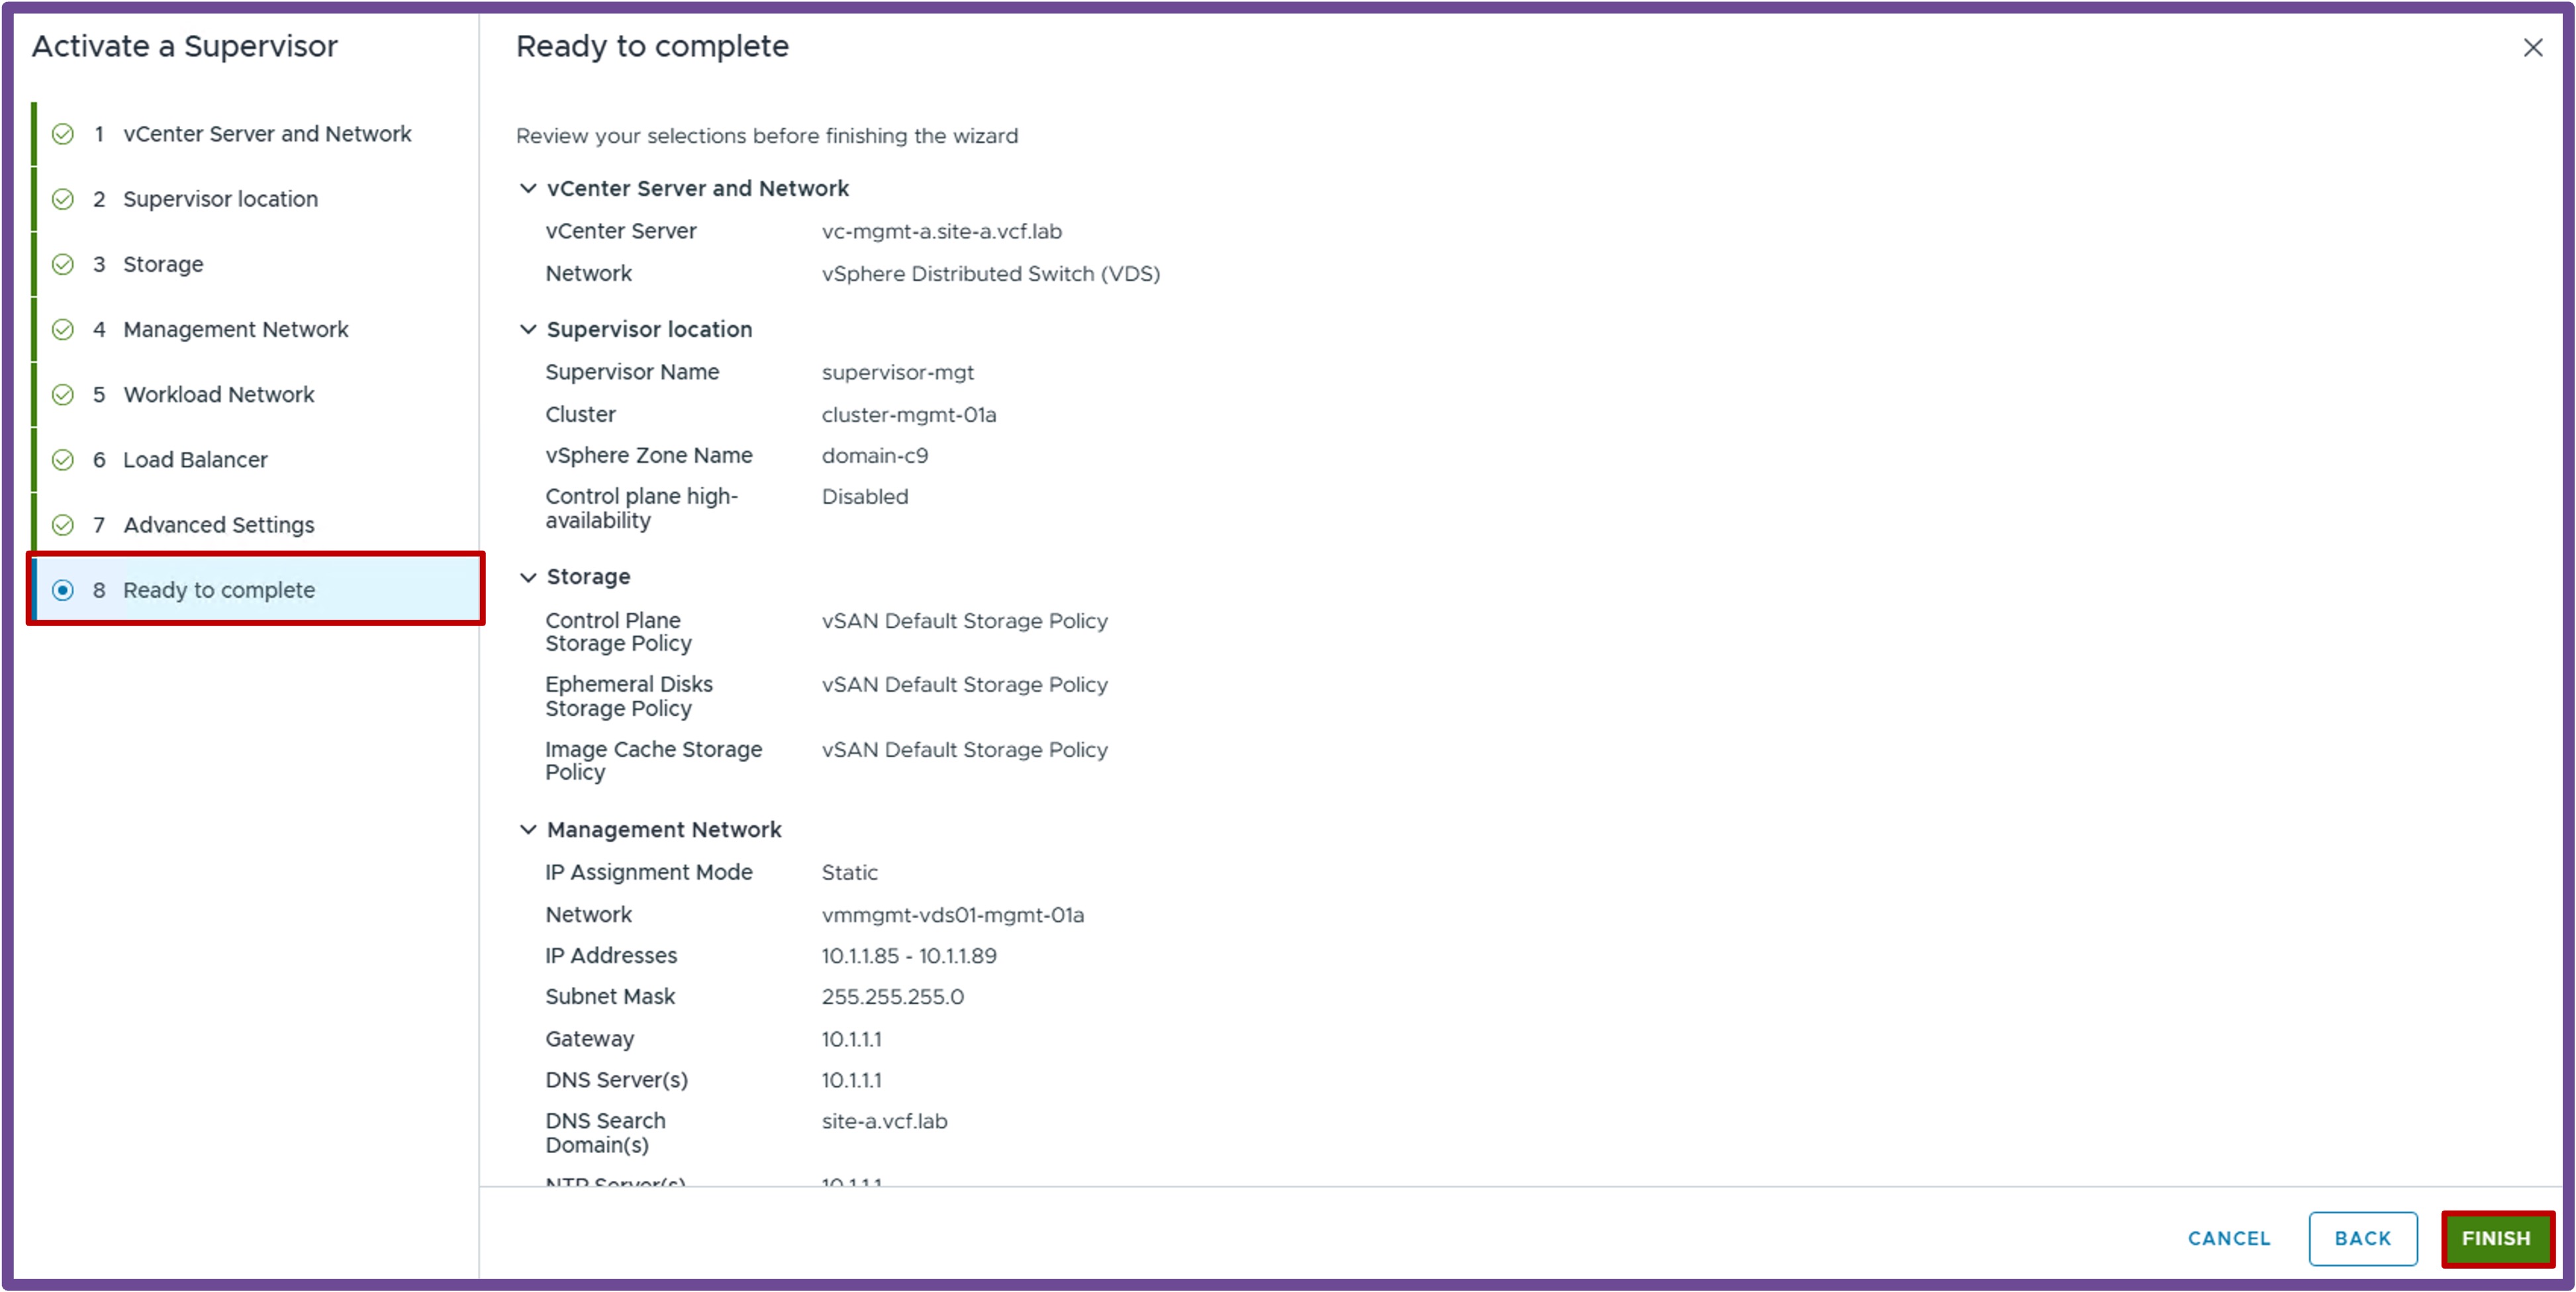
- Review your configuration and click Finish.
Finish Supervisor Creation for future Kubernetes Clusters
Create a Content Library for future Kubernetes Clusters
If you plan to deploy Kubernetes Clusters, create a Content Library with VKS images.
Navigate to vCenter > Content Libraries > and click Create.

-
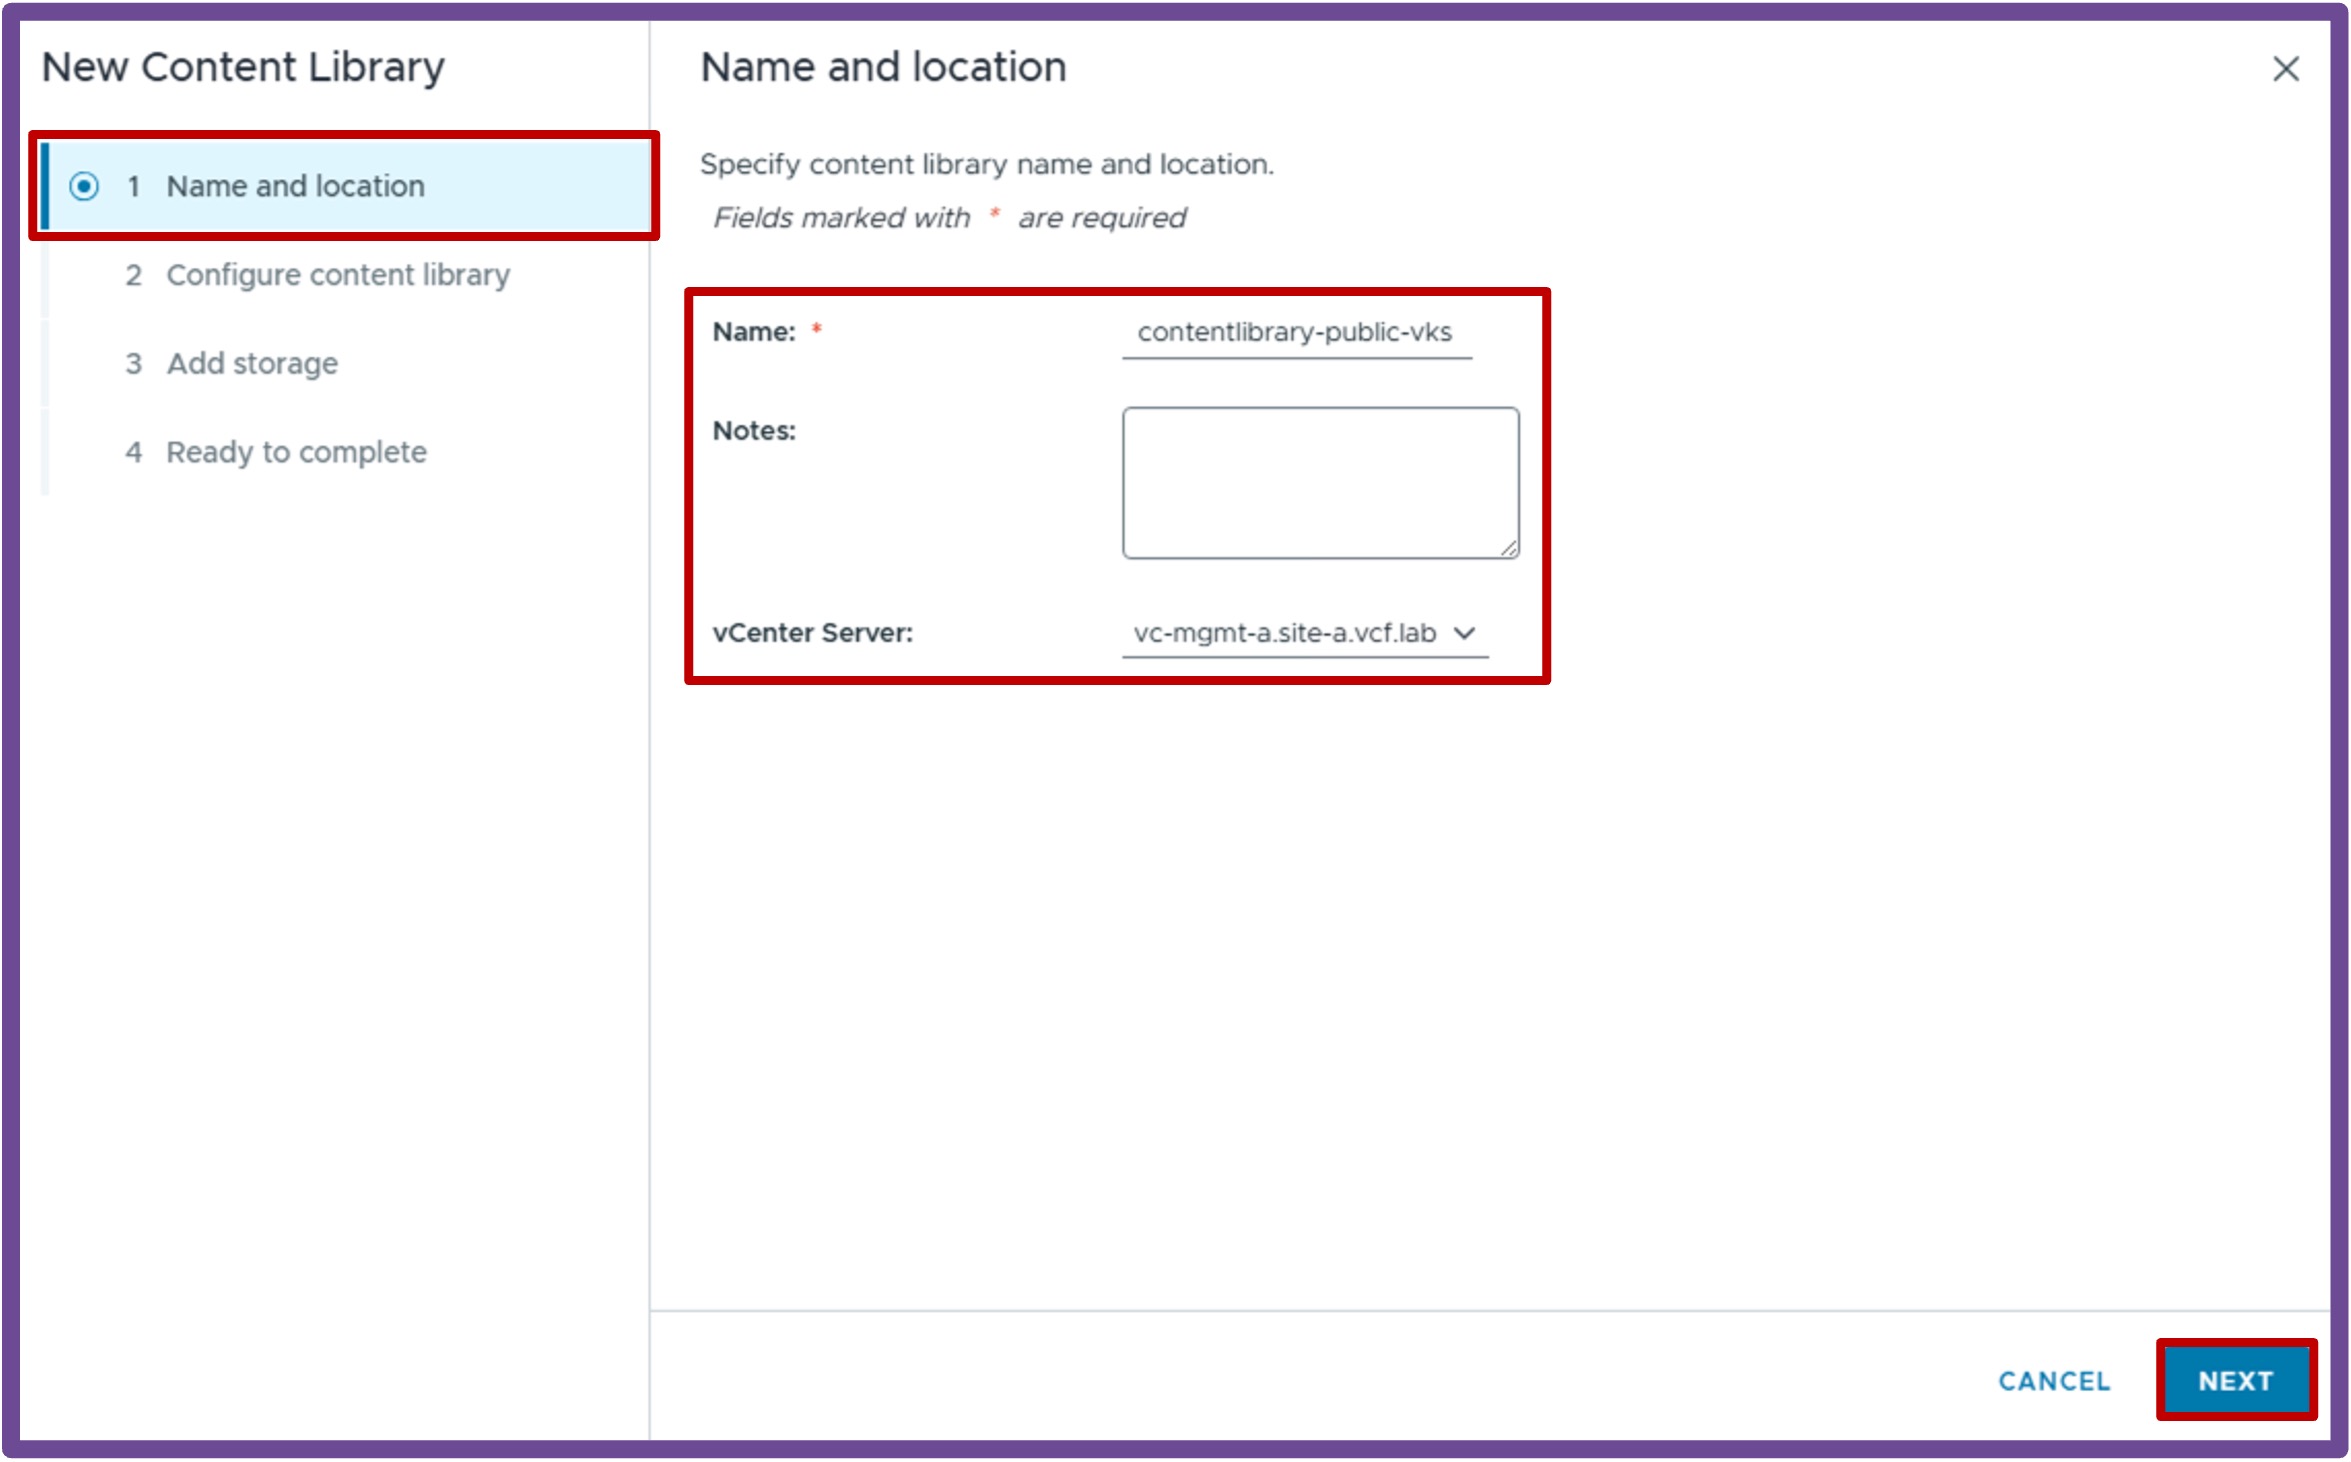
Name and Location
Give it a Name and select the vCenter hosting that Content Library, and click Next.
-
Configure Content Library
Choose between Local content library (you manually upload VKS images) and Subscribed content library (vCenter automatically downloads VKS images from a repository), and click Next.
> Note: This example uses a Subscribed content library pointing to the public repositoryhttps://wp-content.vmware.com/v2/latest/lib.json, with the option to "download content when needed" to save local storage space.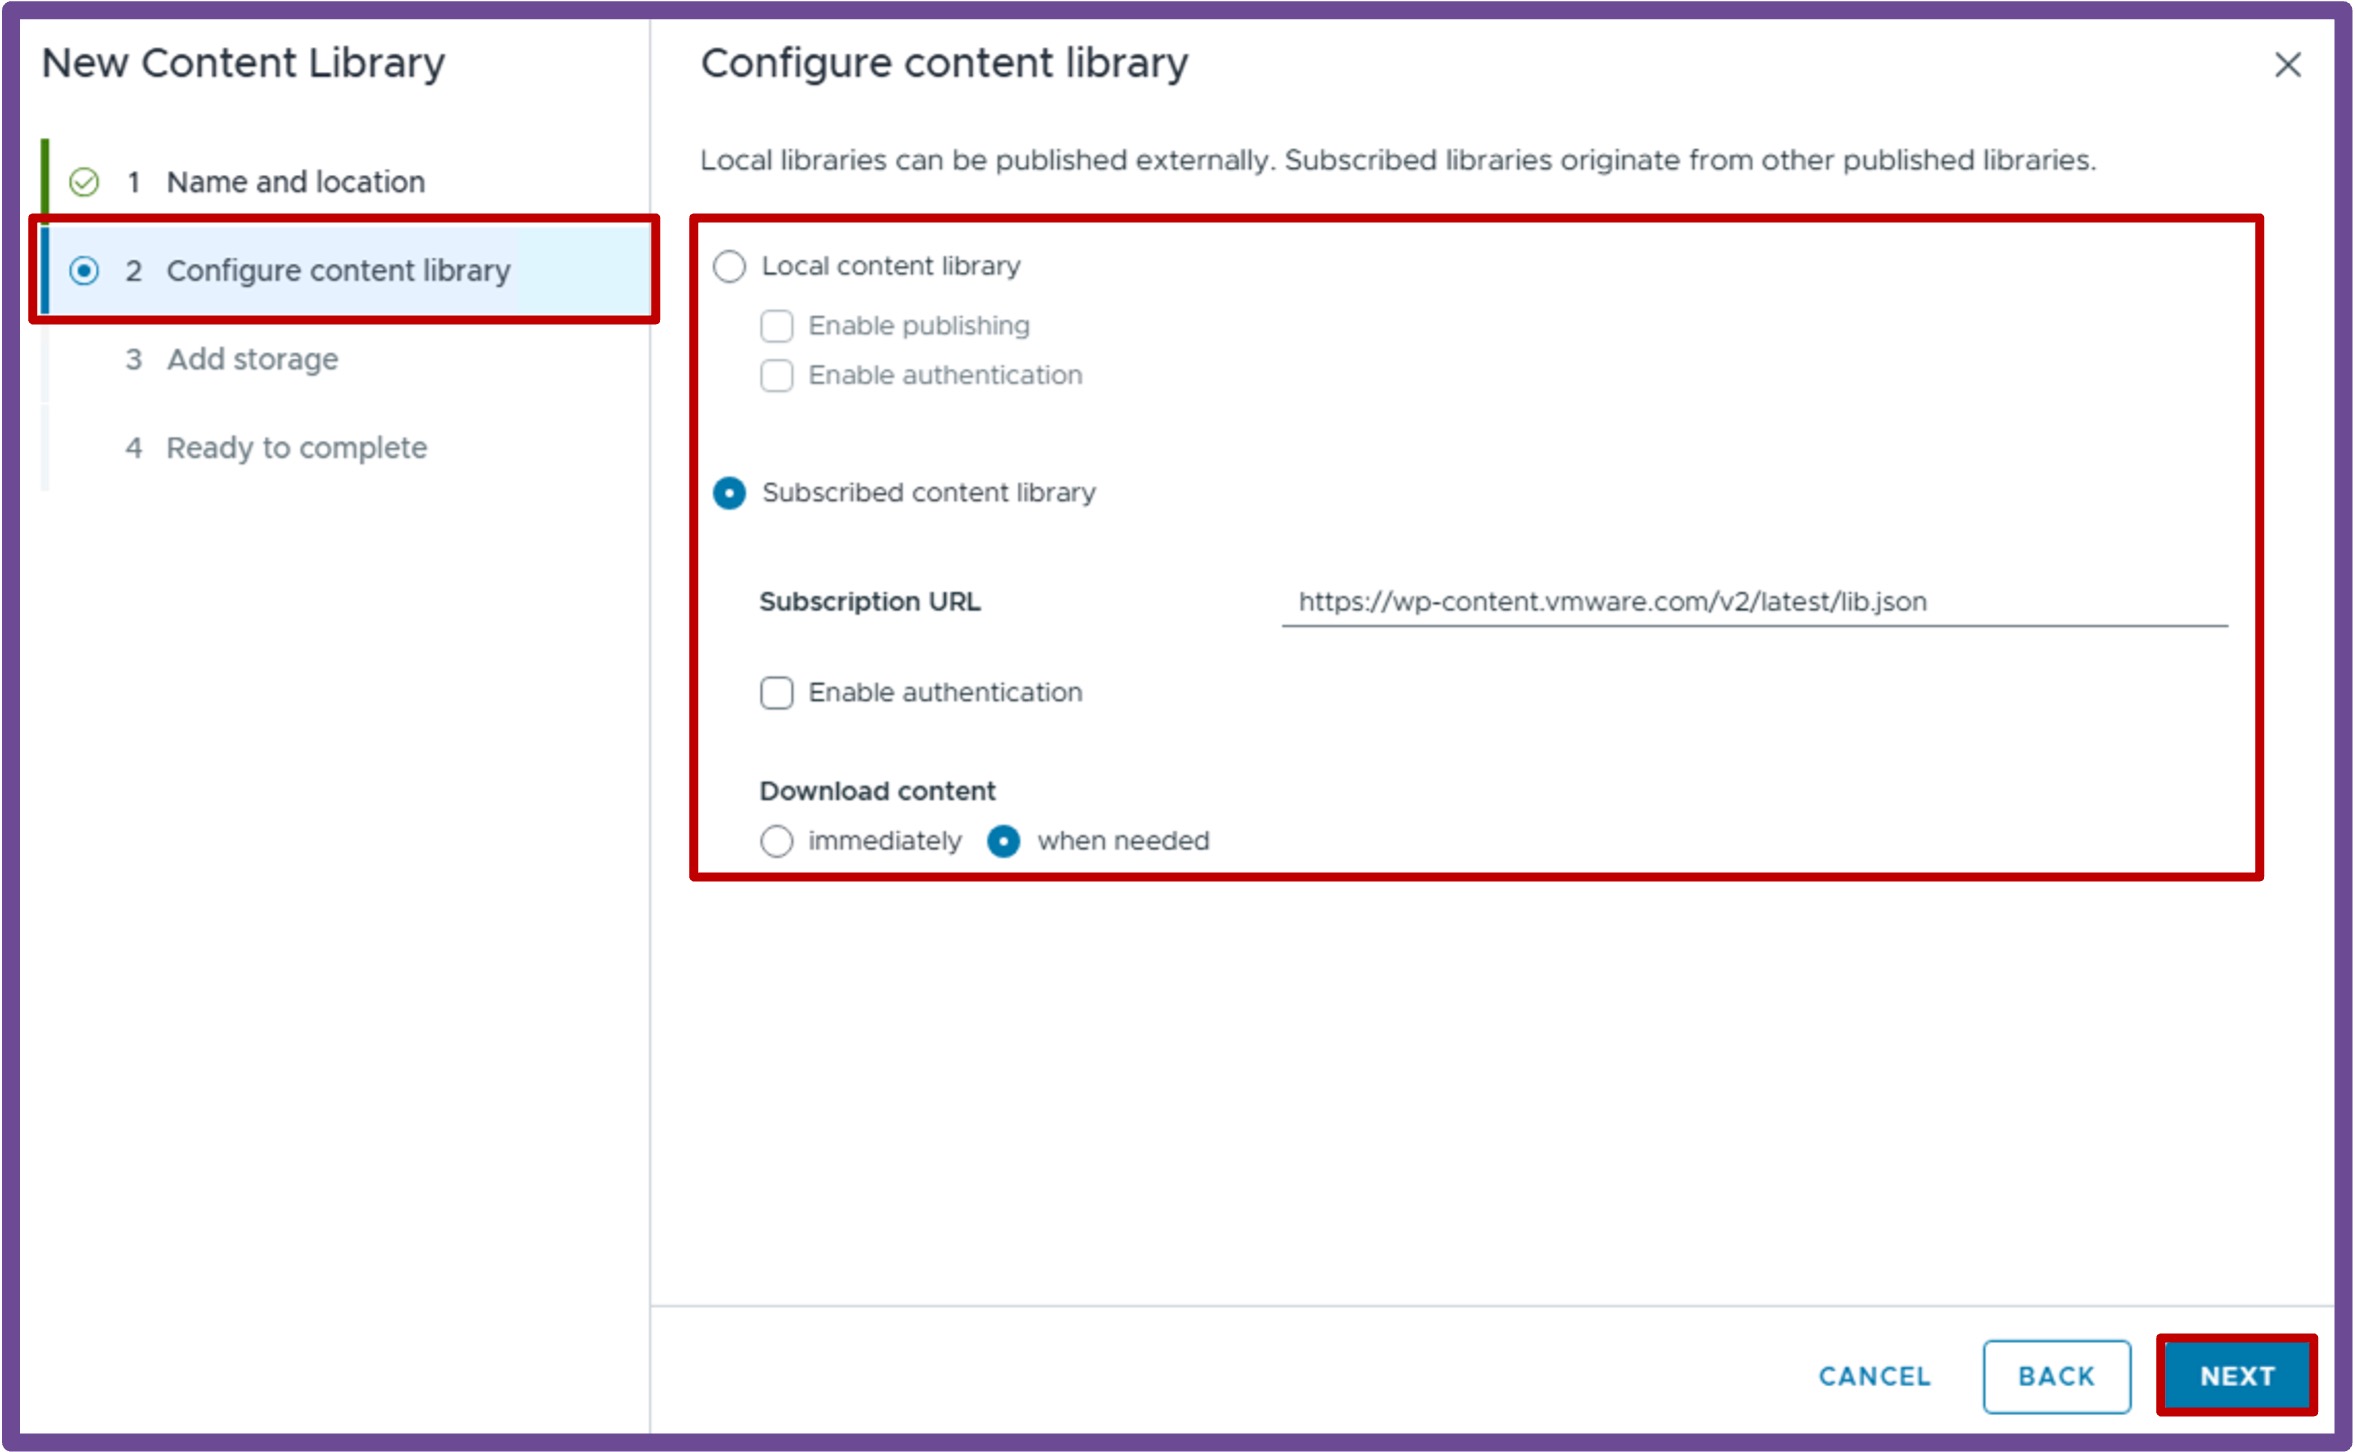
-
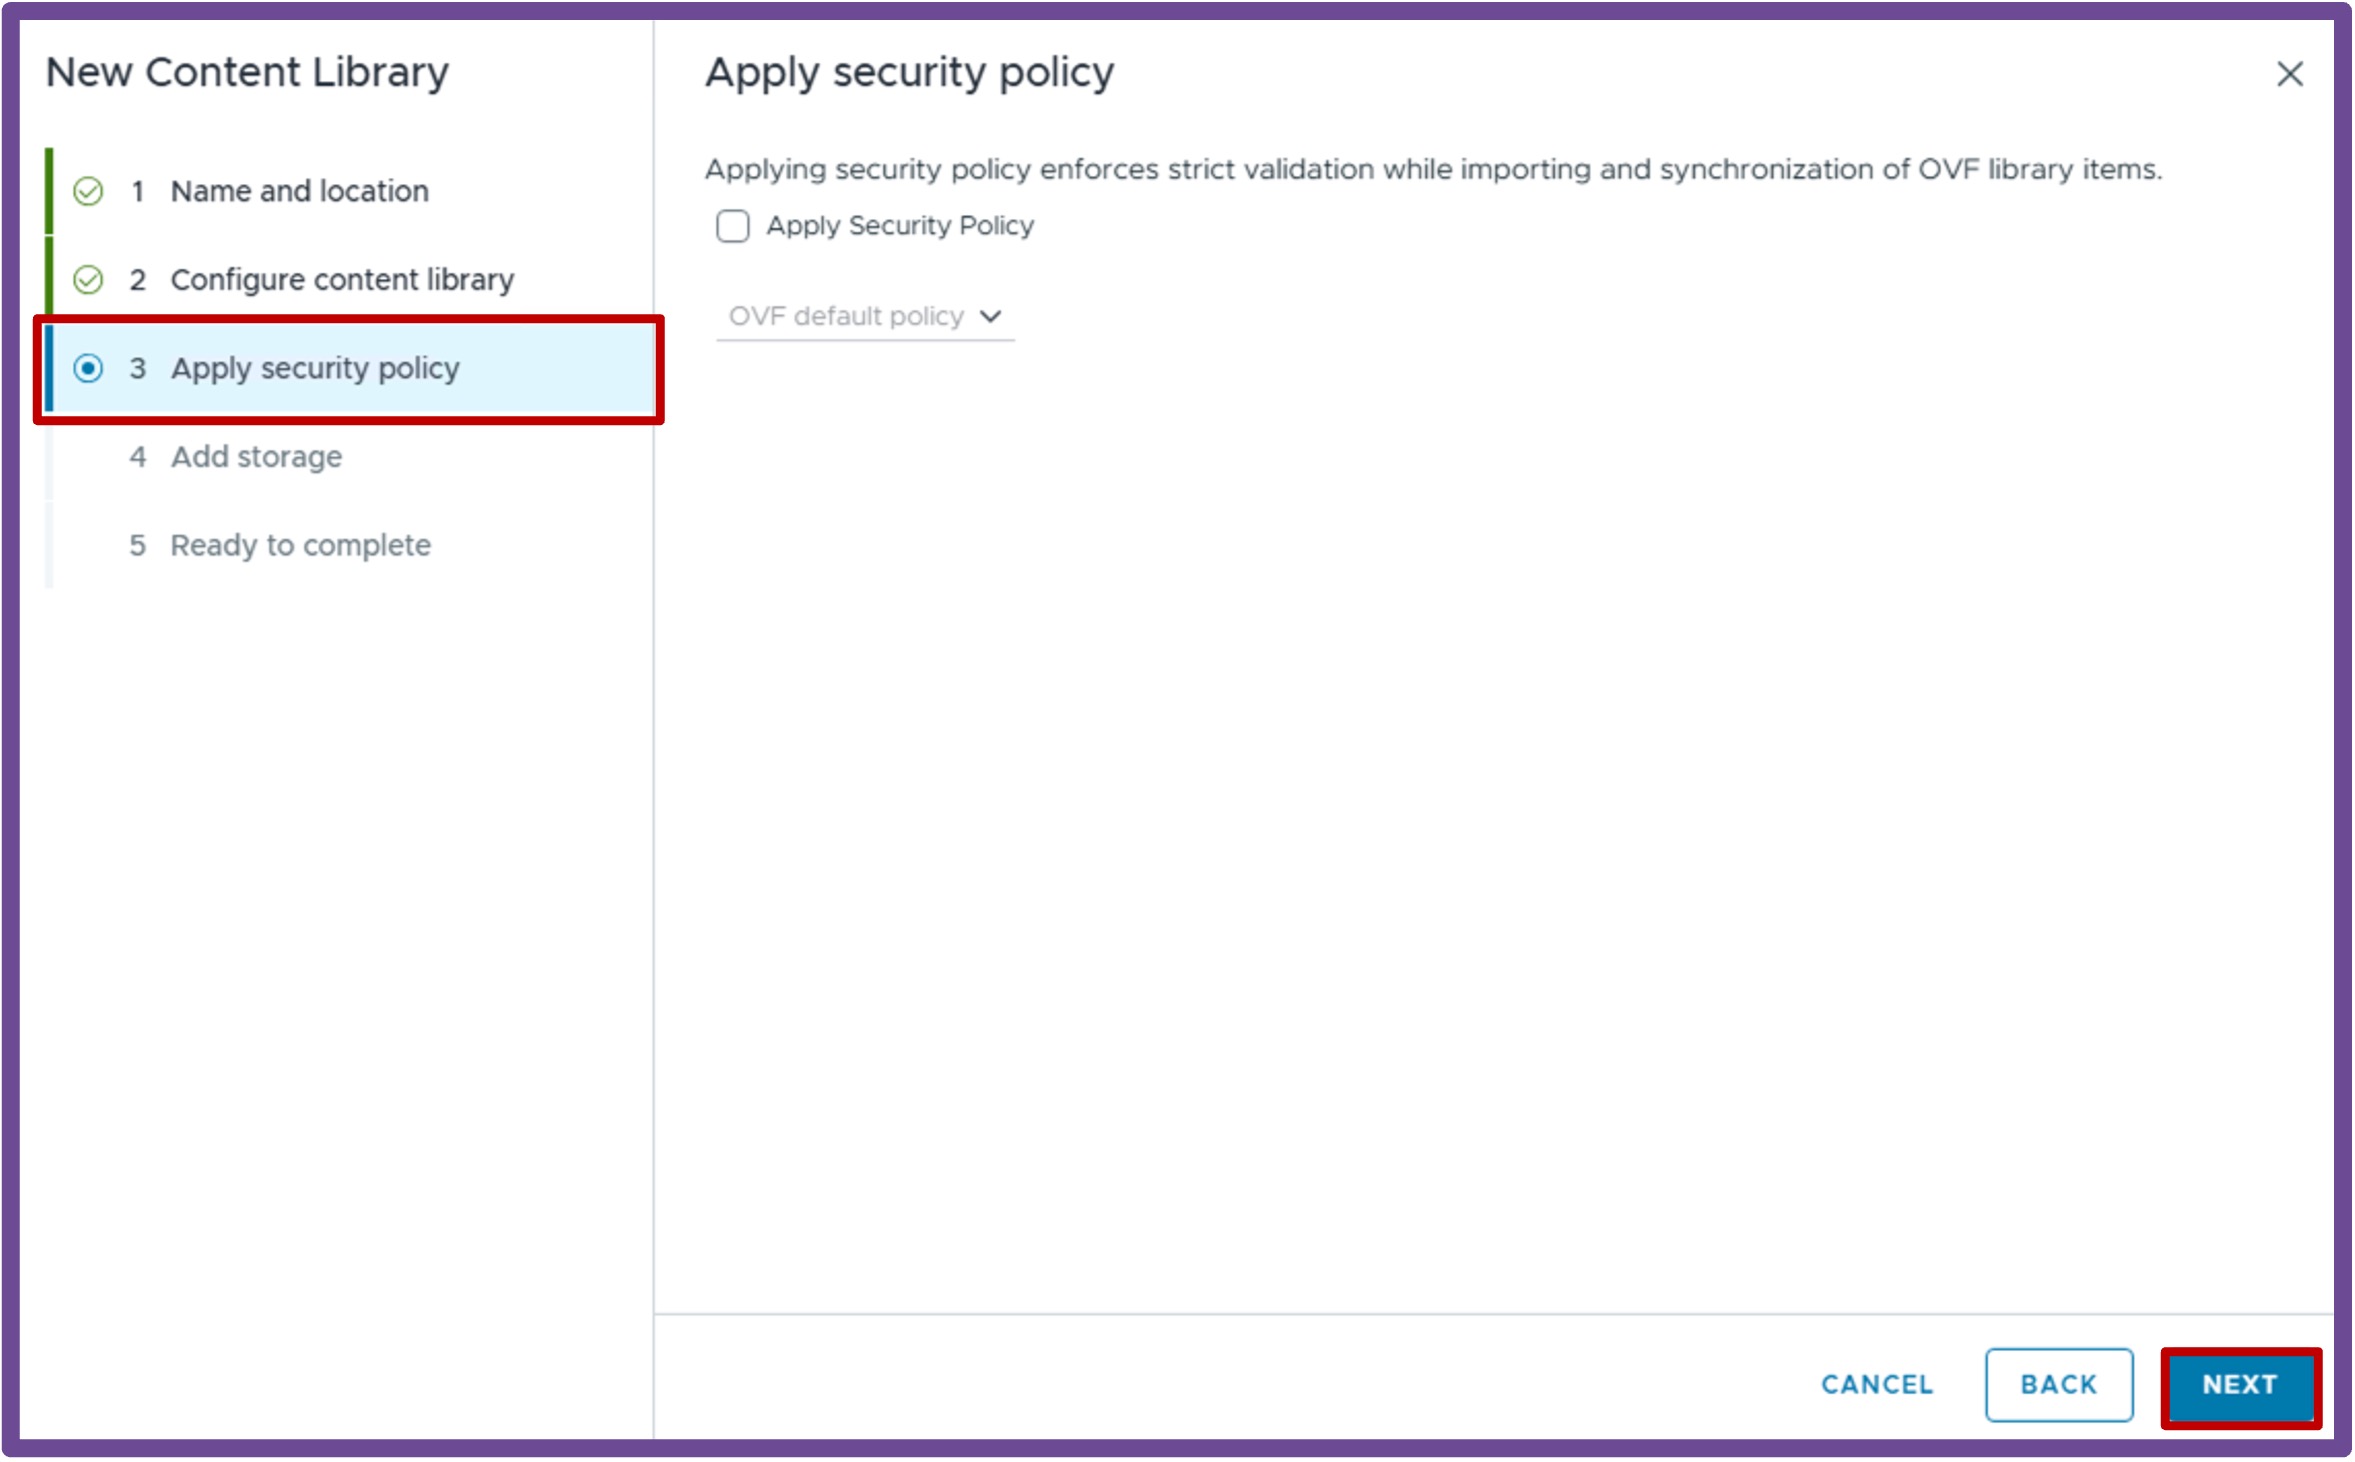
Apply Security Policy
Apply a security policy if required by your organization, and click Next.
(This example uses no security policy).
-
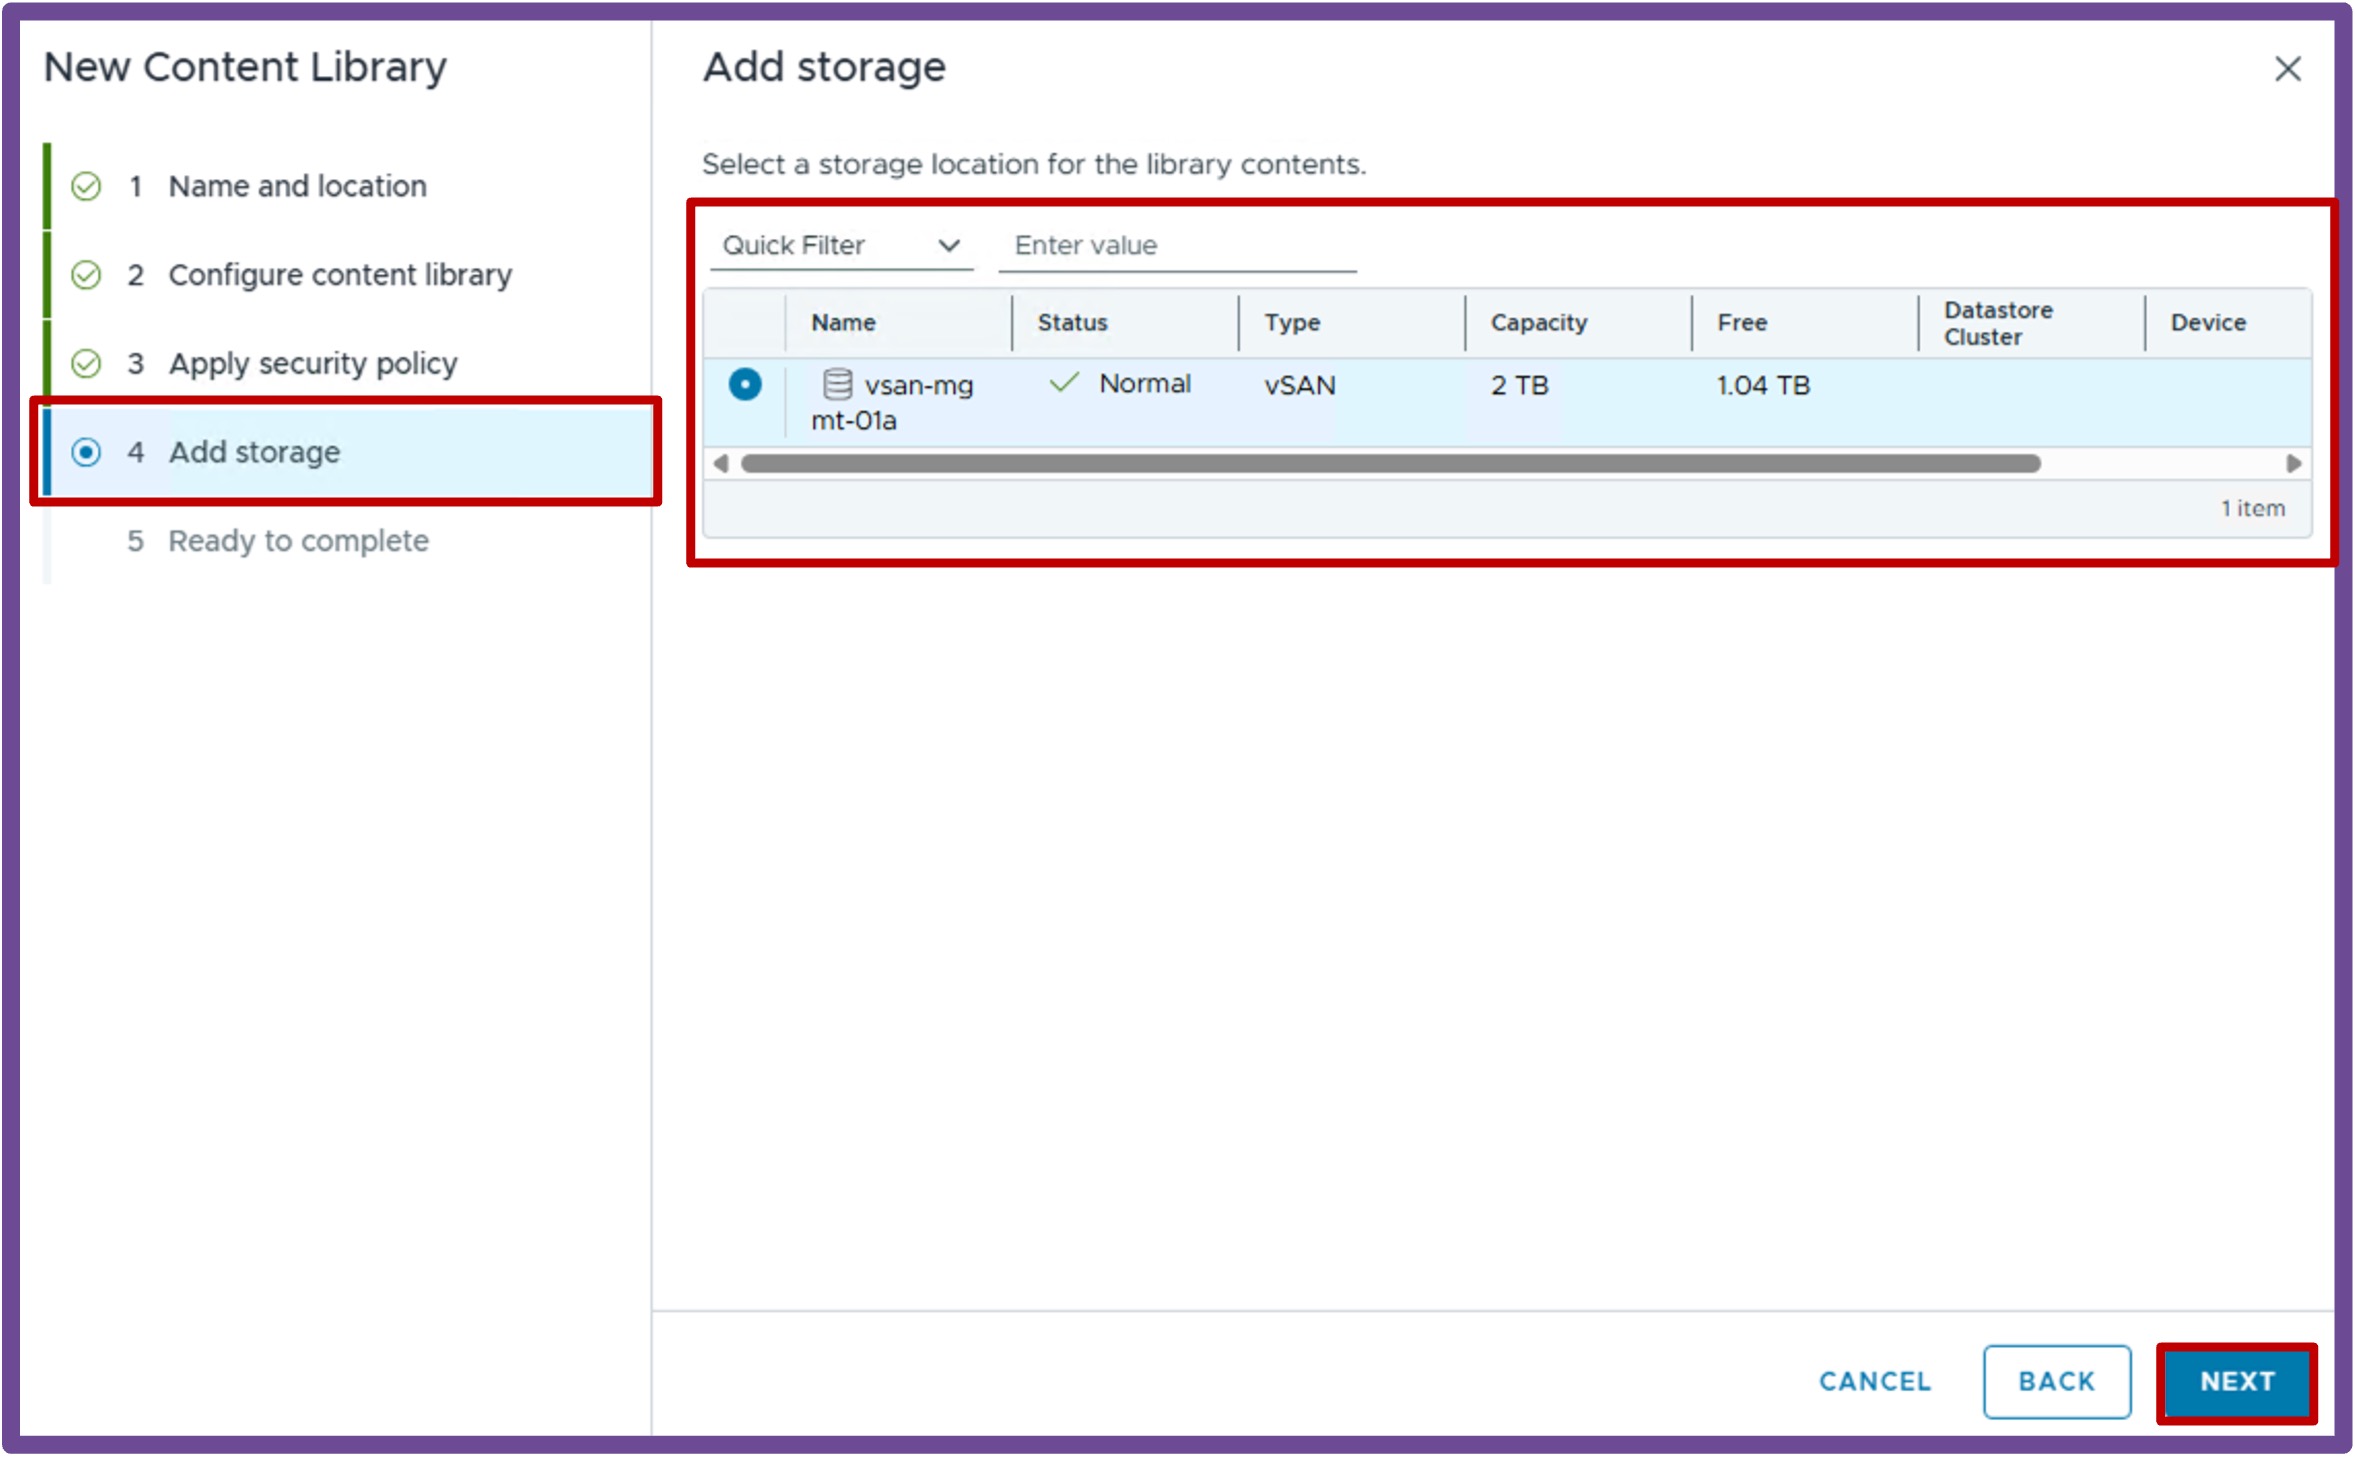
Add Storage
Select a storage to host the content library images, and click Next.
-
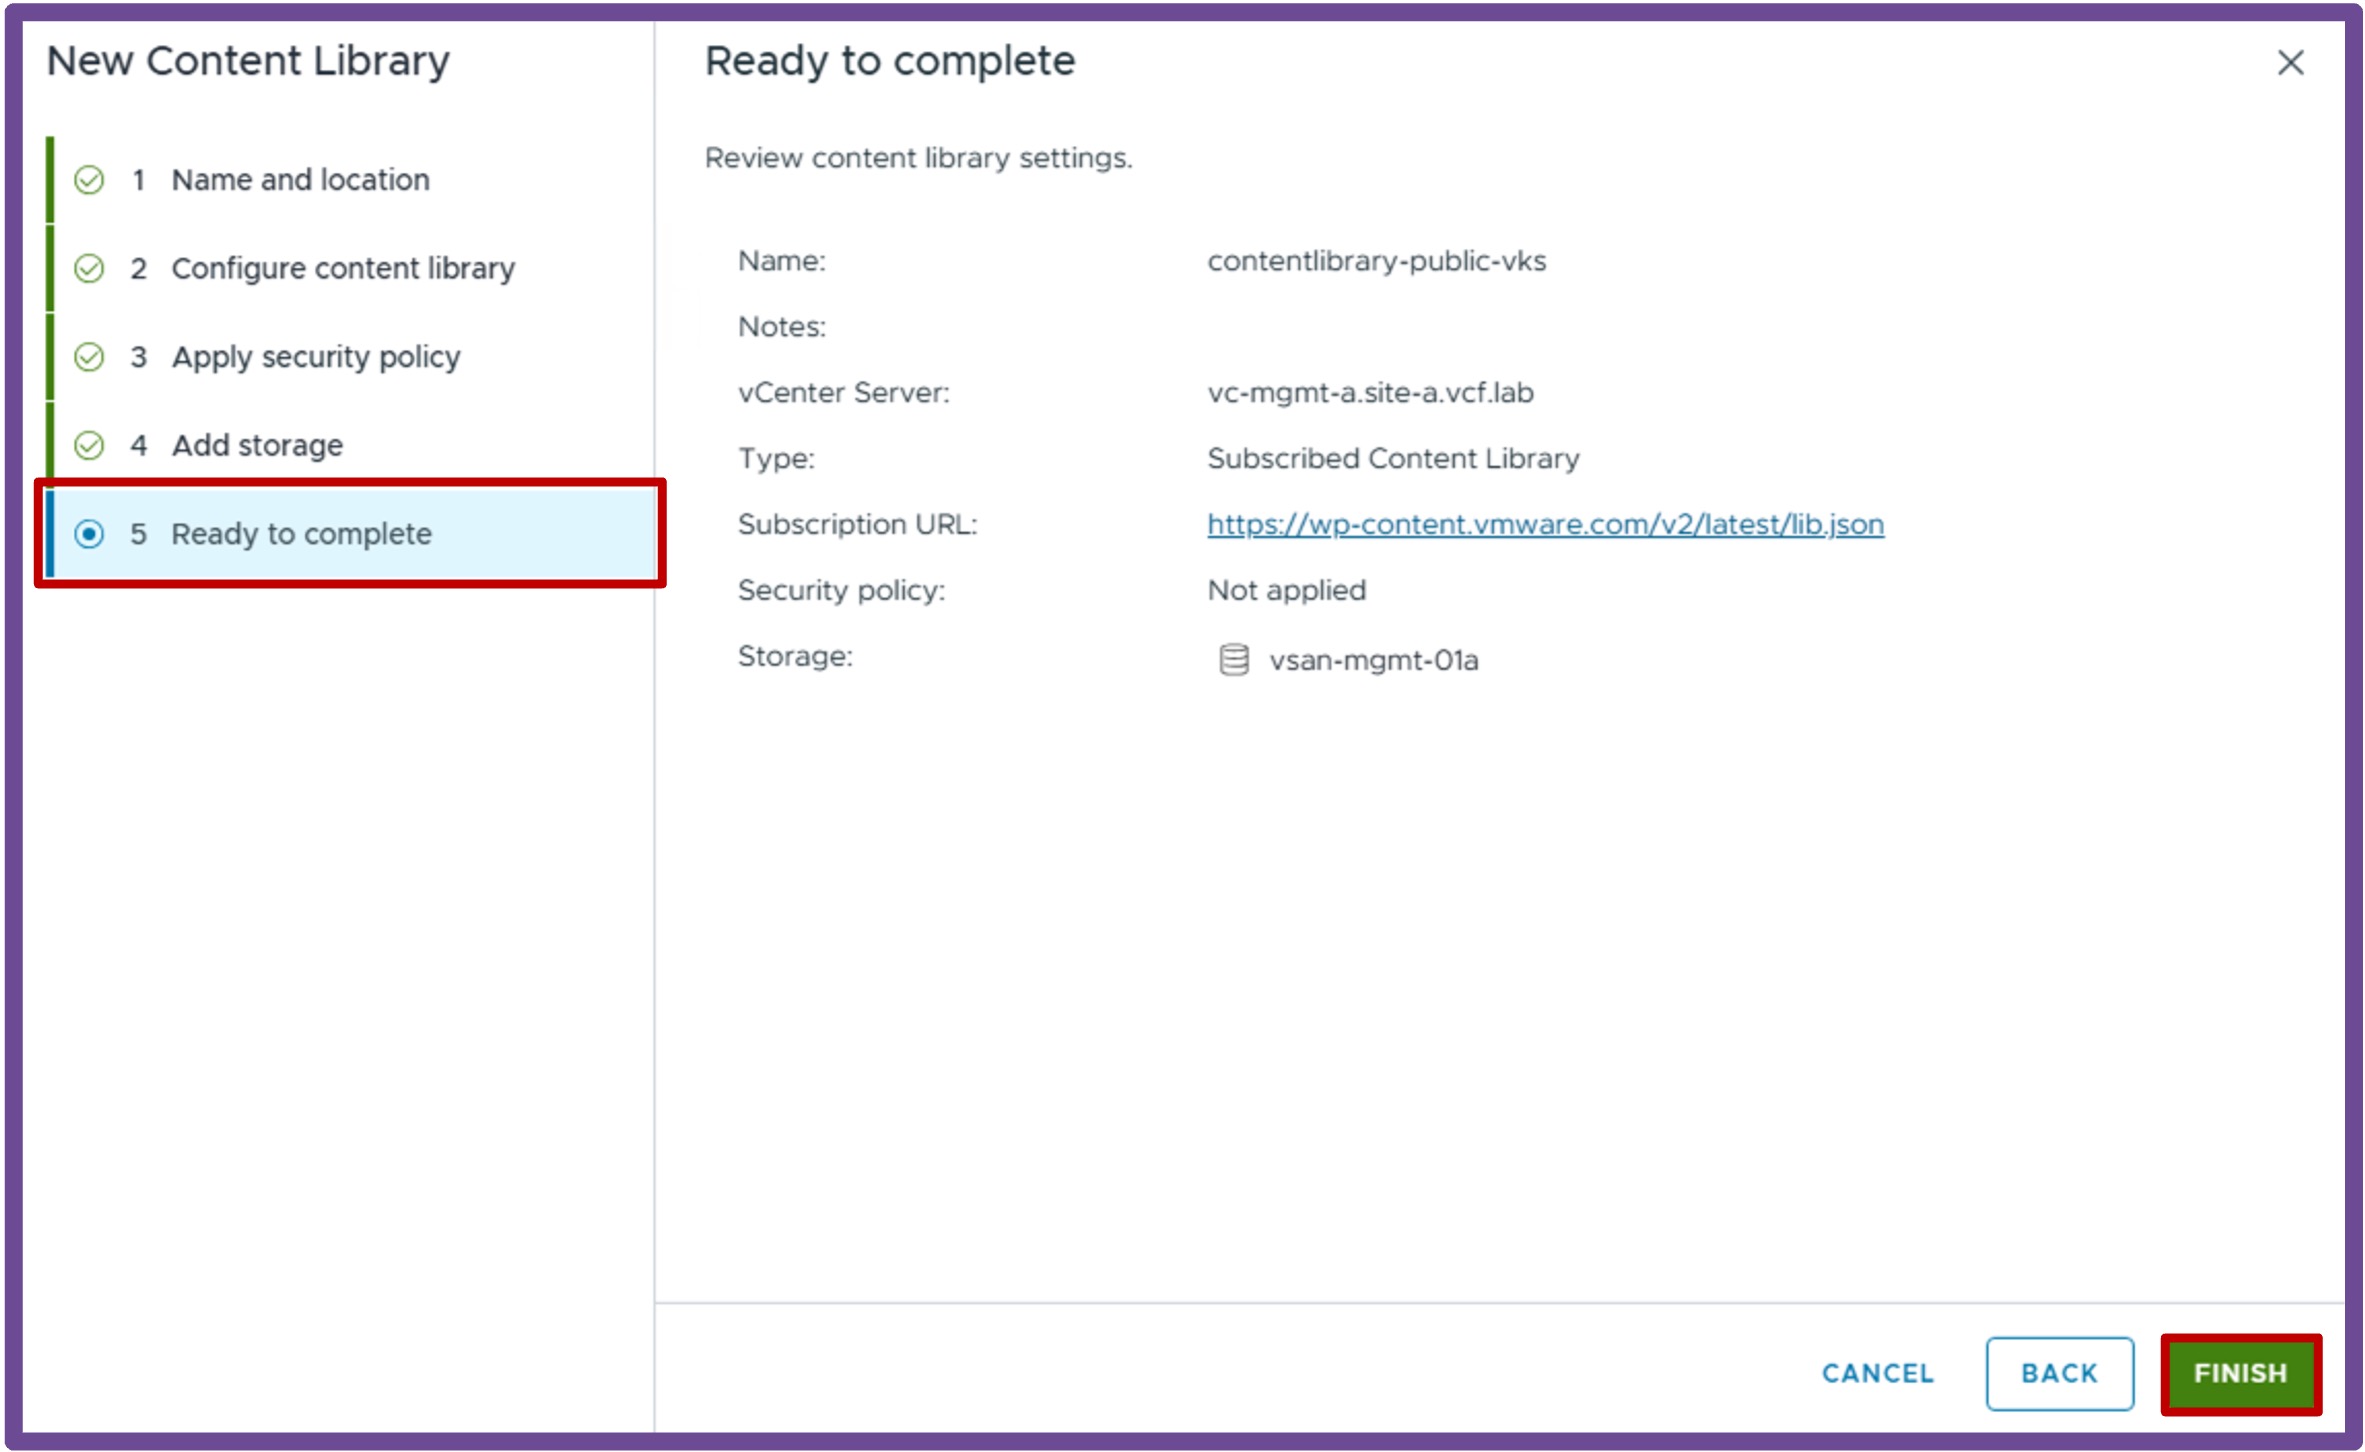
Ready to complete
Review the content library, and click Finish.
Associate the Content Library to the Supervisor
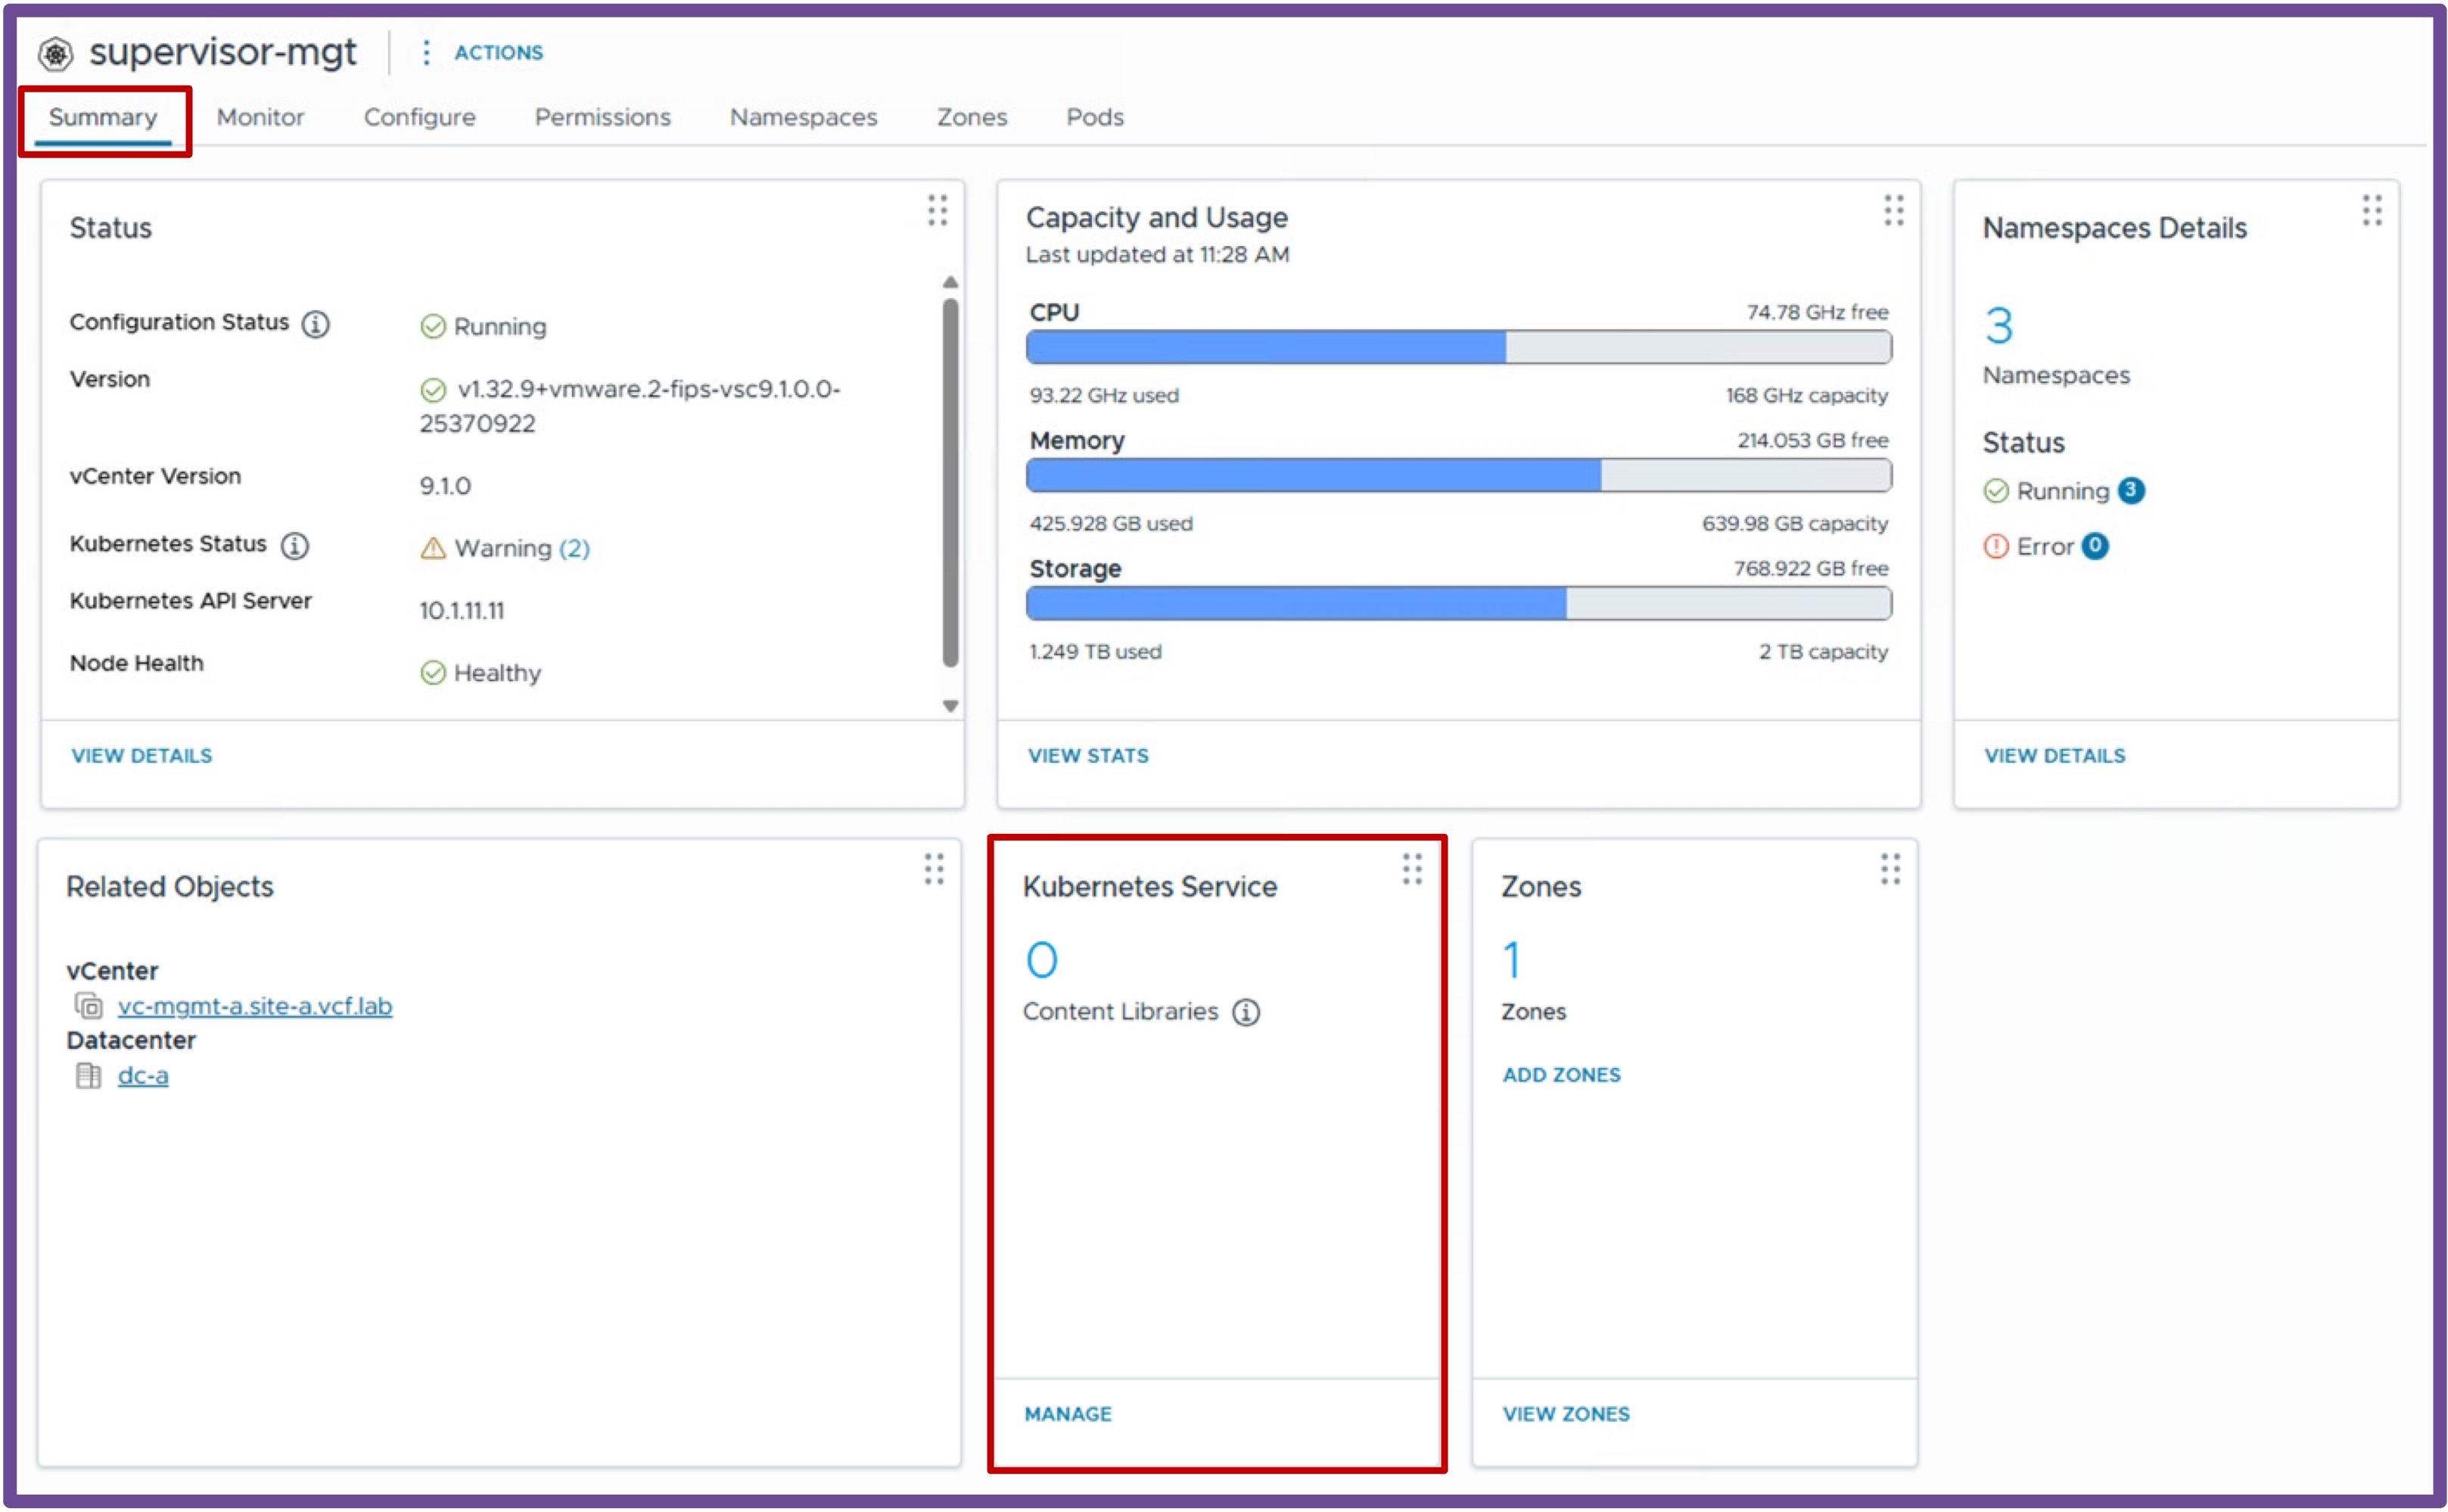
Navigate to vCenter > Supervisor Management > Supervisors, select [your supervisor], and click on Kubernetes Service - Manage.
-
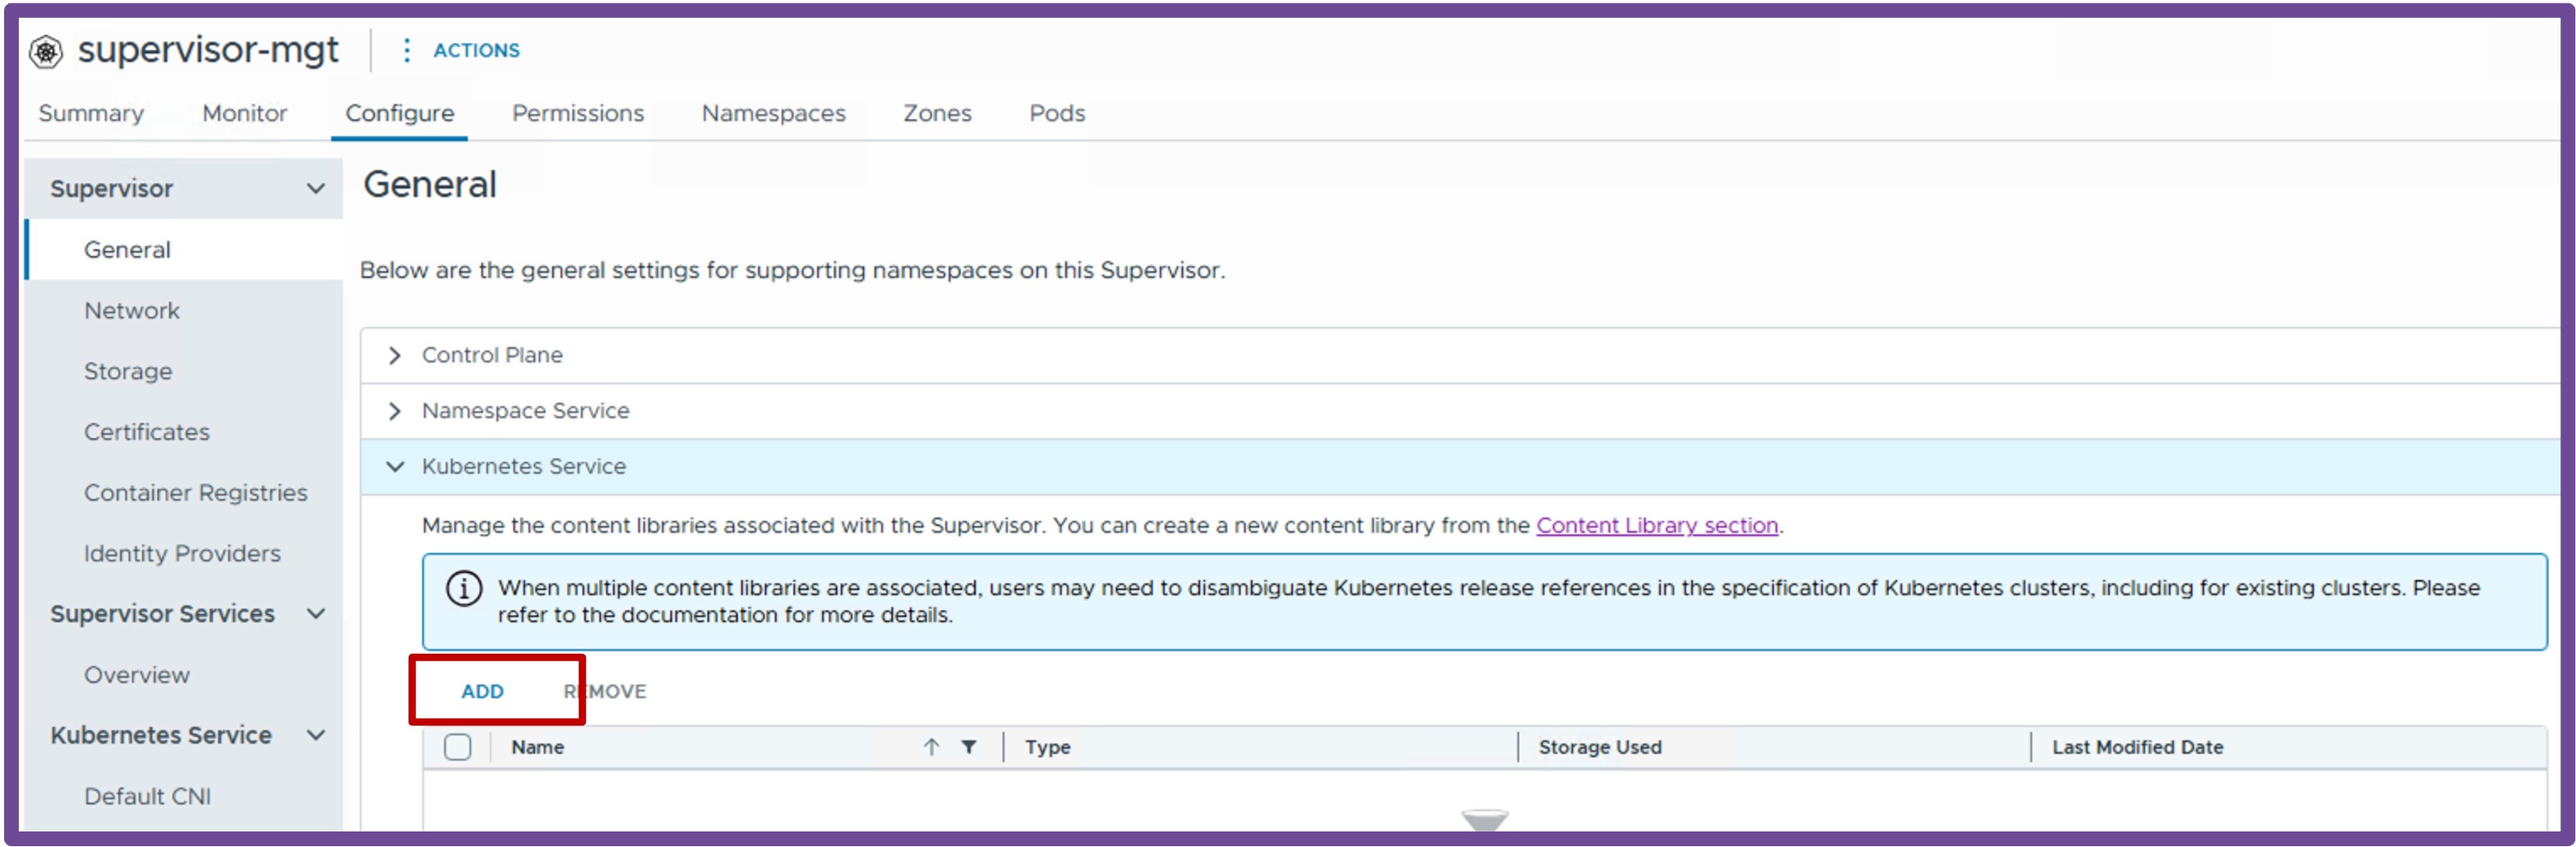
Add Content Library
Click ADD.
-
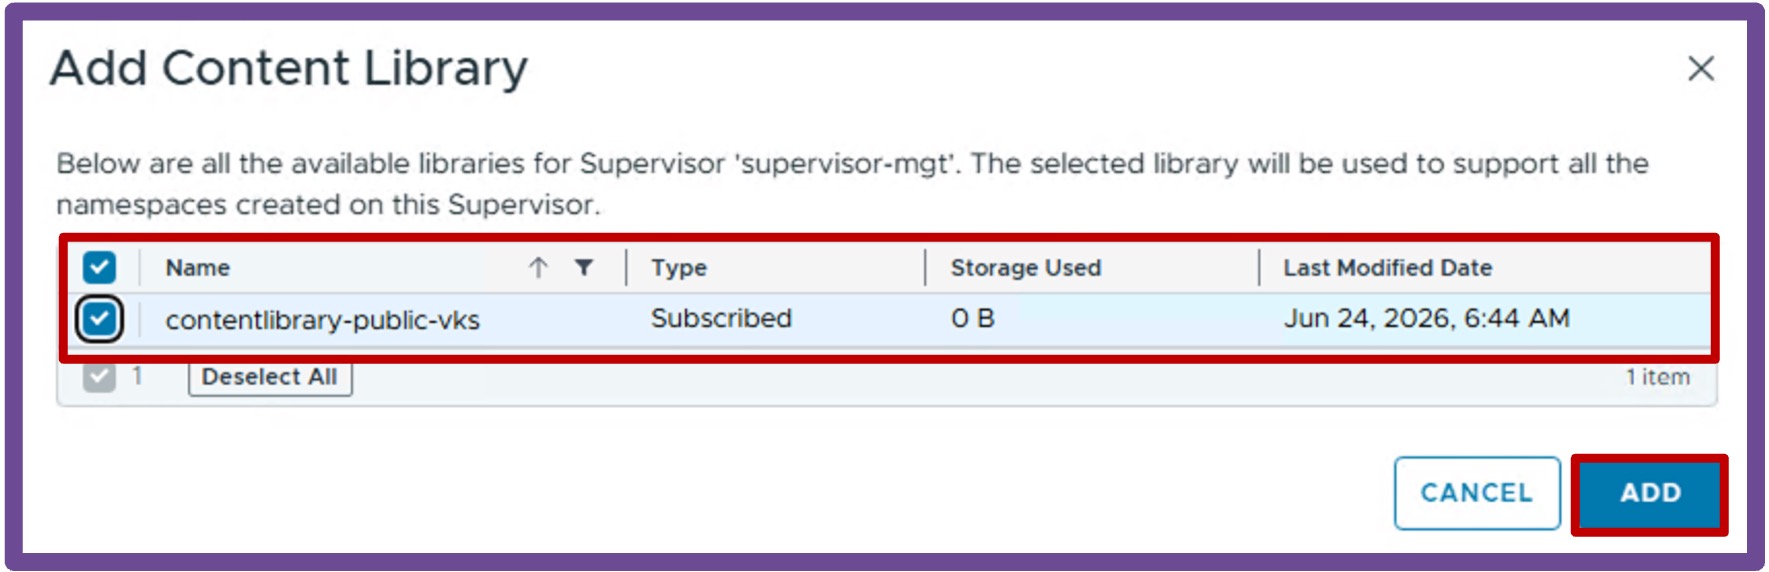
Select Content Library
Select Content Library with VKS images, and click ADD.
Validate Deployment
Validate Supervisor Status
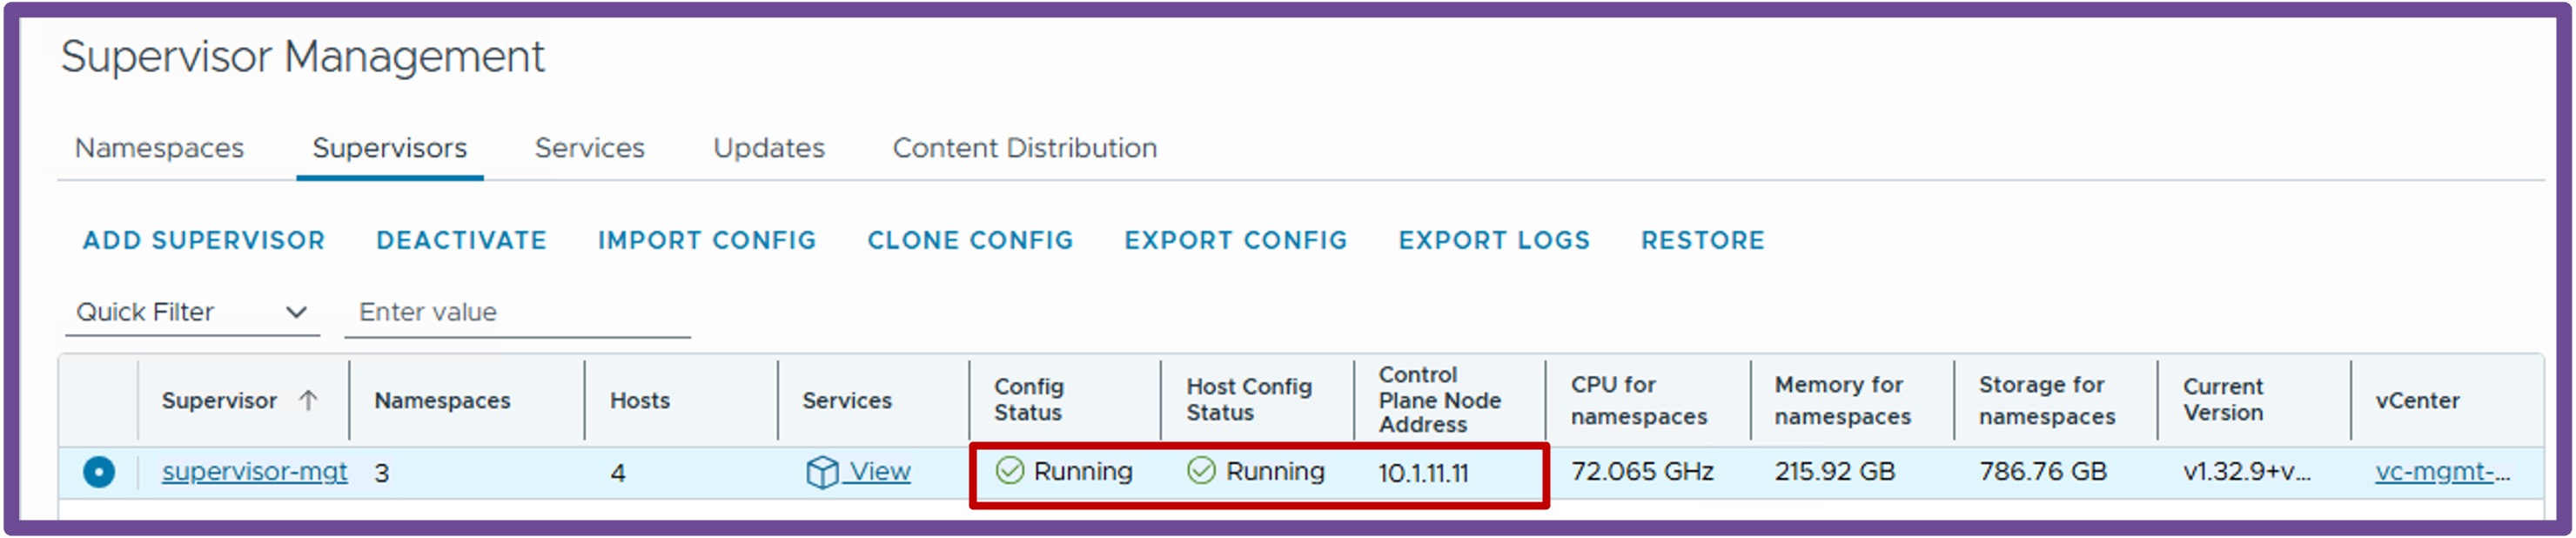
Once the wizard completes, verify the deployment was successful by navigating to vCenter > Supervisor Management > Supervisors.
Check the following fields to ensure they reflect a healthy state:
- Config Status
- Host Config Status
- Control Plane Node Address
Validate Supervisor Content Library
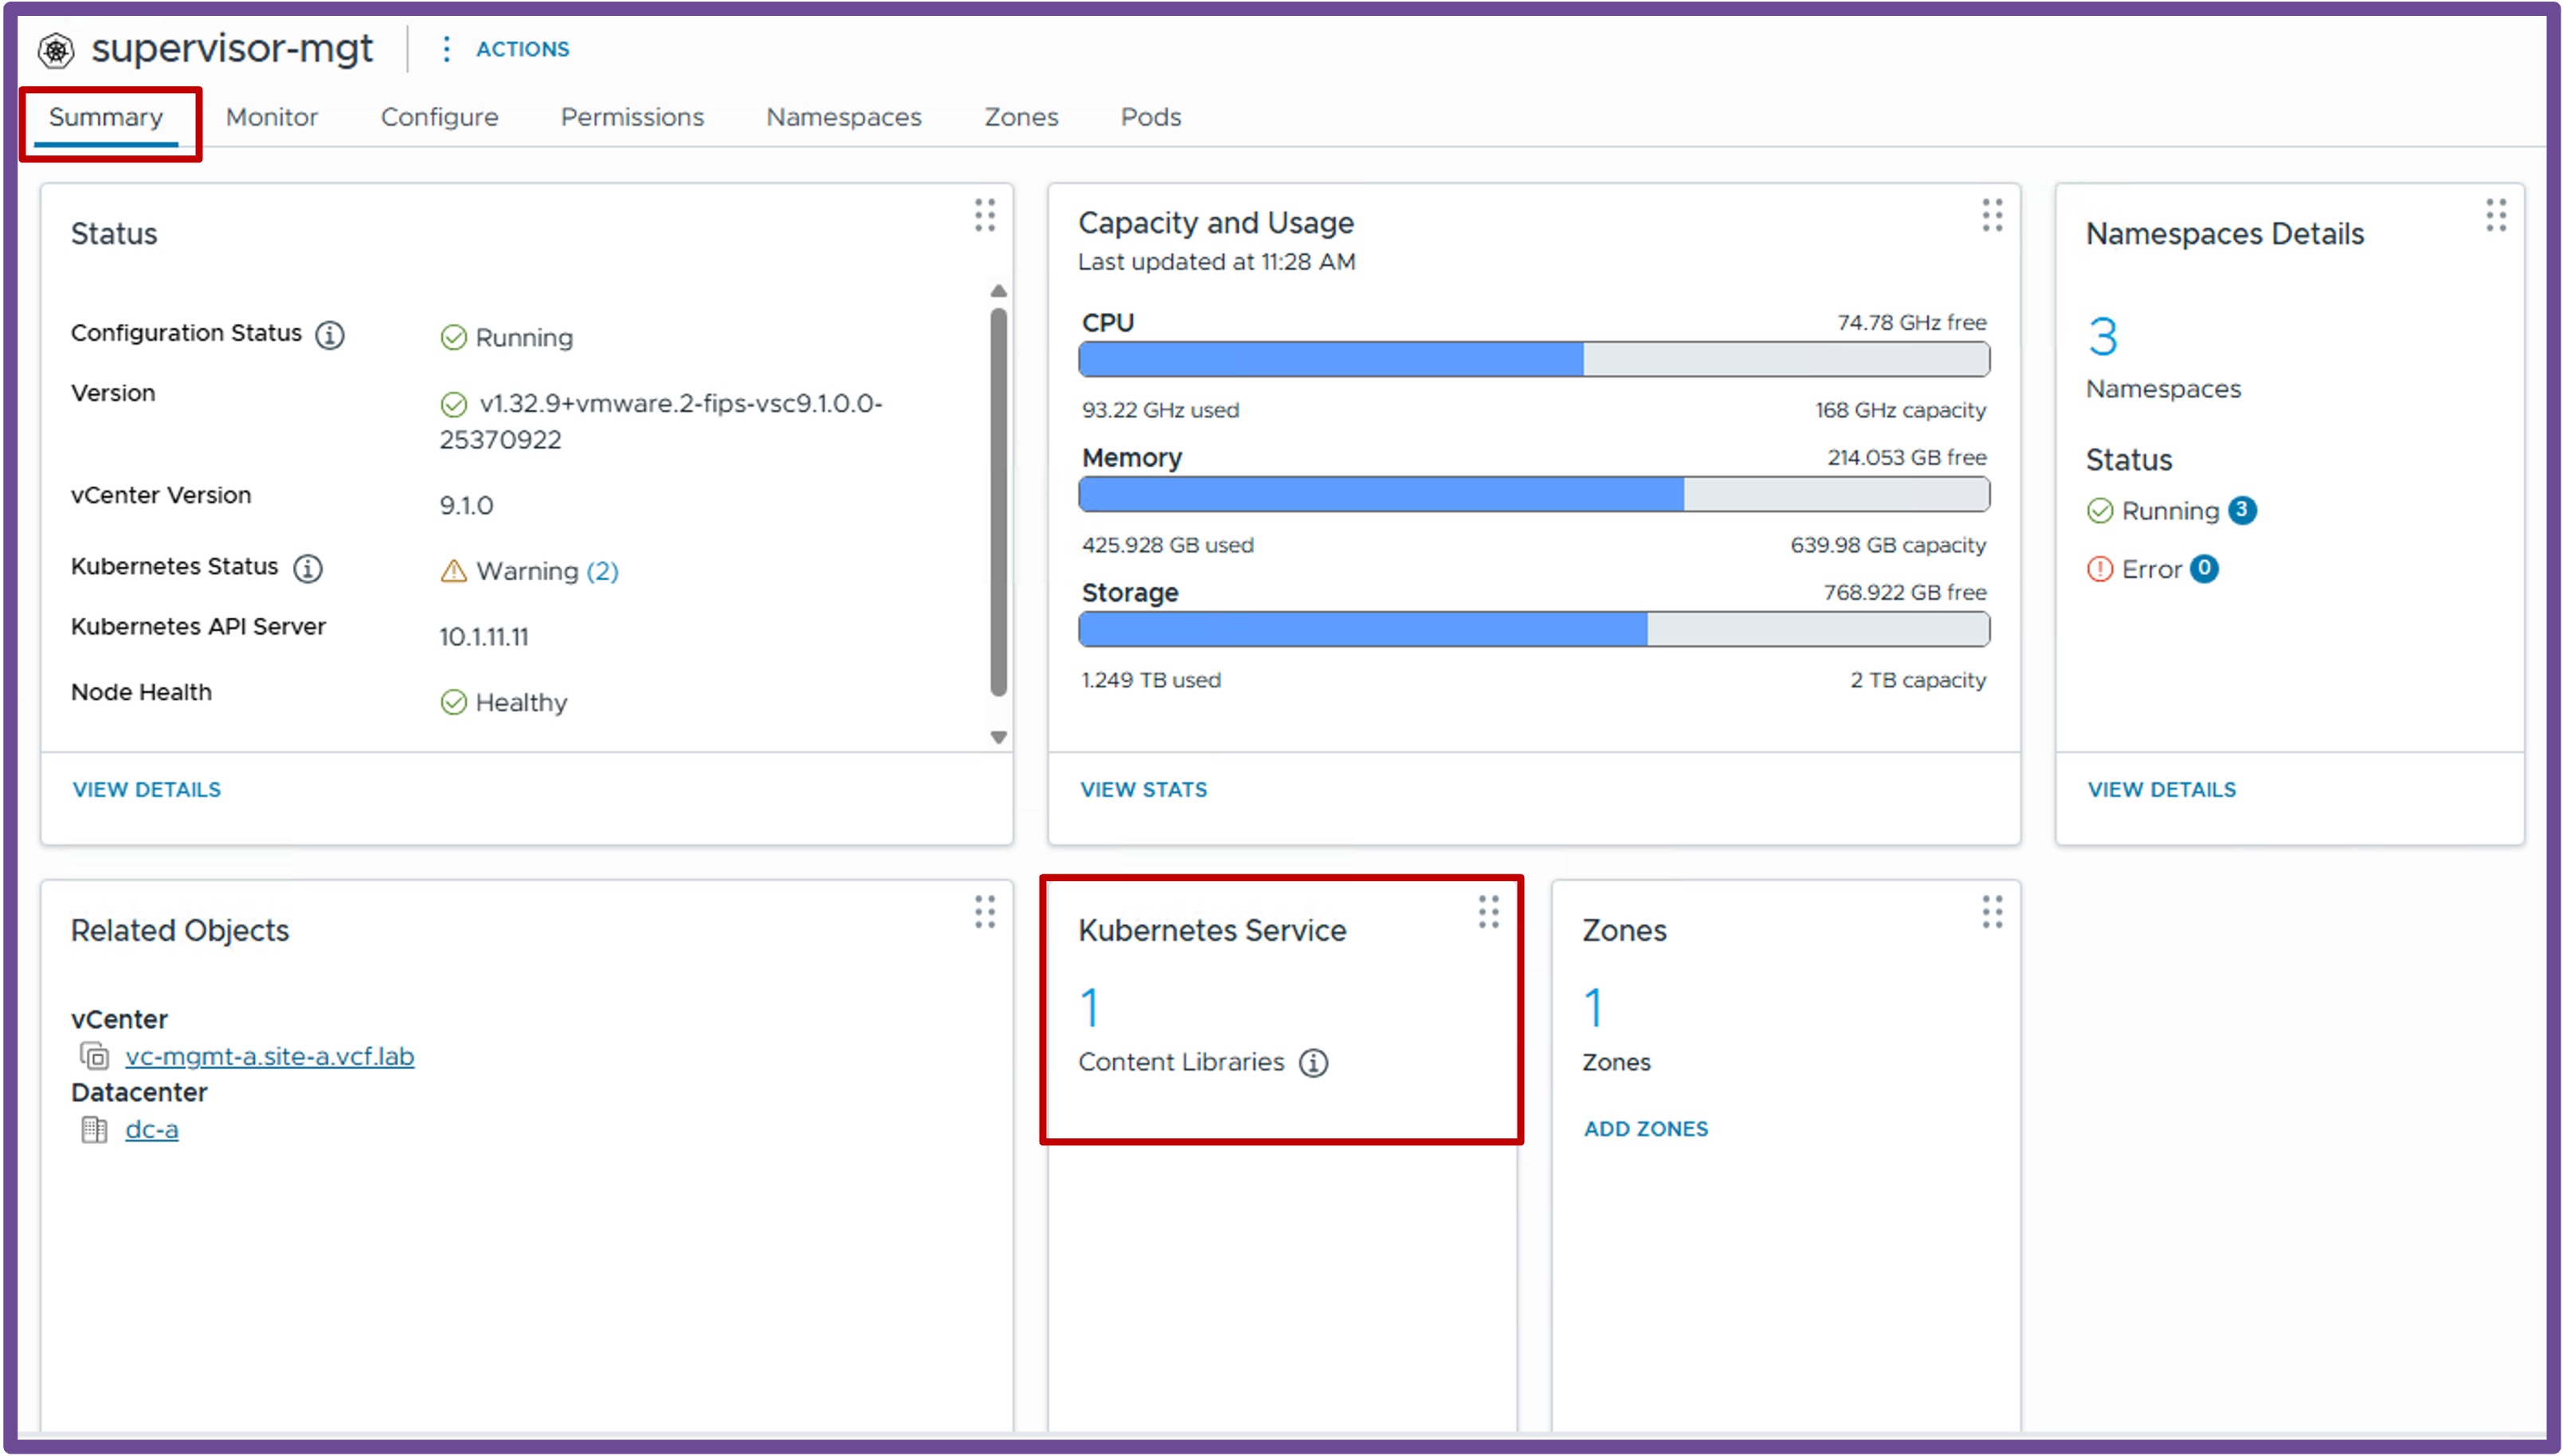
Validate Supervisor Content Library by navigating to vCenter > Supervisor Management > Supervisors, select [your supervisor]
Ignore Kubernetes Status Warning
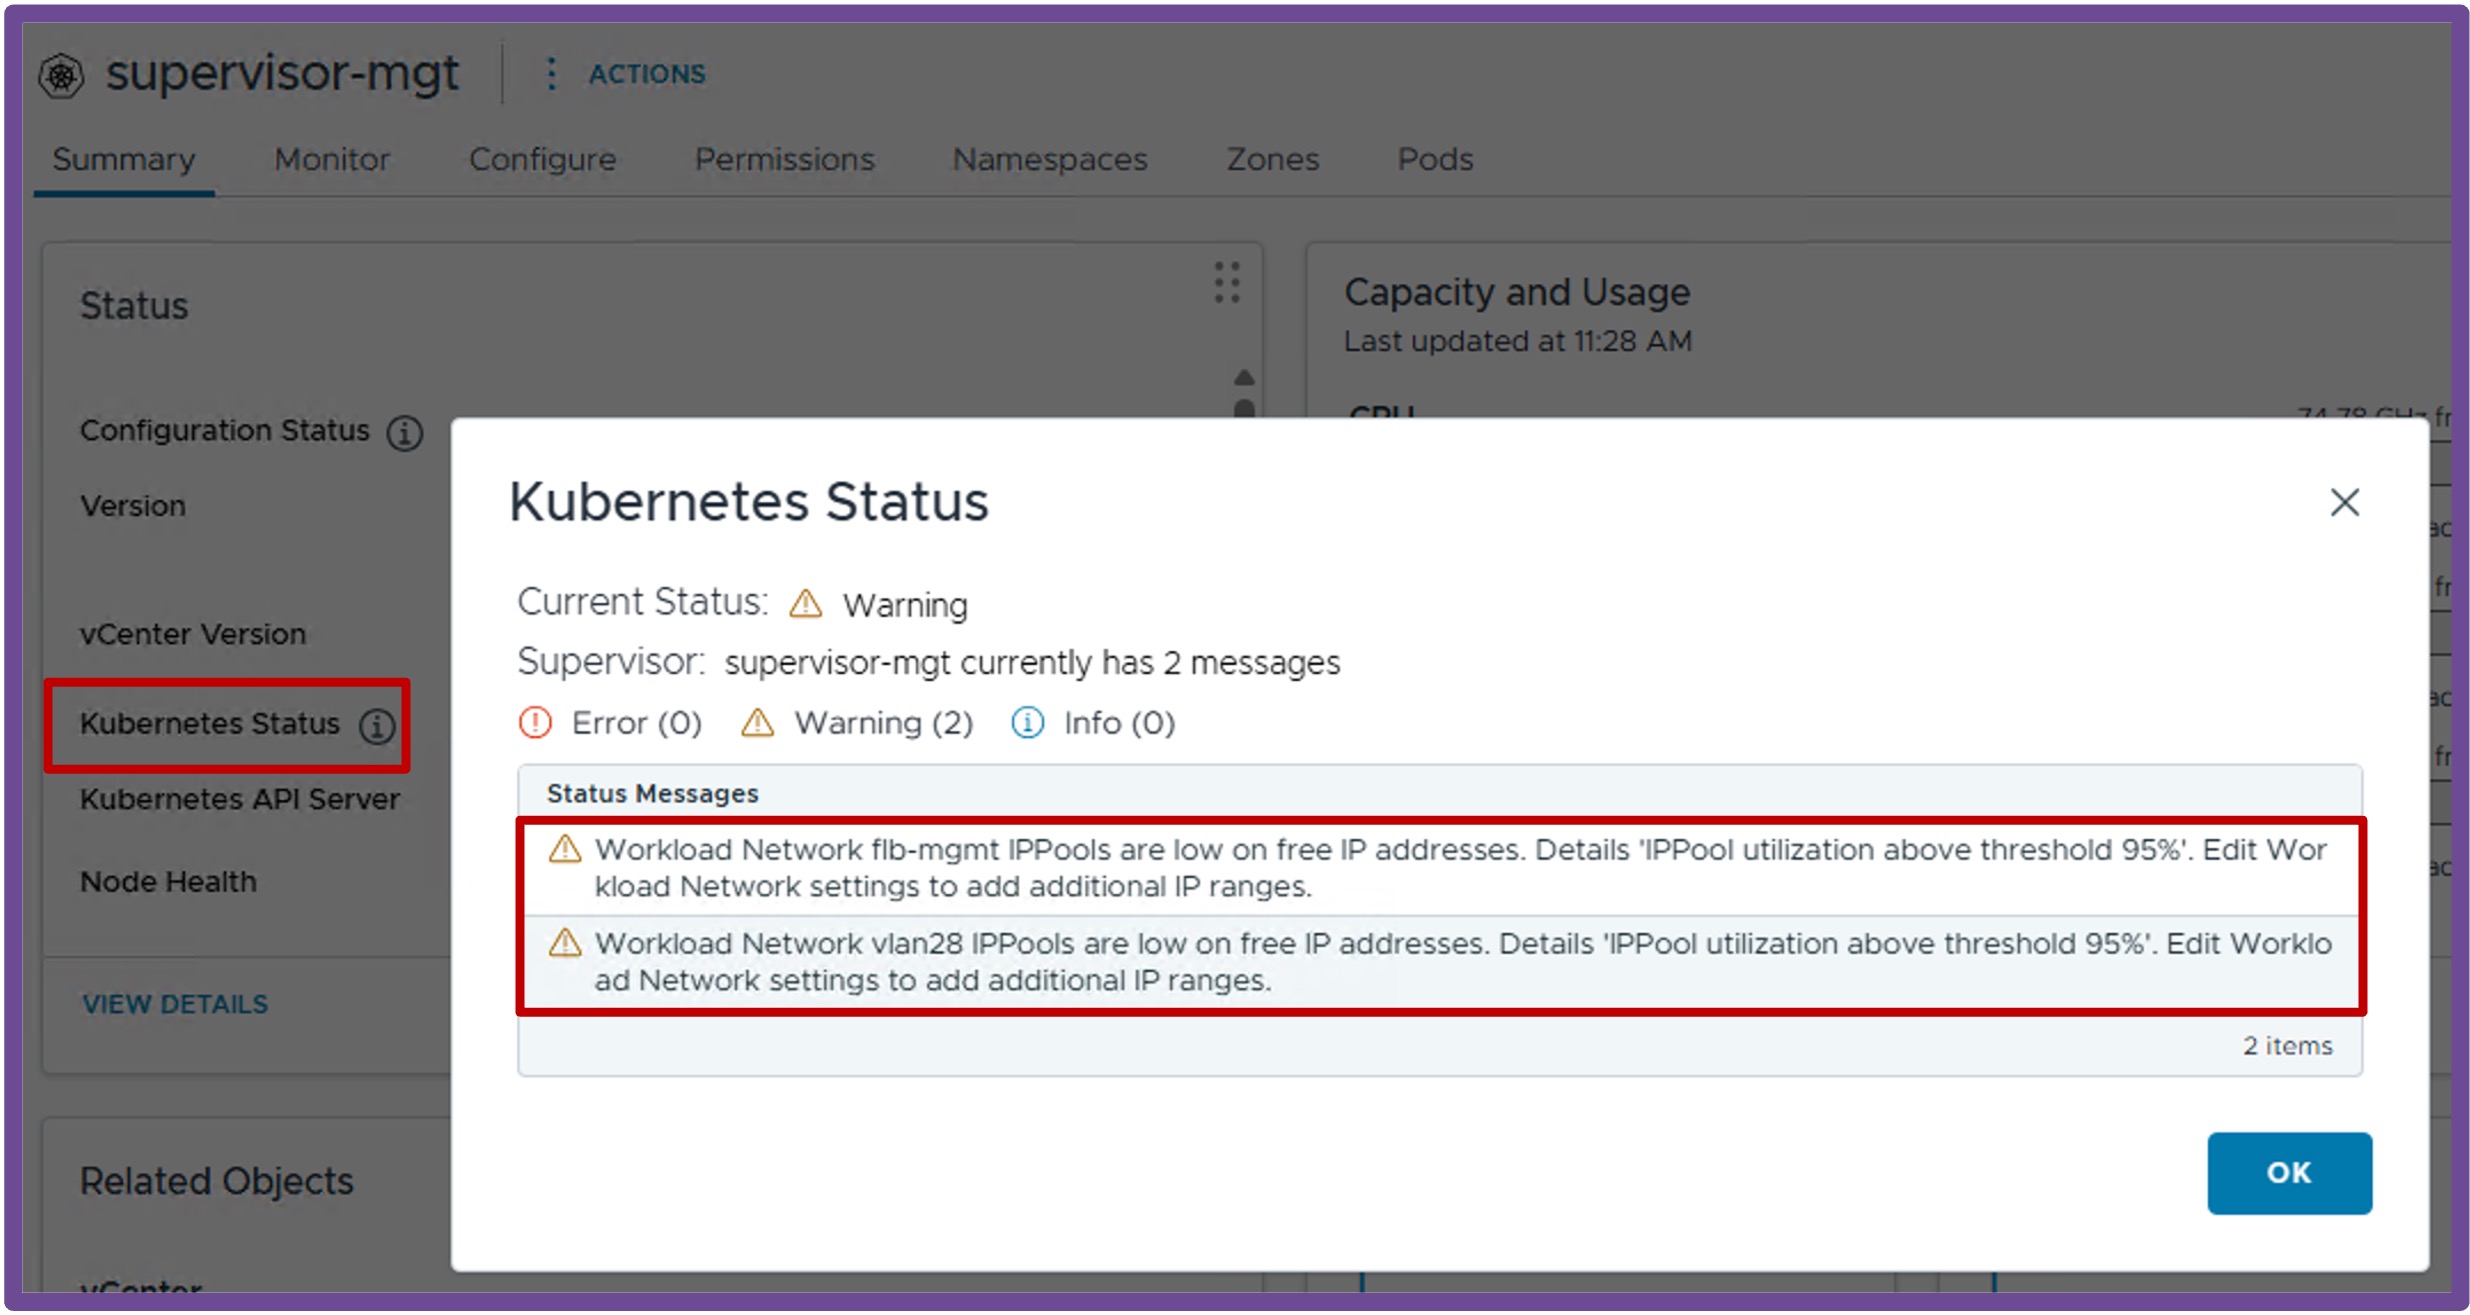 A Supervisor utilizing the "VDS + FLB" architecture supports a maximum of 2 FLB VMs, meaning it only requires 2 IP addresses within the Management and Virtual Server Networks (configured during Step 6).
If exactly 2 IPs are allocated to those networks, the pool is fully consumed immediately upon deployment, triggering a low-IP warning in the UI.
This warning is expected behavior in this specific architecture and can be safely ignored.