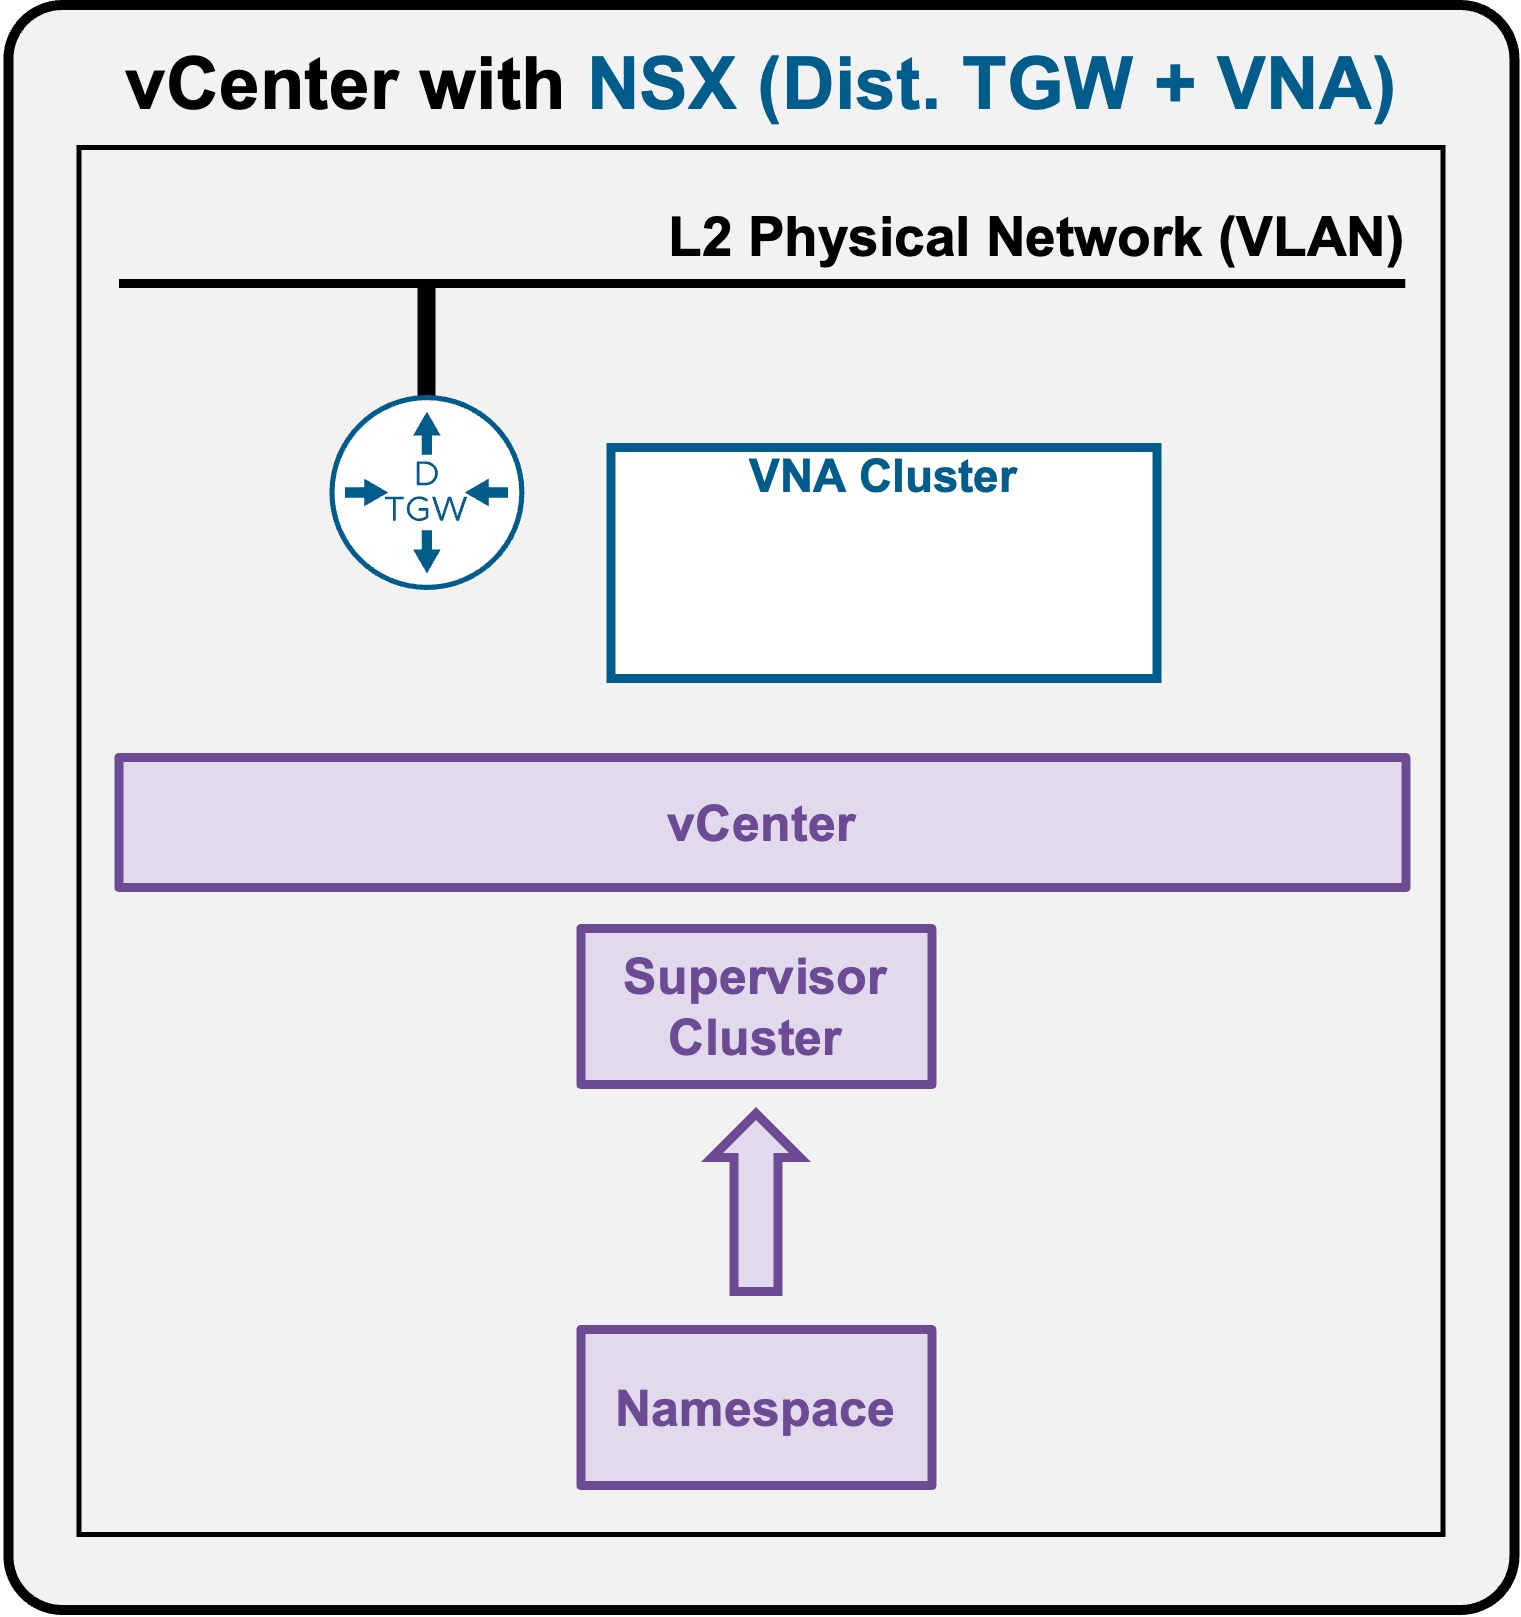
 Supervisor with "NSX + DTGW/VNA"
This section describes the procedures for deploying a Supervisor Namespace utilizing an "NSX + DTGW/VNA" architecture inside a vSphere environment.
- Namespace
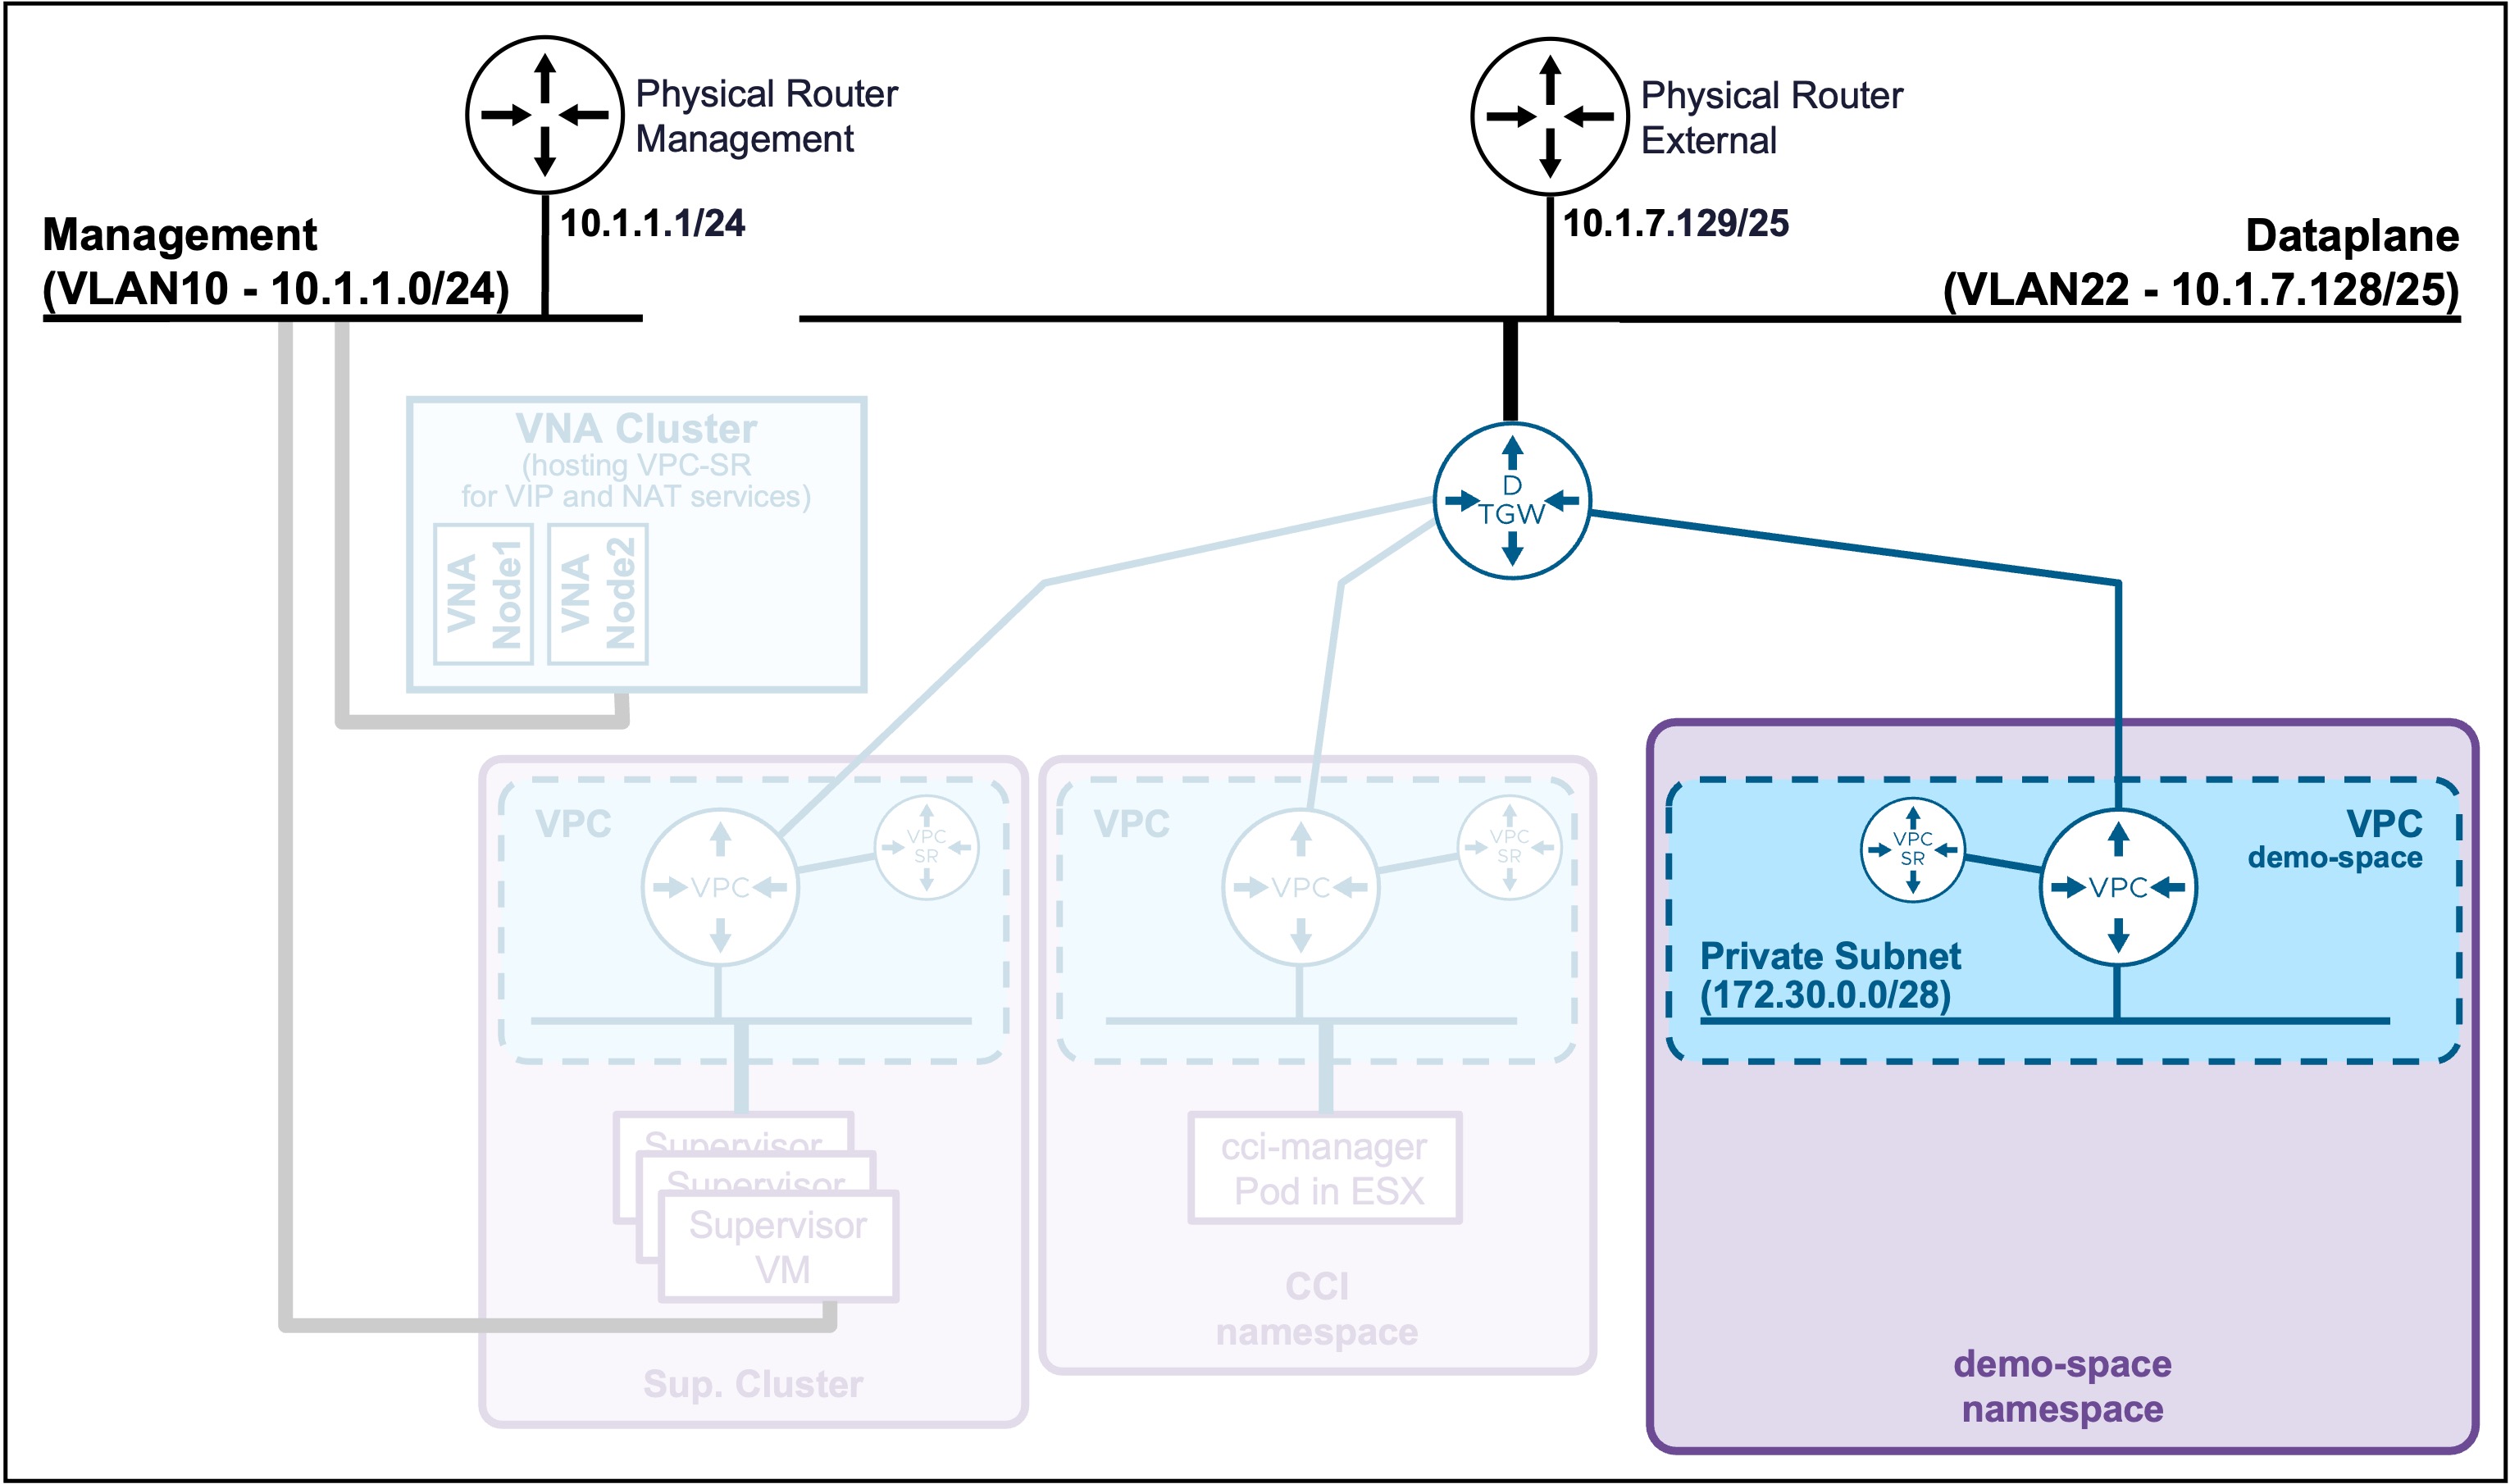
Namespace Deployment
Create Namespace
Navigate to vCenter > Supervisor Management > Namespaces, and click NEW NAMESPACE.

-
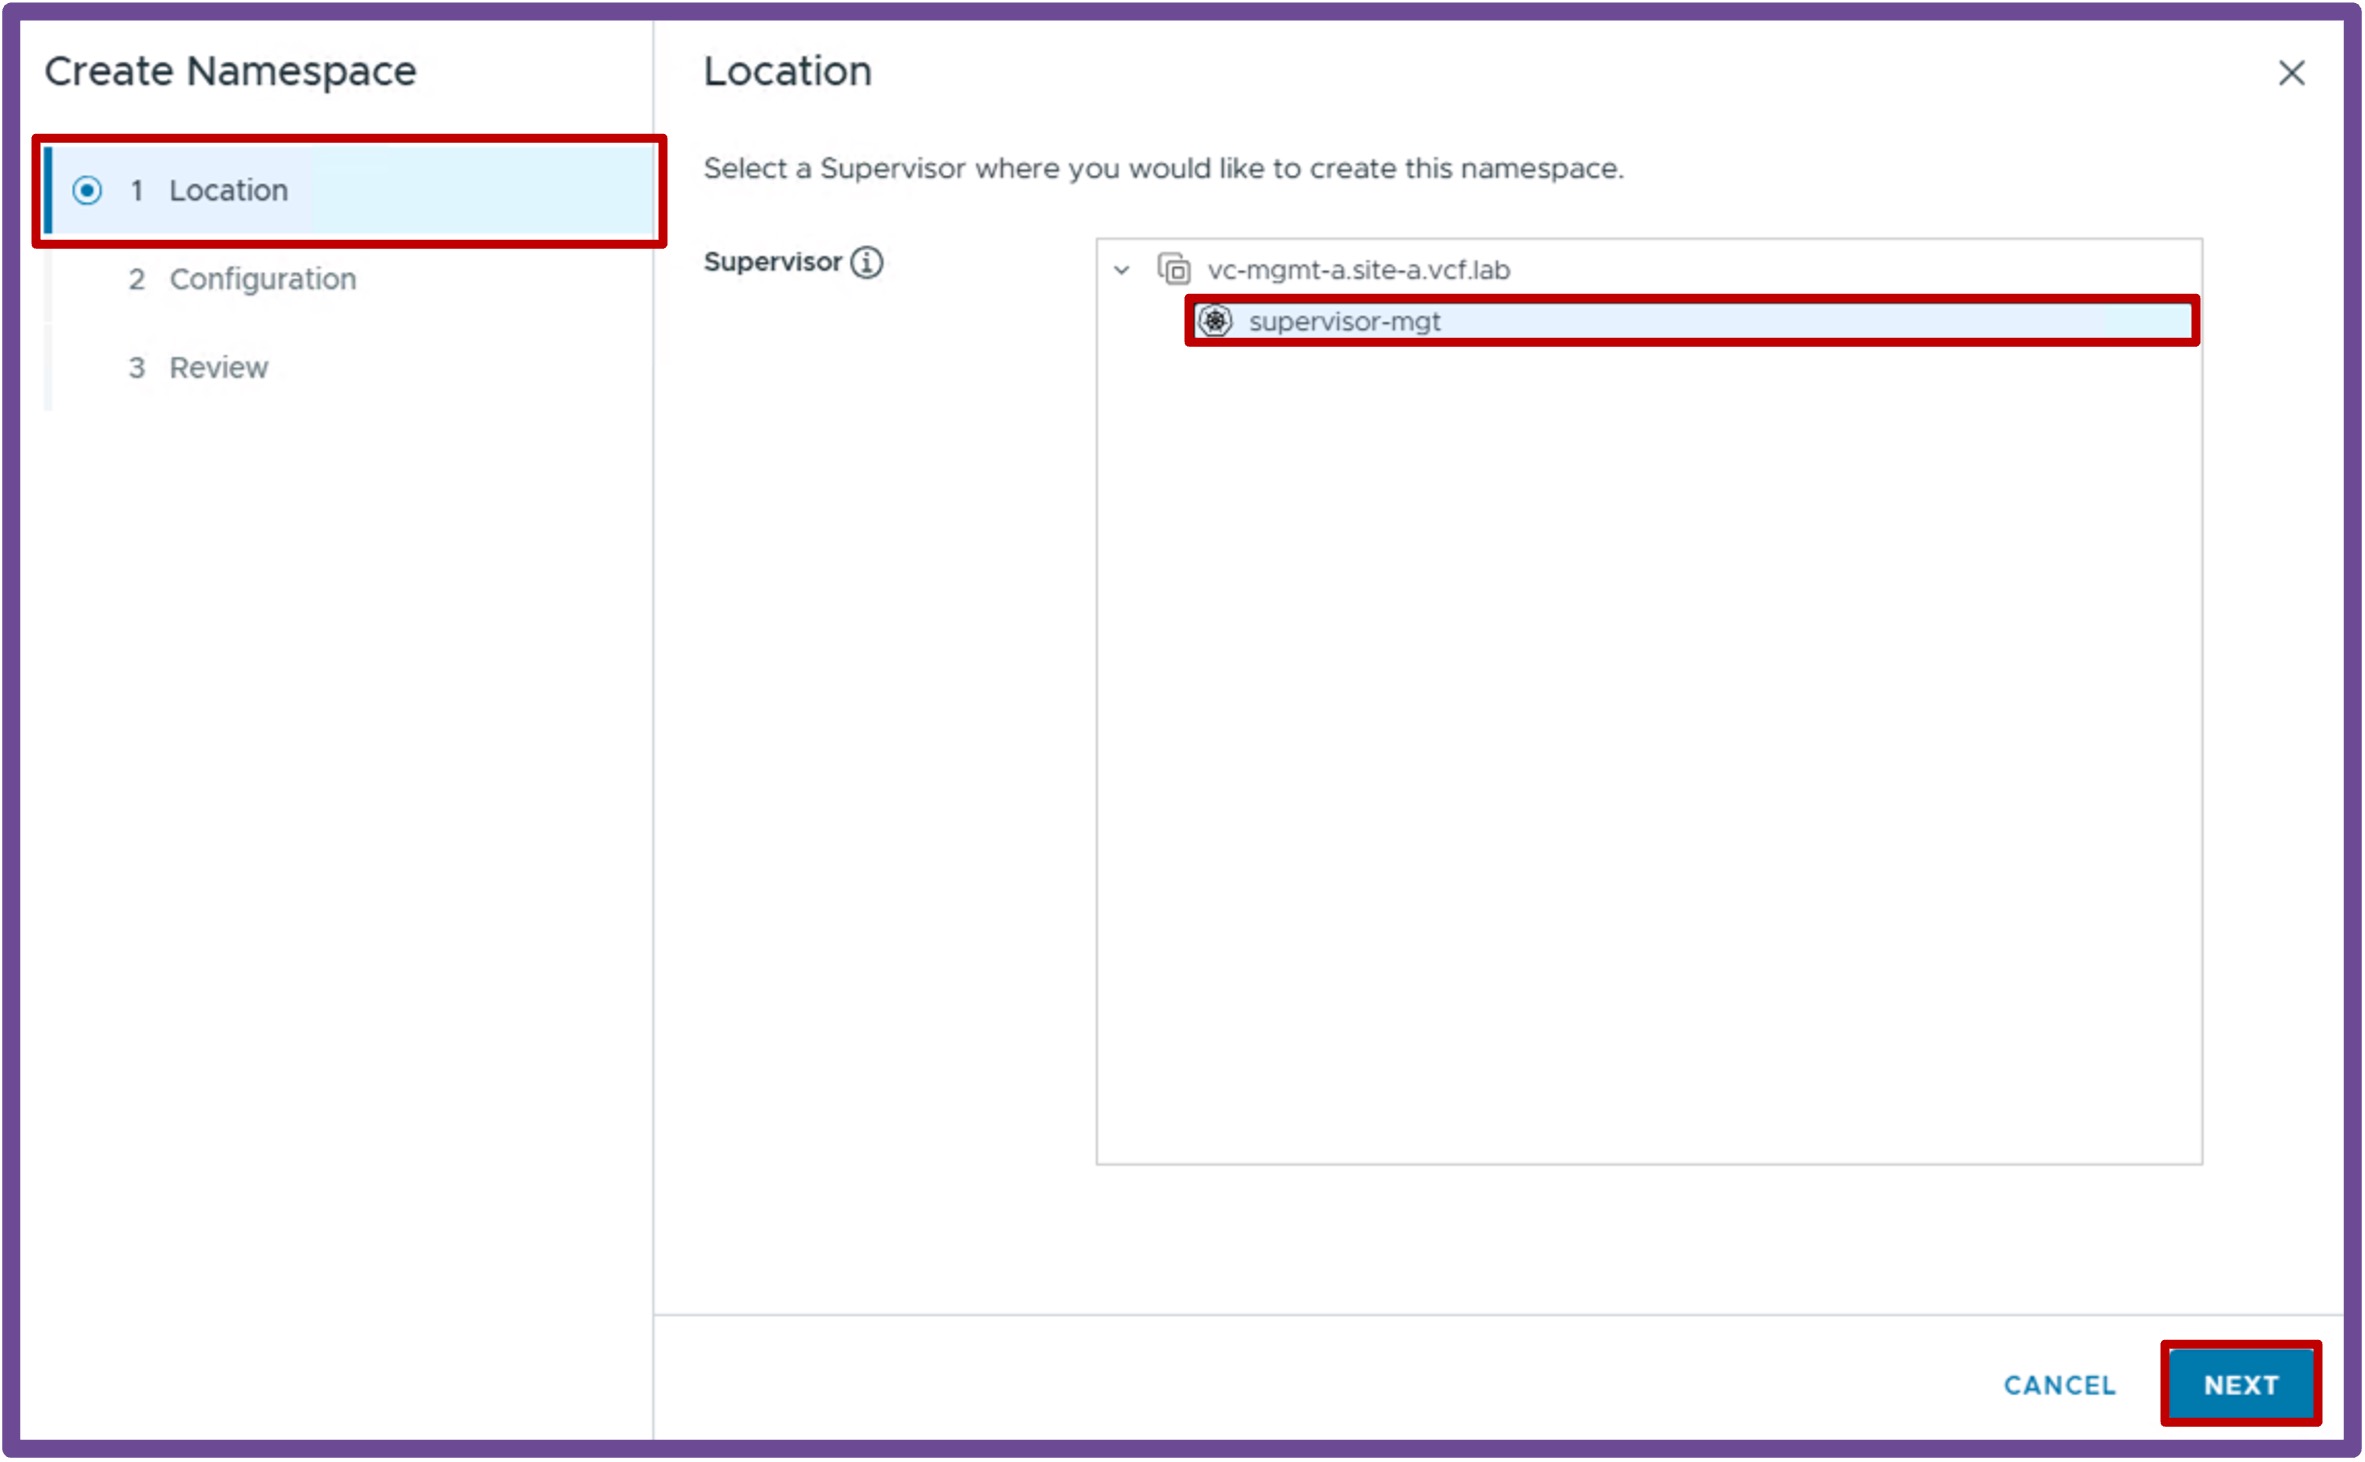
Location
Select the Supervisor, and click Next.
-
Configuration
Give a name to the Namespace, and click Next.
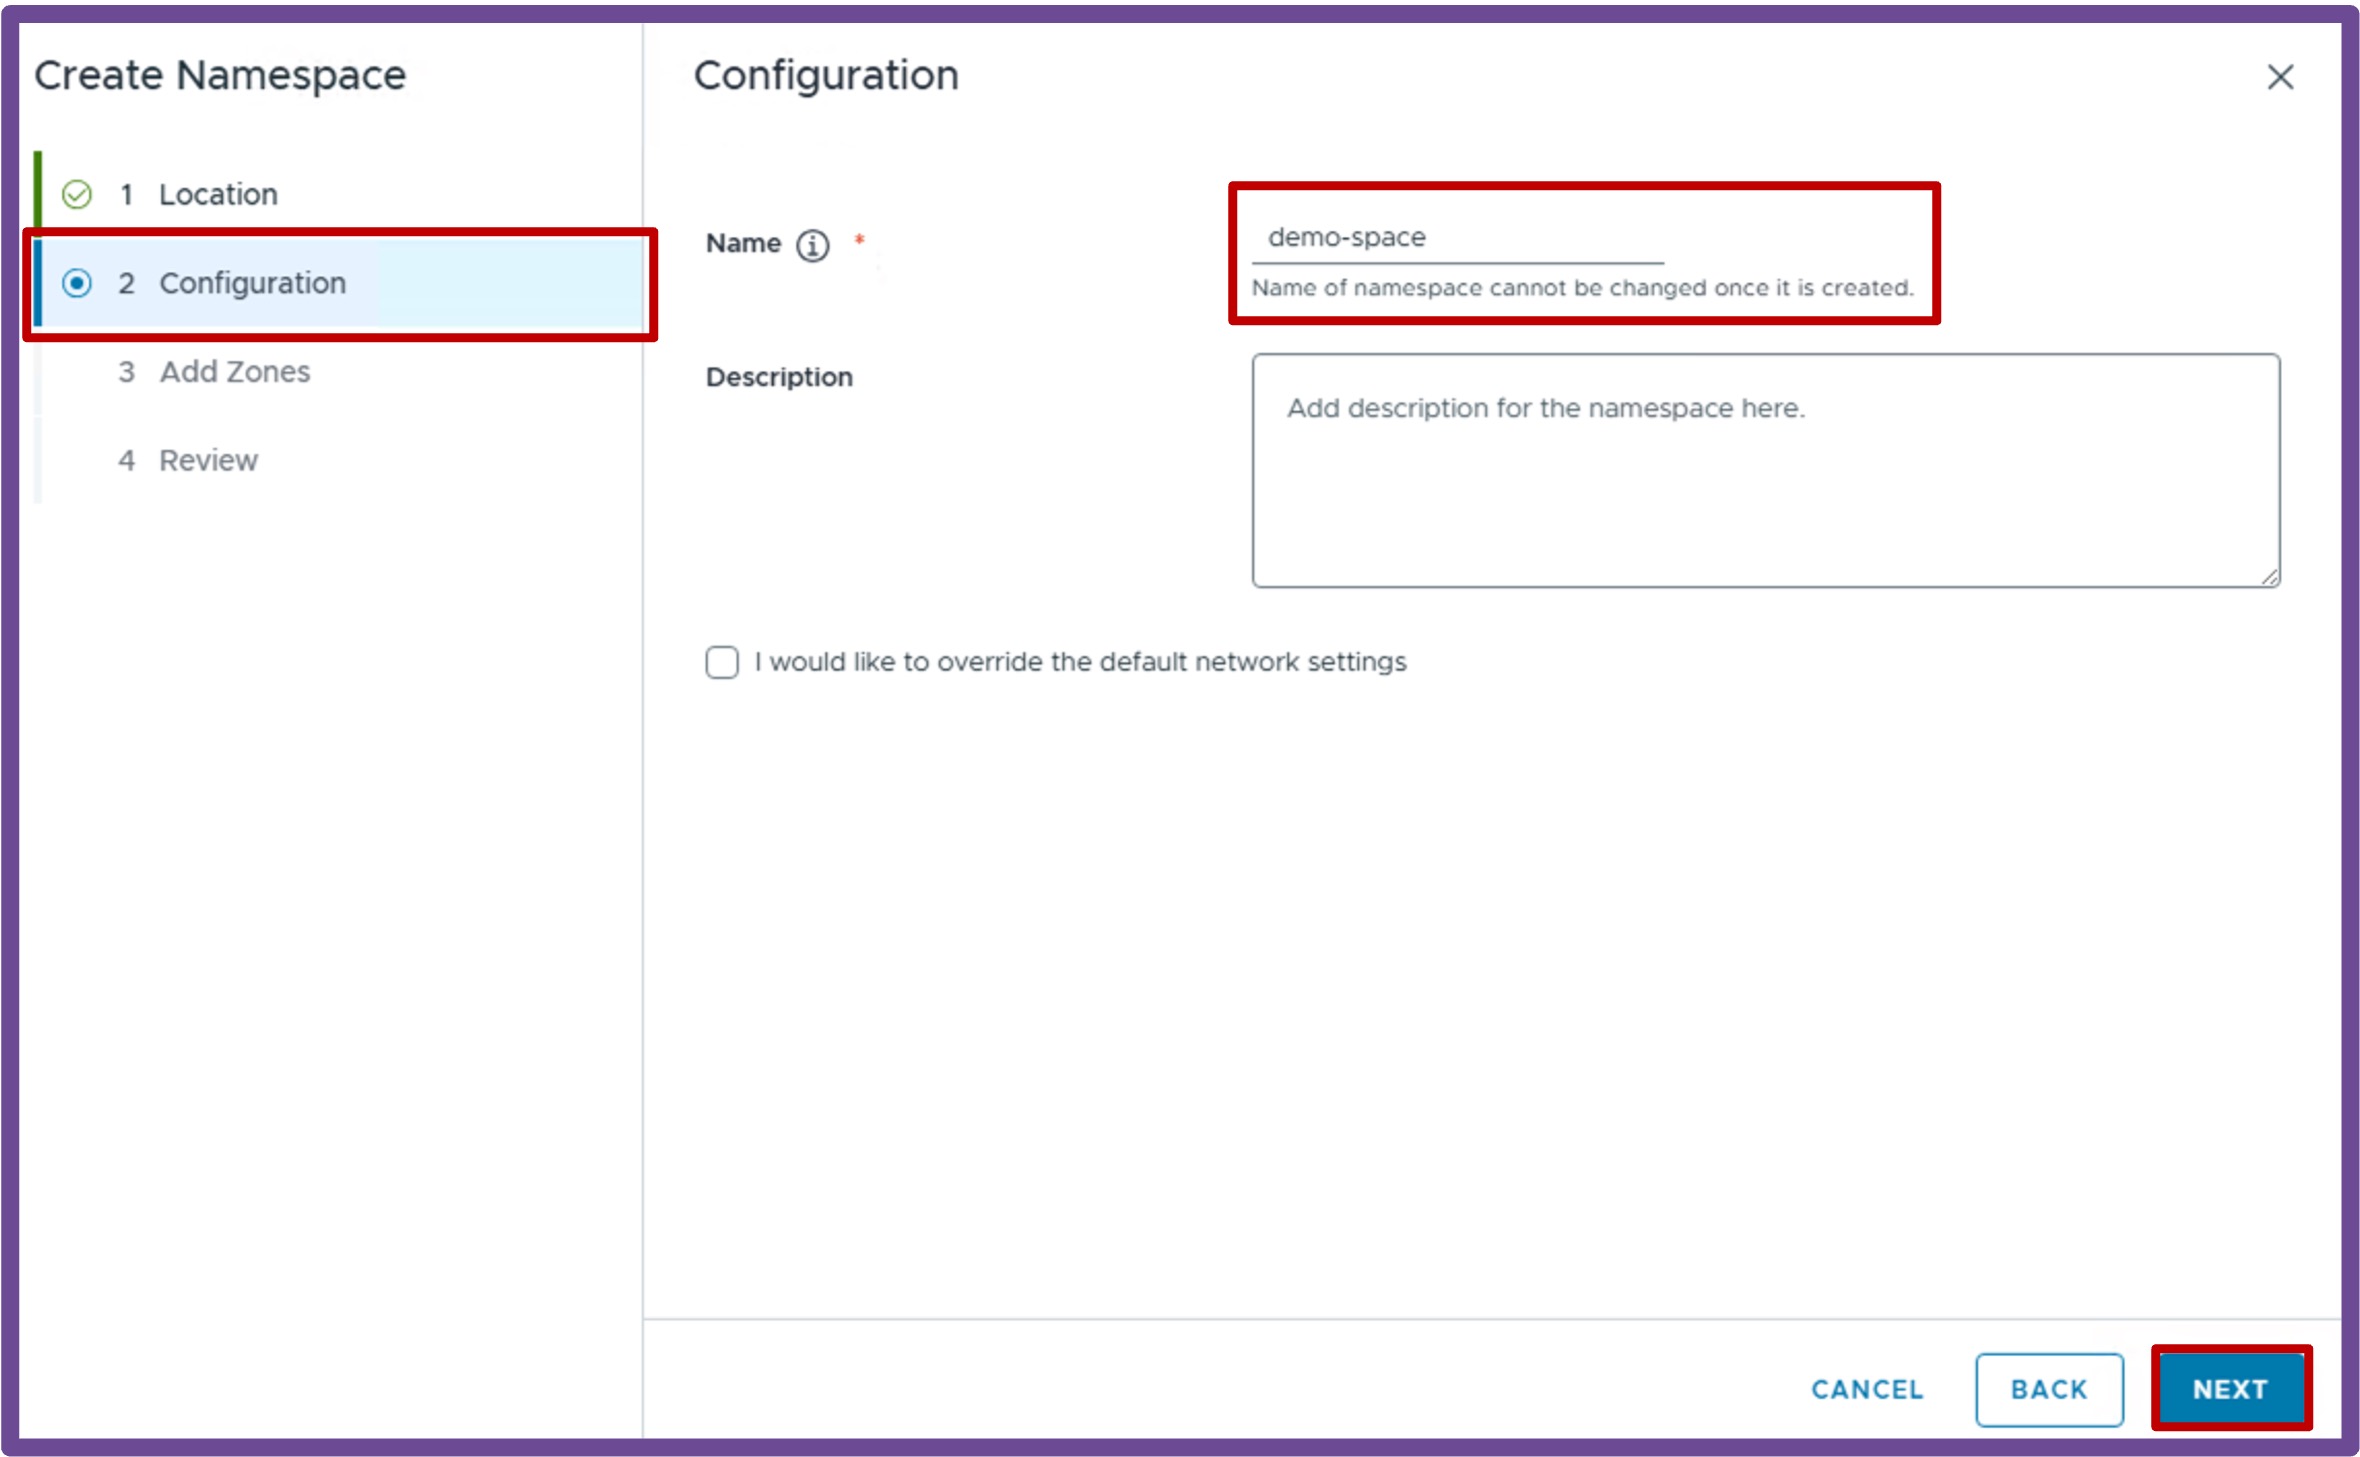
Special Use Case: Override Network Settings
Multiple use cases are available:
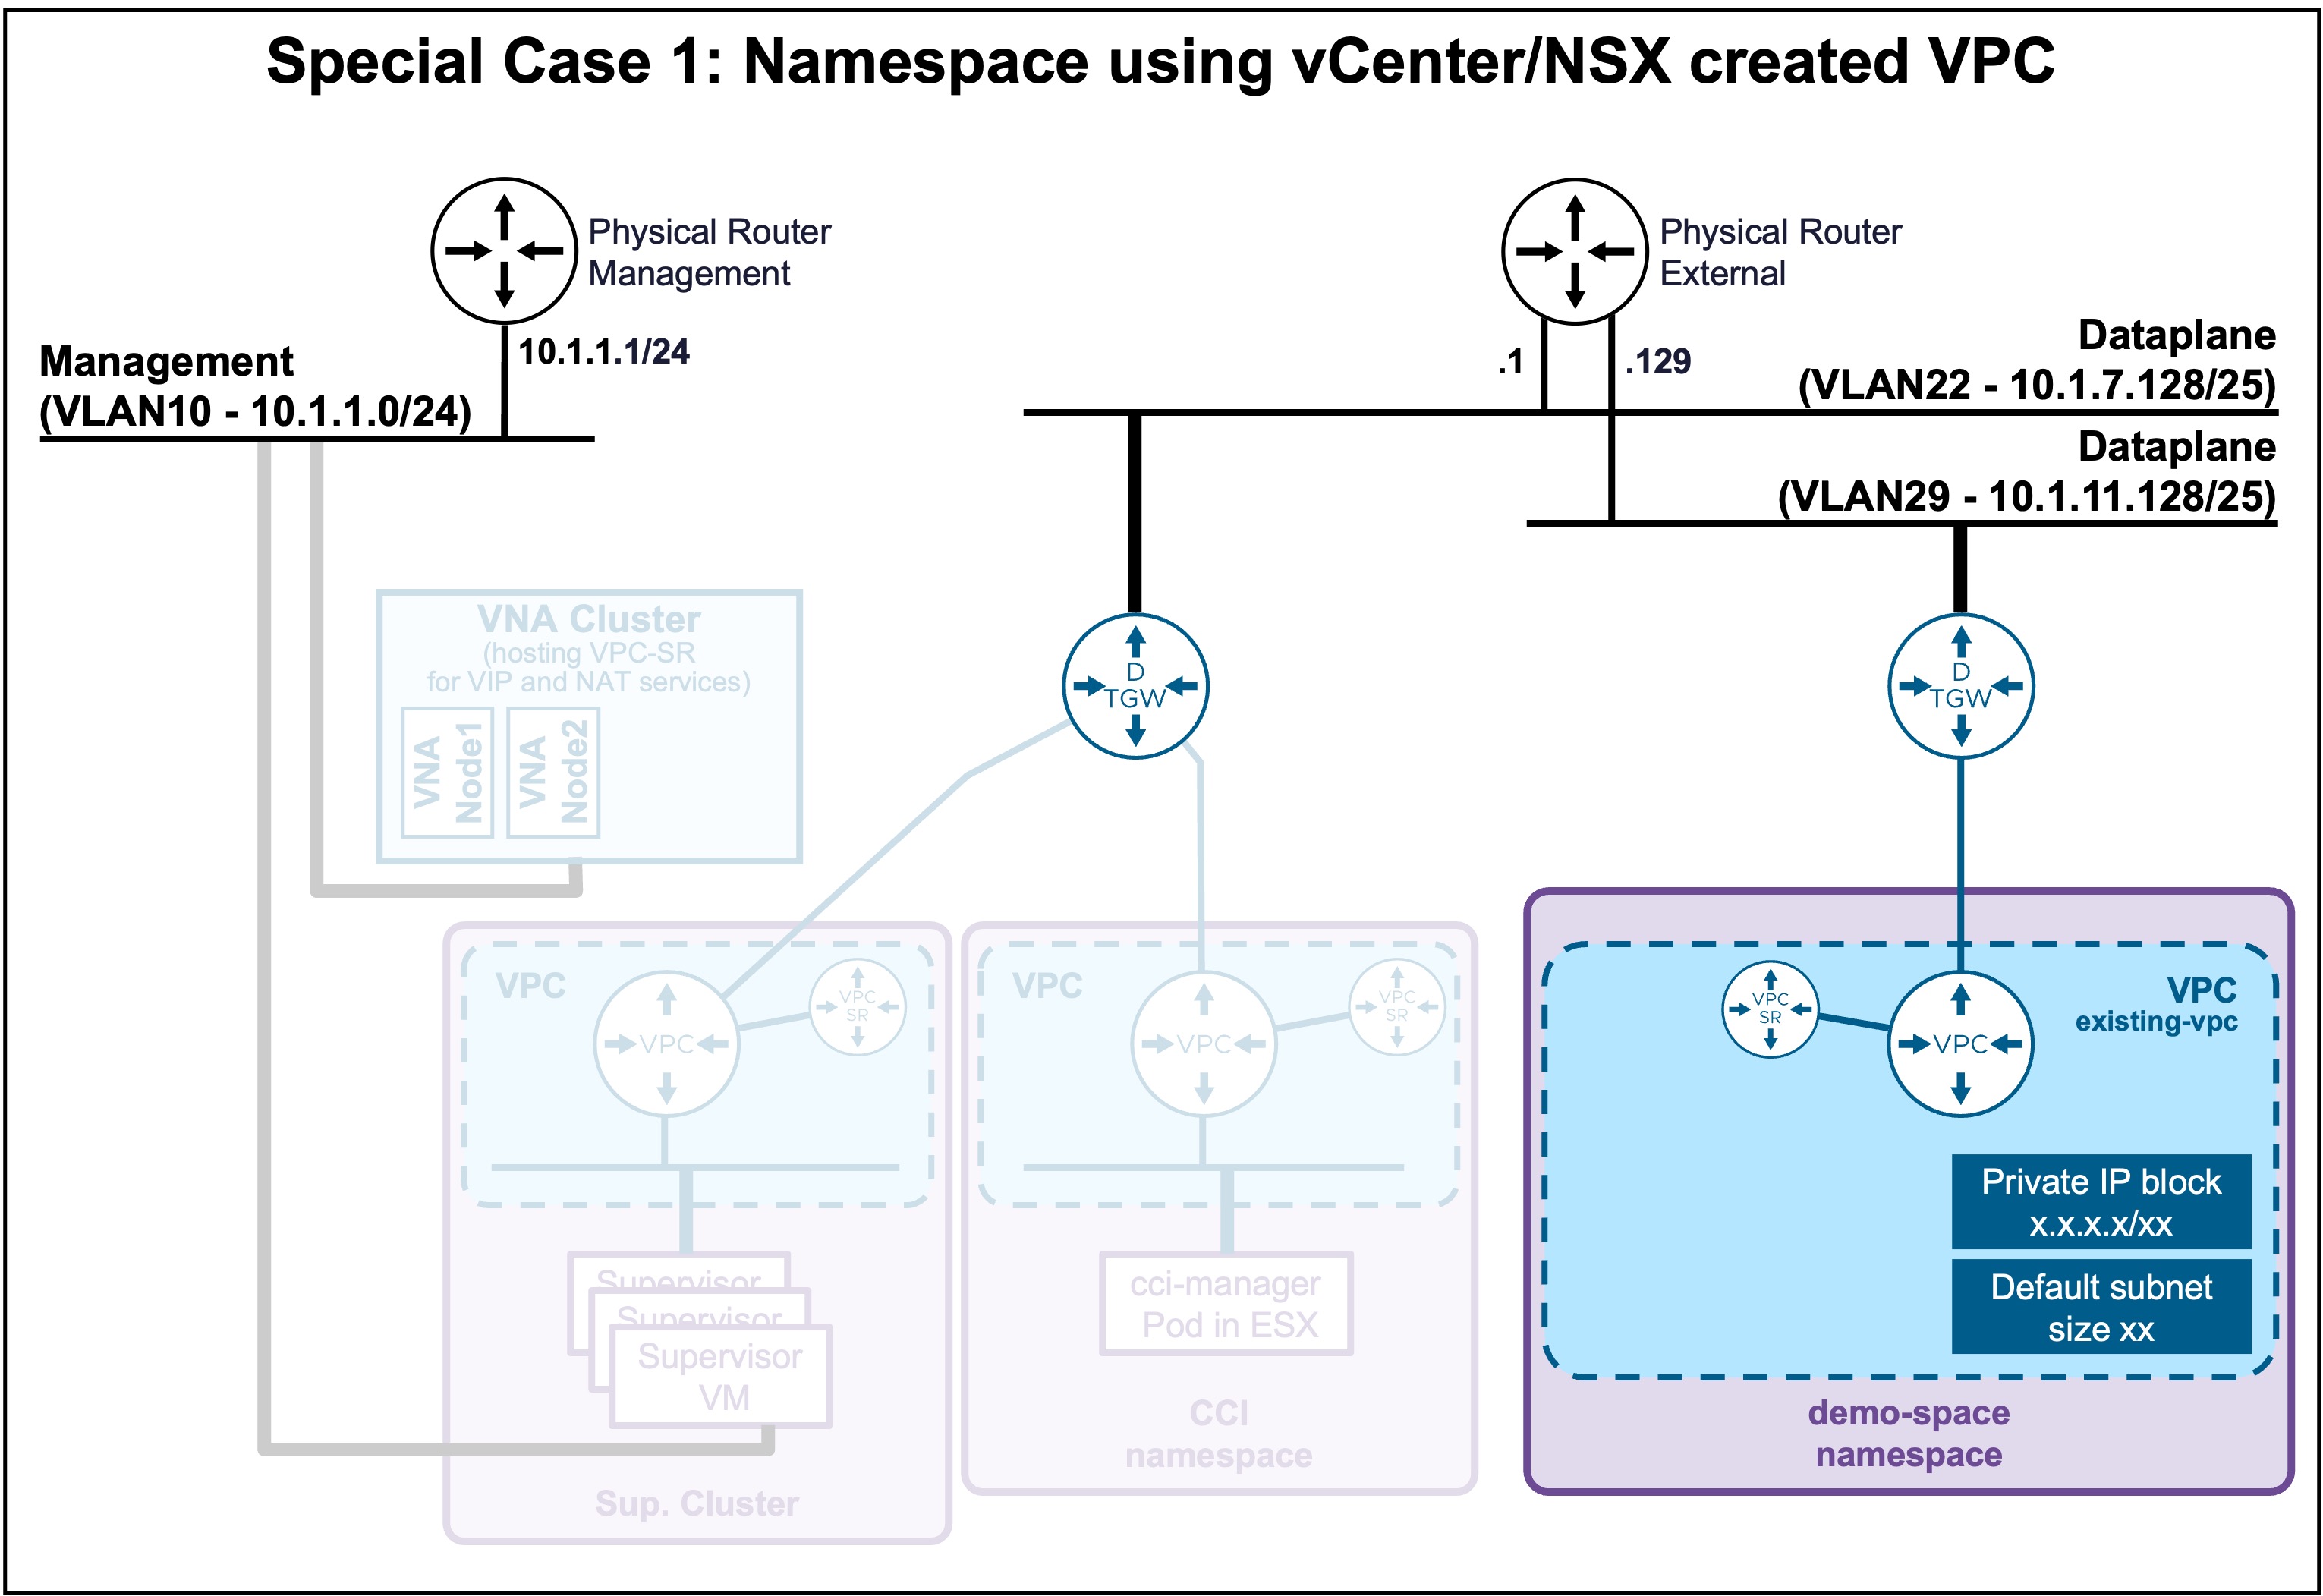
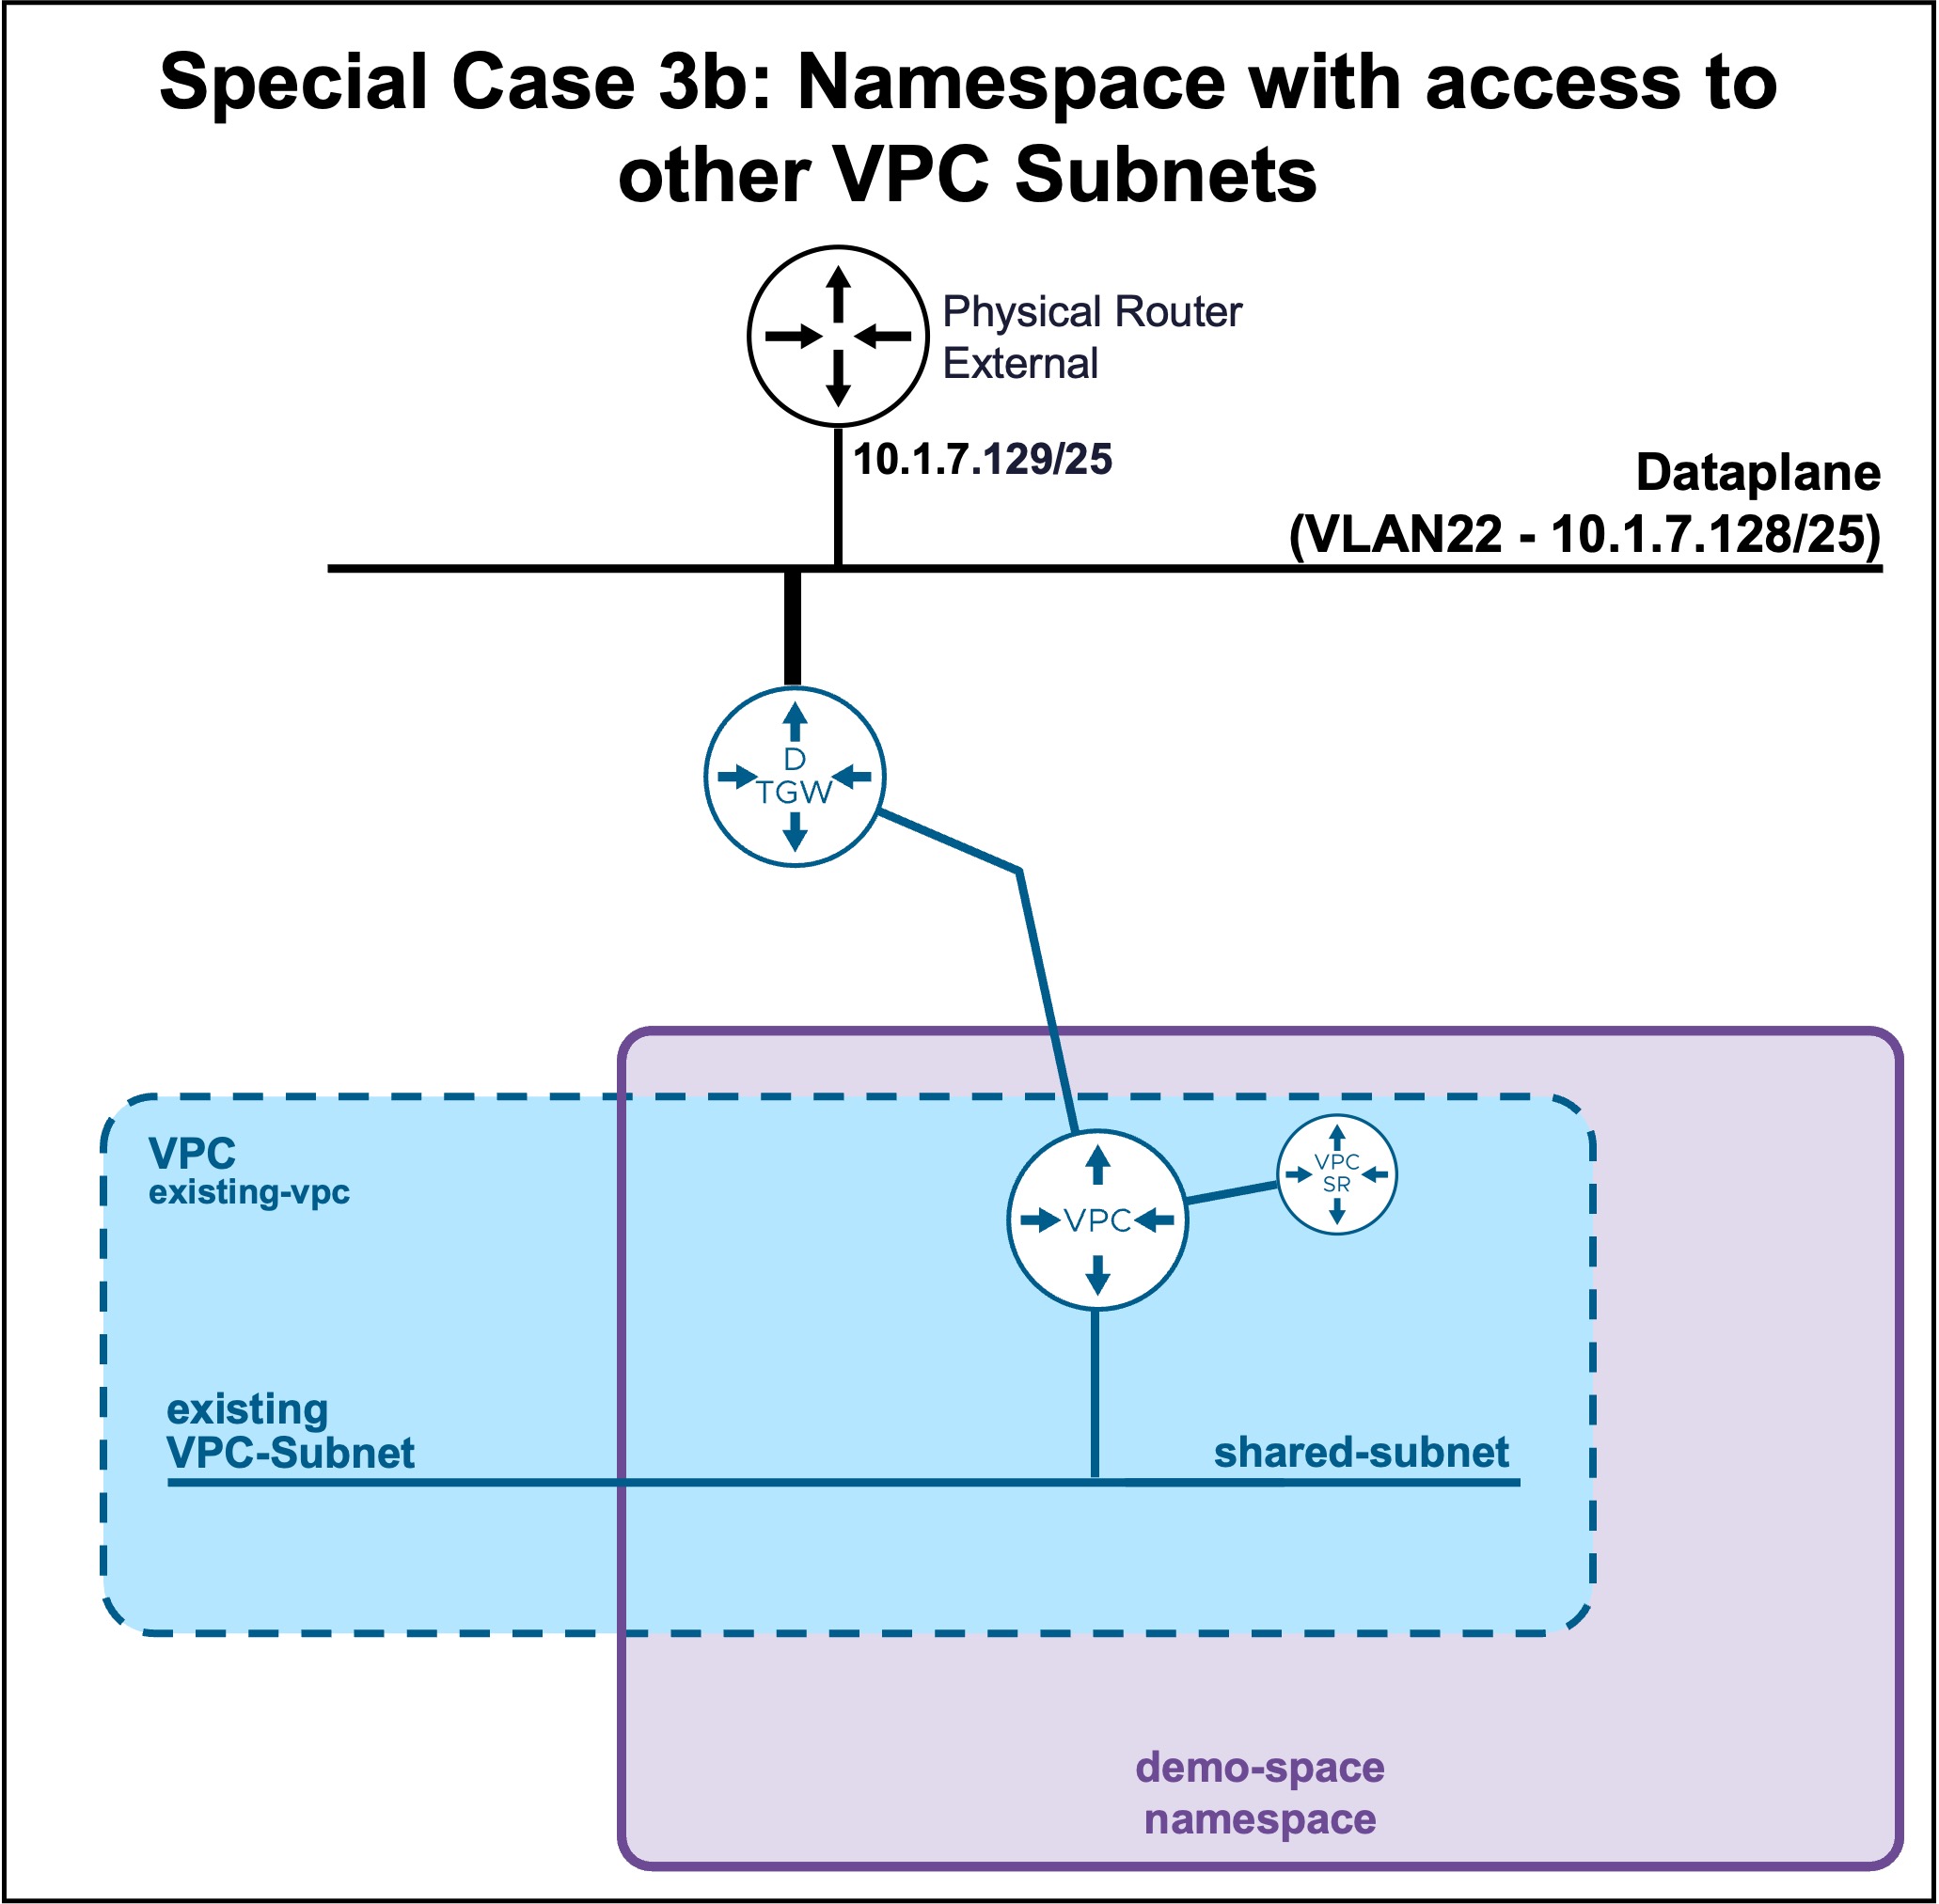
Use Case1: Deploy that namespace with an existing VPC
The typical use case is to have a namespace exiting via another External Connection than the one Supervisor uses.
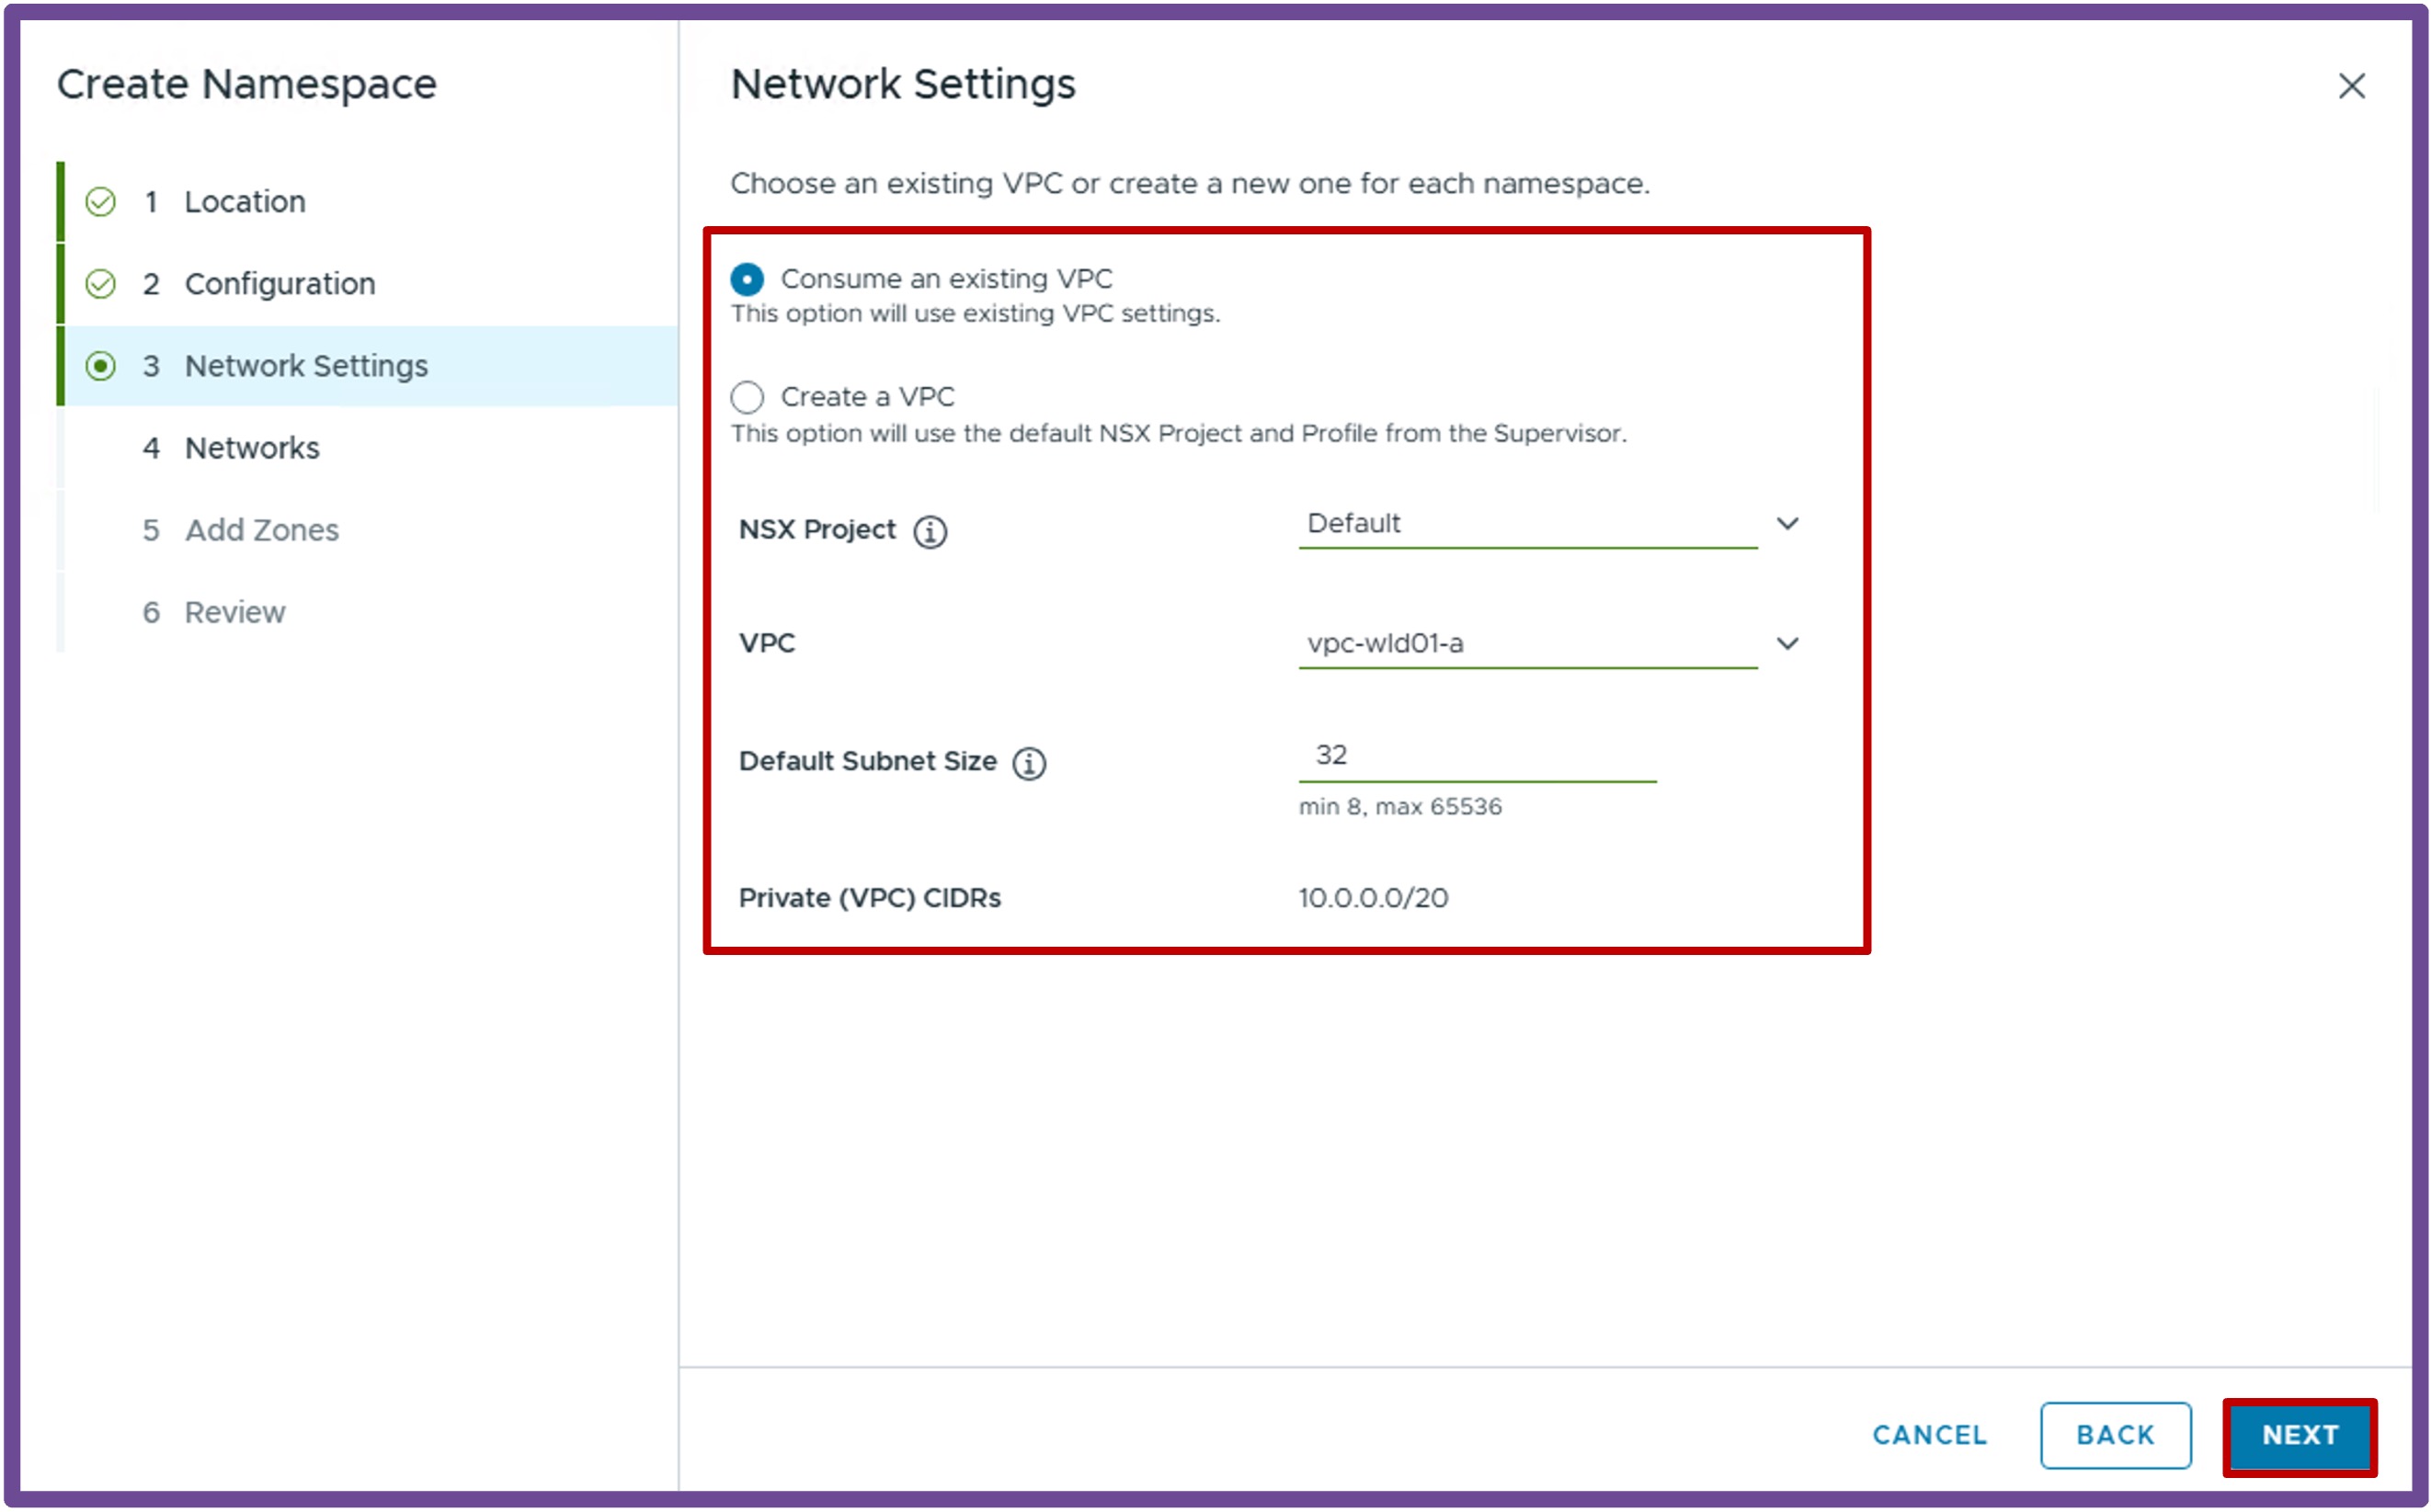
 Select Consume an existing VPC, select the Project / VPC, Default Subnet Size (number power of 2) for future subnets, and click Next.
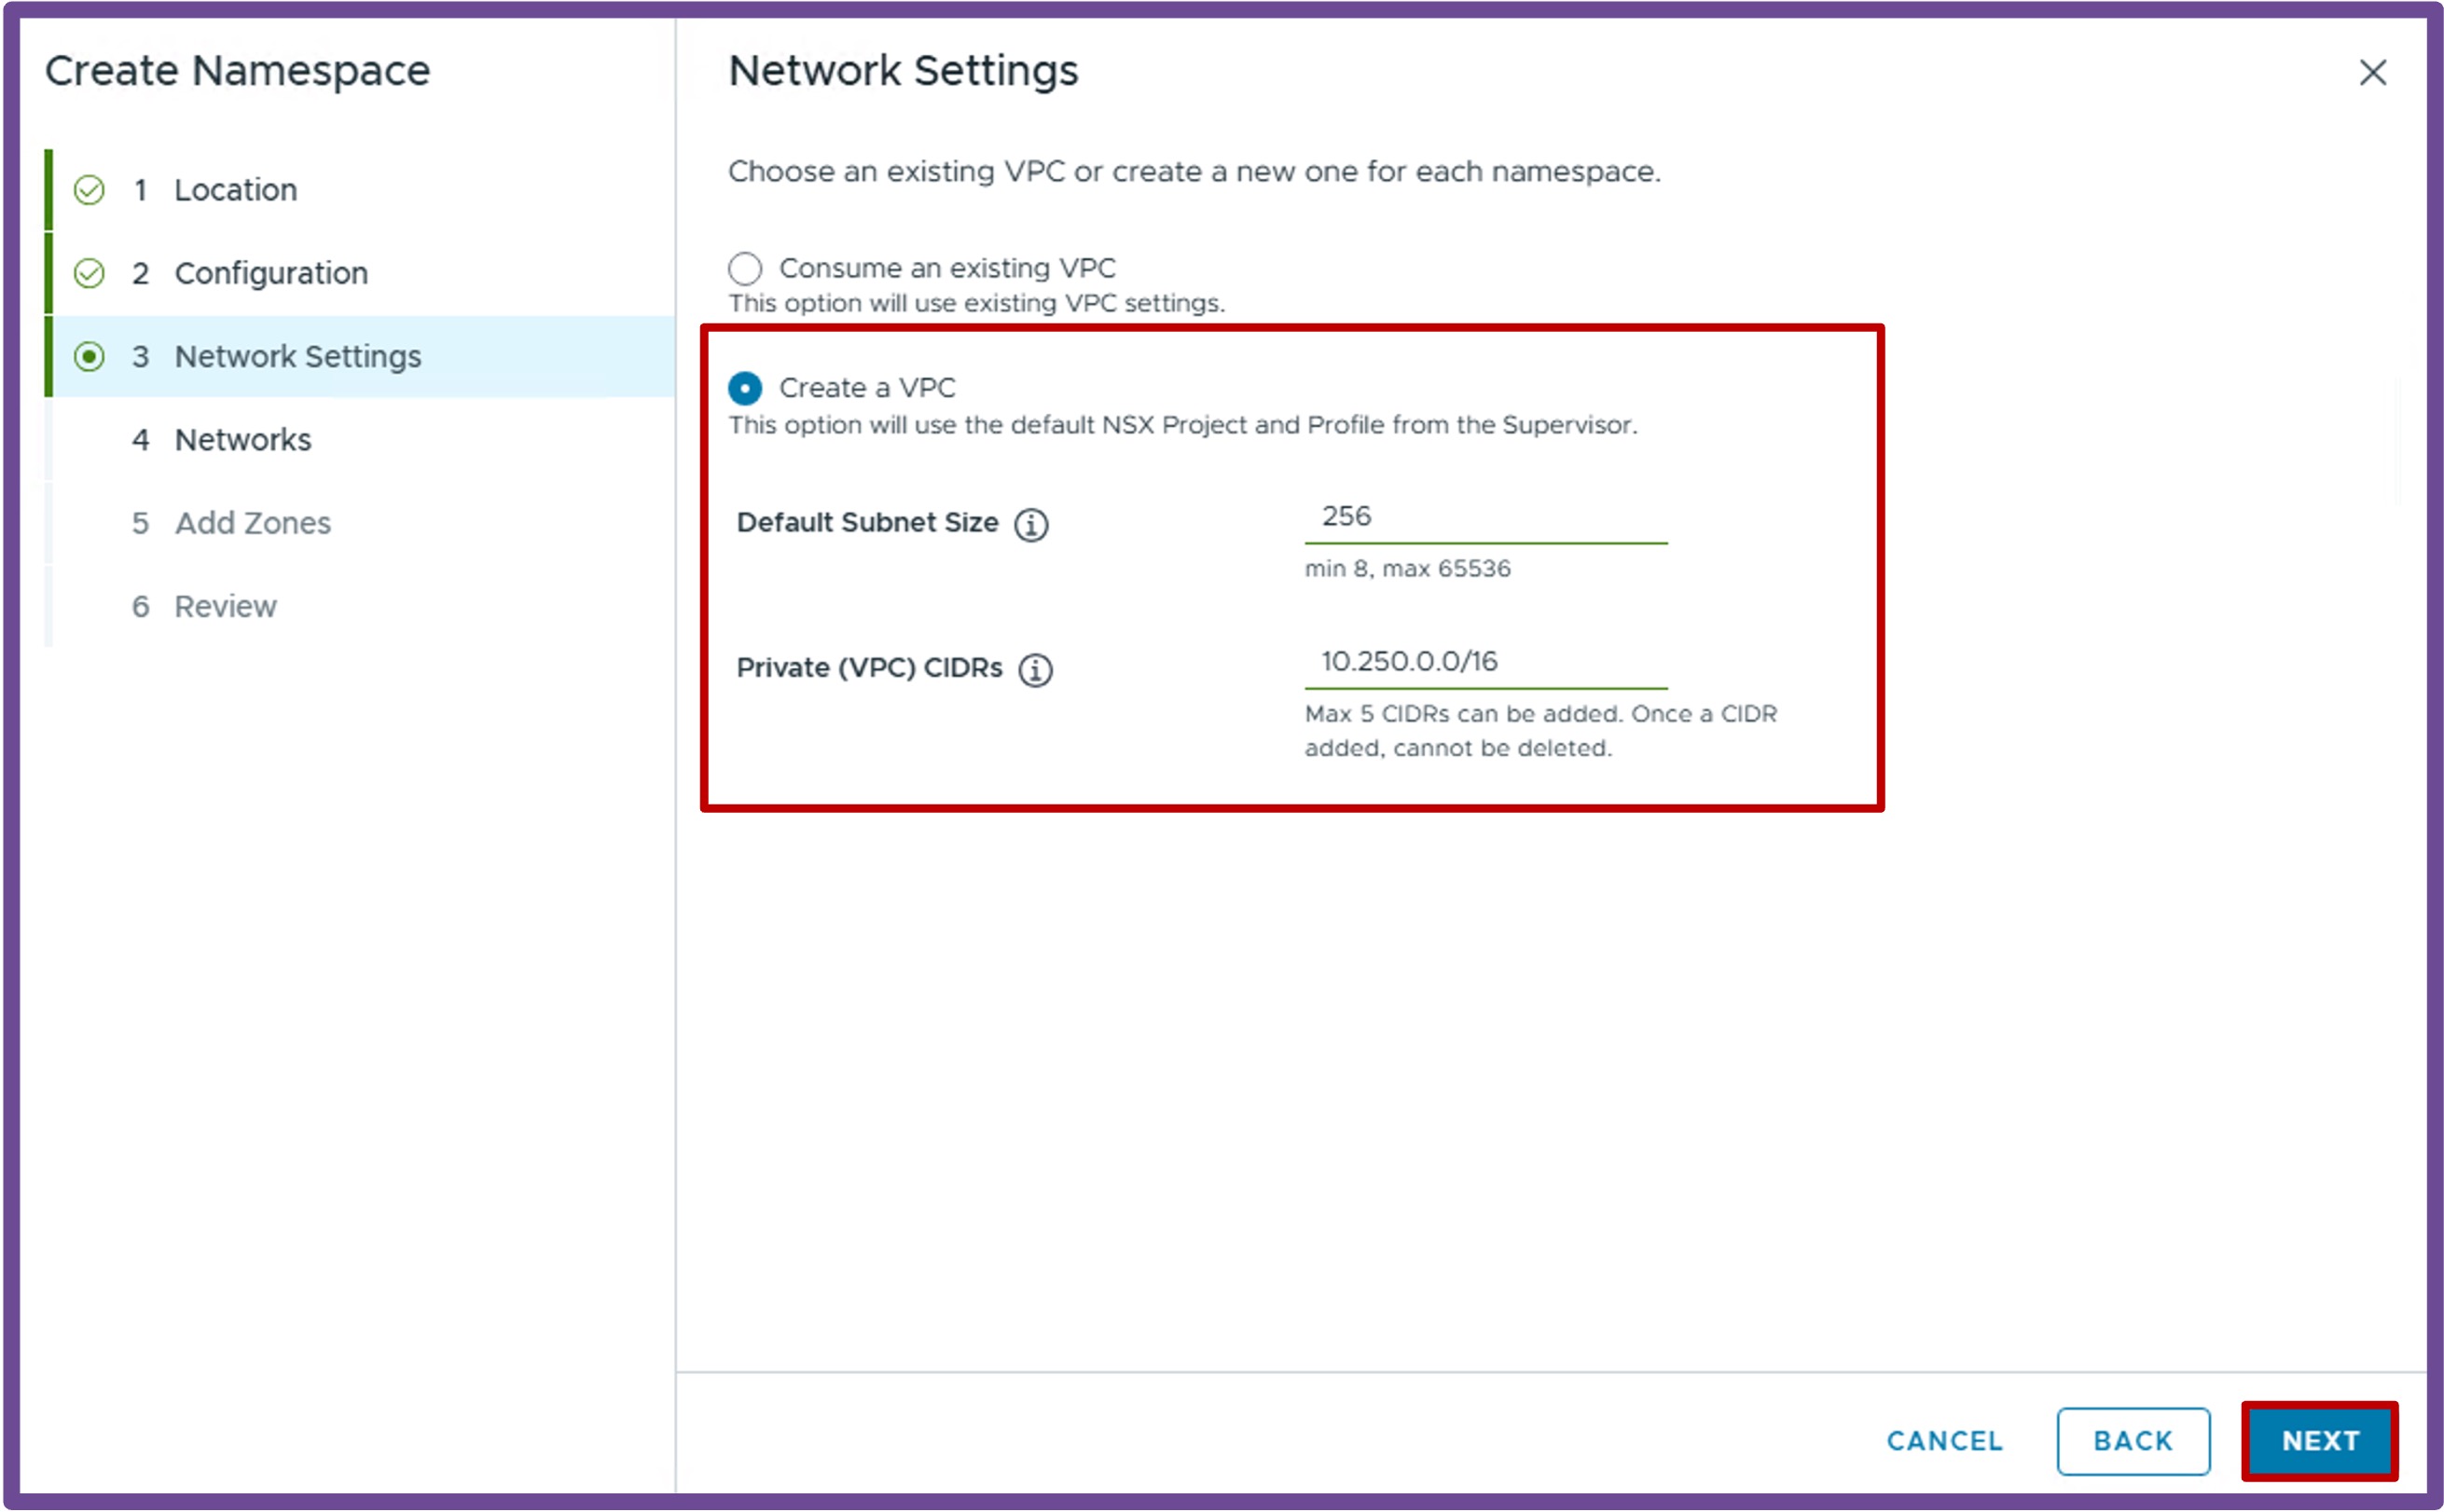
Use Case2: Deploy that namespace with a new VPC with different Default Subnet Size and Private VPC CIDRs settings
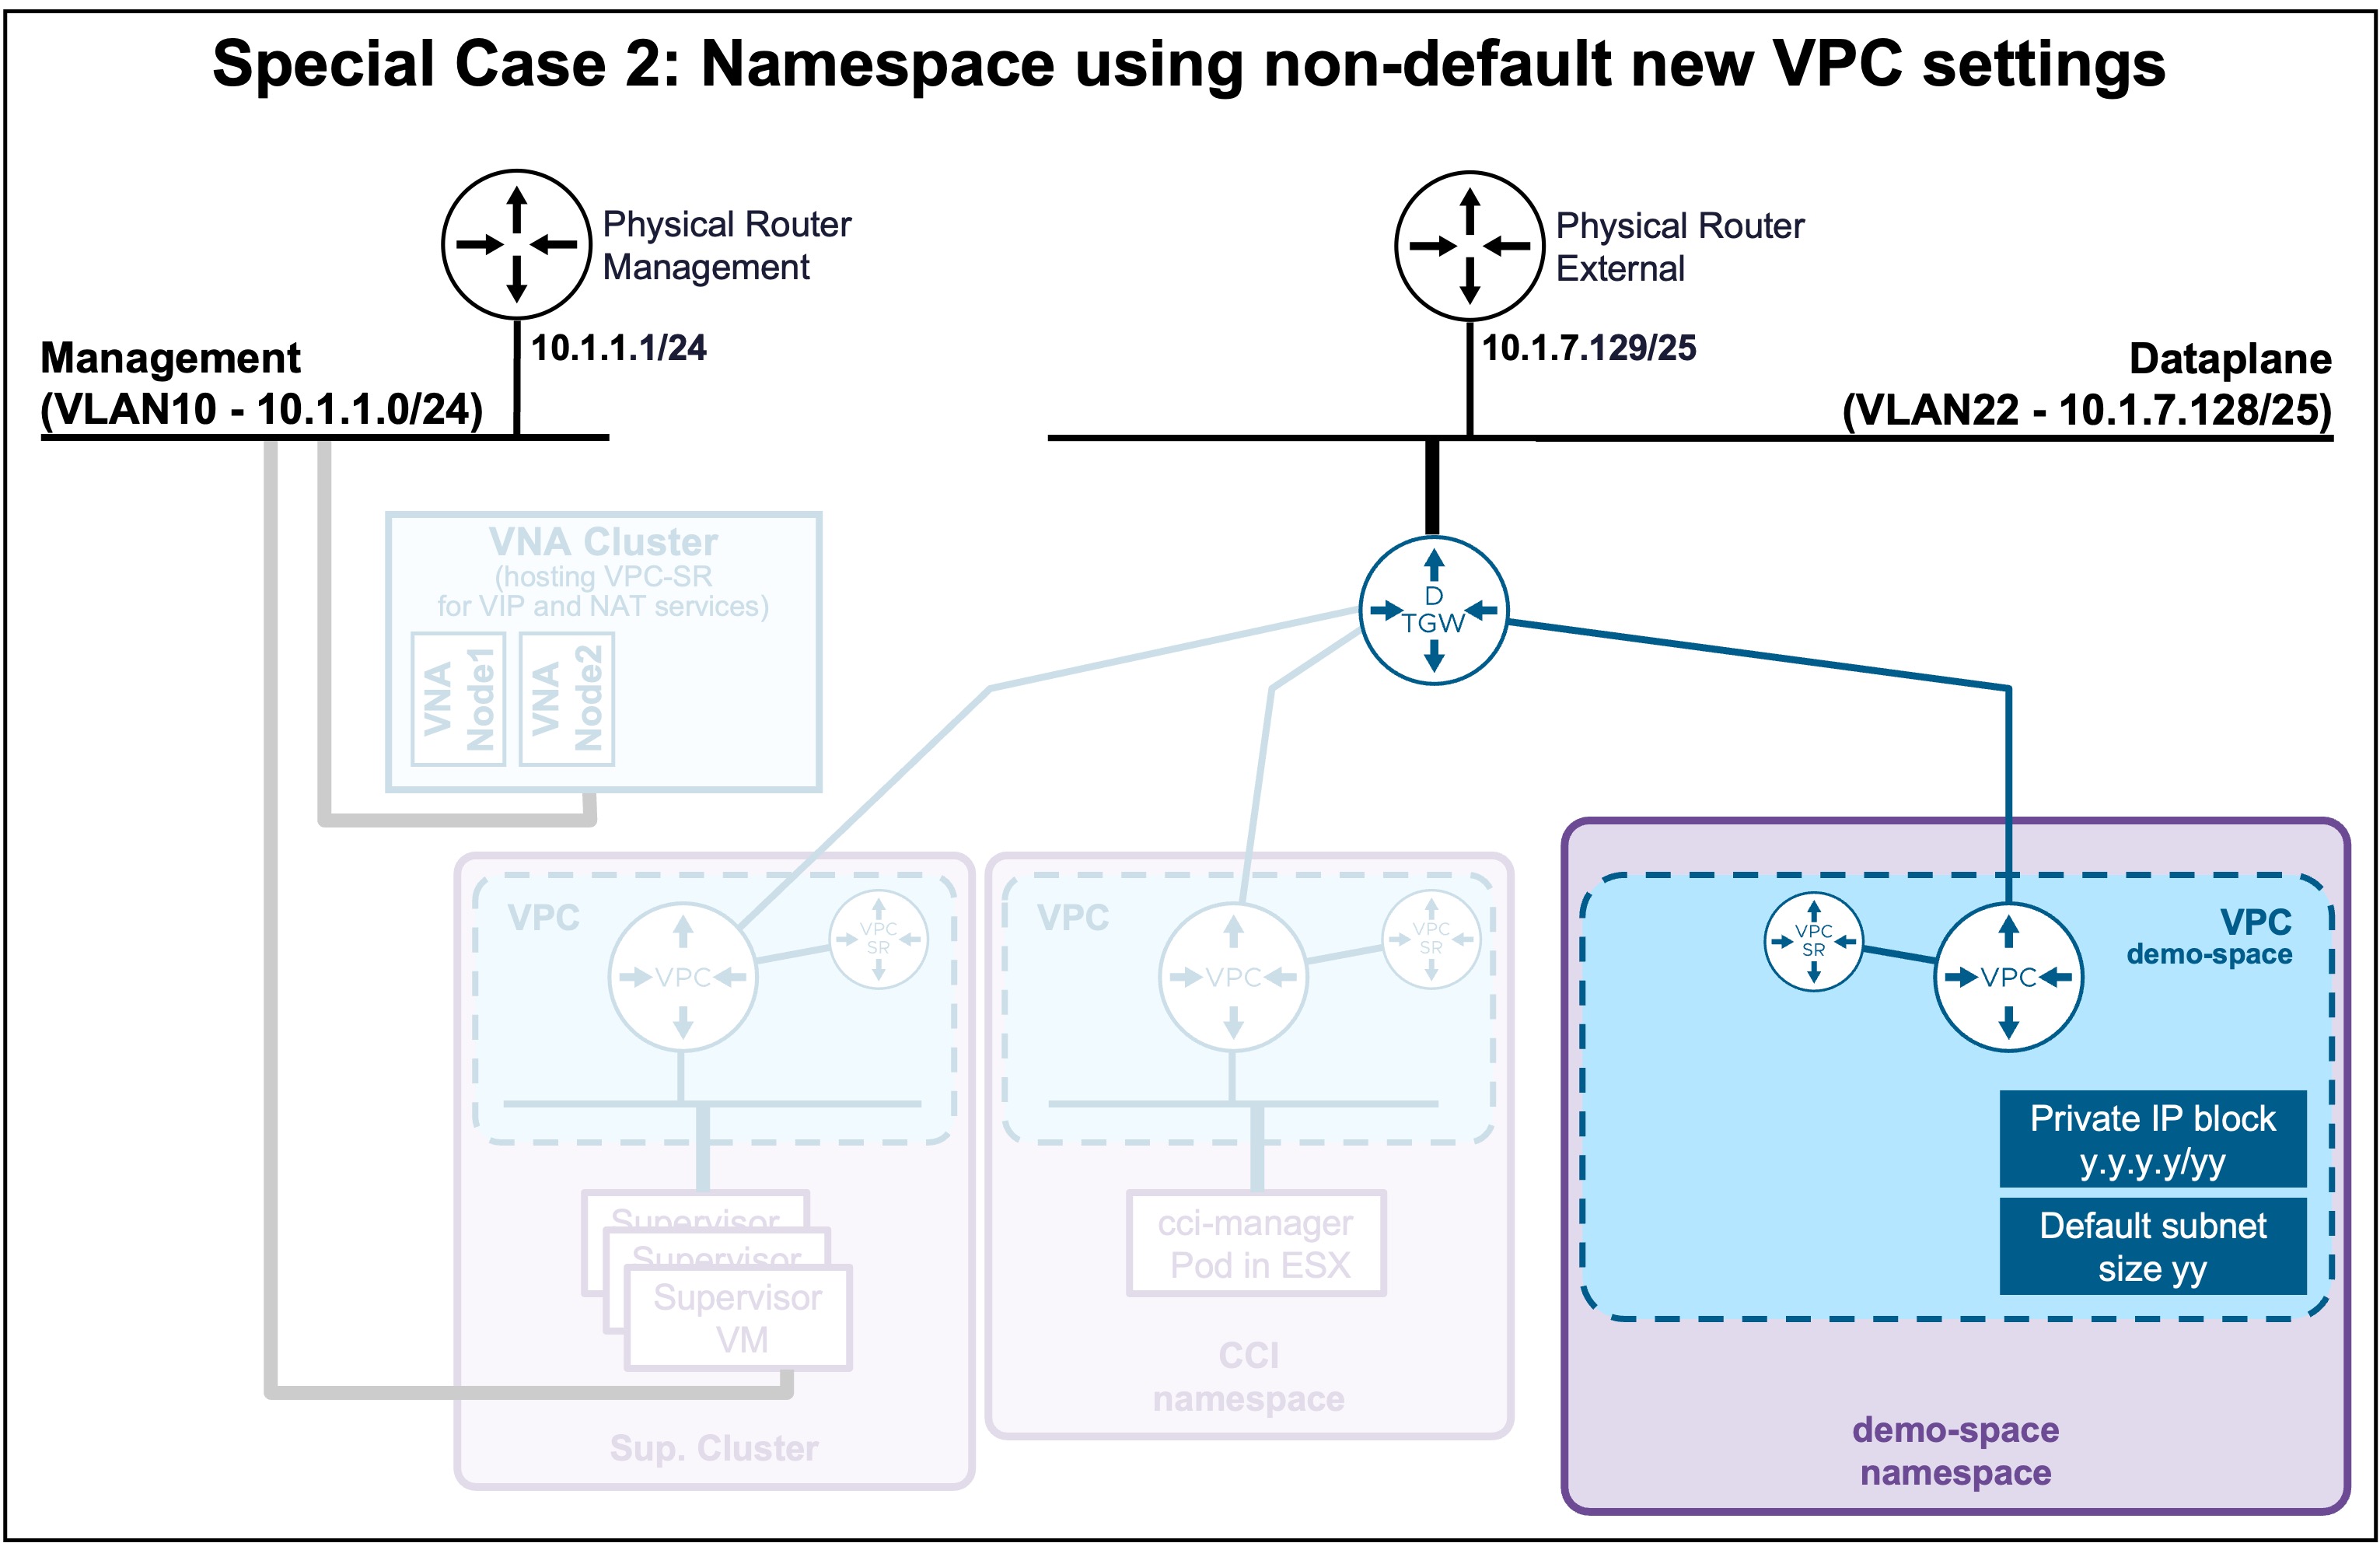 Configure a Default Subnet Size (number power of 2) for future subnets, a Private (VPC) CIDRs, and click Next.
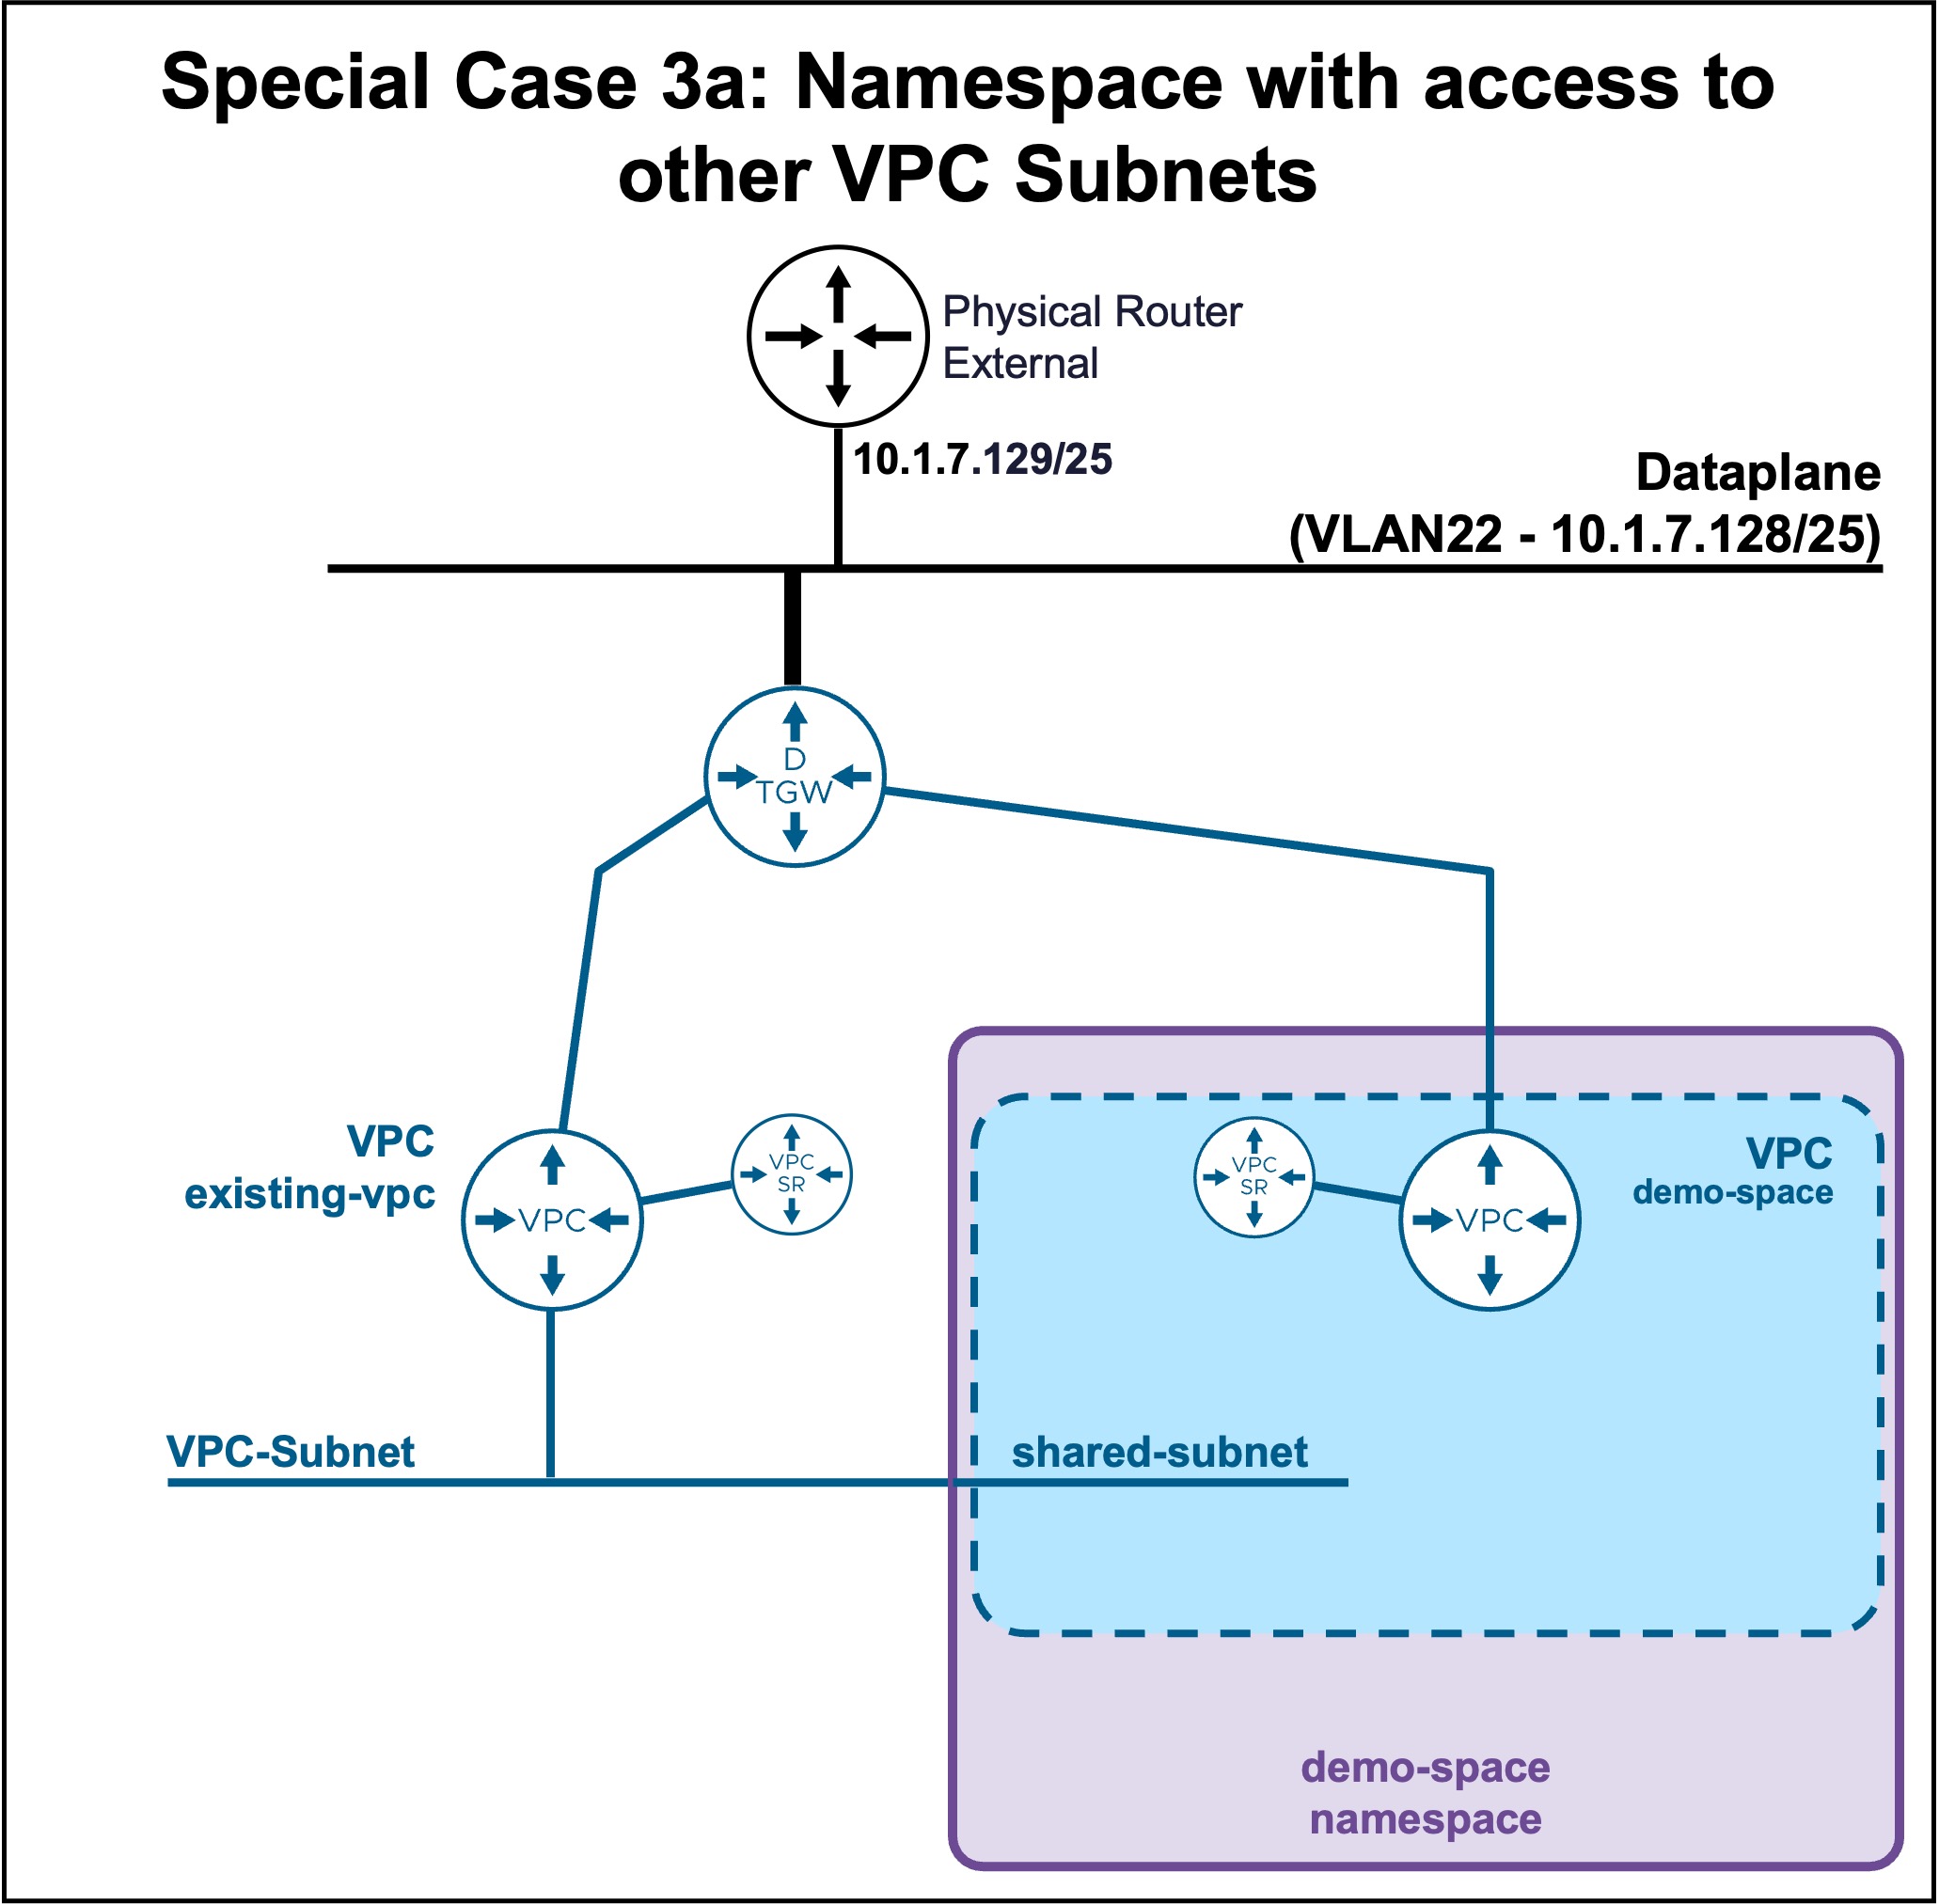
Use Case3: Provide Access to other VPC Subnets to this new namespace
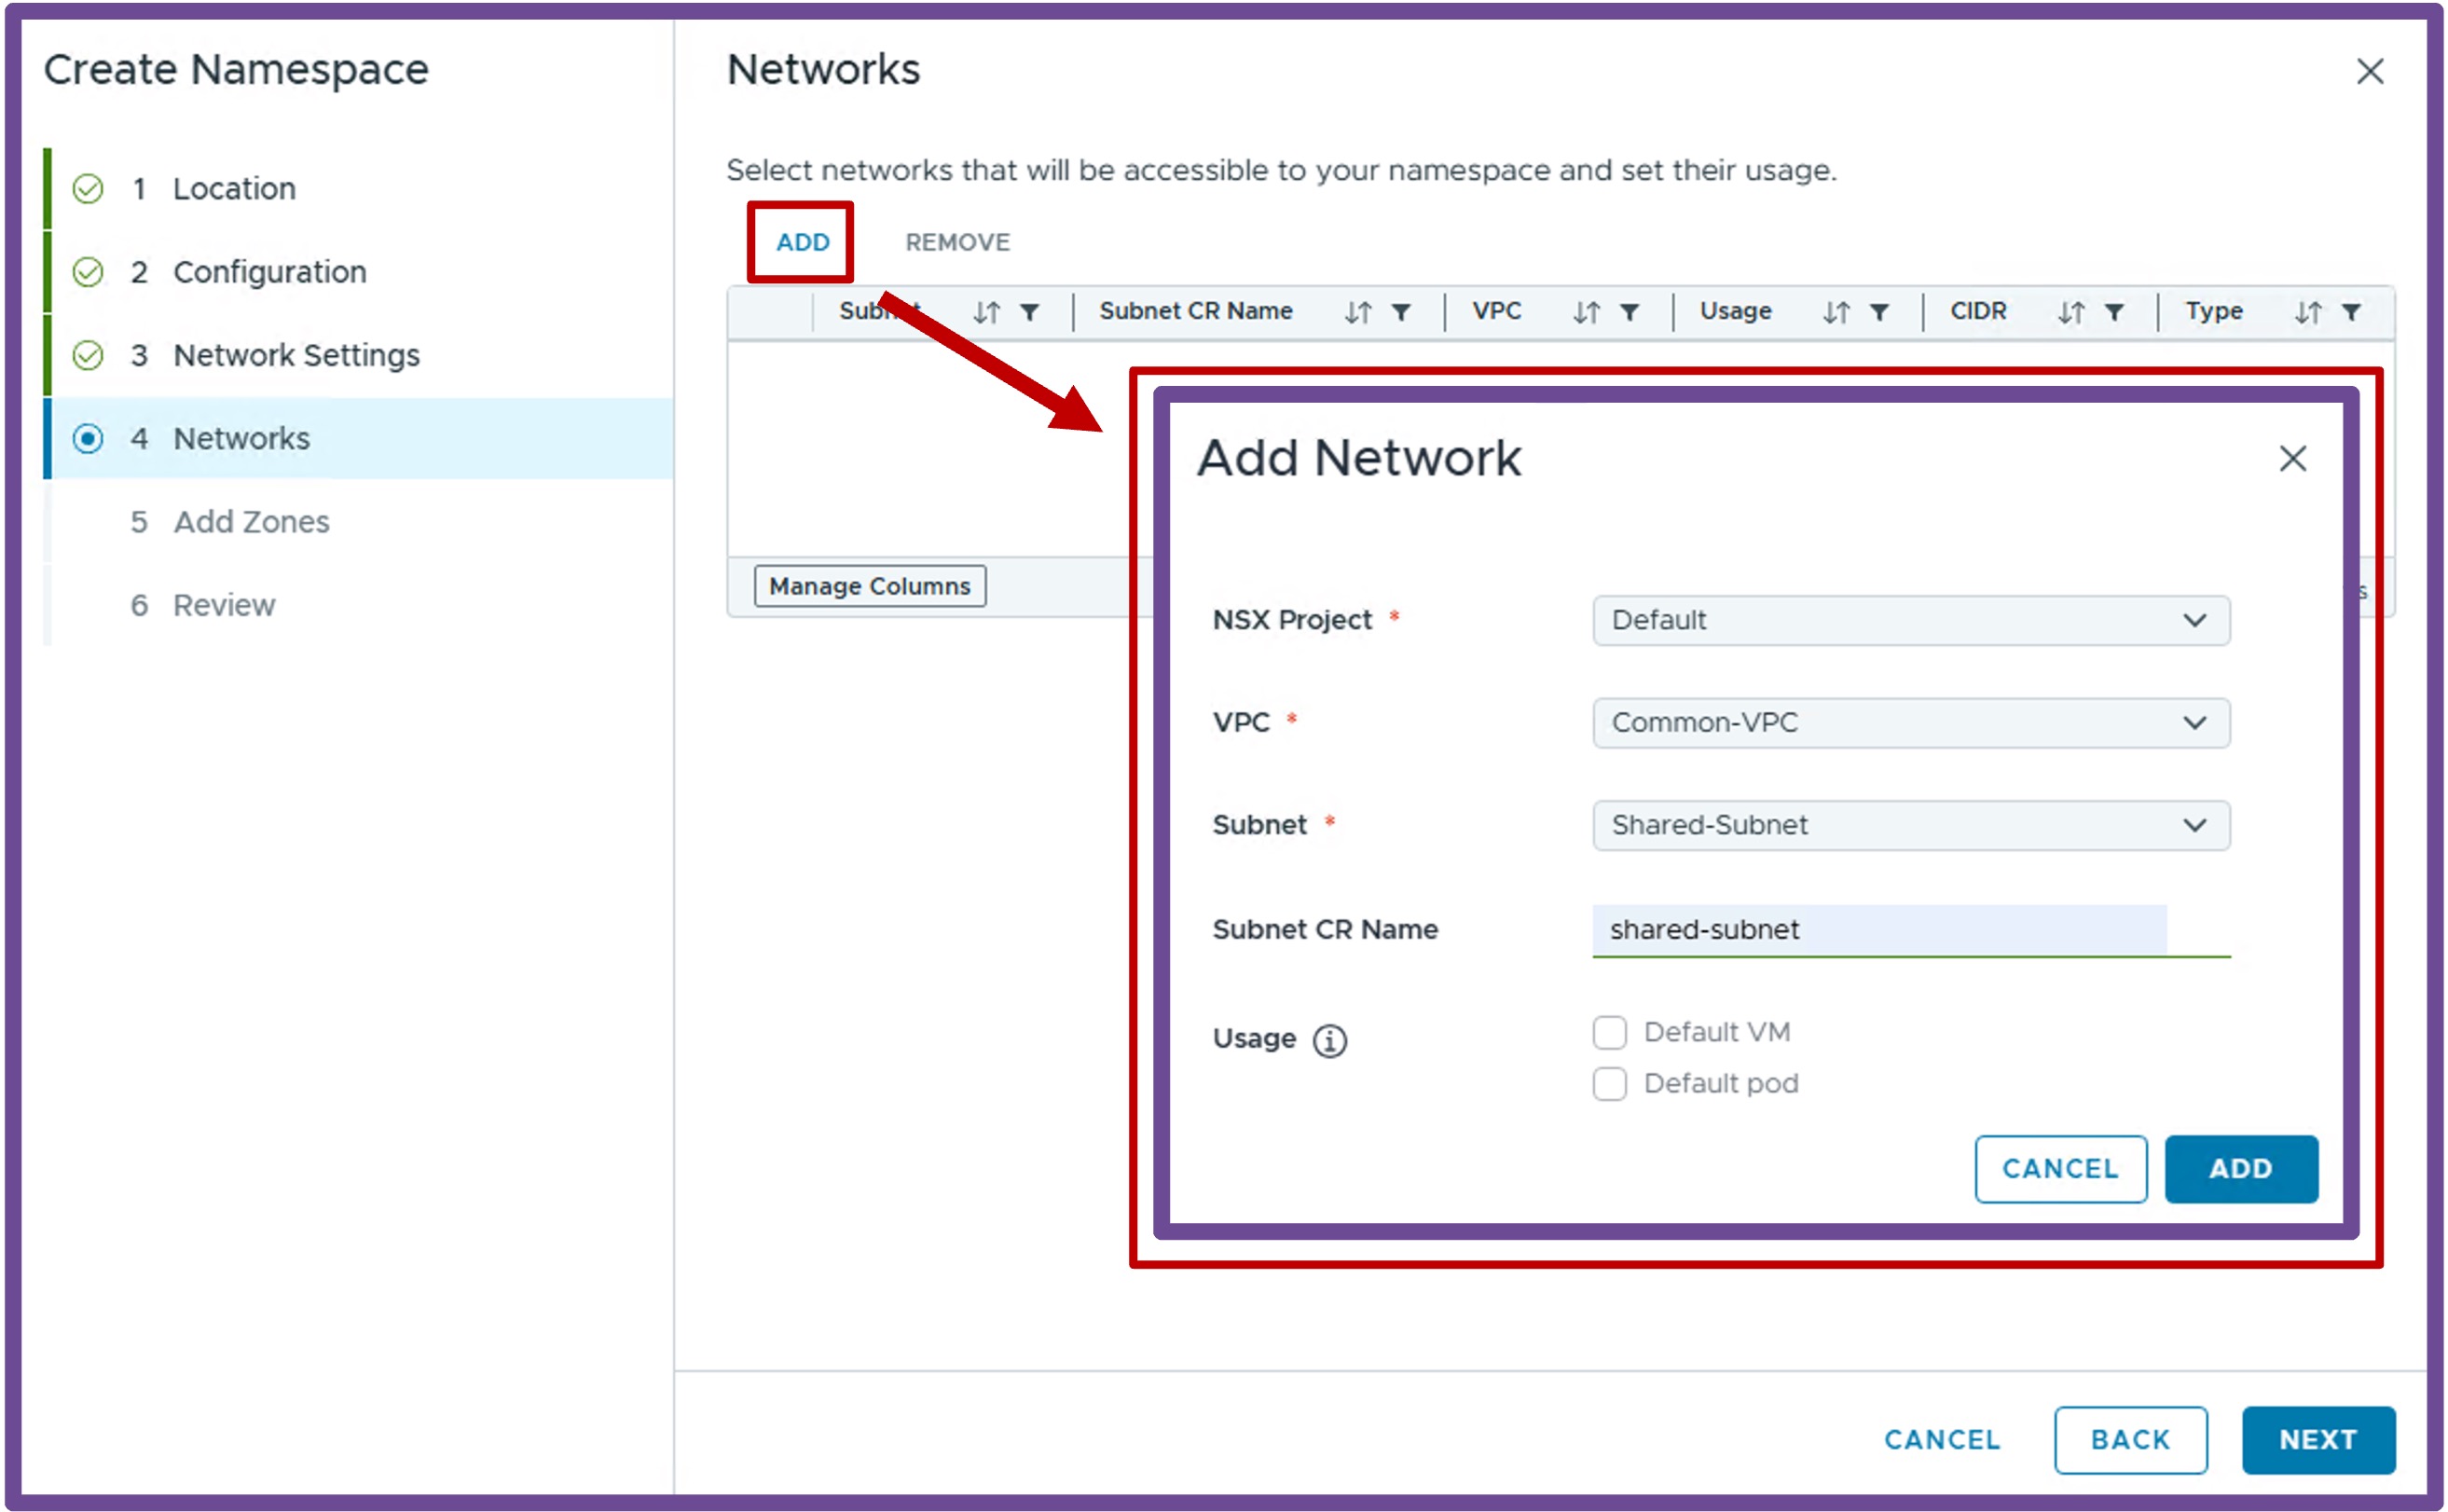 Add the external VPC Subnet you want to be shared with that namespace.
 For this subnet to be used by default for future VMs and/or pods, that subnet must be on the VPC used by that namespace (see above Use Case1).
Use Case4: Enable NSX LB for future VKS deployments when using non default network settings (non needed if using AVI LB)
Future VKS deployments will need an Load Balancing (LB) service.
The LB service canbe offered by NSX or Avi.
When a namespace is deployed with the default network settings, NSX LB is automatically enabled (unless AVI LB is available in the Supervisor).
However, when a namespace is deploy with non-default network settings, then NSX LB must be manually enabled (unless you use AVI LB).
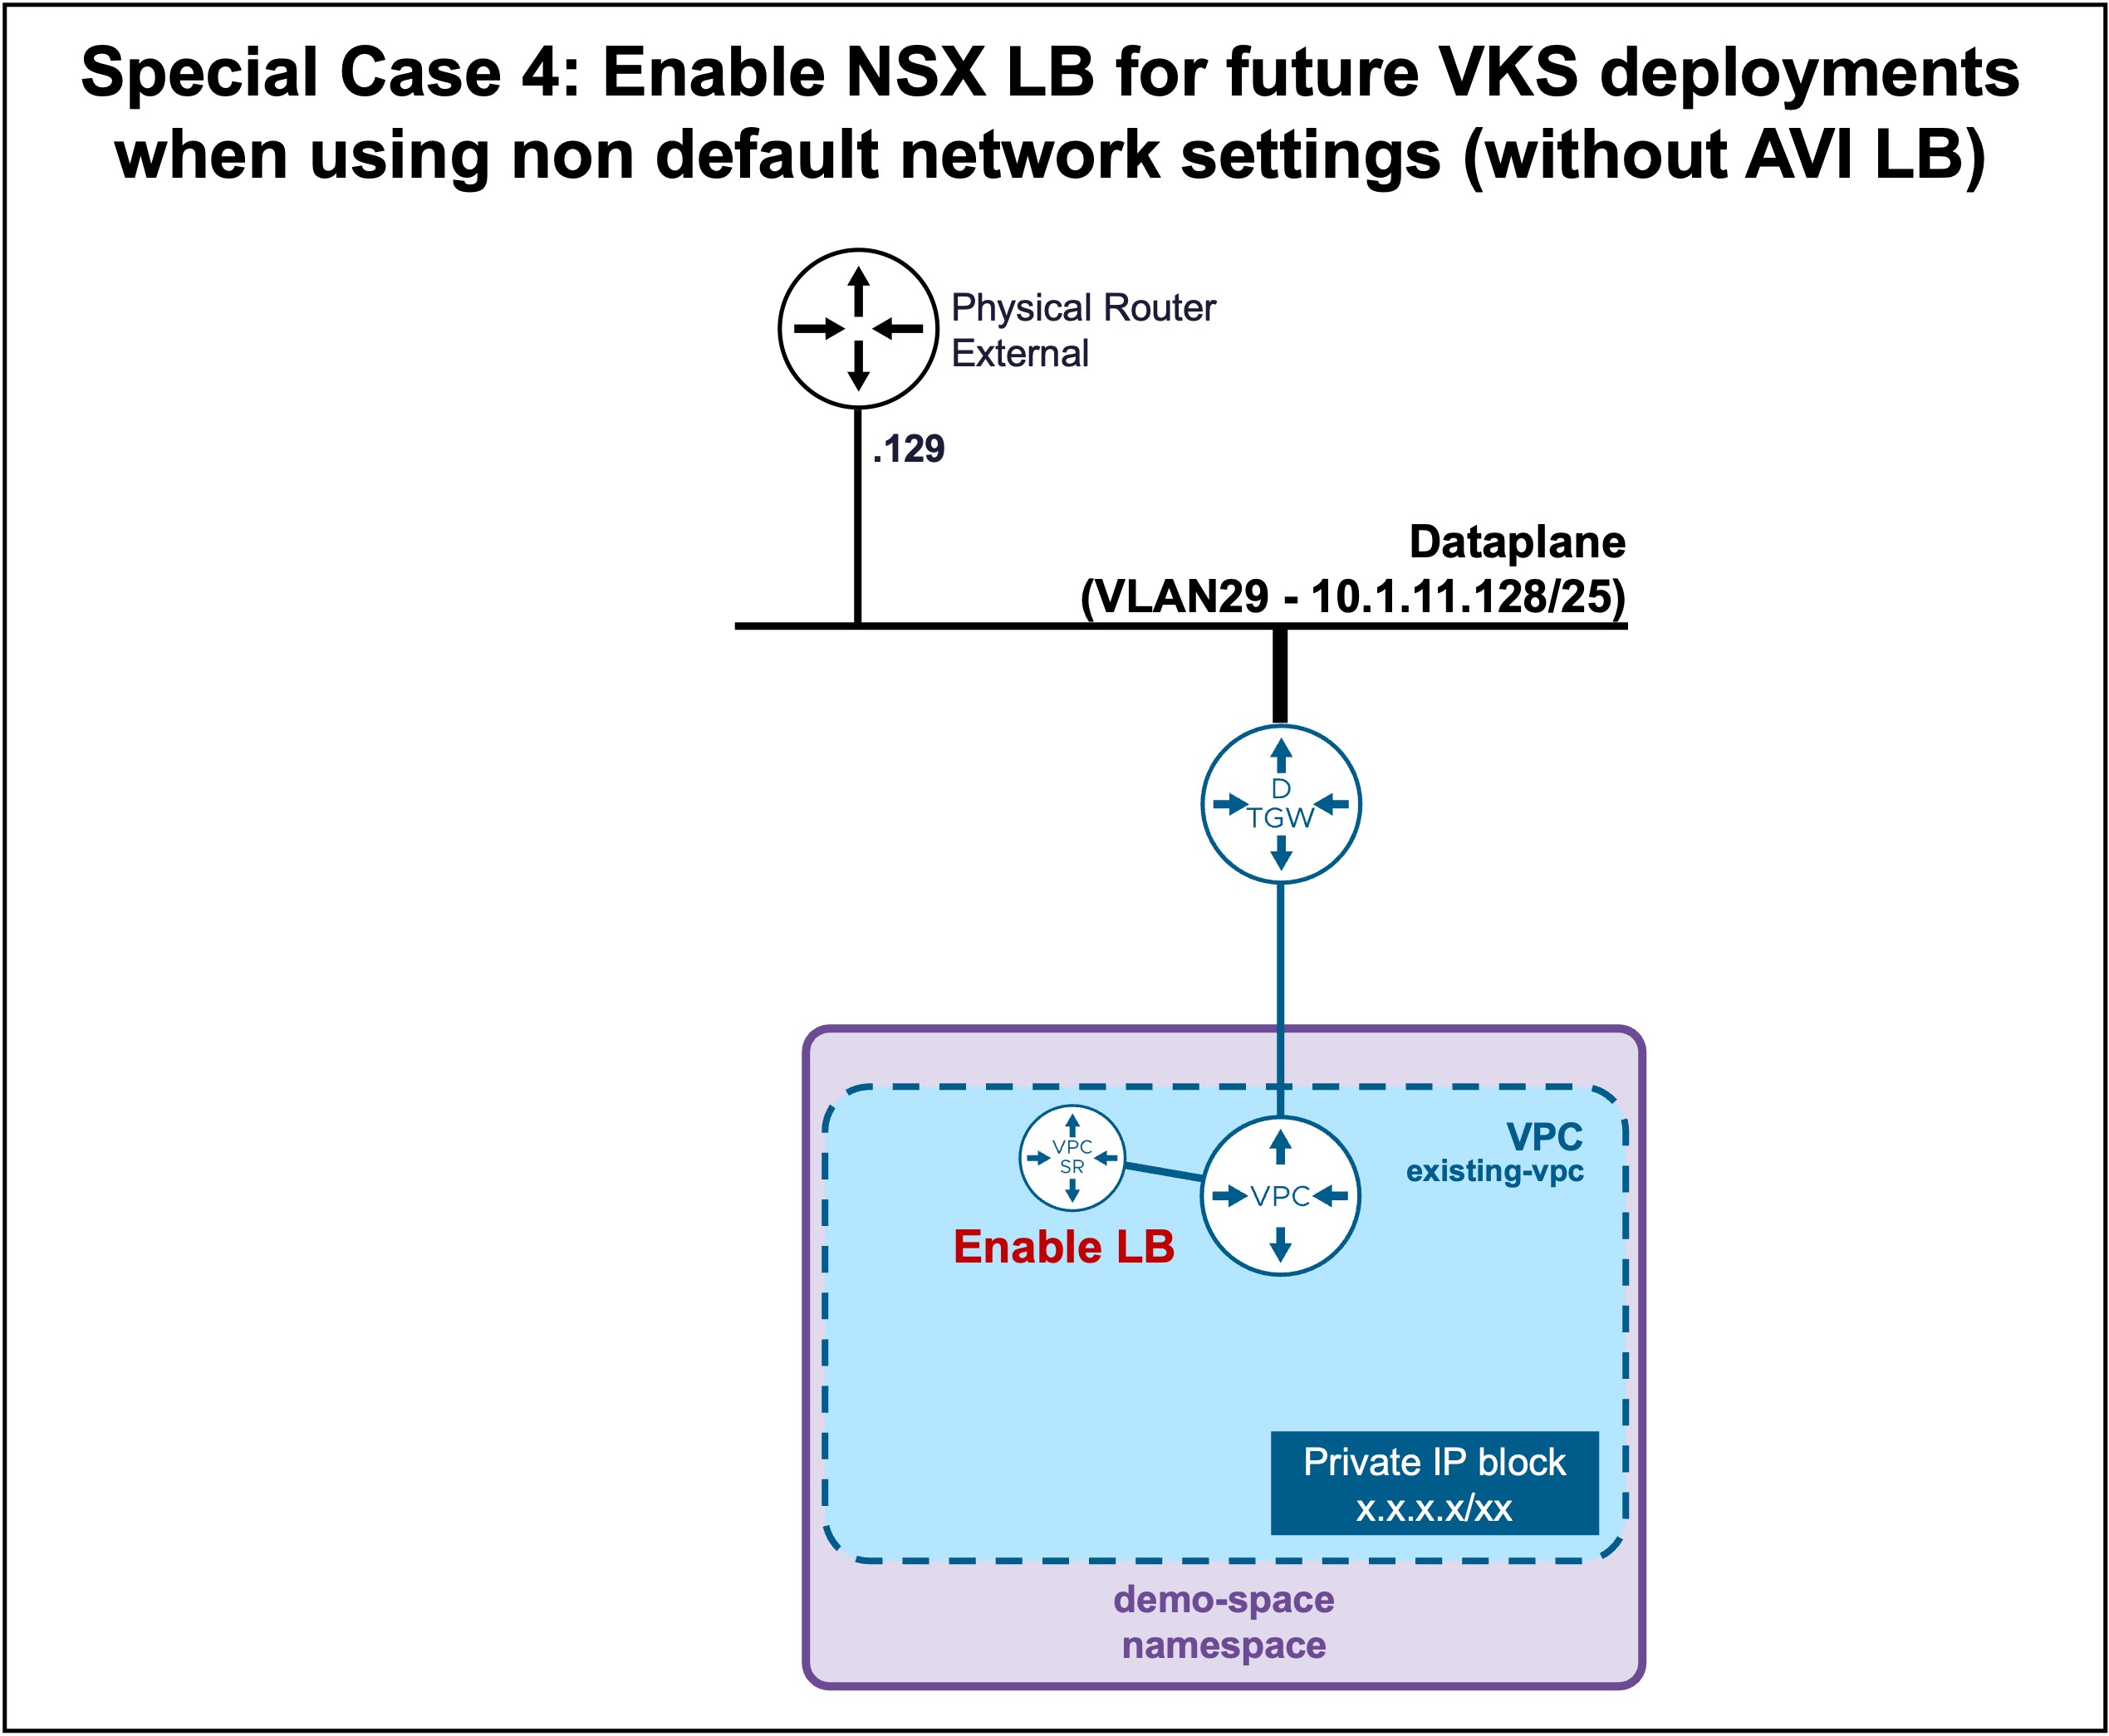 NSX LB can be enabled is a non-default namespace VPC currently only via NSX-API.
PUT https://[NSX-Mgr]/policy/api/v1/orgs/default/projects/[project-name]/vpcs/[vpc-name]/vpc-lbs/lb-1
{
    "resource_type": "LBService",
    "display_name": "lb-1",
    "enabled": true,
    "size": "SMALL"
}
Output example
curl -k -i -X PUT \
-H "Content-Type: application/json" \
-u 'admin:VMware123!VMware123!' \
"https://nsx-wld01-a.site-a.vcf.lab/policy/api/v1/orgs/default/projects/default/vpcs/vpc-wld01-a/vpc-lbs/lb-1" \
-d '{
    "resource_type": "LBService",
    "display_name": "lb-1",
    "enabled": true,
    "size": "SMALL"
}'
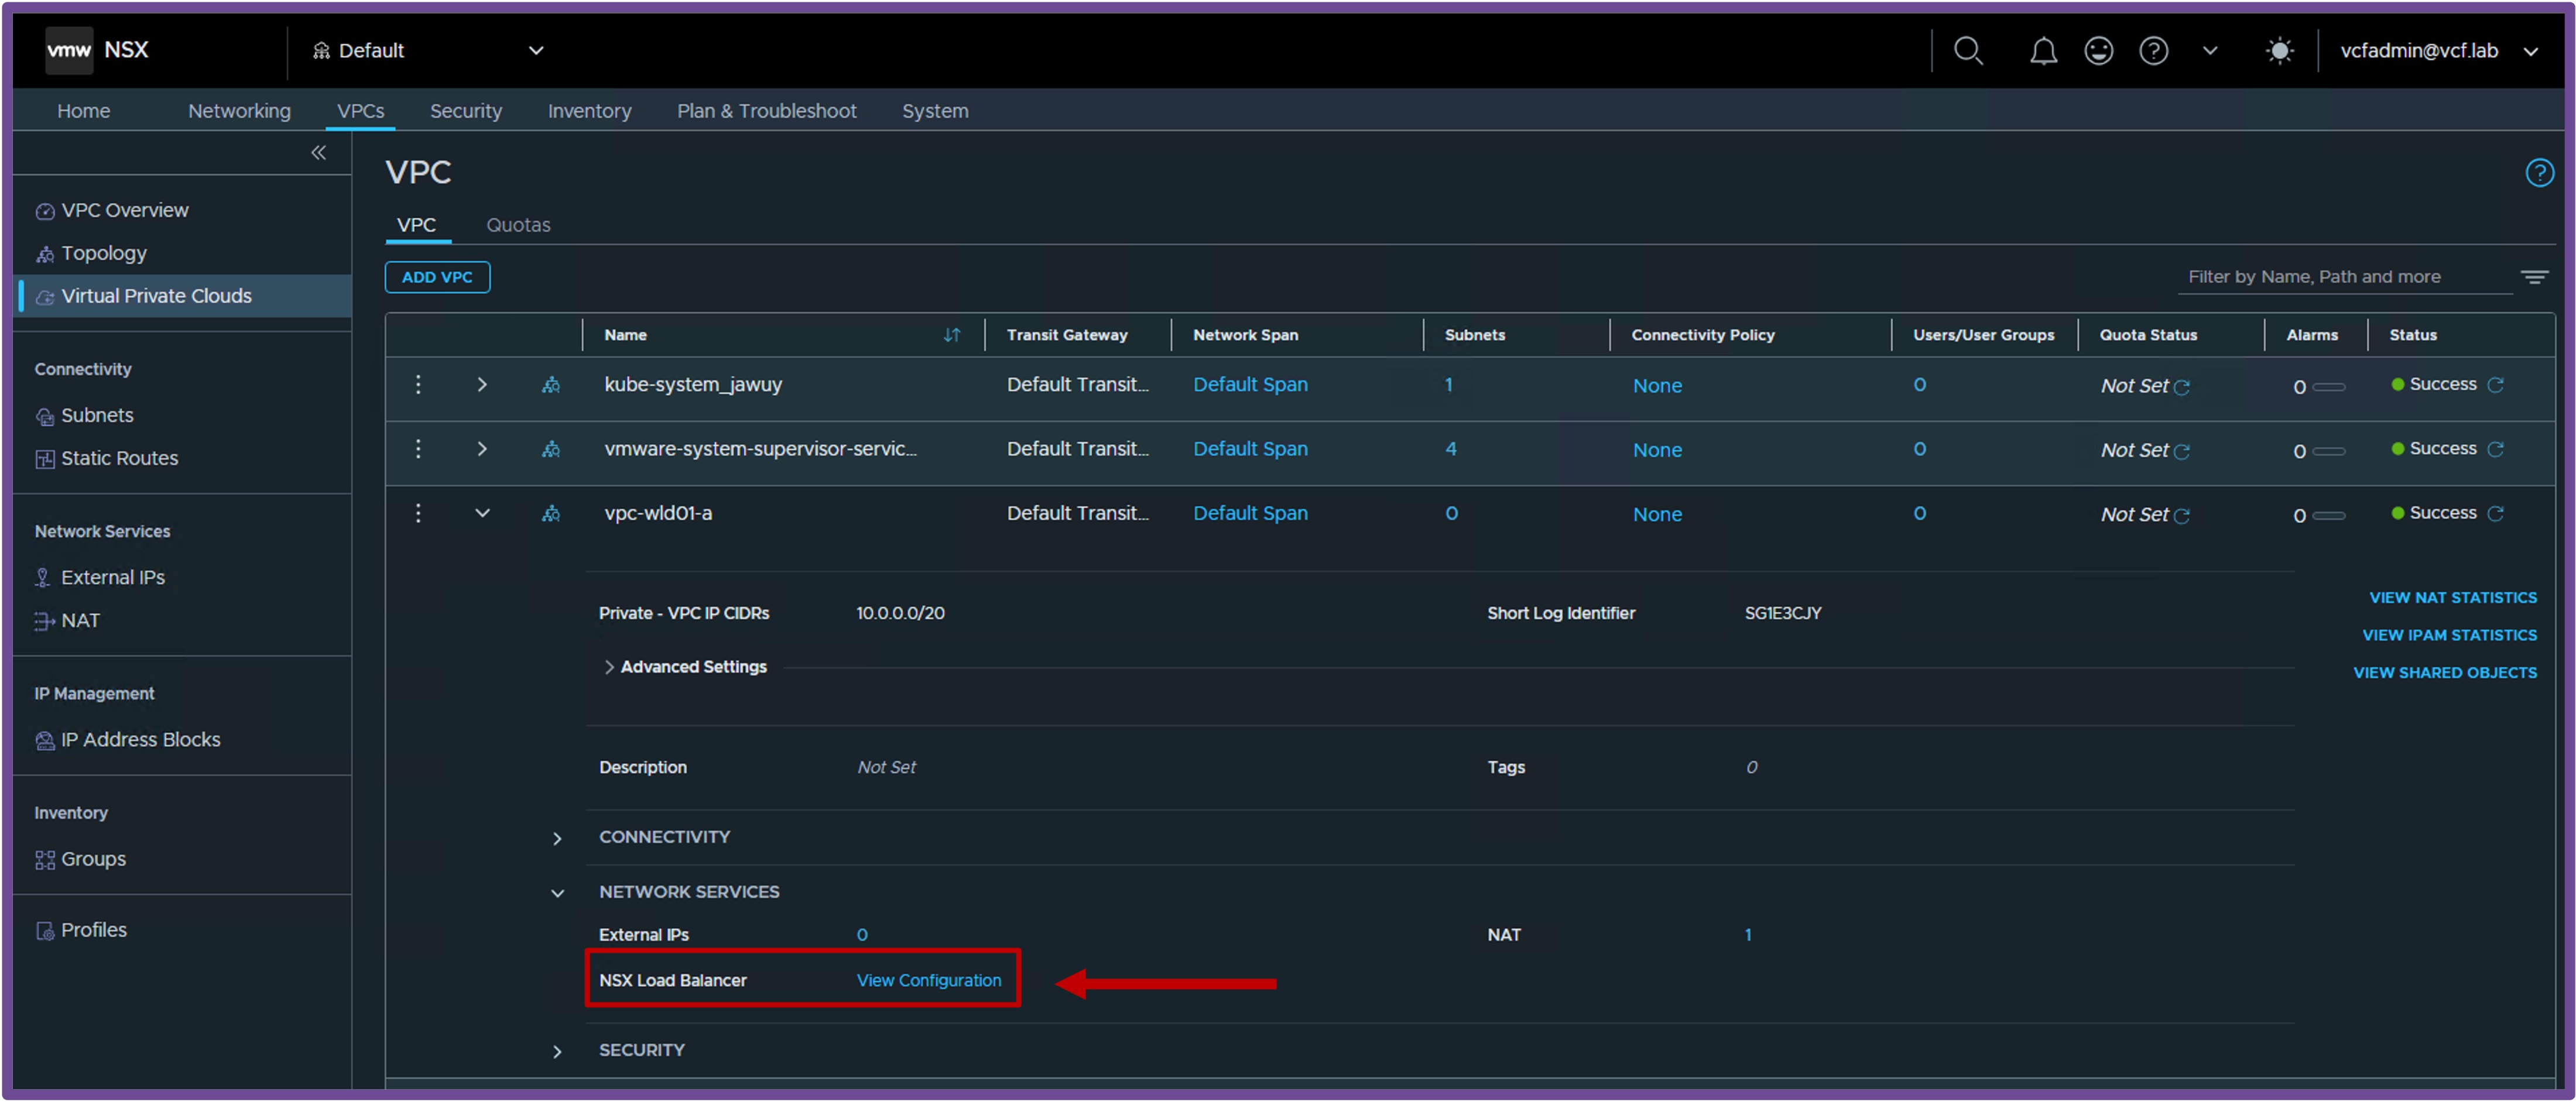
And then, you can see NSX LB is enabled in the VPC:
-
Add Zones
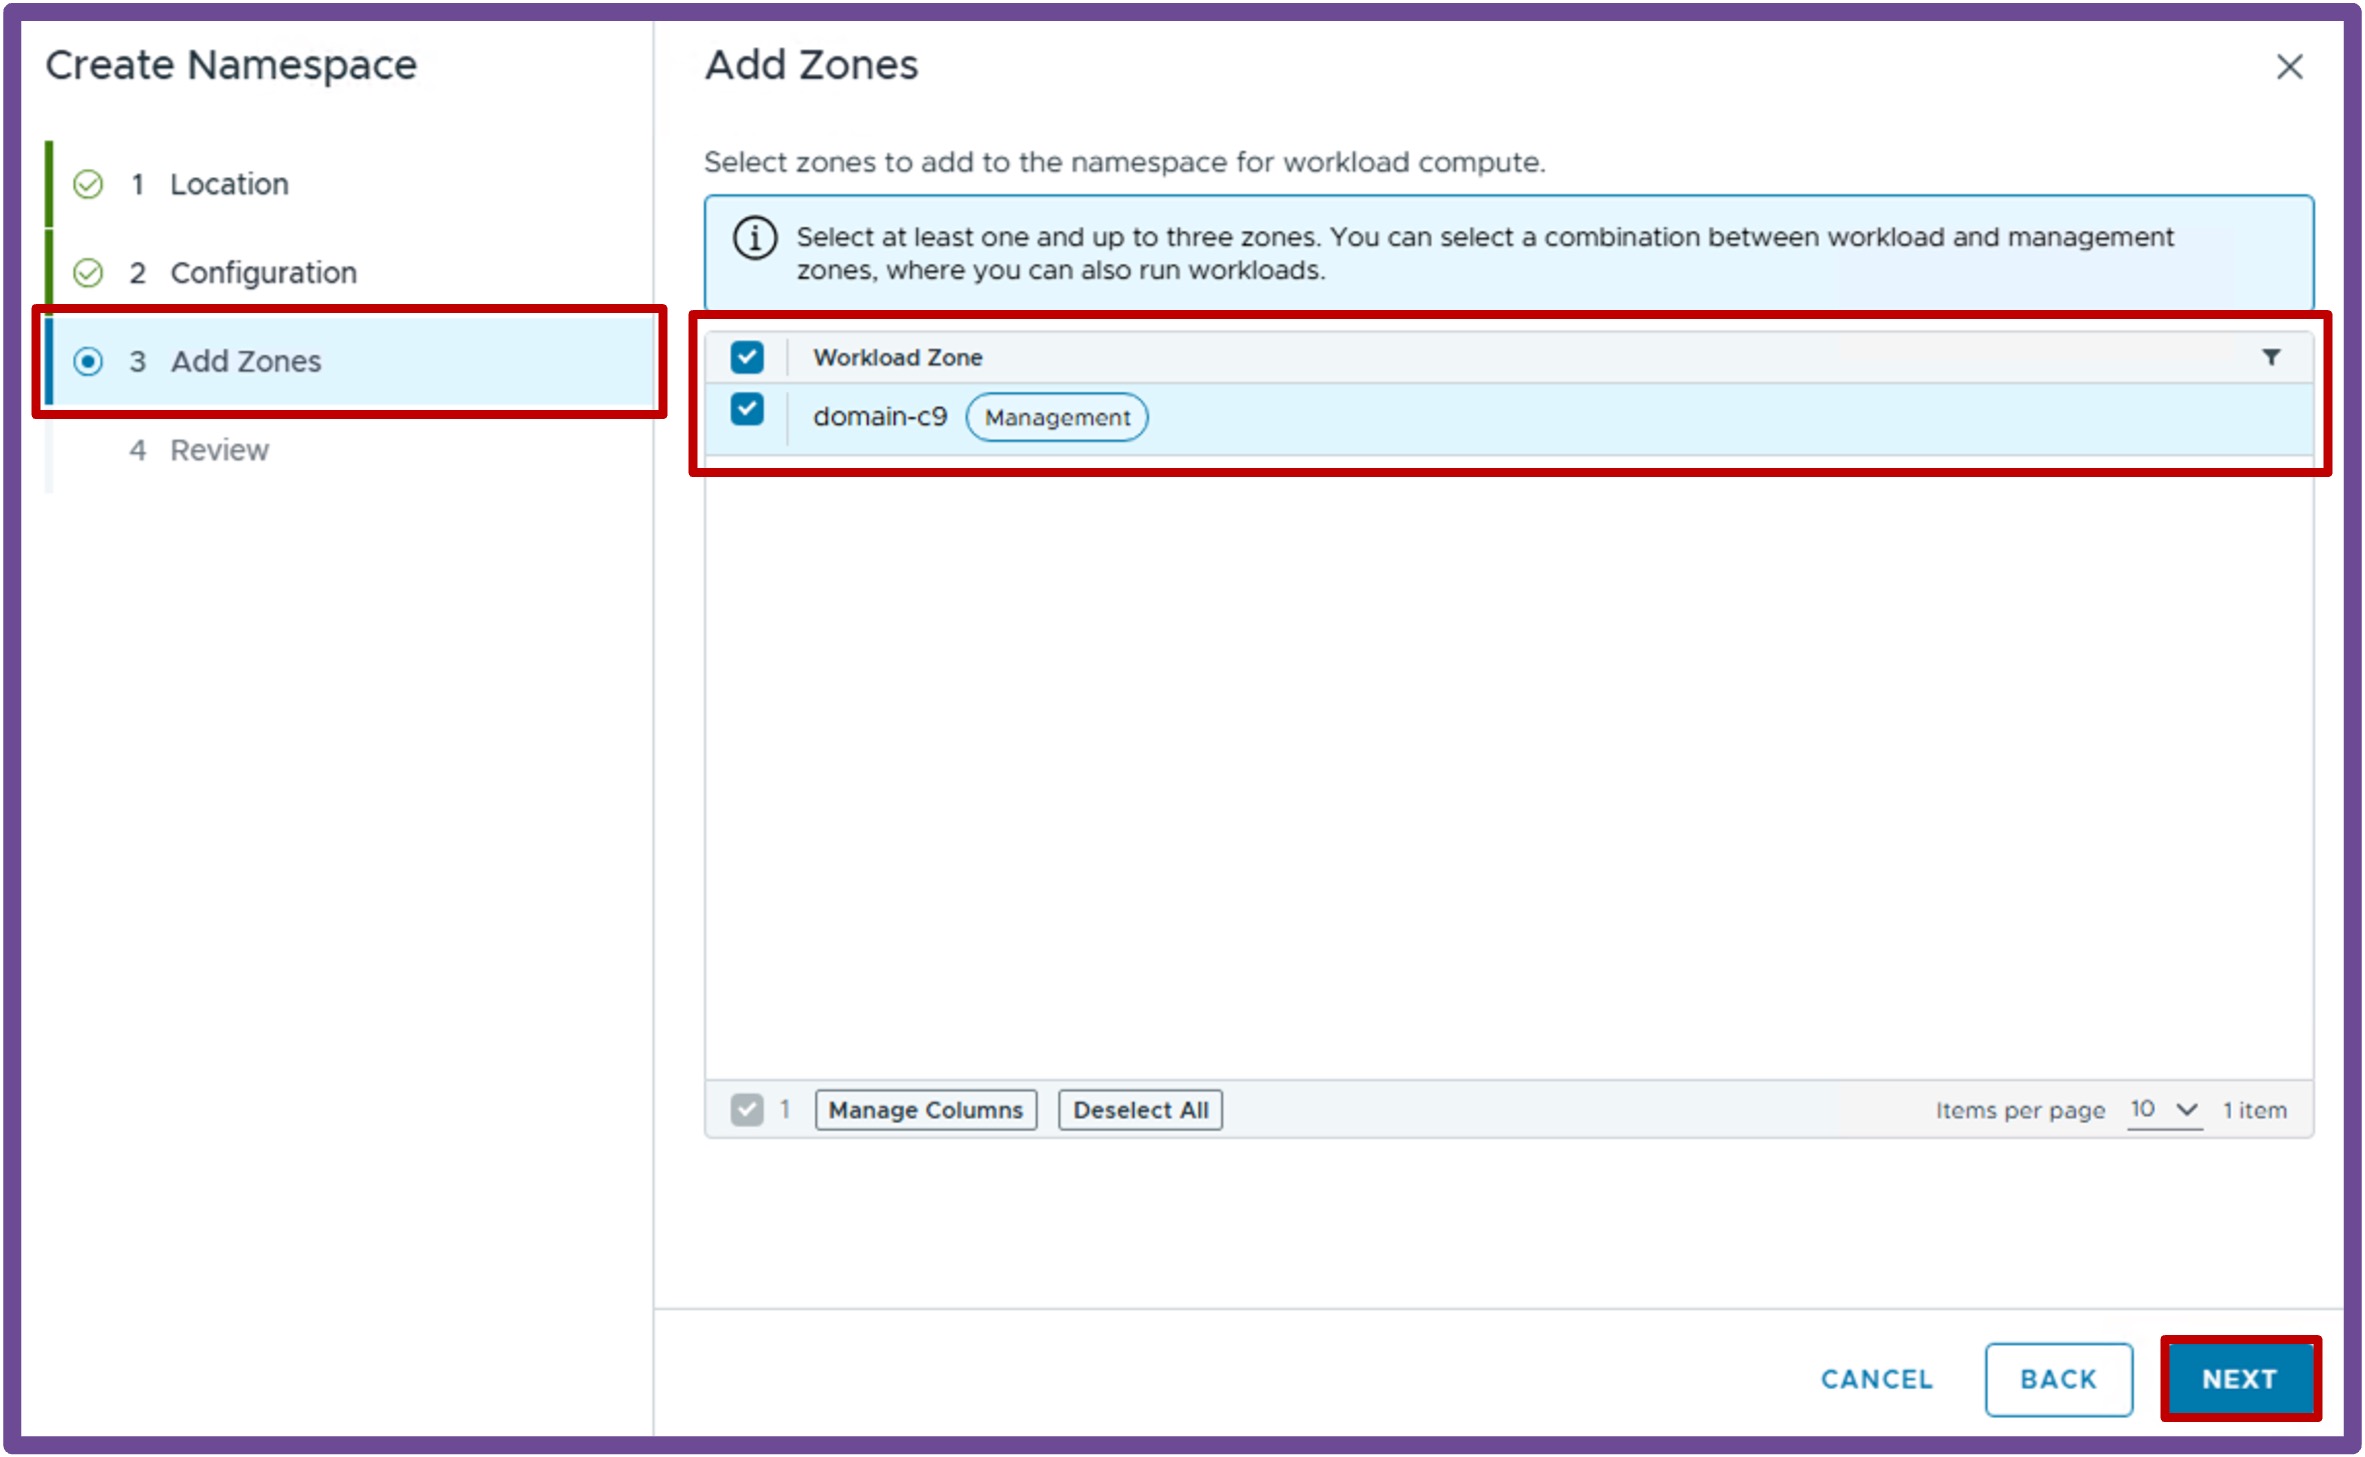
Select the Workload Zone (one or more vCenter Clusters), and click Next.
-
Review
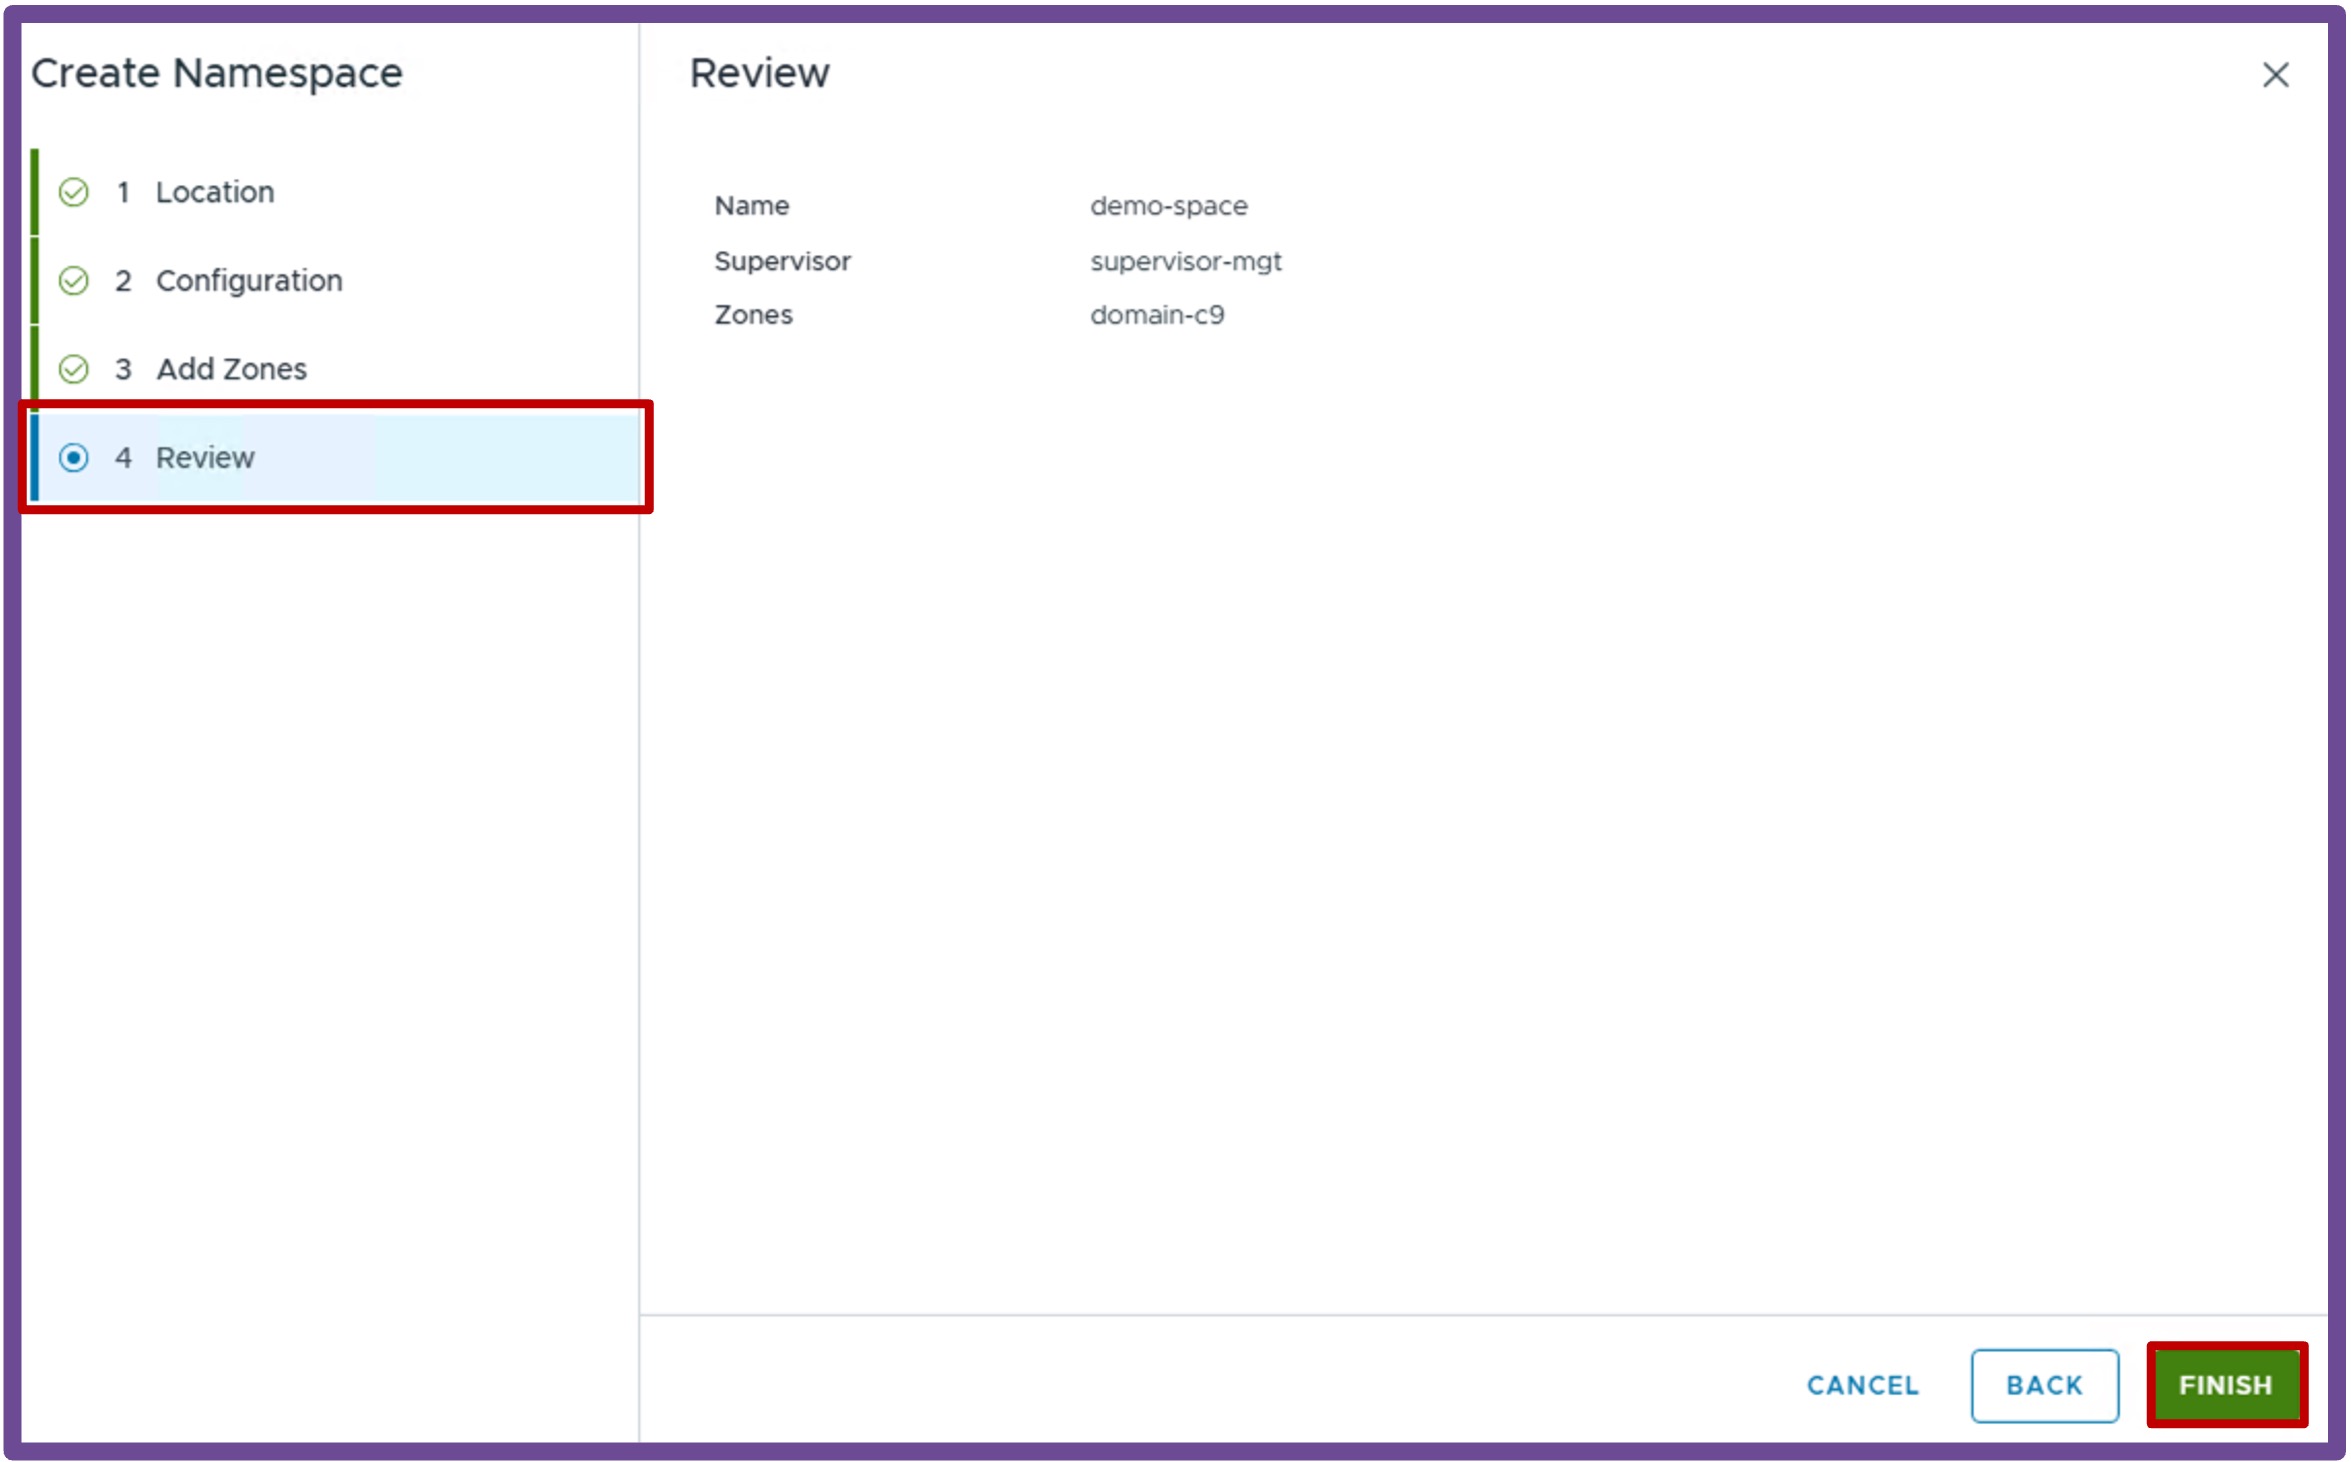
Review the Namespace settings, and click Finish.
Finish Namespace Creation for future Applications
Create a Content Library for future VMs
If you plan to deploy VMs, create a Content Library with VM images.
Navigate to vCenter > Content Libraries > and click Create.

-
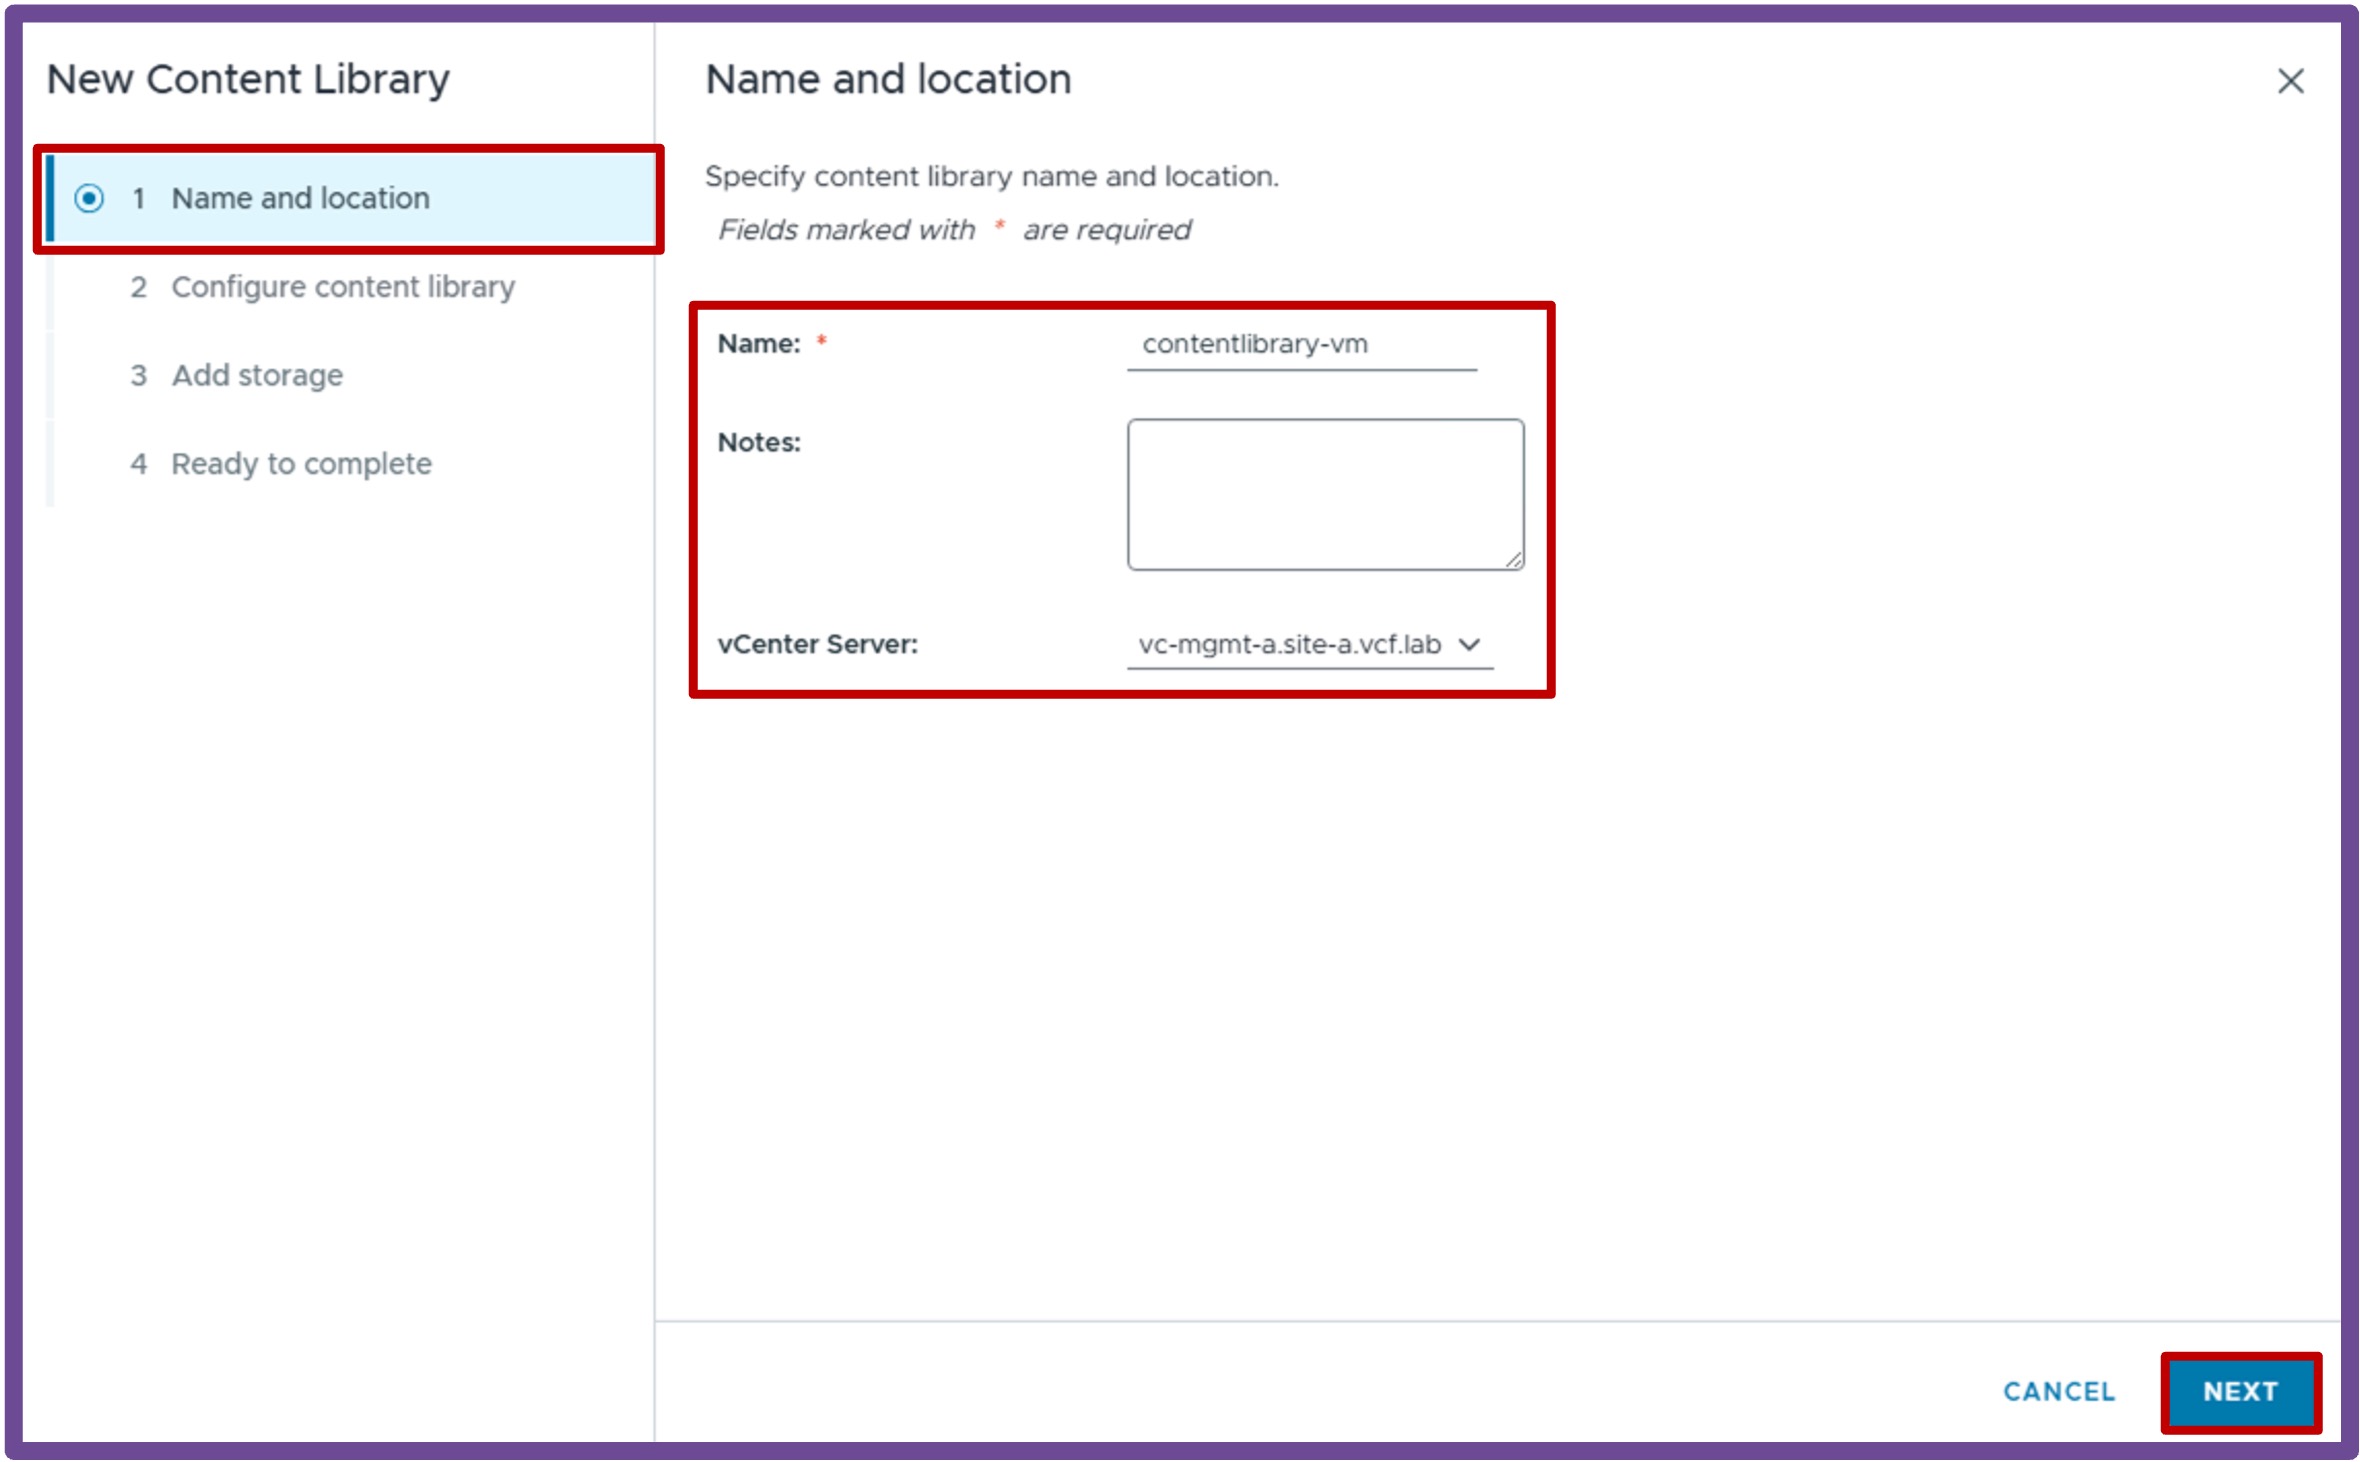
Name and Location Give it a Name and select the vCenter hosting that Content Library, and click Next.
-
Configure Content Library Choose between Local content library (you upload VM images) and Subscribed content library (vCenter downloads VM images from a repository), and click Next.
I'm using here Local content library.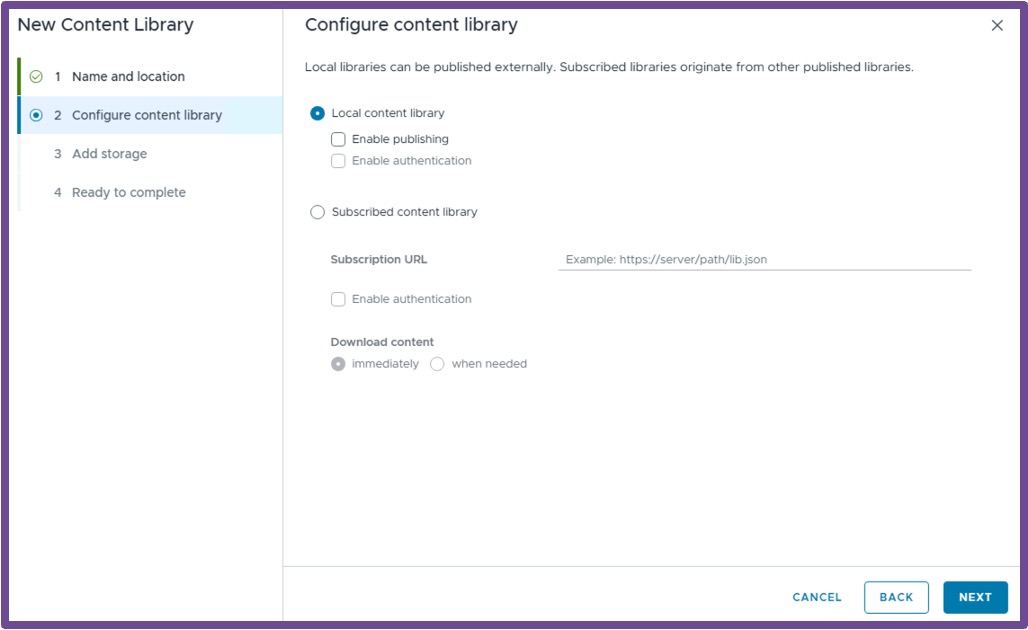
-
Apply Security Policy Apply security policy if you choose to, and click Next.
I'm using here no security policy.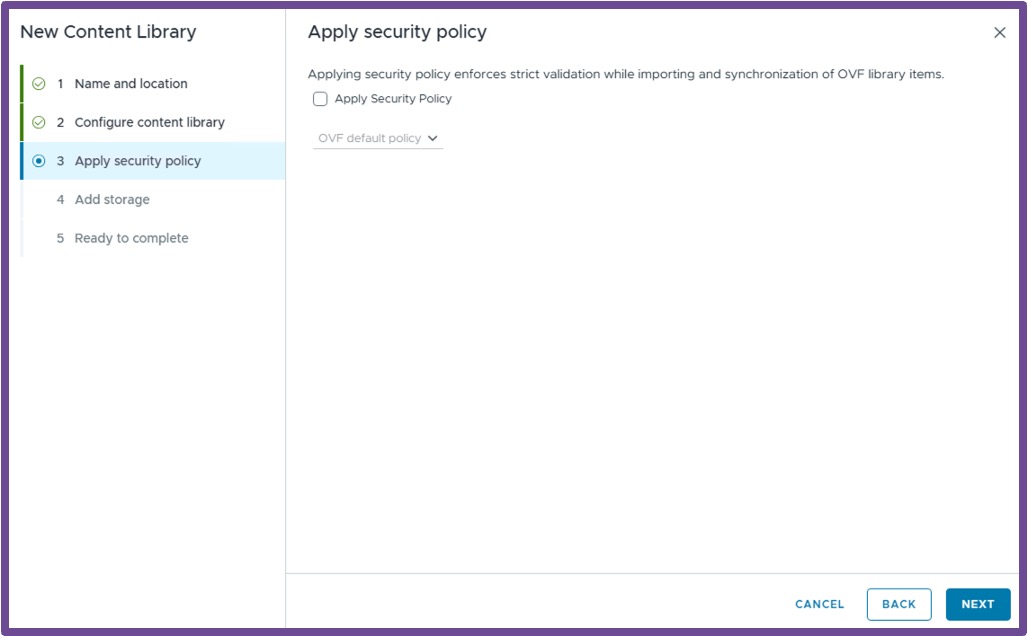
-
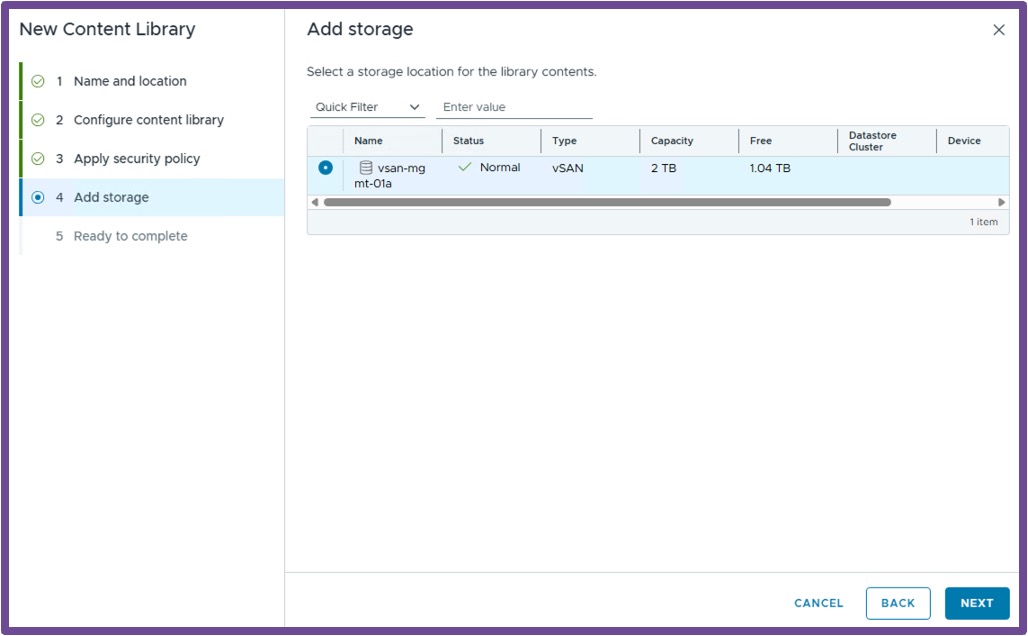
Add Storage Select a storage to host the content library images, and click Next.
-
Ready to complete Review the content library, and click Finish.
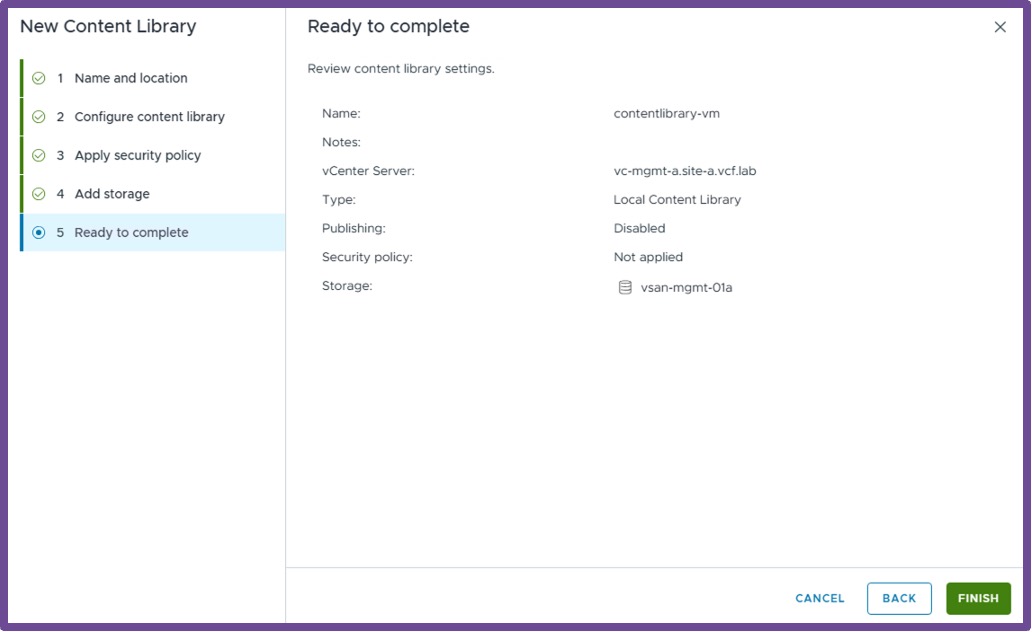
-
Import VM Image In the Content Library created, import a VM Image, click on Import Item.
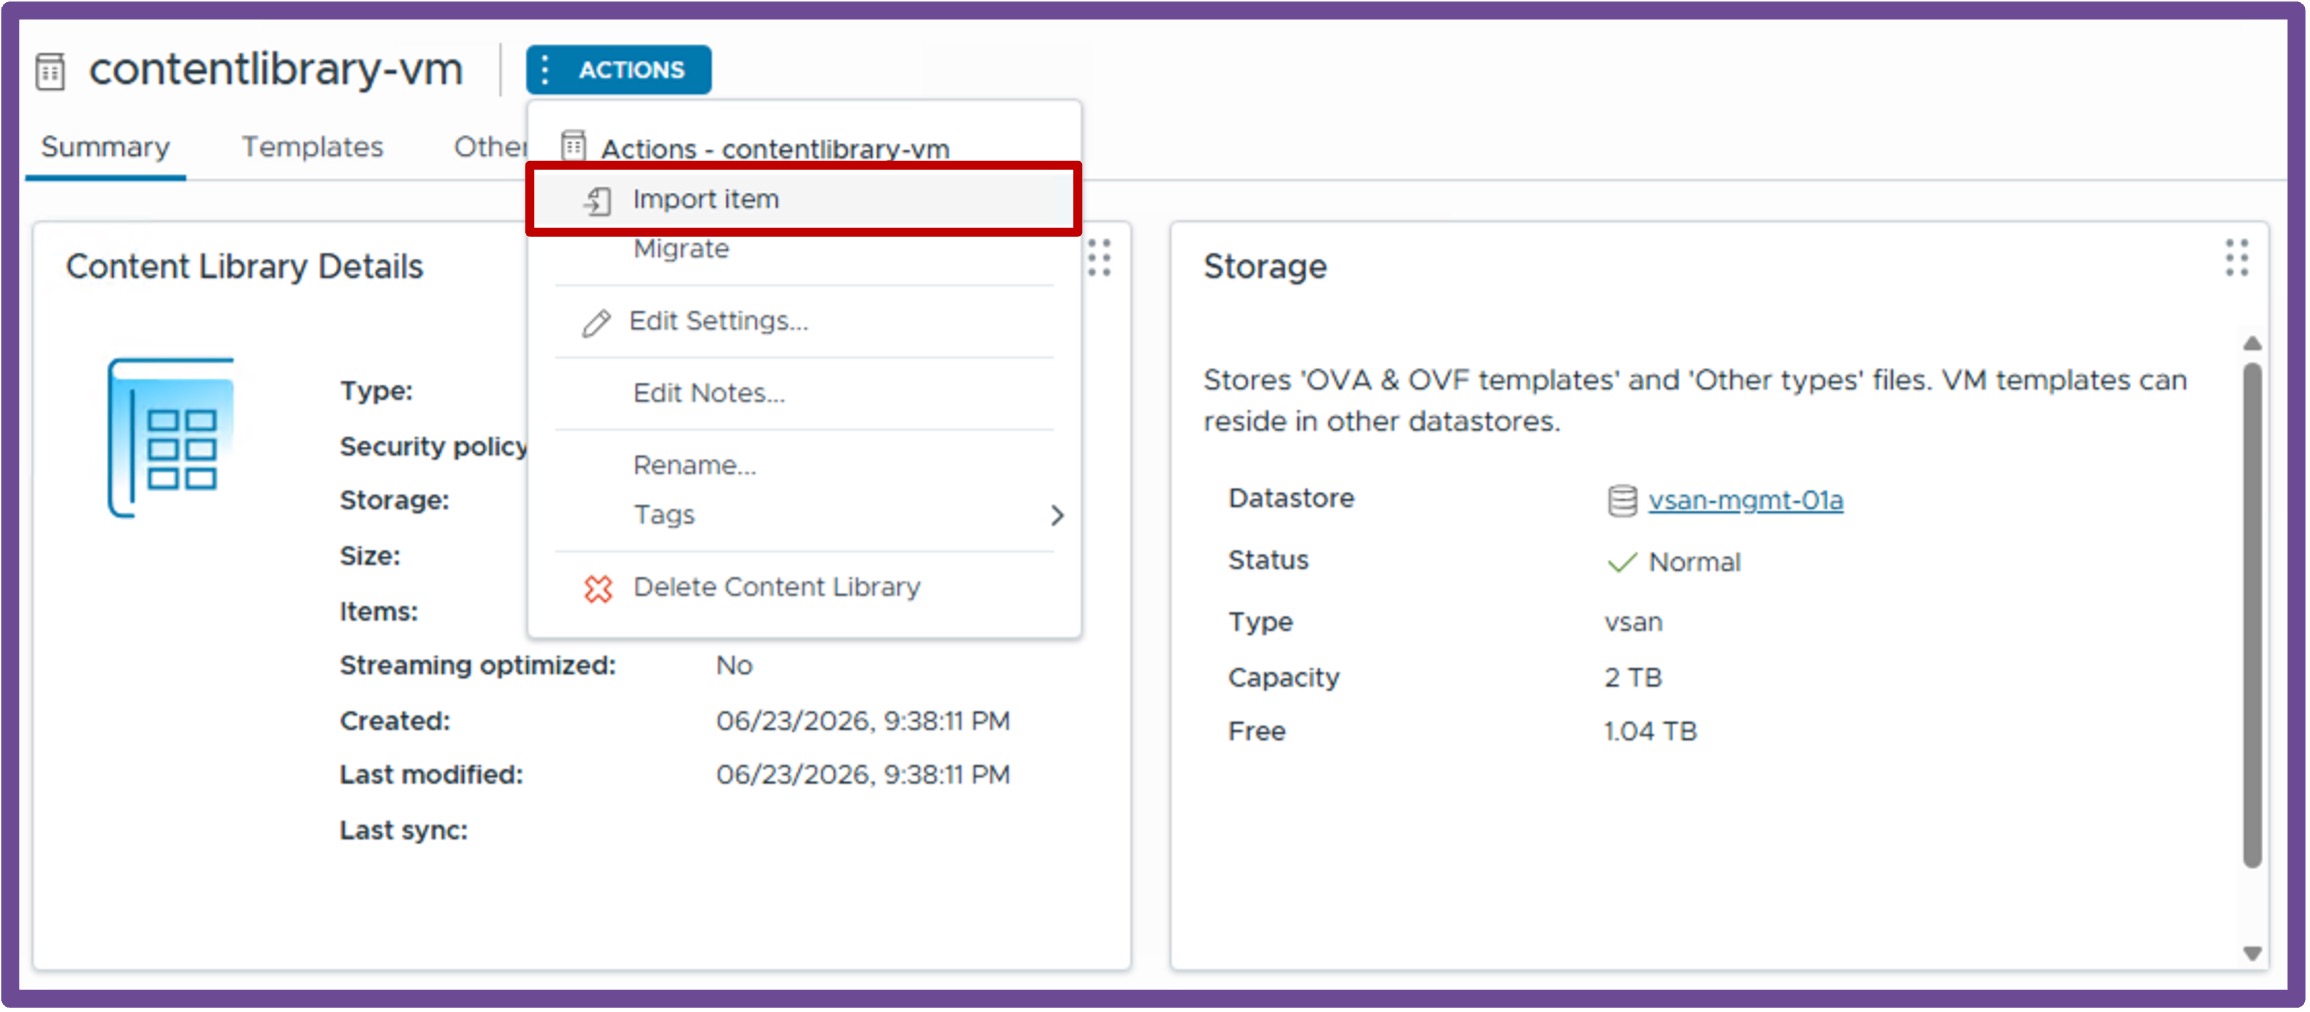
-
Choose VM Image Choose a Source file via URL or Local file, and click Import.
I'm using here the URL https://cloud-images.ubuntu.com/noble/current/noble-server-cloudimg-amd64.ova to download Ubuntu 24.04.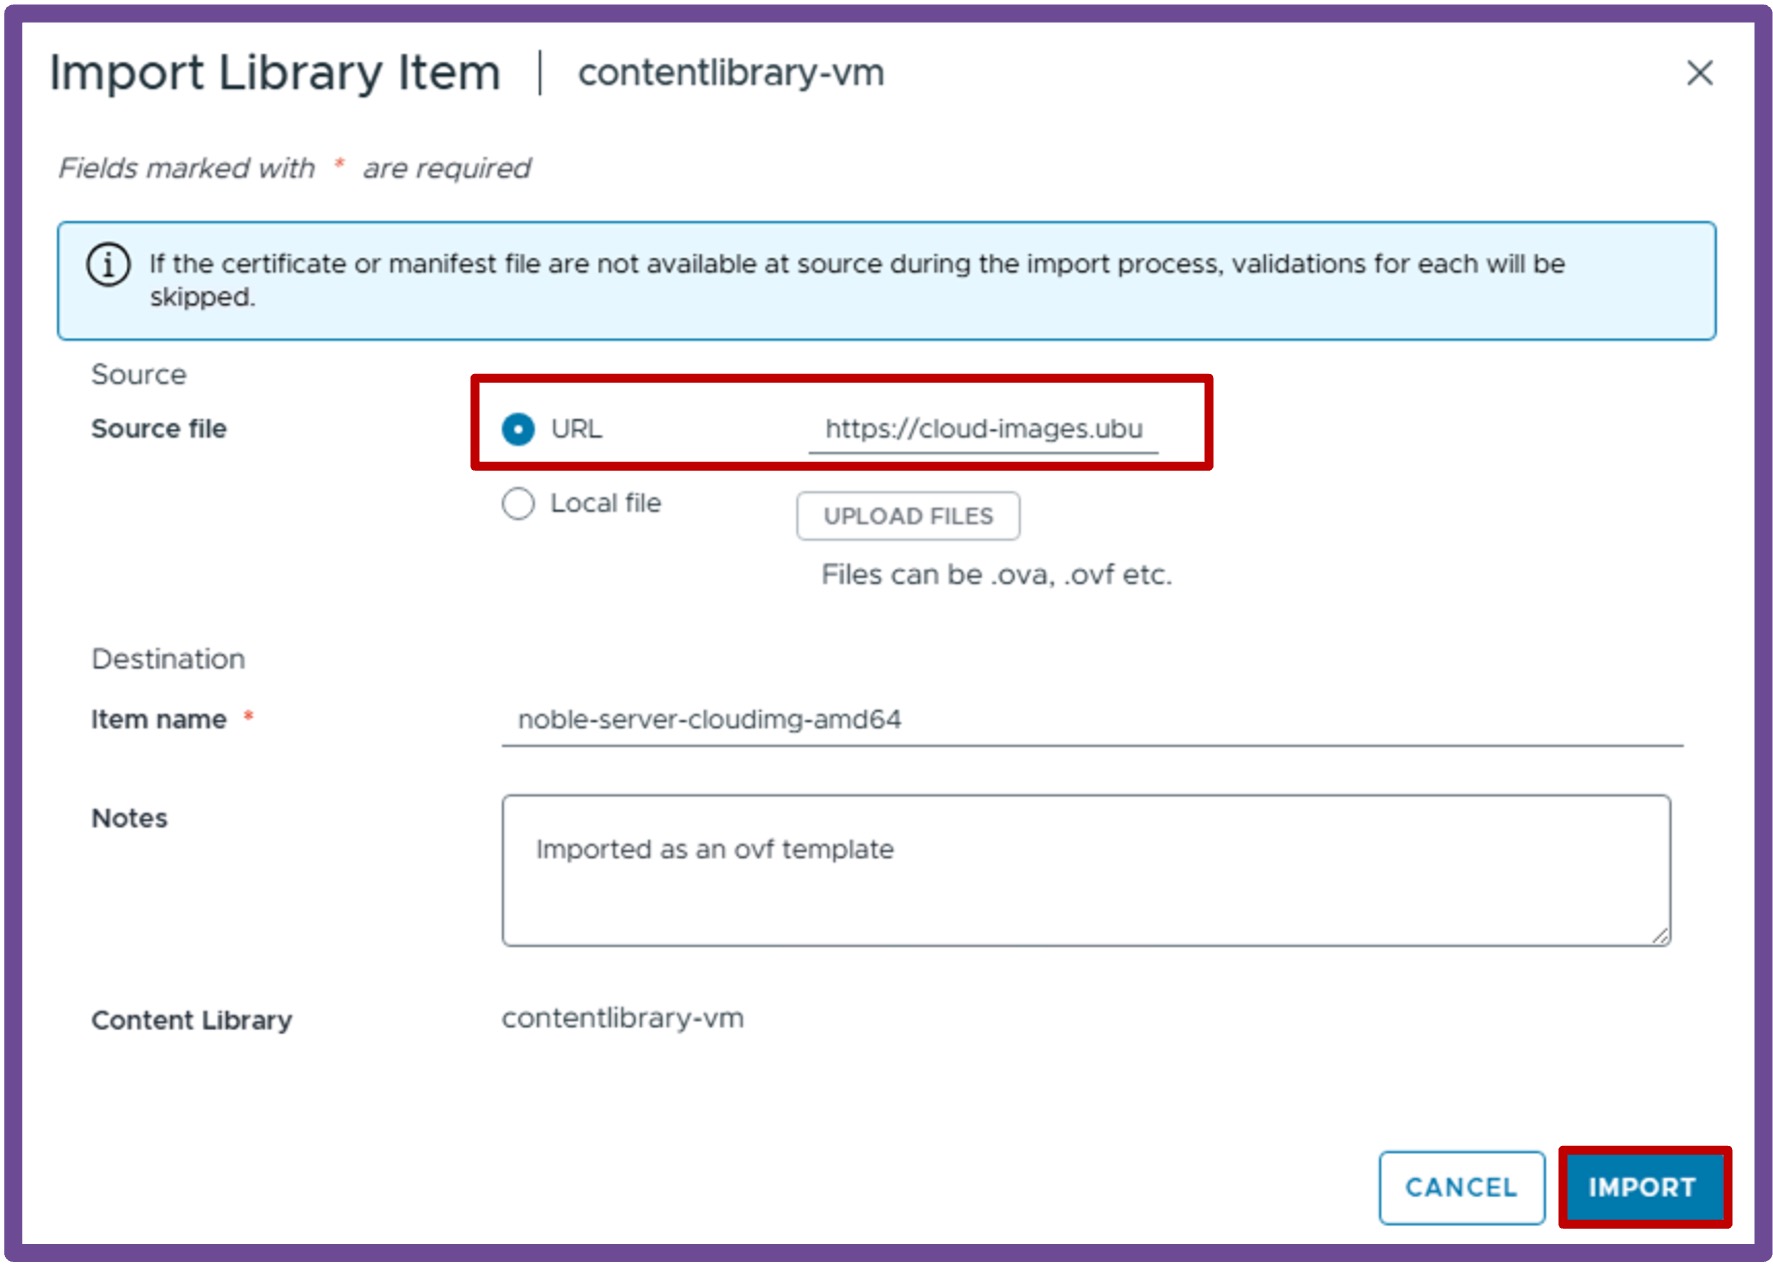
Associate the Content Library to the Namespace
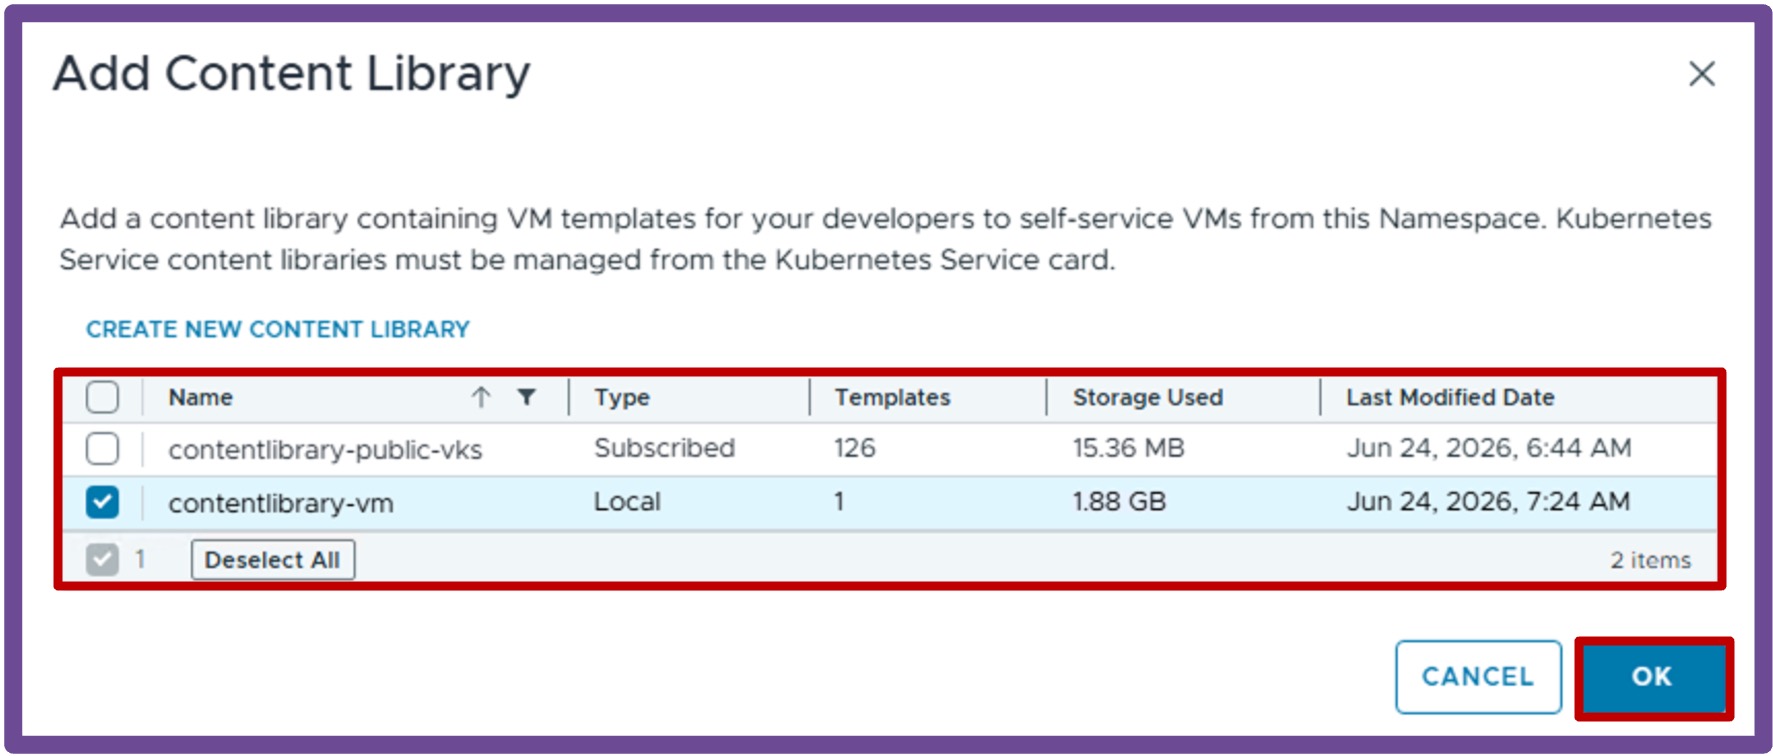
Navigate to vCenter > Supervisor Management > Supervisors, select [your supervisor], navigate to Namespaces, and select [your namespace], and click on VM Service - Add Content Library.
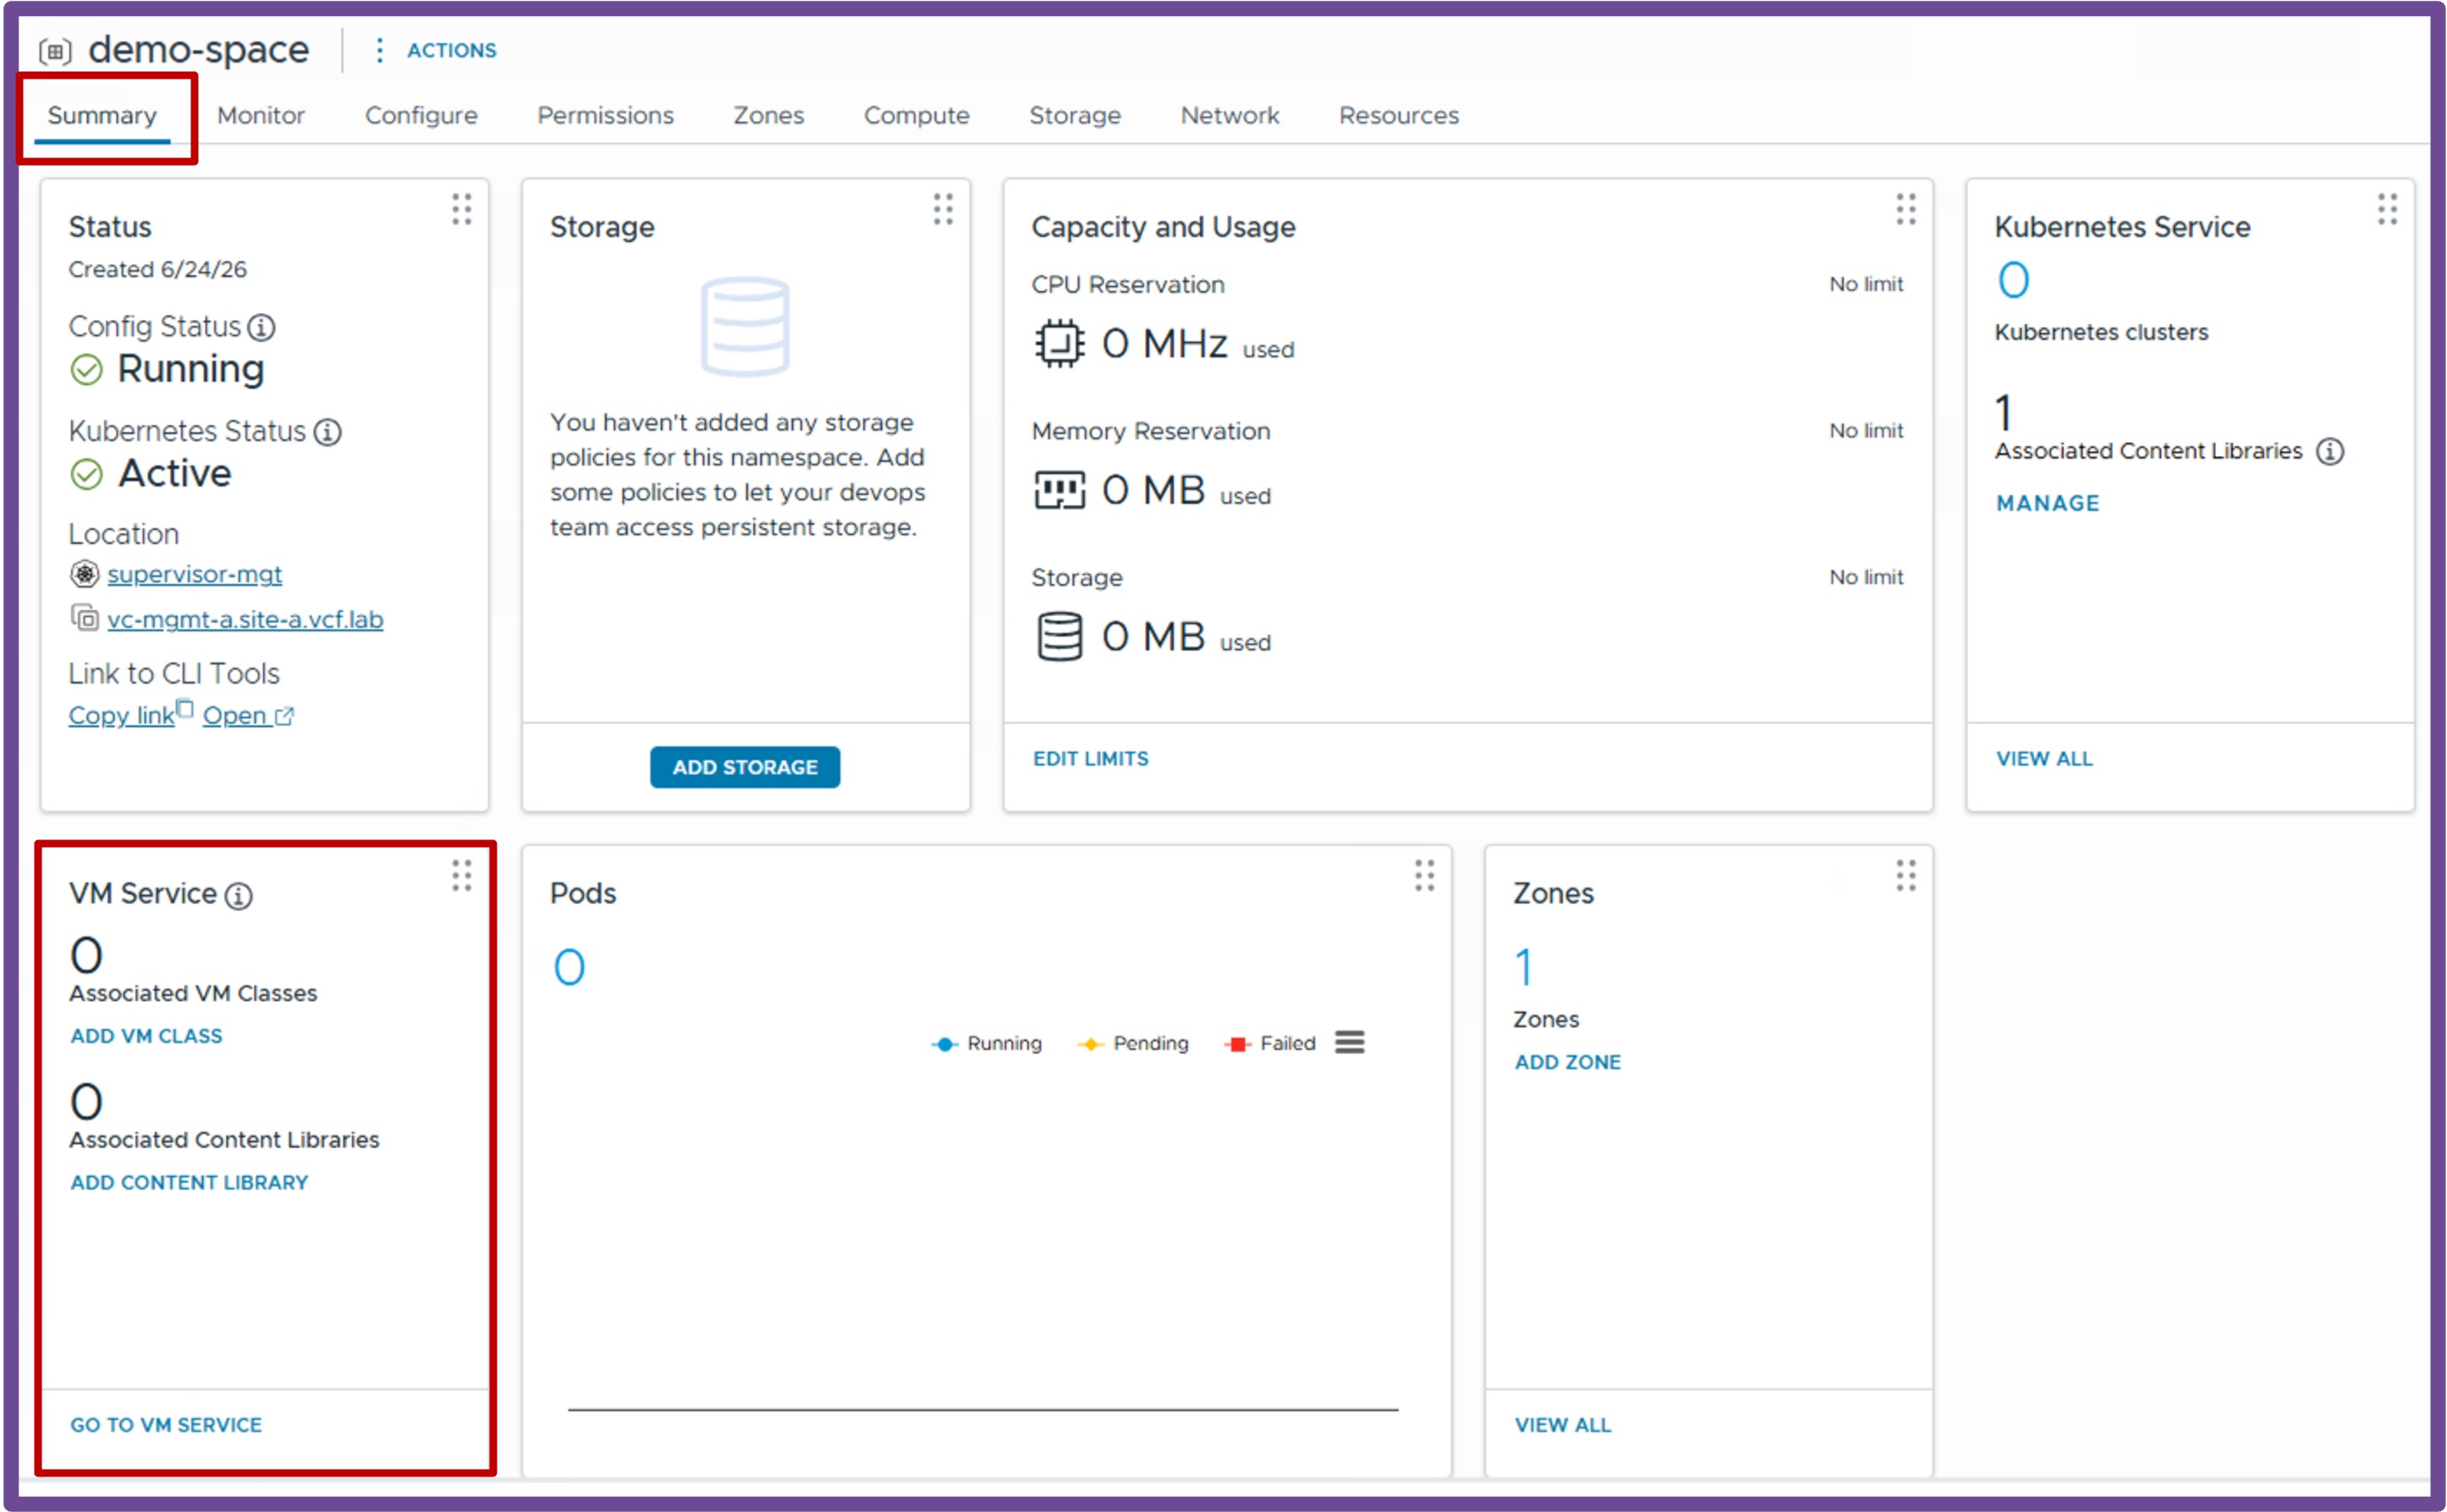
- Add Content Library Select Content Library with VM images, and click OK.
Associate Storage Policy to the Namespace
Navigate to vCenter > Supervisor Management > Supervisors, select [your supervisor], navigate to Namespaces, and select [your namespace], and click on Storage - Add Storage.
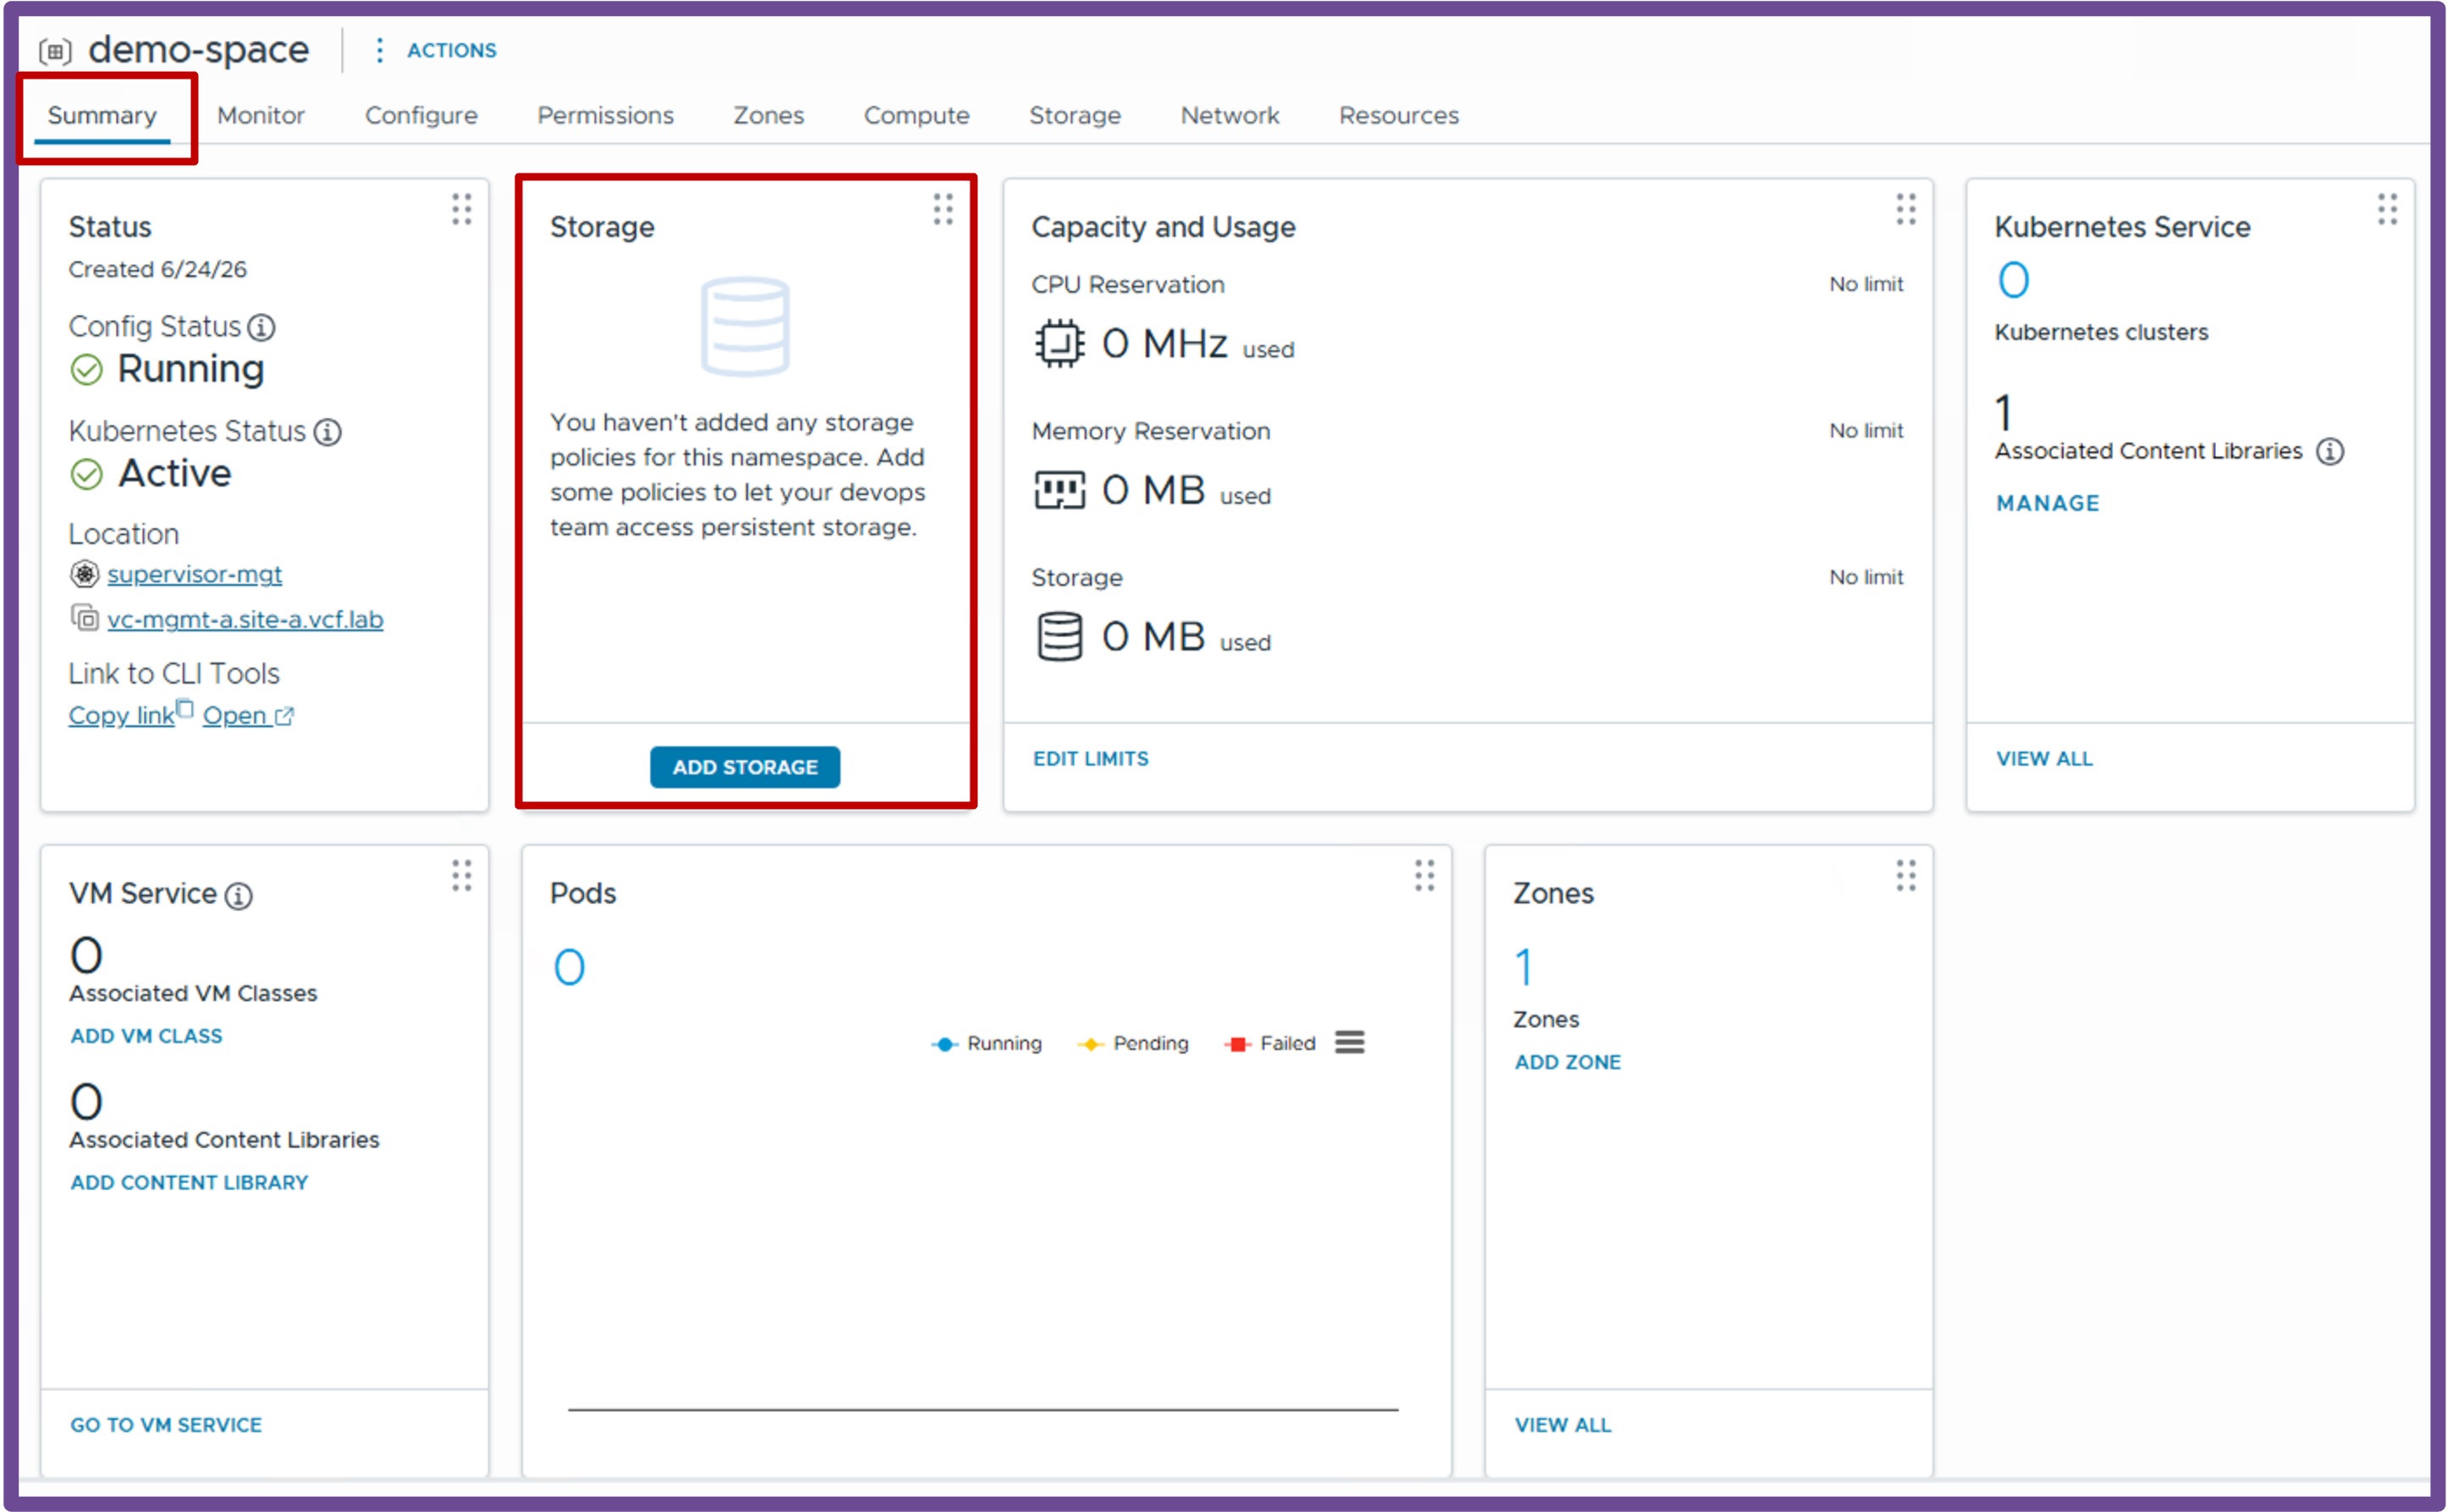
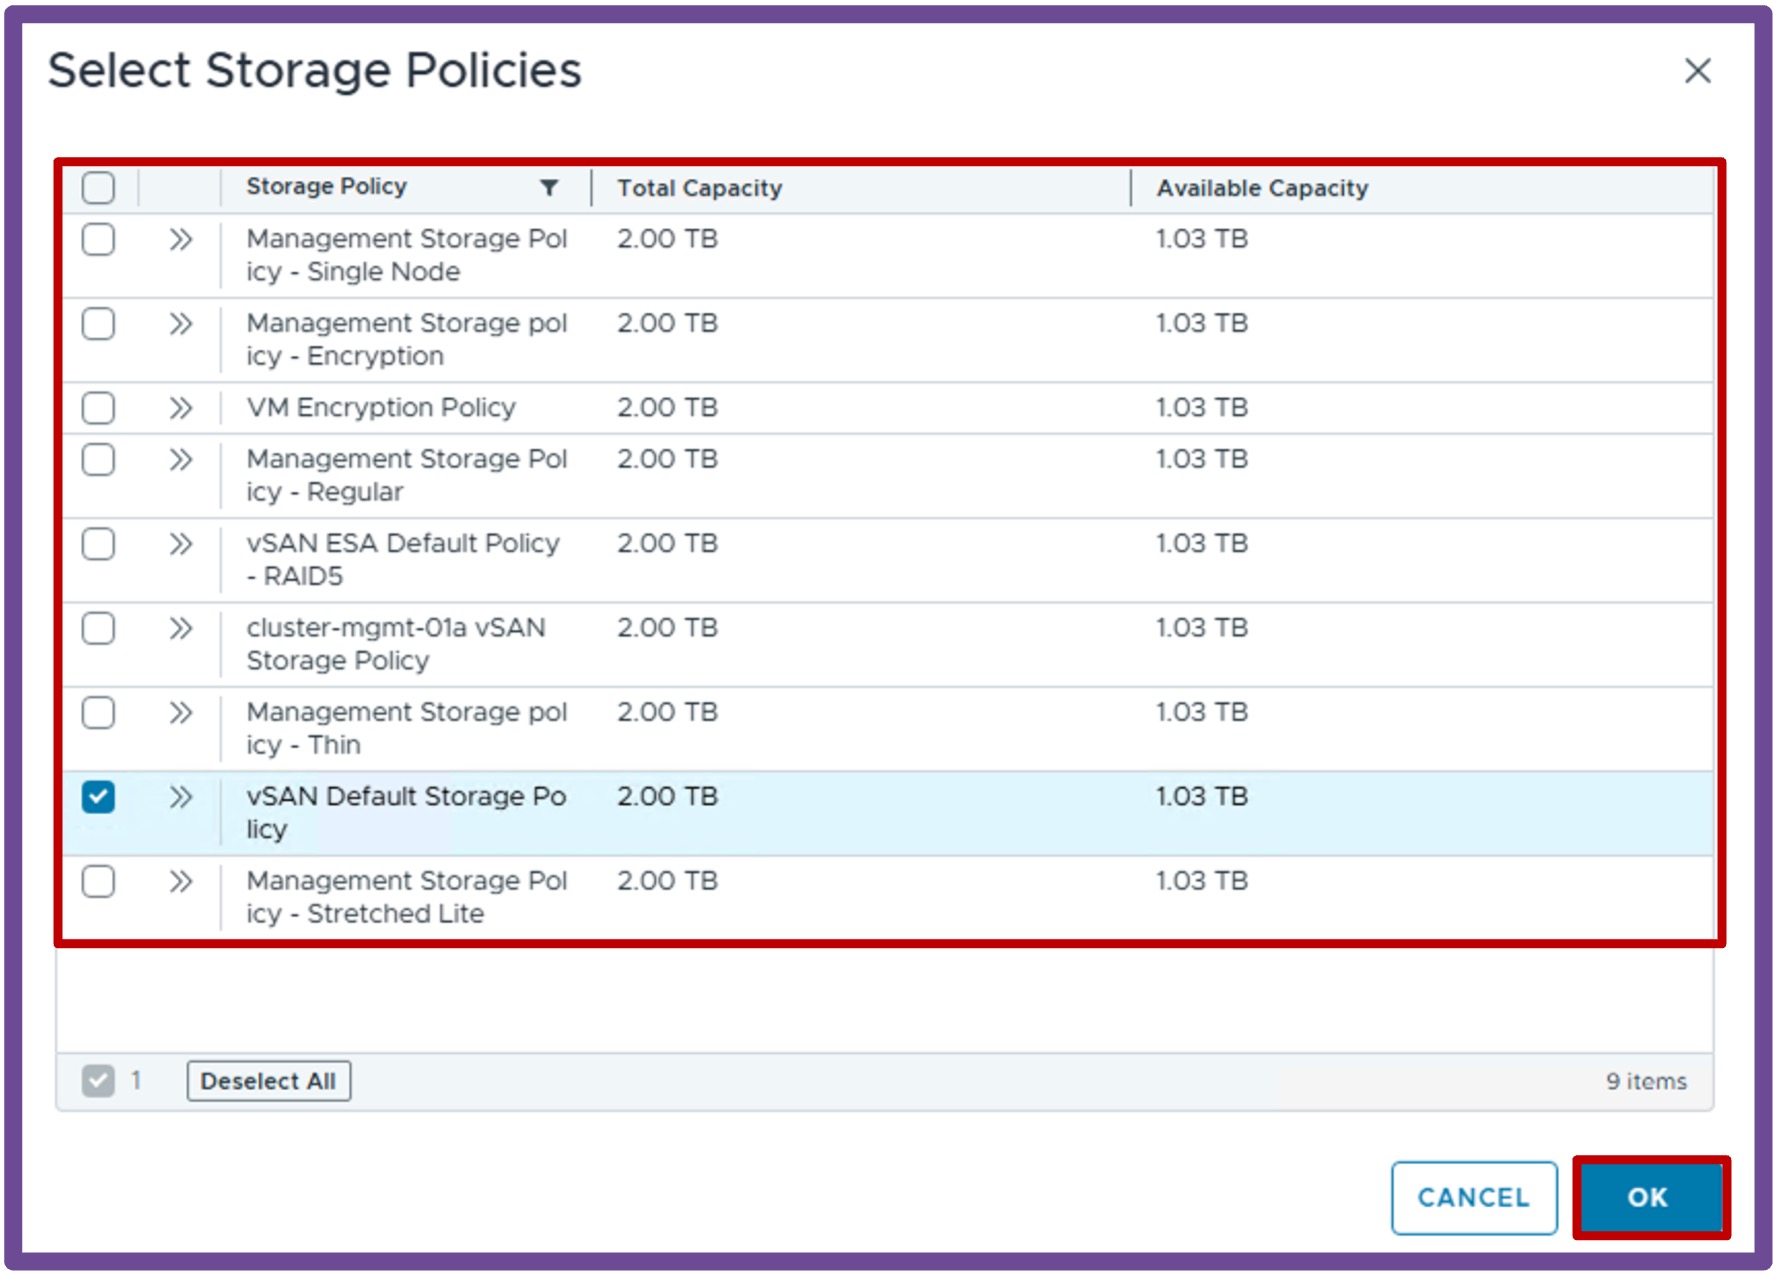
- Add Storage Policy Select Storage Policy, and click OK.
Associate VM Class to the Namespace
Navigate to vCenter > Supervisor Management > Supervisors, select [your supervisor], navigate to Namespaces, and select [your namespace], and click on VM Service - Add VM Class.
- Add VM Classes Select VM Classes, and click OK.
I selected here all VM Classes type "small" and "medium".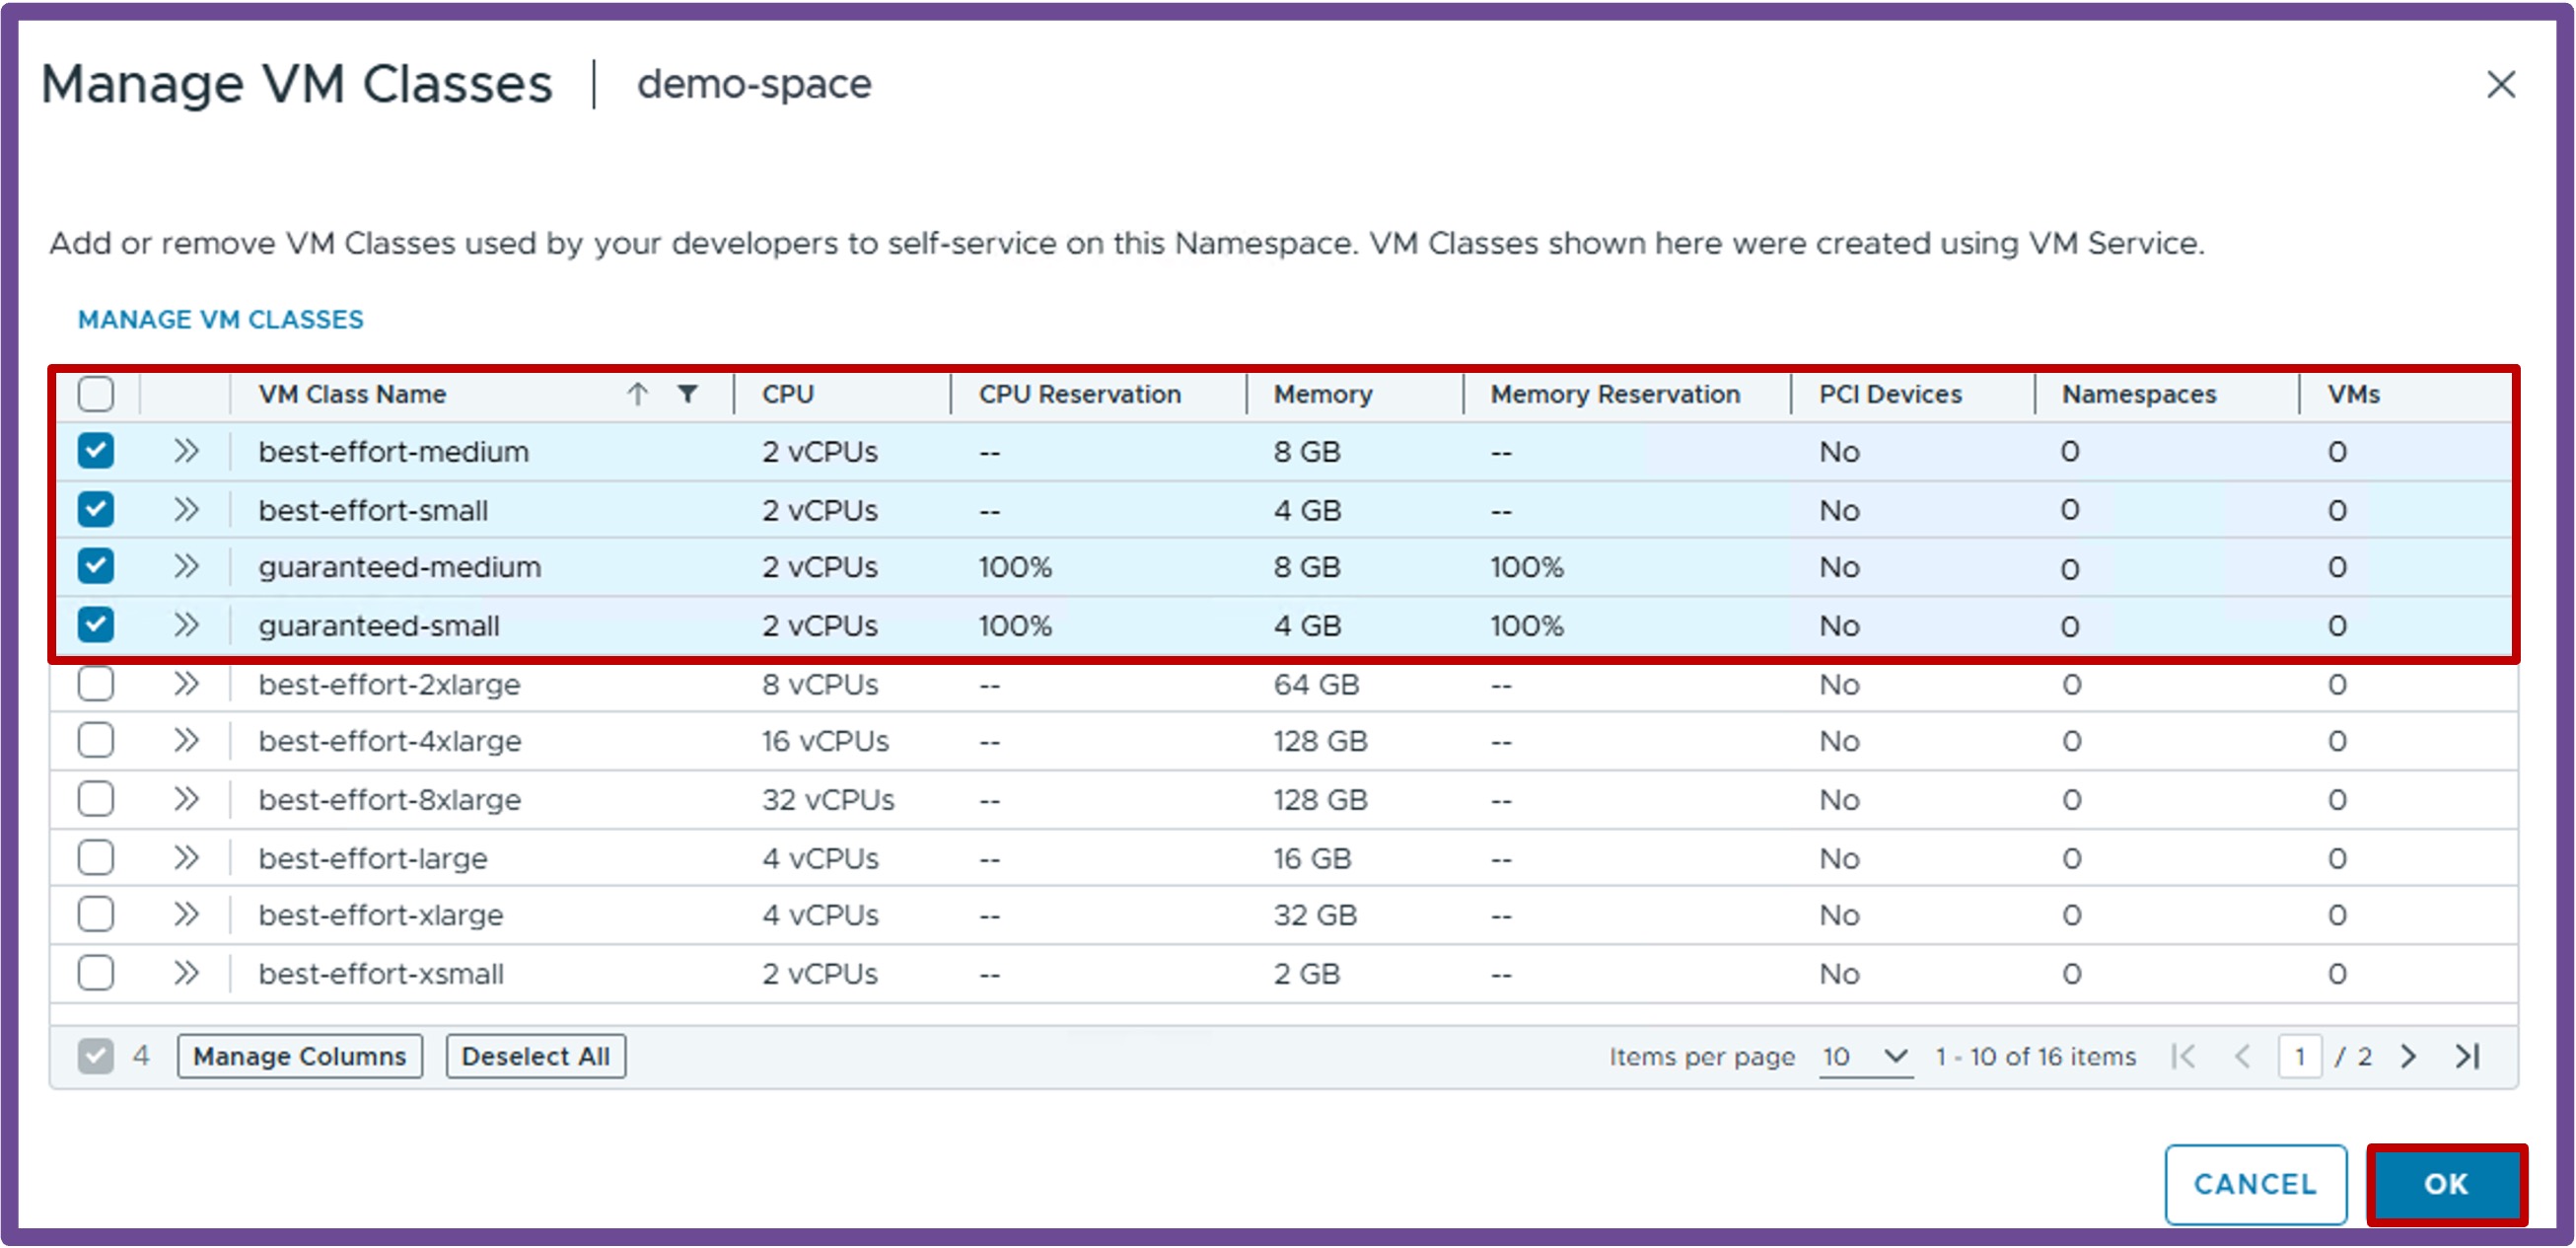
Validate Deployment
Validate Namespace Status
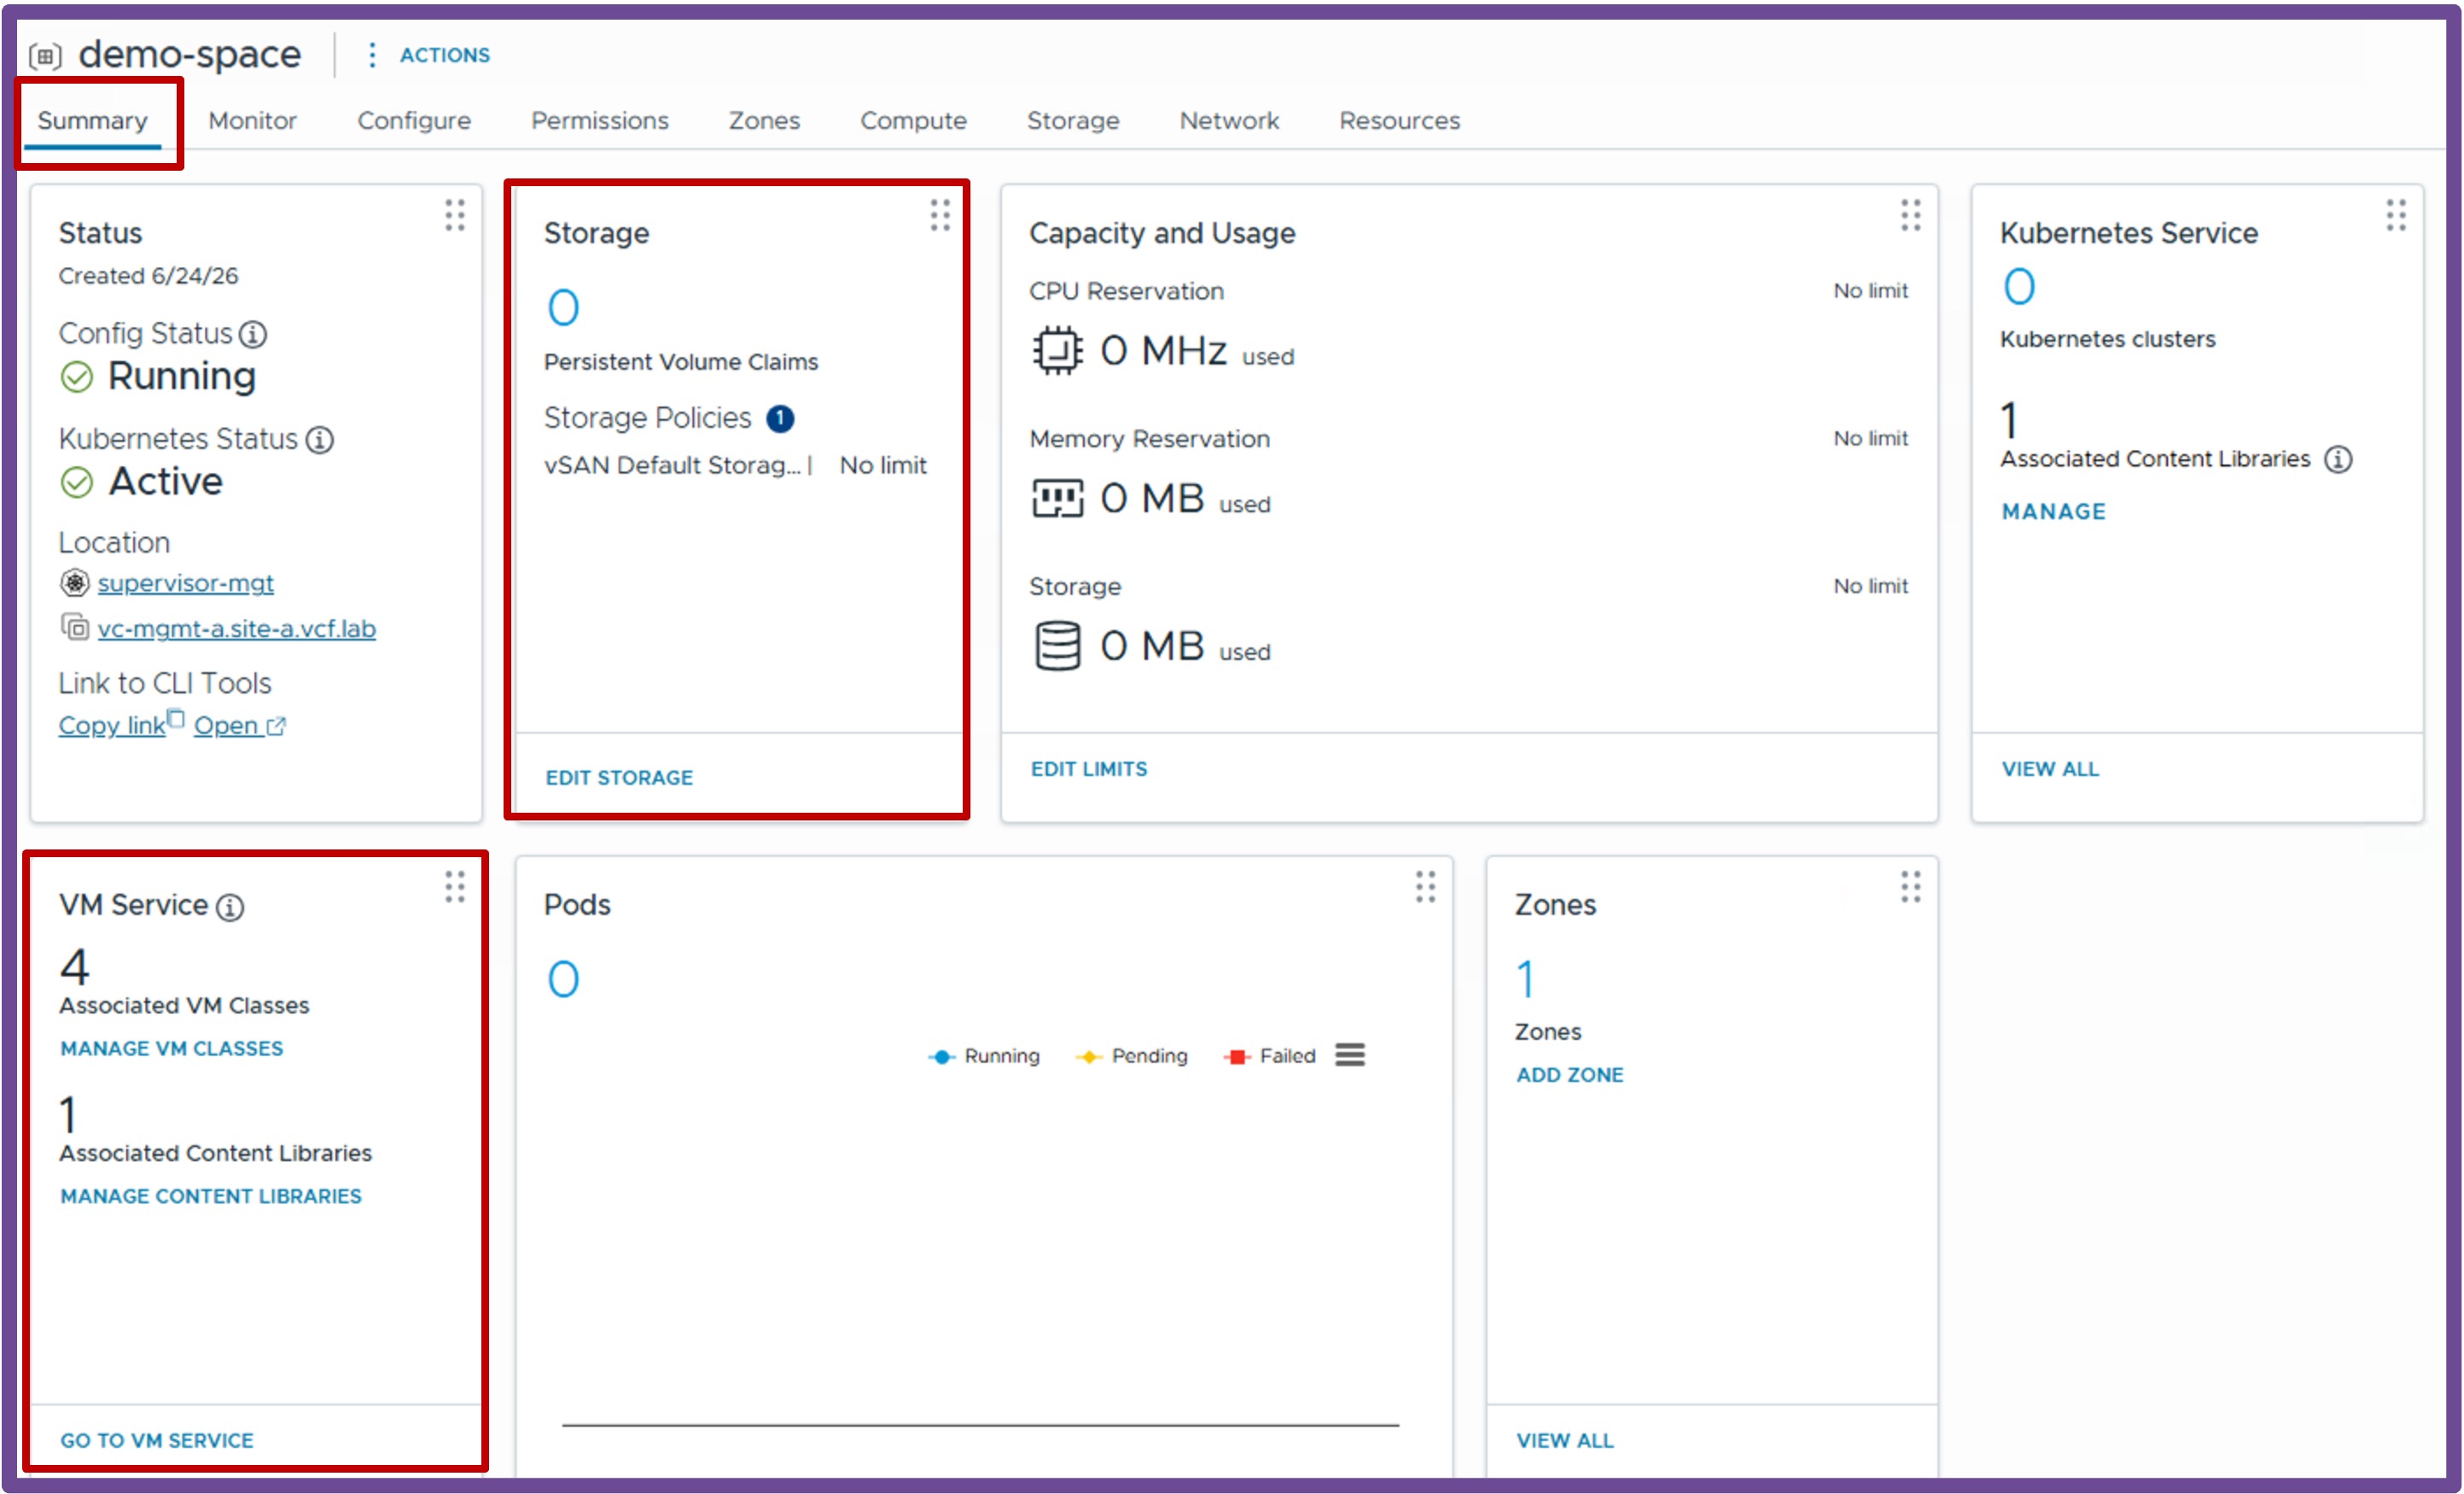
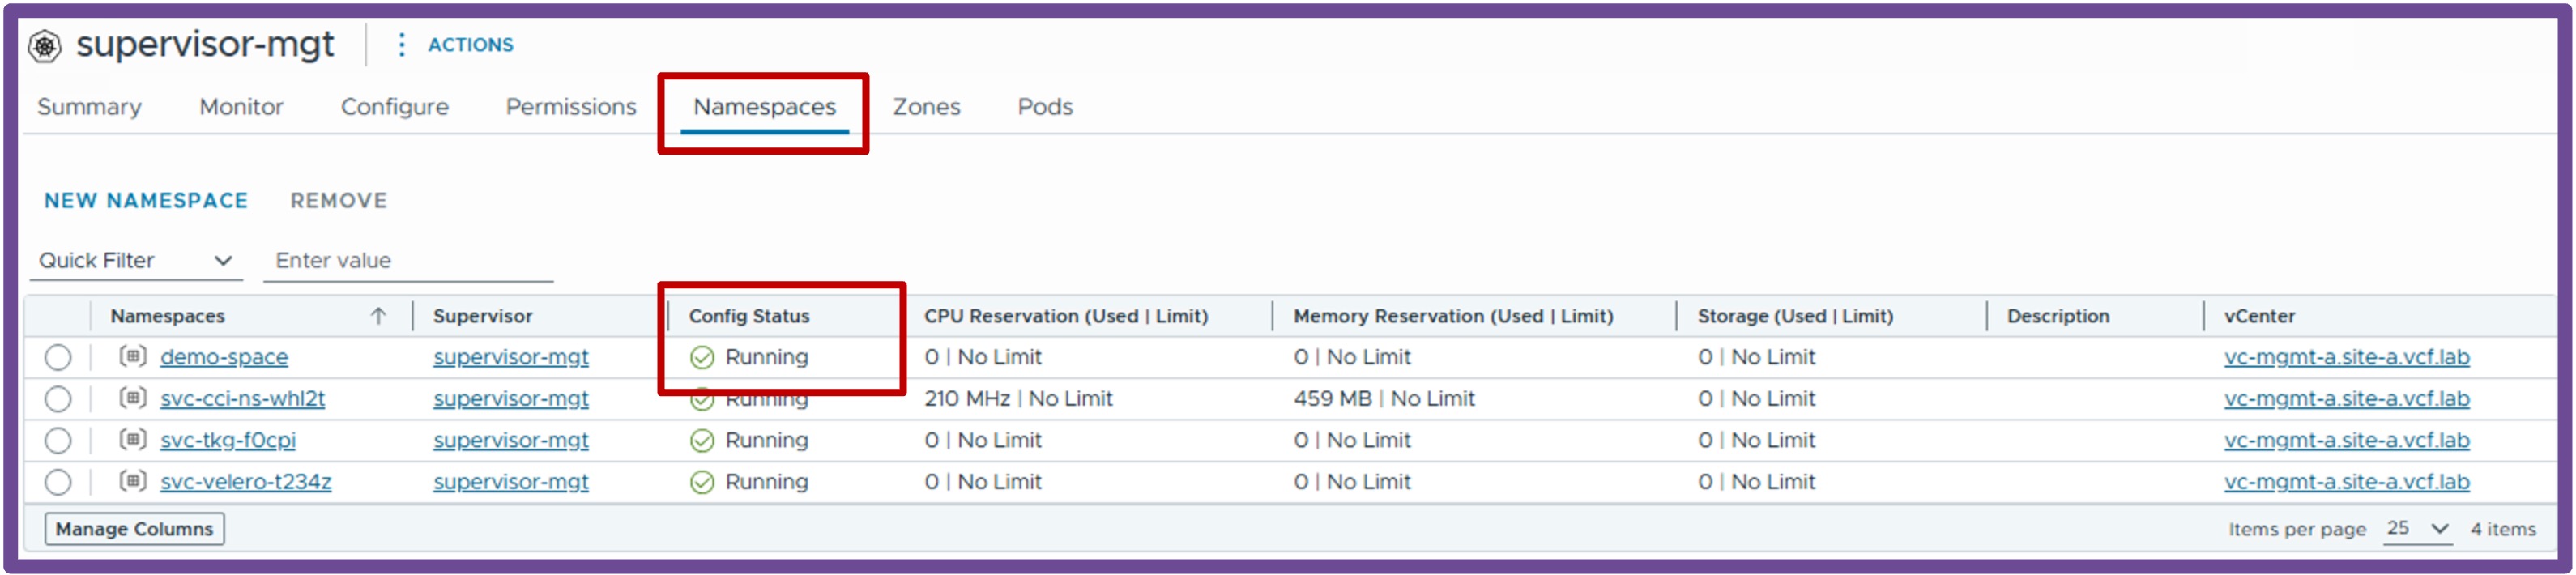
Once the wizard completes, verify the deployment was successful by navigating to vCenter > Supervisor Management > Supervisors, select [your supervisor], and navigate to Namespaces.
Validate Namespace Storage and Content Library
Verify the Namespace has at least a Content Library, VM Classes, and Storage by navigating to vCenter > Supervisor Management > Supervisors, select [your supervisor], navigate to Namespaces, and select [your namespace].