 Supervisor with "NSX + CTGW/Edge/T0"
This section describes the procedures for provisioning and managing Network Services within a VKS Namespace utilizing an "NSX + CTGW/Edge/T0" architecture inside a vSphere environment.
- Network Services
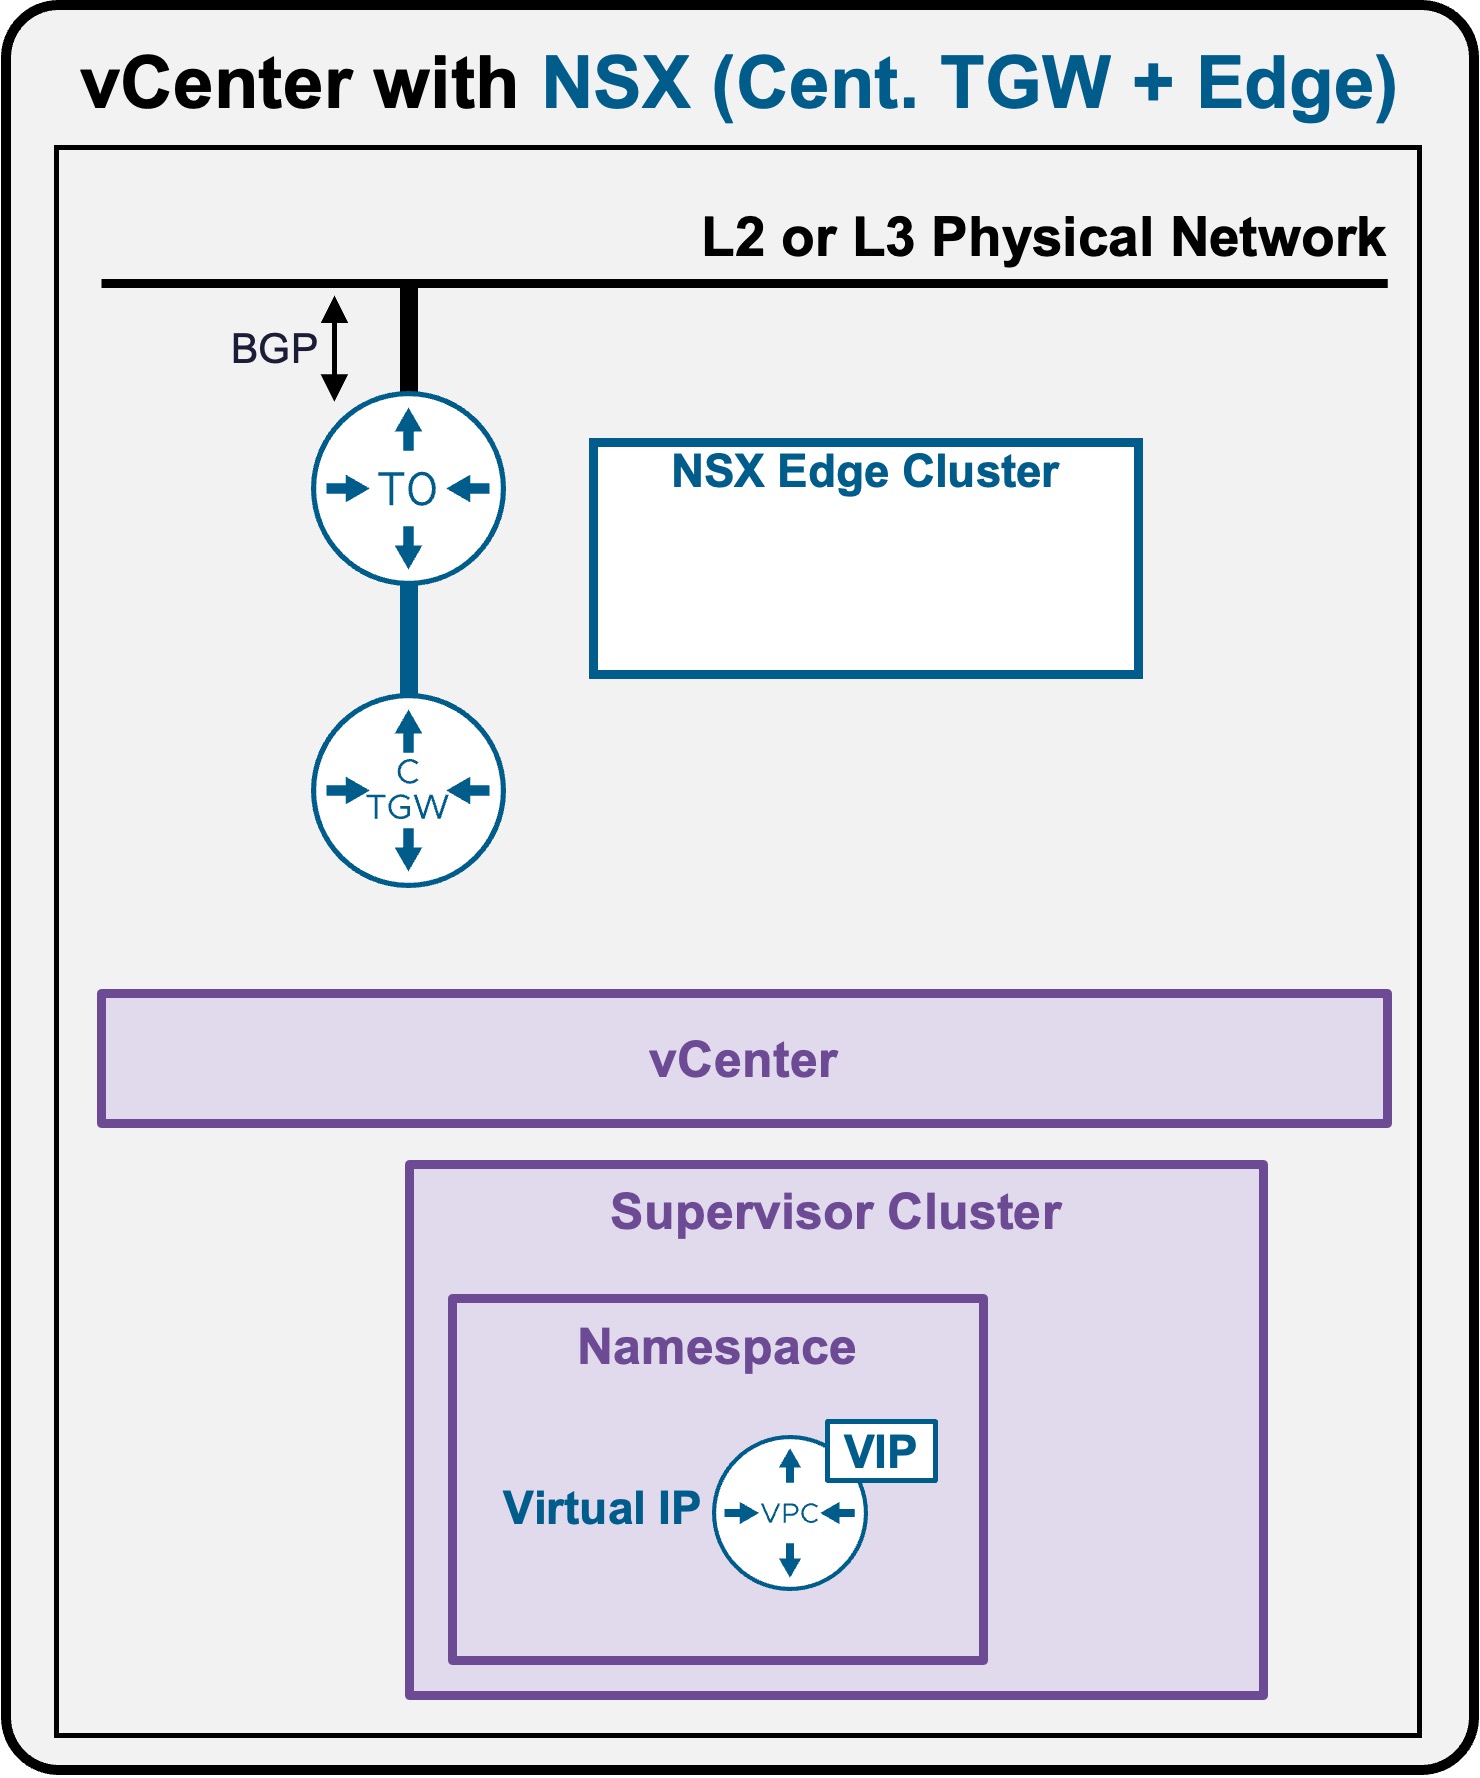
Network Services: VM Load Balancers
The primary use case for configuring a VM Load Balancer is to efficiently distribute inbound network traffic across a designated pool of backend Virtual Machines.
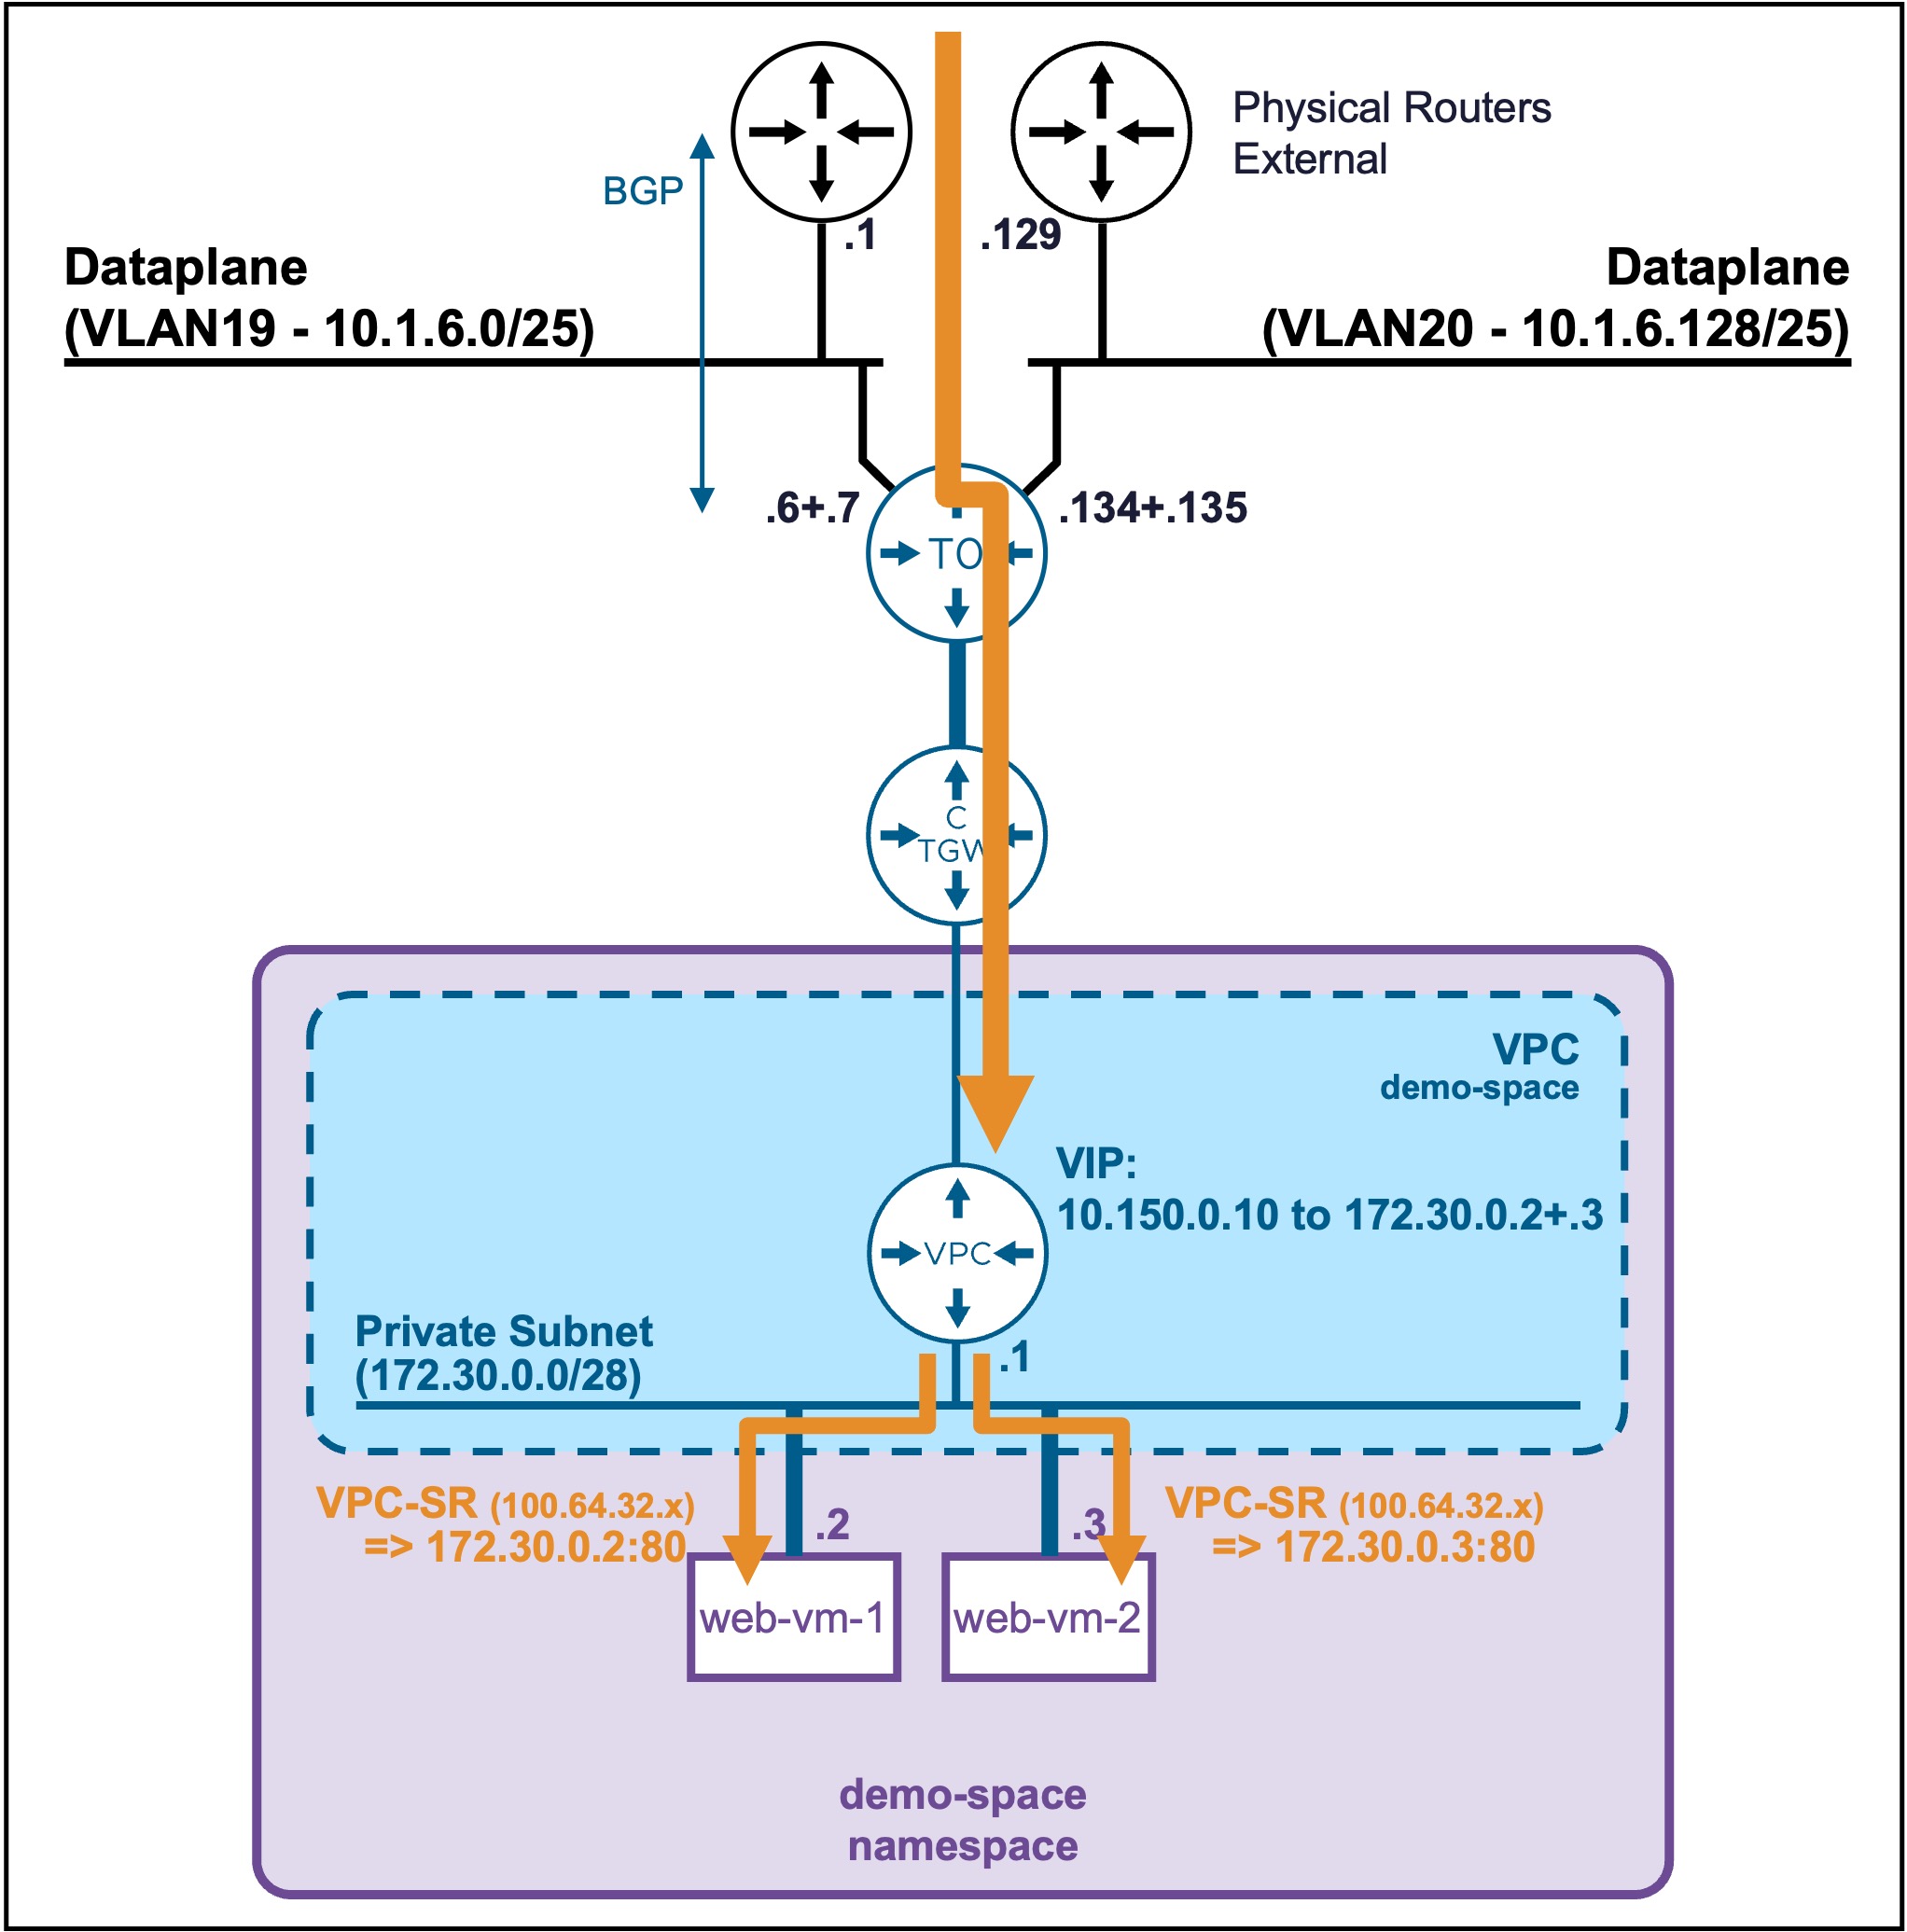
Current Limitation: No Application Health Checks
Currently, the vCenter Namespace VM Load Balancer does not perform application-level health checks on backend VMs.
If a backend VM goes down, the load balancer VIP will continue forwarding traffic to it.
This section will be updated once active health monitoring becomes officially available.
Create a VM Load Balancer
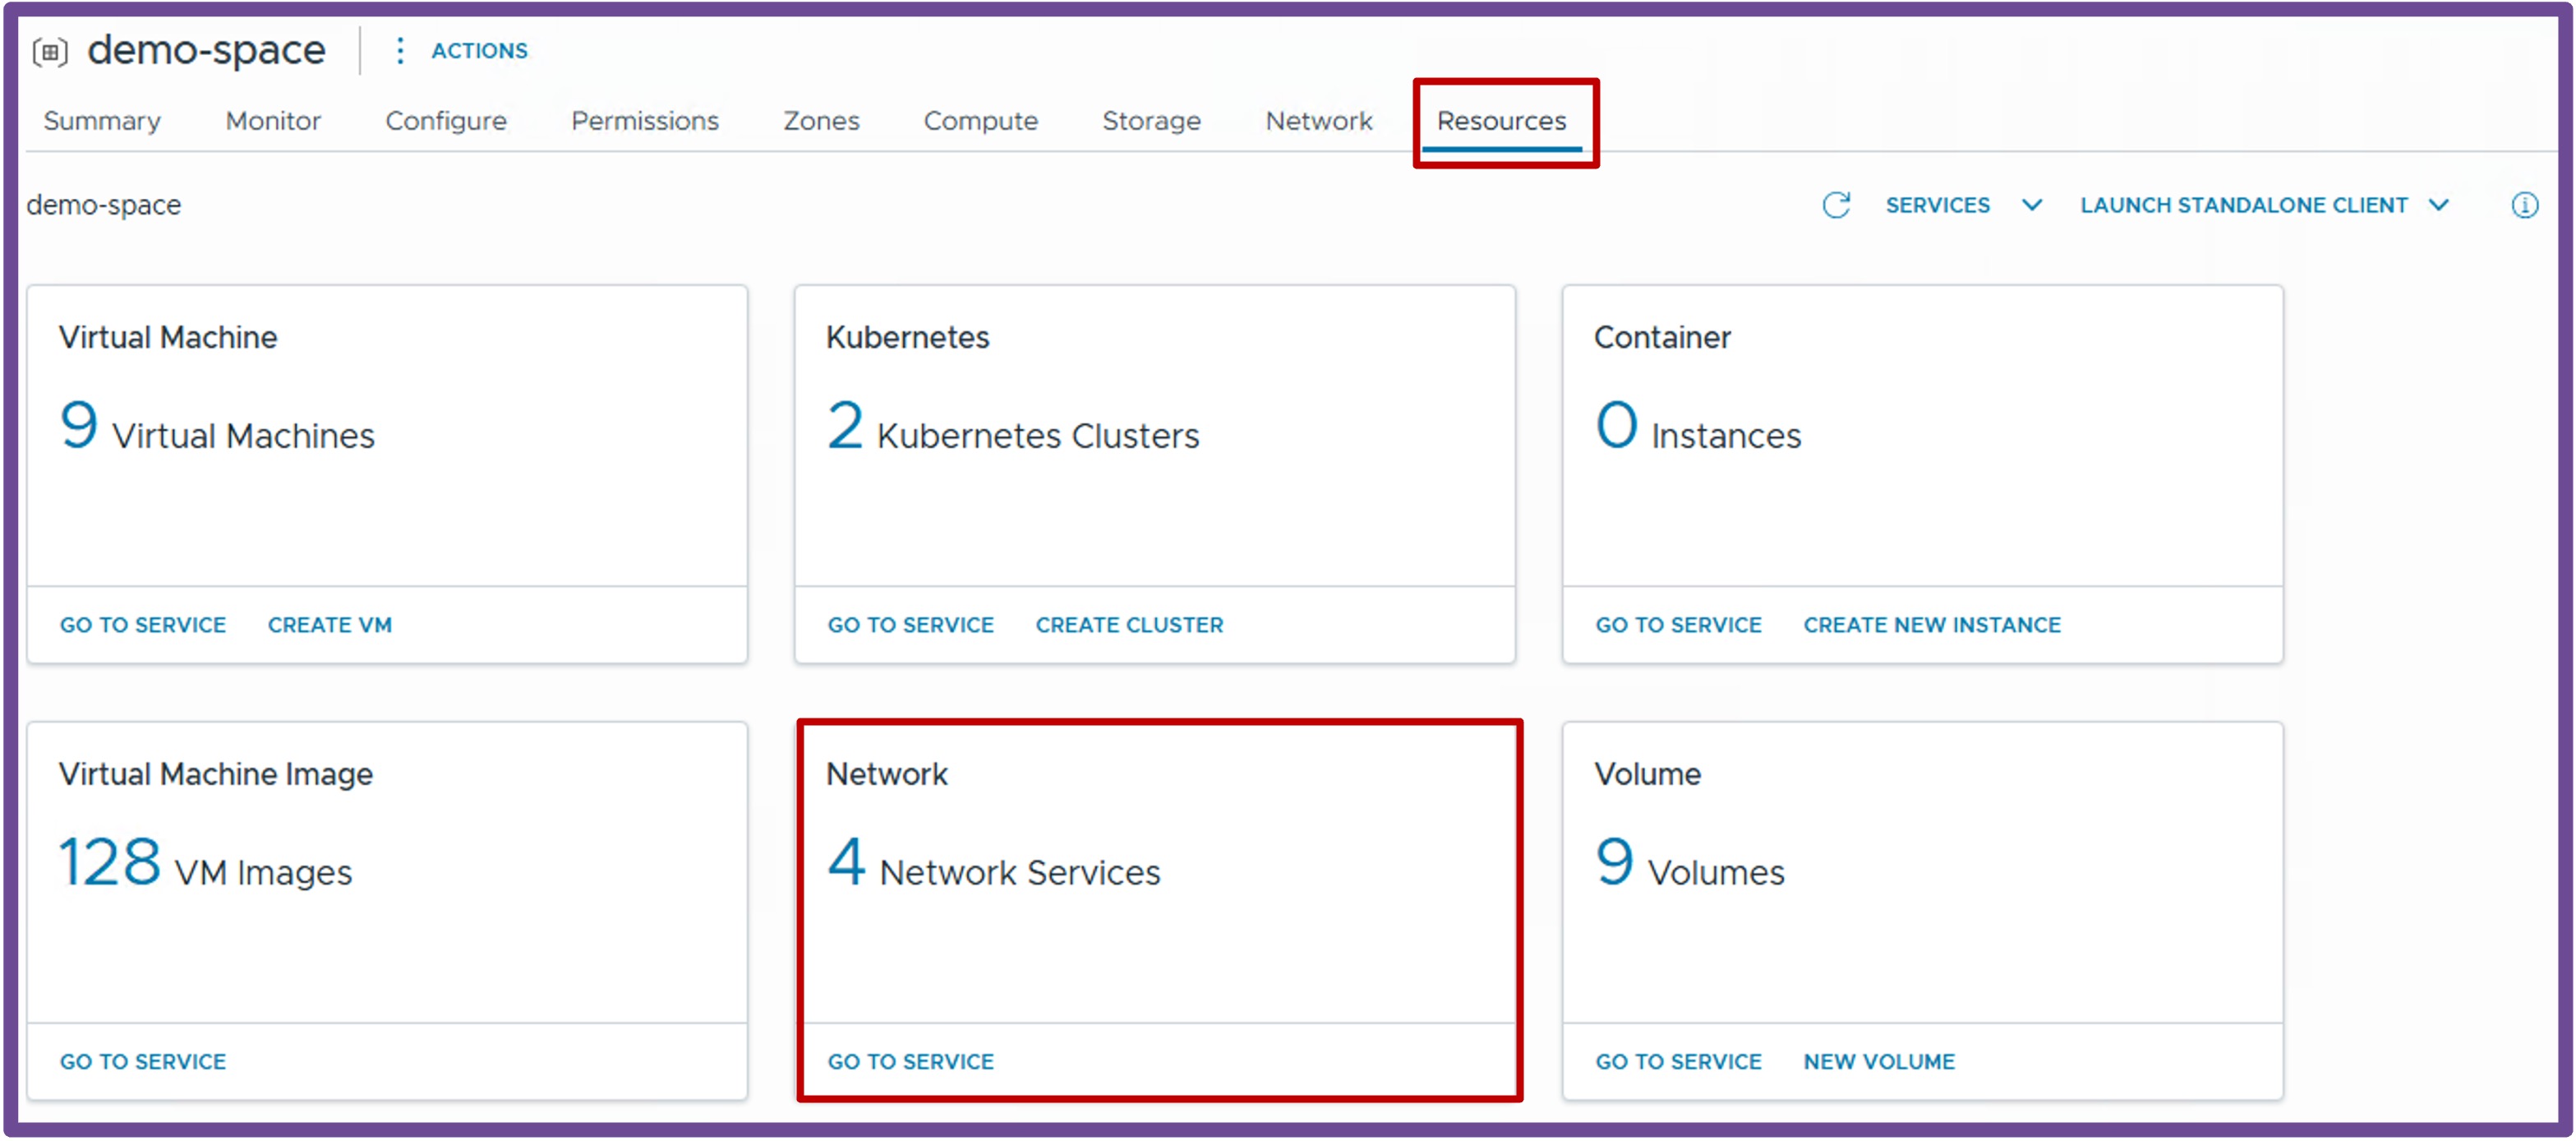
Navigate to vCenter > Supervisor Management > Supervisors, select your target Supervisor, click the Namespaces tab, and select your specific Namespace.
Under the Resources card, click Network - Go to Service.
1. Create New VM Load Balancer
Navigate to the VM Load Balancers tab, and click Create.
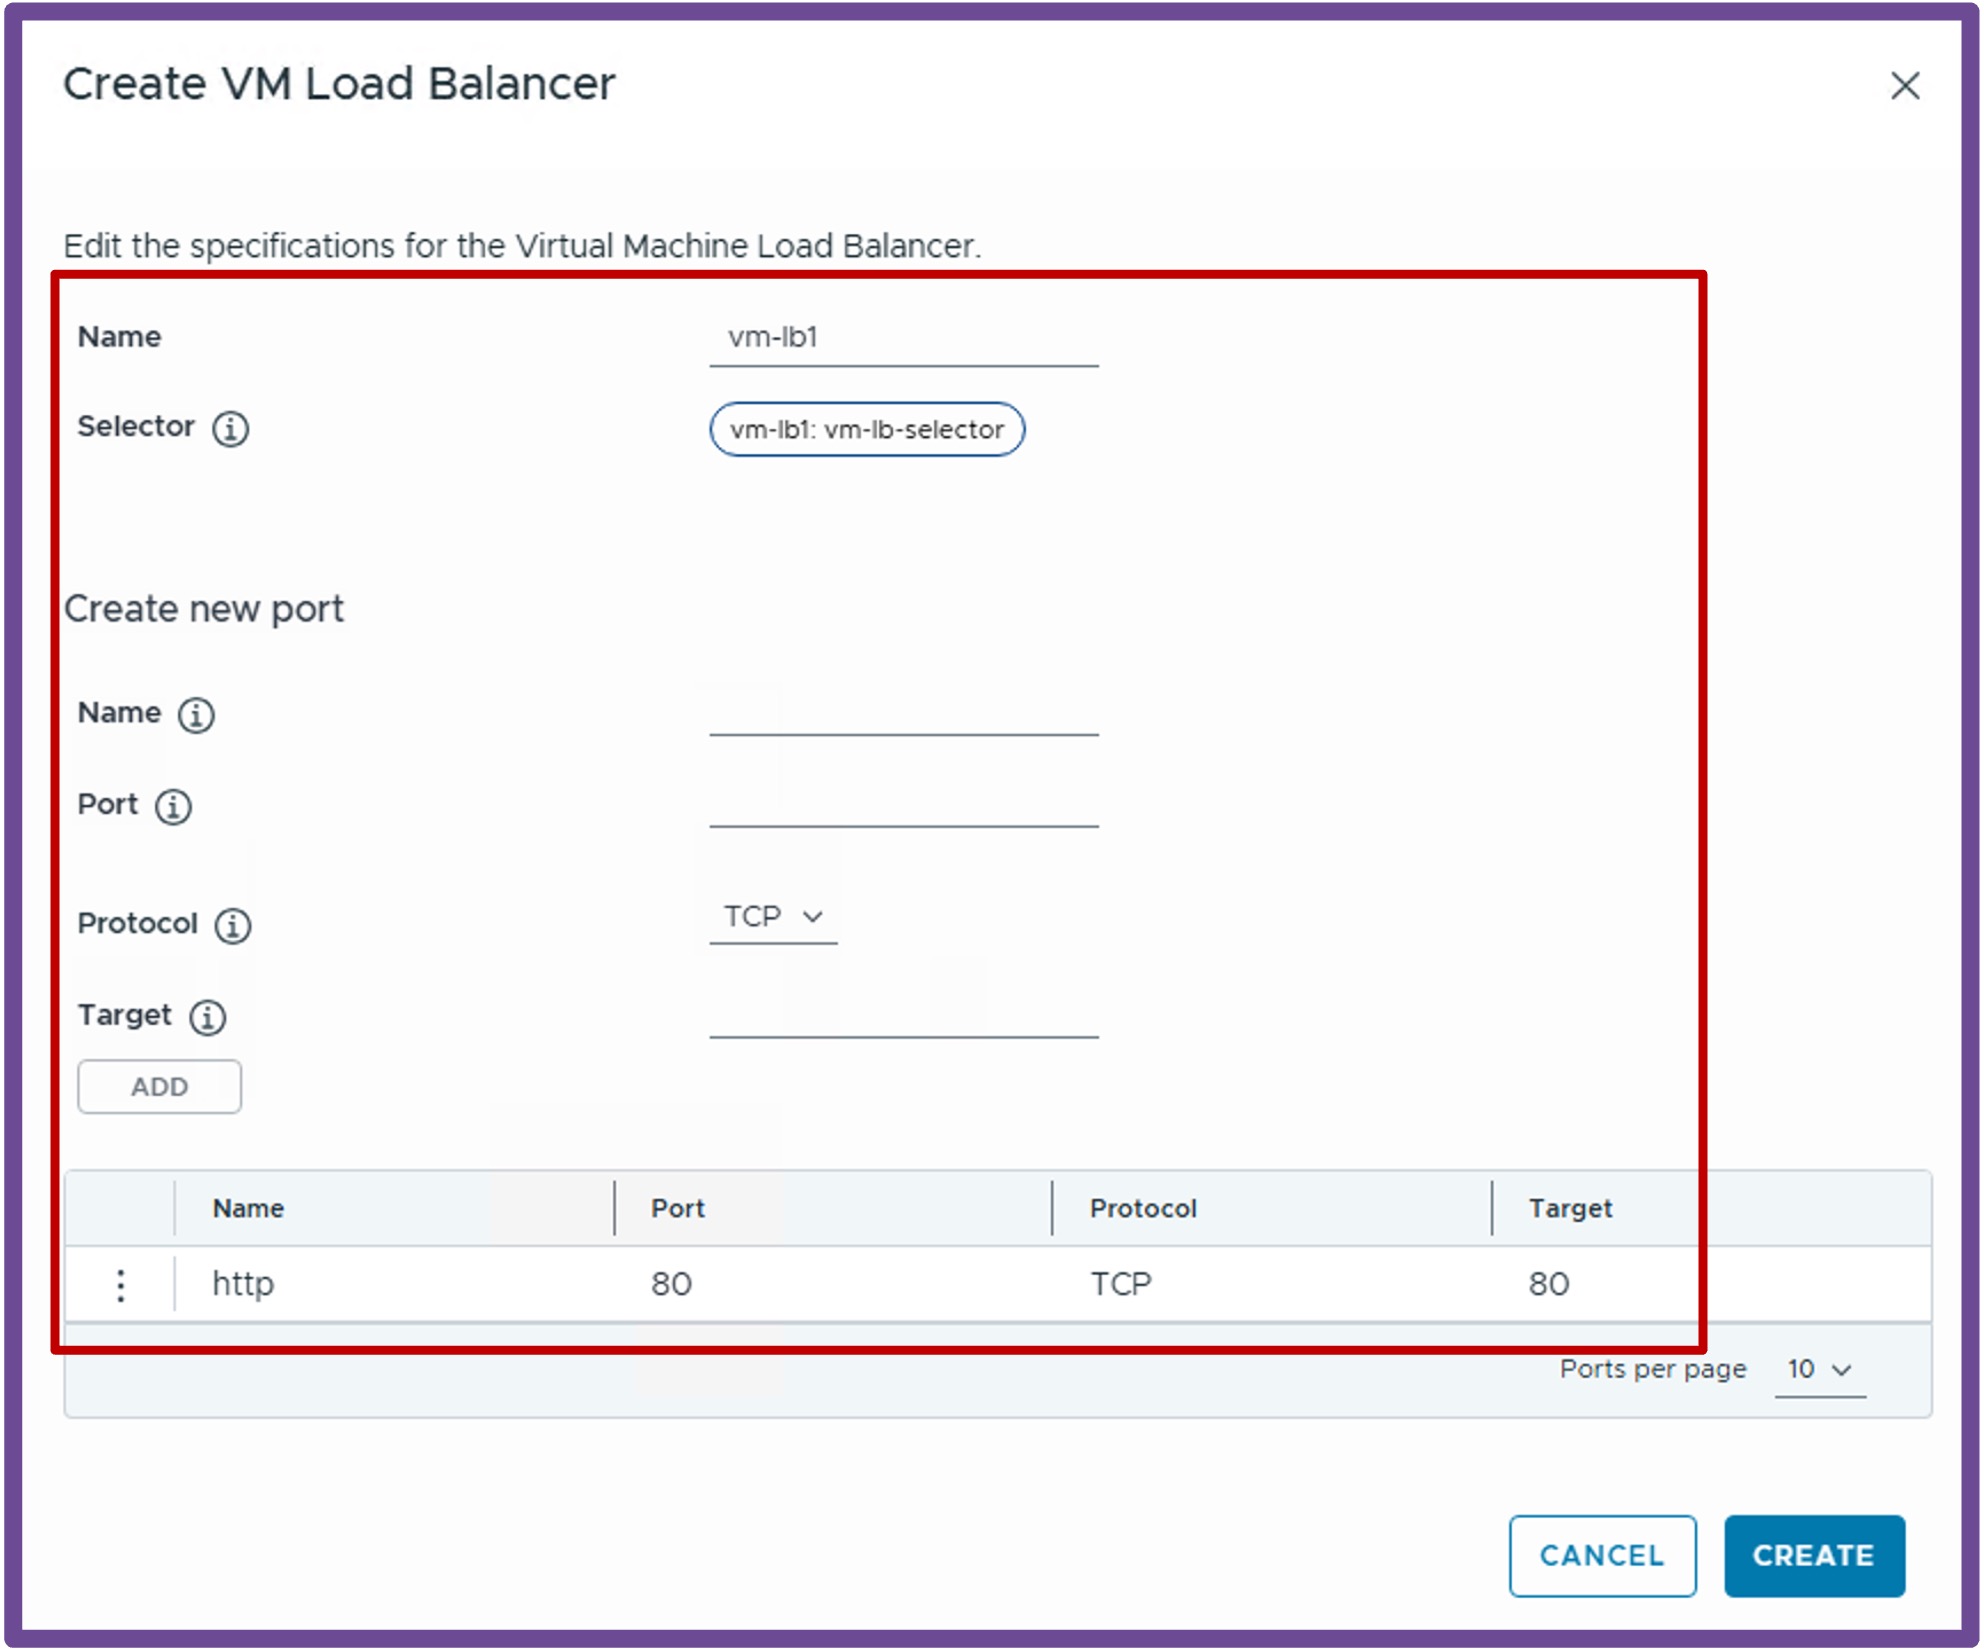
2. Apply Selectors (Labels) to the Backend VMs
The load balancer identifies which VMs to send traffic to based on Kubernetes labels. If you deploy a new VM from the vCenter UI, you can apply this label during creation. If the VM is already deployed, you can apply the label using kubectl.
How to label an existing VM via kubectl
Step A: Connect to Supervisor Namespace
vcf context use <supervisor>:<namespace>
Output example
PS C:\Users\Administrator\Documents> vcf context use supervisor-mgt:demo-space
Logged in successfully.
Step B: Add the label to the VM
kubectl label virtualmachine <vm> <label_key>=<label_value> -n <namespace>
Output example
PS C:\Users\Administrator\Documents> kubectl label virtualmachine web-vm-1 vm-lb1=vm-lb-selector -n demo-space
virtualmachine.vmoperator.vmware.com/web-vm-1 labeled
Validate VM Load Balancer
-
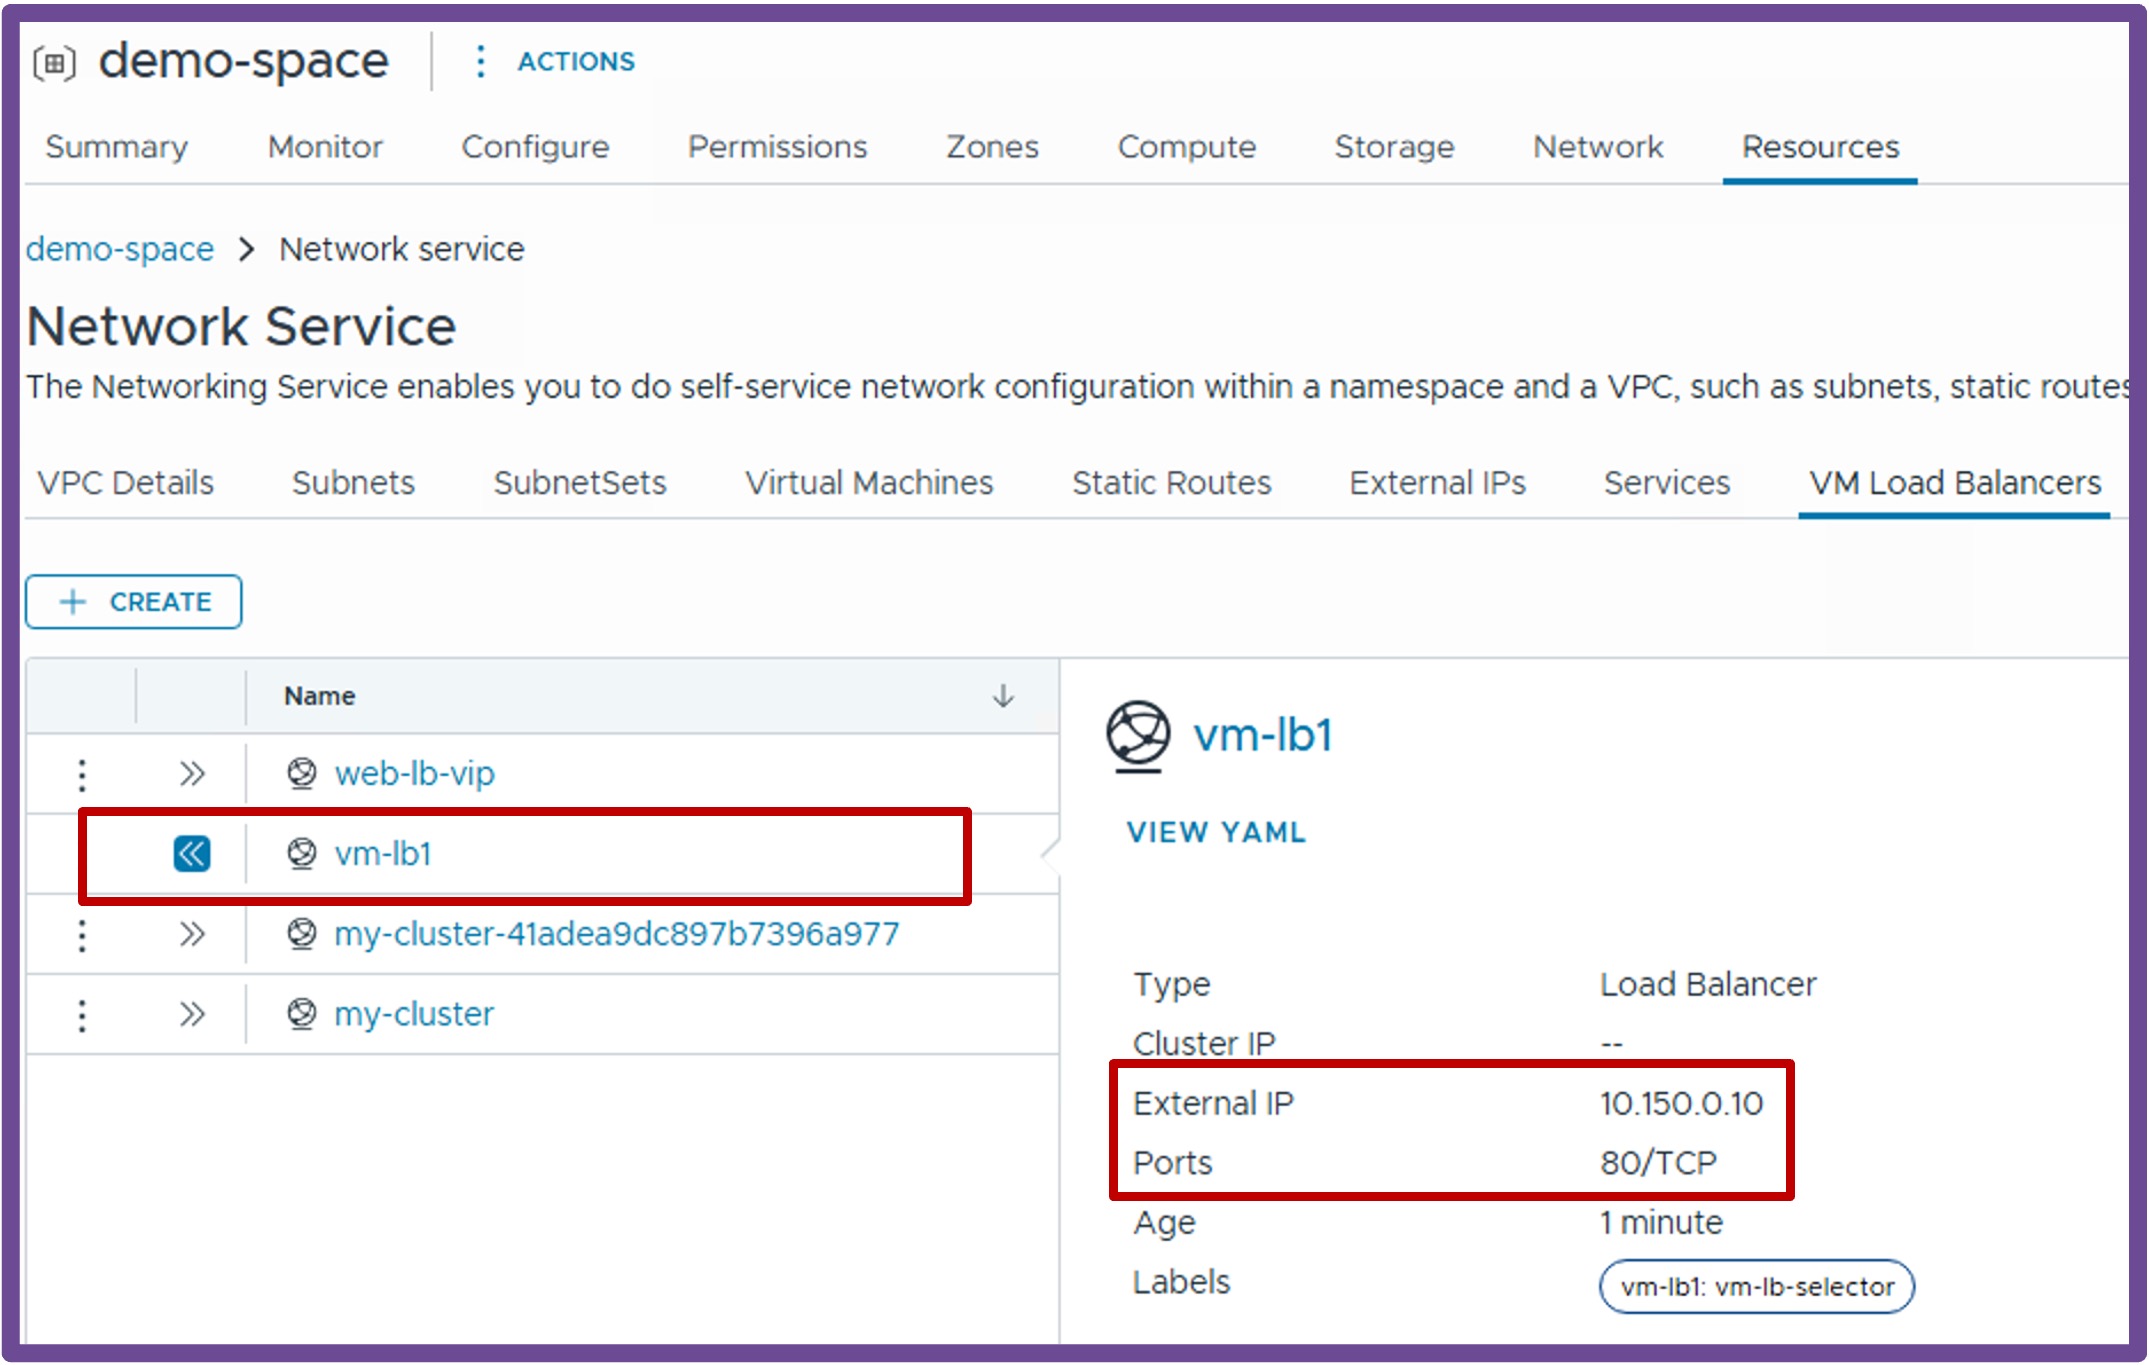
Locate the Load Balancer VIP
Navigate back to vCenter > Supervisor Management > Supervisors > target Supervisor > Namespaces > specific Namespace > Resources > Network - Go to Service.
Go to the VM Load Balancers tab and expand the newly created VM Load Balancer to view its assigned IP address.
-
Test Connectivity
To verify connectivity, connect to a VM within the VPC and usecurlto directly access the Load Balancer's Virtual IP (VIP).root@vm-public:~# curl http://10.150.0.10 <h1>It works - web-vm-1</h1>