 Supervisor with "VDS + FLB"
This section describes the procedures for deploying an application (VMs/K8s) into the VKS Namespace utilizing a "VDS + FLB" architecture inside a vSphere environment.
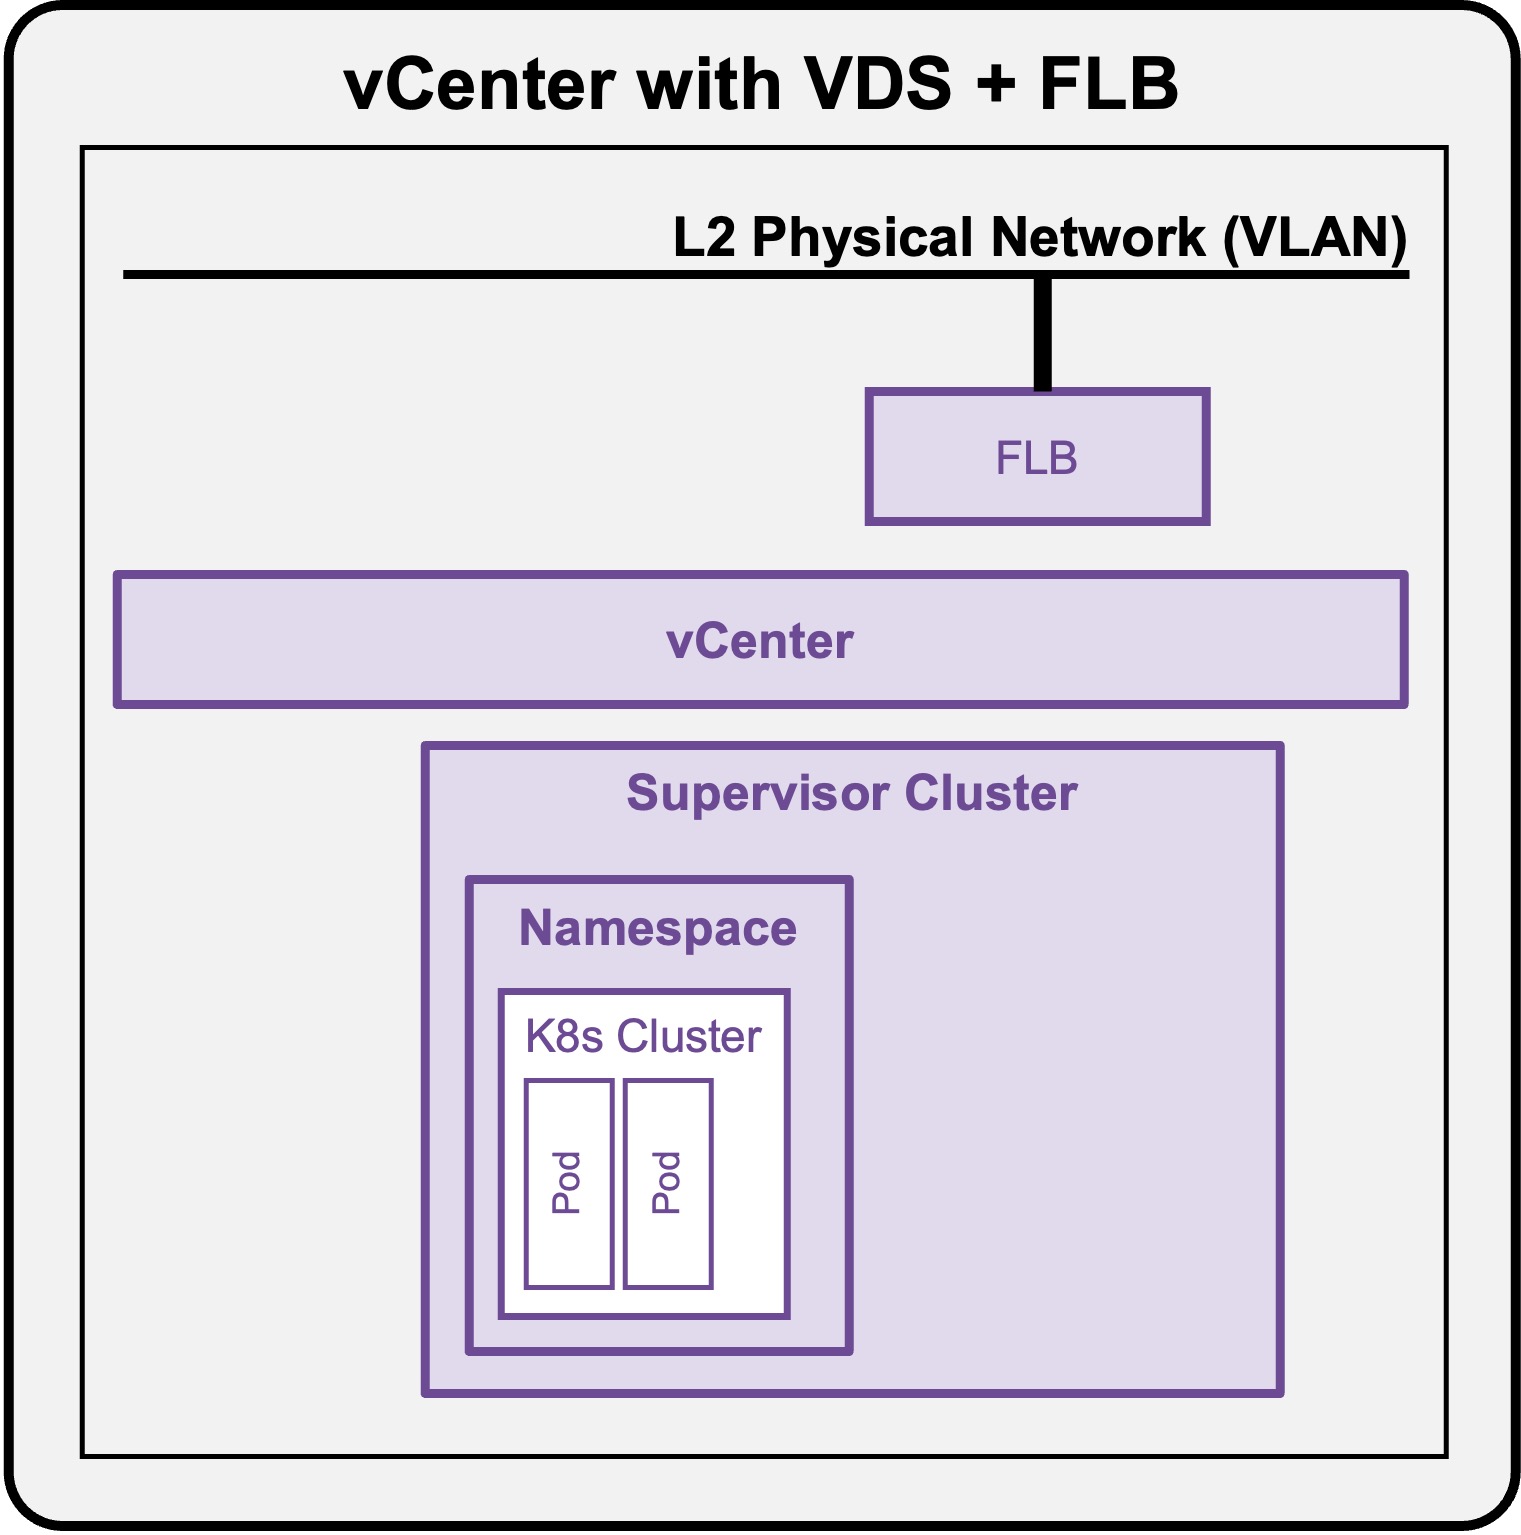
Deployment App (k8s)
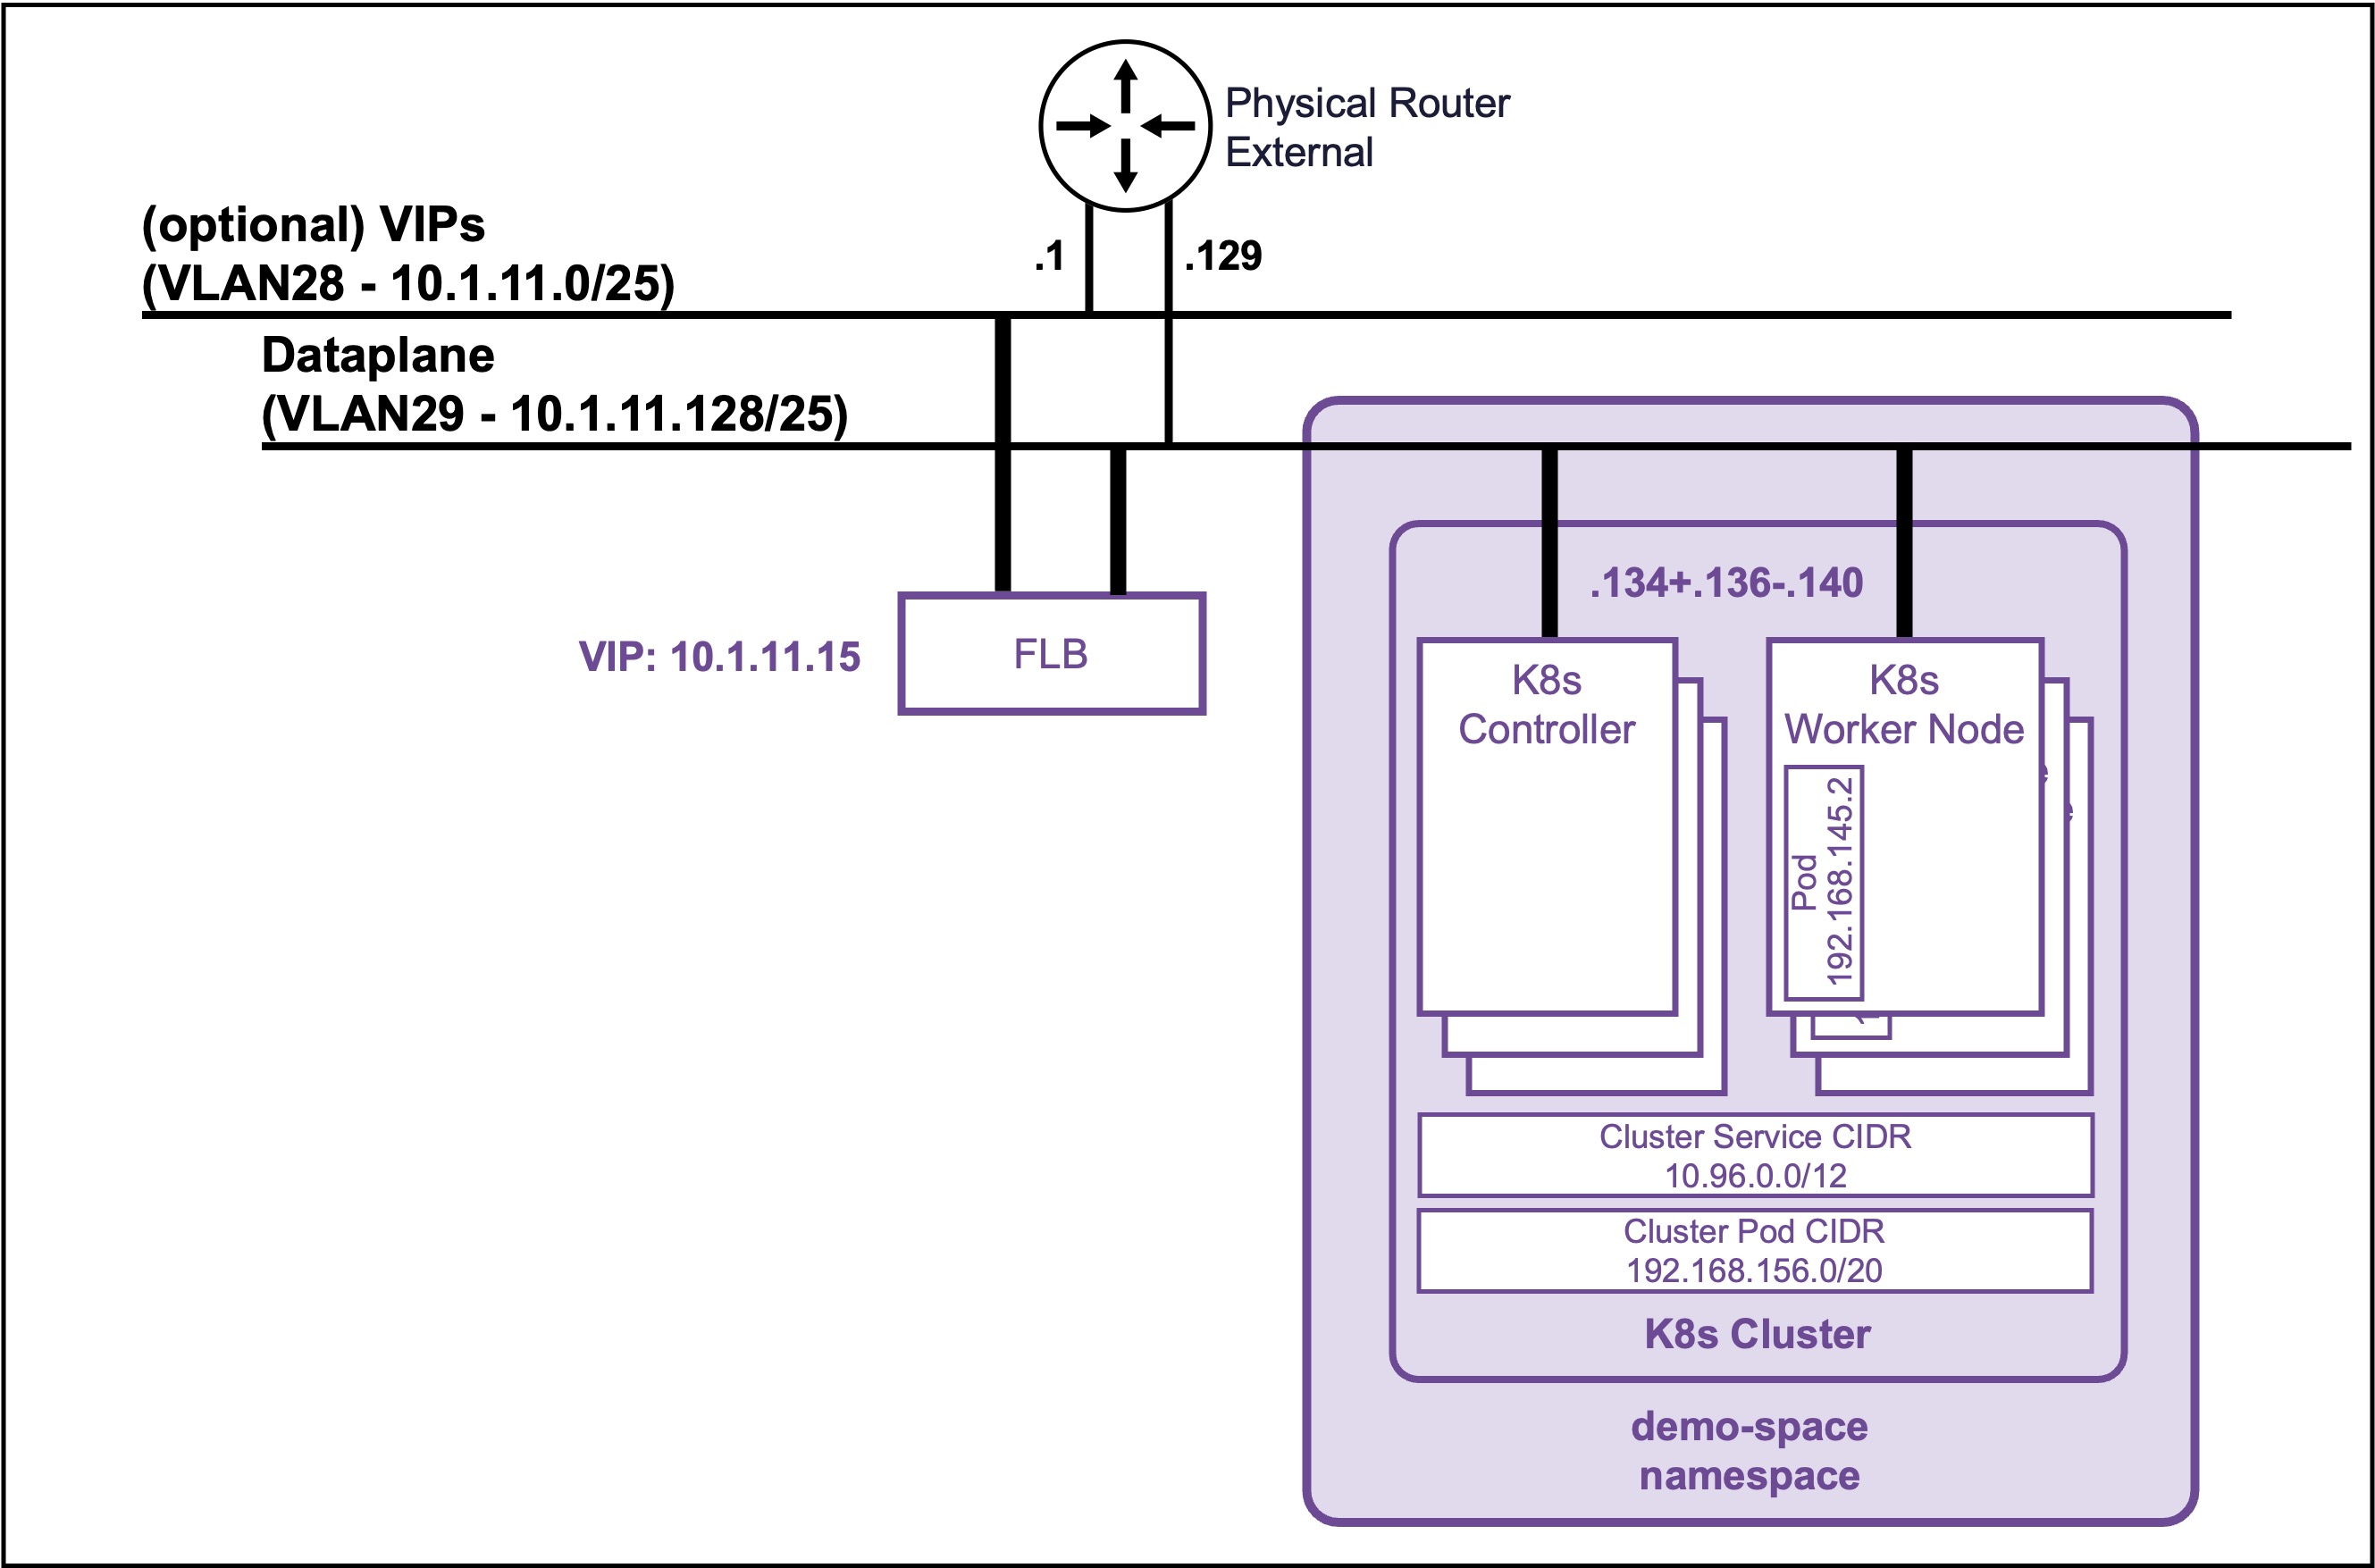
Client Operating System
While the command outputs below are captured from a Windows client, the vcf and kubectl CLI tools operate identically across Linux and macOS environments.
Deploy a Full Application (Load Balancer + Pods)
Connect to the K8s Cluster
See Connect to the K8s Cluster
(Optional) Create a Namespace in the K8s Cluster
Create a Namespace if you want to deploy the application (pod) in a specific K8s Cluster Namespace (not default).
kubectl create namespace ns1
Output example
PS C:\Users\Administrator\Documents> kubectl create namespace ns1
namespace/ns1 created
Allow the deployment of applications in the Namespace.
kubectl label ns ns1 pod-security.kubernetes.io/enforce=baseline
Output example
PS C:\Users\Administrator\Documents> kubectl label ns ns1 pod-security.kubernetes.io/enforce=baseline
namespace/ns1 labeled
Create application (LB + 2 Pods apache) yaml file
Create file "apache-k8s.yaml"
apache-k8s.yaml file
apiVersion: v1
kind: Service
metadata:
  name: apache-vip-service
  namespace: ns1
spec:
  type: LoadBalancer
  ports:
    - port: 80
      targetPort: 8080
      protocol: TCP
  selector:
    app: apache-web
---
apiVersion: apps/v1
kind: Deployment
metadata:
  name: apache-deployment
  namespace: ns1
spec:
  replicas: 2
  selector:
    matchLabels:
      app: apache-web
  template:
    metadata:
      labels:
        app: apache-web
    spec:
      containers:
        - name: apache
          image: public.ecr.aws/docker/library/httpd:2.4
          ports:
            - containerPort: 8080
              protocol: TCP
          # Intercept startup to write the file, THEN start Apache
          command: ["/bin/sh", "-c"]
          args:
            - 'sed -i "s/Listen 80/Listen 8080/g" /usr/local/apache2/conf/httpd.conf && echo "<h1>It works - Pod: $HOSTNAME</h1>" > /usr/local/apache2/htdocs/index.html && httpd-foreground'
Deploy the application (LB + 2 Pods apache)
kubectl apply -f apache-k8s.yaml
Output example
PS C:\Users\Administrator\Documents> kubectl apply -f apache-k8s.yaml
service/apache-vip-service created
deployment.apps/apache-deployment created
Validate deployment of the application (LB + 2 Pods apache)
-
Check application VIP
kubectl get service apache-vip-service -n ns1Output example
PS C:\Users\Administrator\Documents> kubectl get service apache-vip-service -n ns1 NAME TYPE CLUSTER-IP EXTERNAL-IP PORT(S) AGE apache-vip-service LoadBalancer 10.101.178.230 10.1.11.15 80:32176/TCP 3m34s -
Check application Pods
kubectl get pods -n ns1Output example
PS C:\Users\Administrator\Documents> kubectl get pods -n ns1
NAME                                 READY   STATUS    RESTARTS   AGE
apache-deployment-58bf9564f6-mx6rb   1/1     Running   0          3m52s
apache-deployment-58bf9564f6-vjpqw   1/1     Running   0          3m52s
Access the application (LB + 2 Pods apache)
curl http://10.1.11.15
Output example
PS C:\Users\Administrator\Documents> curl http://10.1.11.15
<h1>It works - Pod: apache-deployment-58bf9564f6-mx6rb</h1>

PS C:\Users\Administrator\Documents> curl http://10.1.11.15
<h1>It works - Pod: apache-deployment-58bf9564f6-vjpqw</h1>
The external load balancer (NSX) load balances (round-robin mode) to the Worker Nodes. Then, each Worker Node load balances to the Apache pods (random). So, to validate the load balancing to the different Apache pods, run the curl command multiple times.