Installing the ISO Image for Photon OS 3.0
After you have downloaded the latest Photon OS ISO image into a folder of your choice, open VMware Workstation.
Start the Installation Process
From the File menu, choose New Virtual Machine to create a new virtual machine.
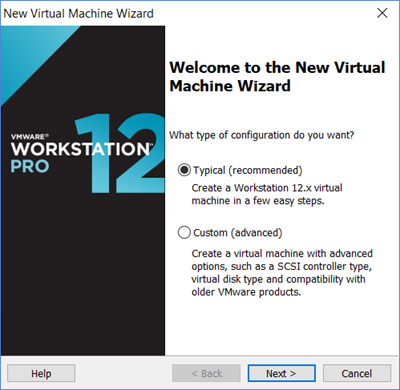
Select Typical or Custom, and then choose Next. These instructions refer to a Typical installation.
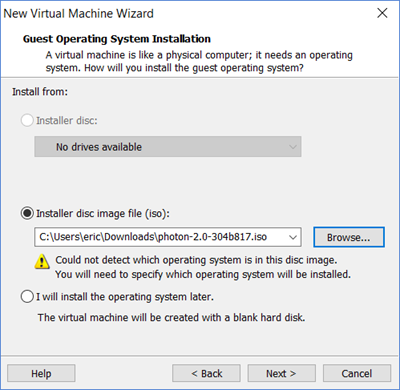
Select the ISO Image
Select Installer disc image file (iso), choose Browse and select the Photon OS ISO file.
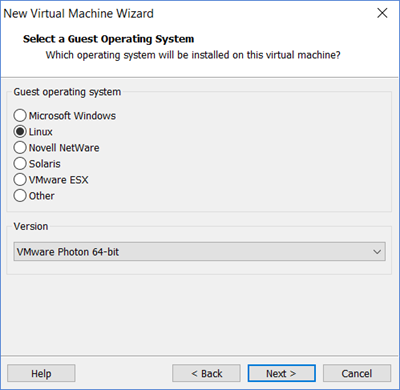
Select the Operating System
Choose Next. Select the Guest operating system.
For the Guest operating system, select Linux.
Click the Version dropdown and select VMware Photon 64-bit from the list.
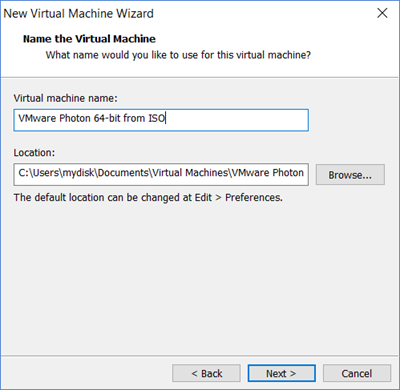
Specify the VM Name and Location
Choose Next. Specify a virtual machine name and location.
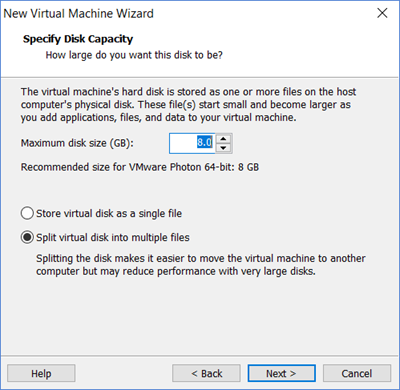
Specify Disk Options
Choose Next. Specify the maximum disk size and whether you want to split the virtual disk into multiple files or store it as a single file.
Configure VM Settings
Choose Next. Workstation displays a summary of your selections.
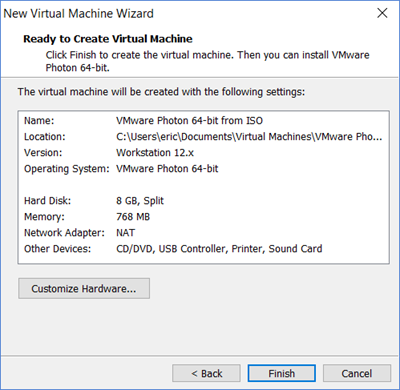
Important : Before you finish creating the Photon OS Virtual Machine, we strongly recommend that you customize the virtual machine and remove any unwanted devices that are not needed for a container run-time environment. To remove unnecessary devices, choose Customize hardware.
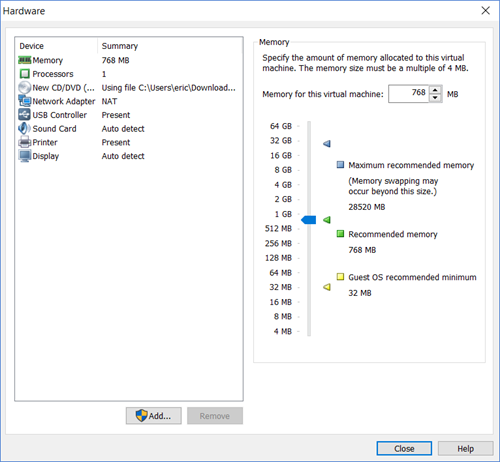
Consider removing the following components, which are not used by Photon OS:
- Select Sound Card, un-tick the Connect at power on option. Confirm your action and choose Close to return to the VM Settings by .
- Select USB Controller and ensure that the Share Bluetooth devices with the virtual machine setting is unchecked (it should be unchecked, by default) and then choose Close.
- Select Display and ensure that the Accelerate 3D Graphics option is unchecked (it should be unchecked, by default) and then choose Close.
- At this stage we have now made all the necessary customizations and you are ready to select the Photon OS ISO image to boot and begin the installation process.
Choose Finish.
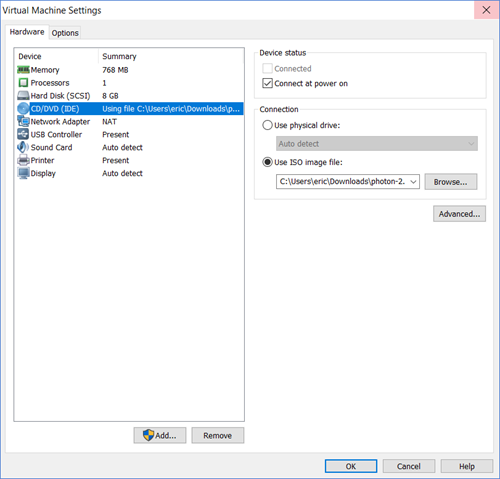
In Workstation, choose Edit virtual machine settings, select CD/DVD (IDE), and verify that Connect at power on is selected.
Configure a Secure Boot (Optional)
Note: If you want to configure a secure boot for the Photon OS VM, in Workstation, choose Edit virtual machine settings, select Options, choose Advanced, and select Boot with EFI instead of BIOS.
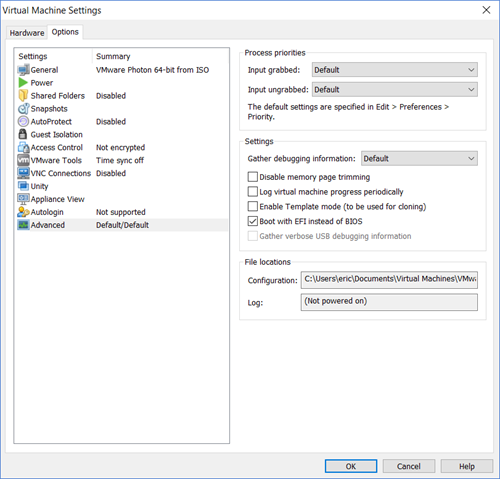
The EFI boot ensures that the ISO content is signed by VMware and that the entire stack is secure.
Choose OK.
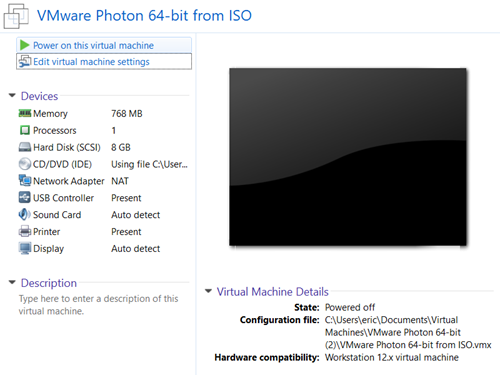
Power On the VM
Choose Power on this virtual machine.
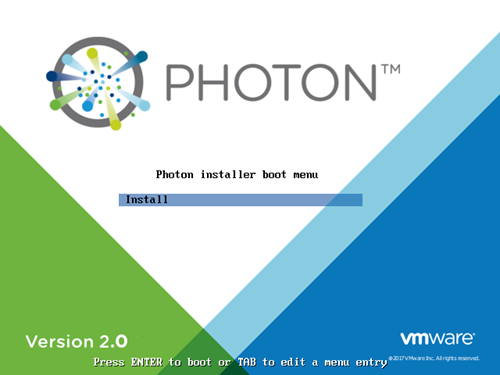
When you see the Photon Installer boot menu, press Enter on your keyboard to start installing.
Review the license agreement.
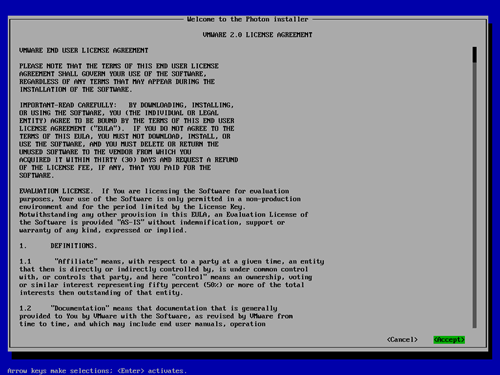
Choose Accept and press Enter.
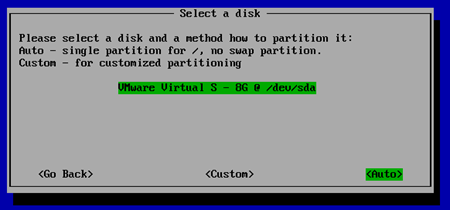
Configure the Partition
The installer will detect one disk, which should be the 8GB volume configured as part of the virtual machine creation. Choose Auto to have the installer automatically allocate the partition, or choose Custom if you want to configure individual partitions, and then press the Enter key.
Note: If you choose Custom, the installer displays the following screen.
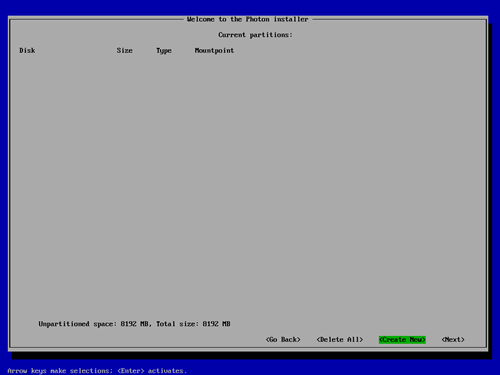
For each custom partition, choose Create New and specify the following information:
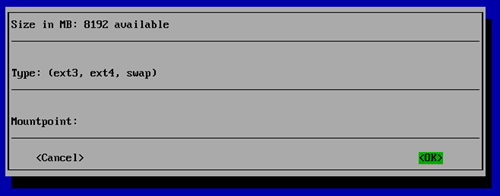
Size - Preallocated size of this partition, in MB.
Type - One of the following options:
- ext3 - ext3 file system
- ext4 - ext4 file system
swap - swap partition
Mountpoint - Mount point for this partition.
Choose OK and press the Enter key. When you are done defining custom partitions, choose Next and press the Enter key.
The installer prompts you to confirm that you want to erase the entire disk. Choose Yes and press the Enter key.

Select an Installation Option
After partitioning the disk, the installer will prompt you to select an installation option.
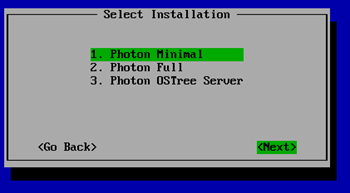
Each installation option provides a different run-time environment, depending on your requirements.
Option Description Photon Minimal Photon Minimum is a very lightweight version of the container host runtime that is best suited for container management and hosting. There is sufficient packaging and functionality to allow most common operations around modifying existing containers, as well as being a highly performant and full-featured runtime. Photon Full Photon Full includes several additional packages to enhance the authoring and packaging of containerized applications and/or system customization. For simply running containers, Photon Full will be overkill. Use Photon Full for developing and packaging the application that will be run as a container, as well as authoring the container, itself. For testing and validation purposes, Photon Full will include all components necessary to run containers. Photon OSTree Server This installation profile will create the server instance that will host the filesystem tree and managed definitions for rpm-ostree managed hosts created with the "Photon OSTree Host" installation profile. Most environments should need only one Photon OSTree Server instance to manage the state of the Photon OSTree Hosts. Use Photon OSTree Server when you are establishing a new repository and management node for Photon OS hosts. Note: The option you choose determines the disk and memory resources required for your installation.
Select the option you want and press the Enter key.
The Network Configuration screen appears, select one of the four options to configure your network.
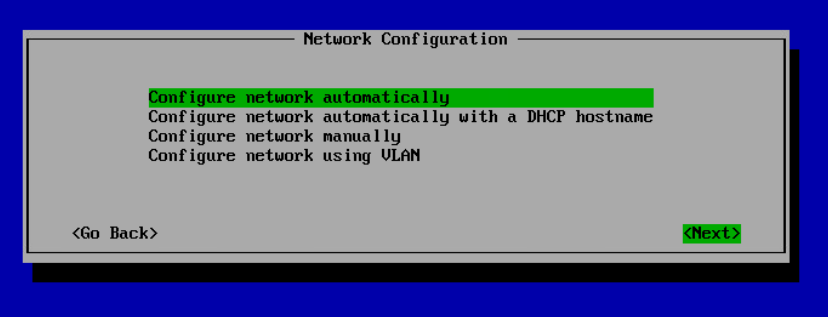
- Choose Configure network automatically and select Next to configure the network automatically.
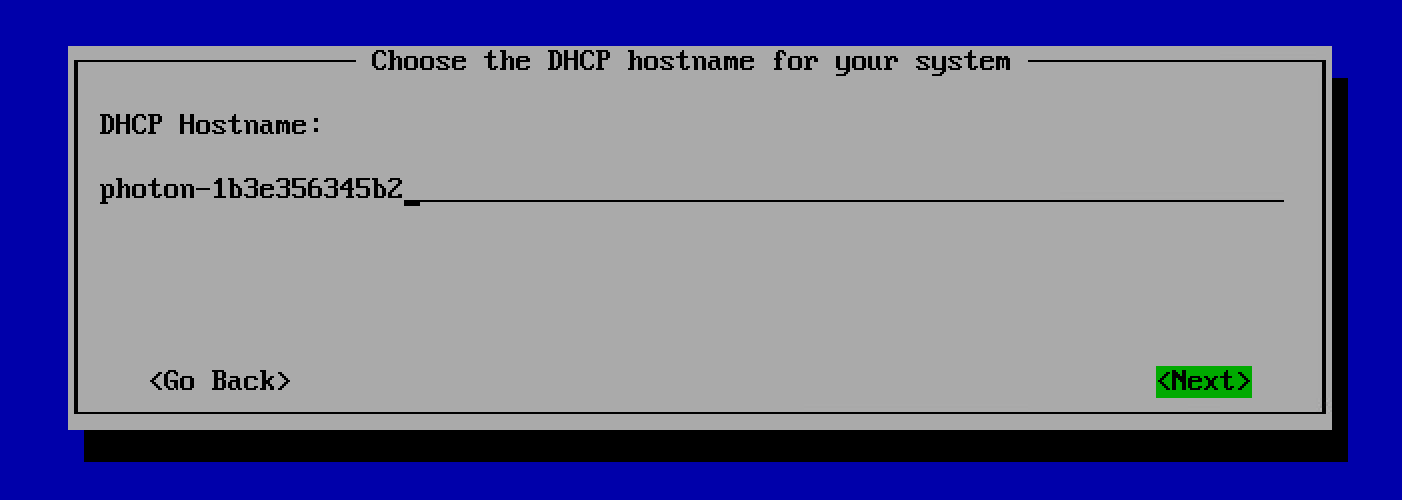
- To configure network automatically with the DHCP hostname, select Configure network automatically with a DHCP hostname and select Next. Enter the DHCP Hostname and select Next.
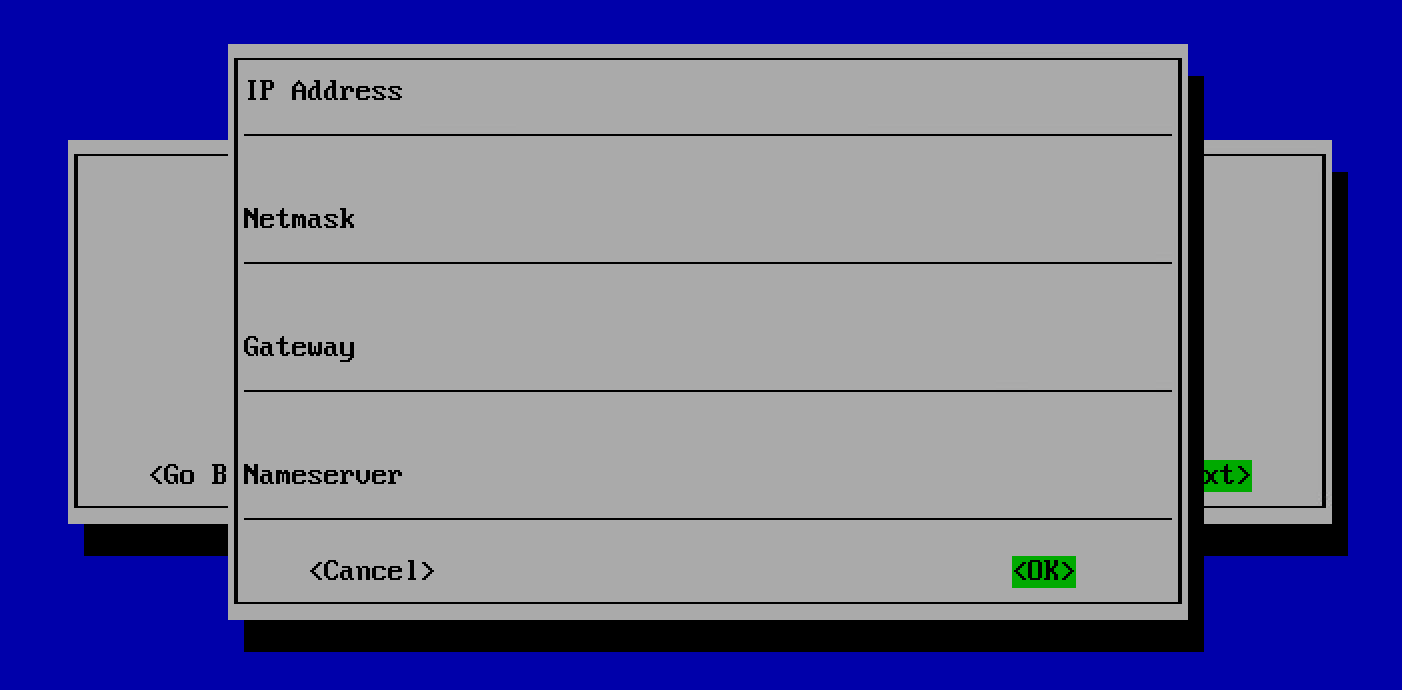
To configure the network manually, select Configure Network manually. In the window that appears, enter the IP Address, Netmask, Gateway and Nameserver and select OK.
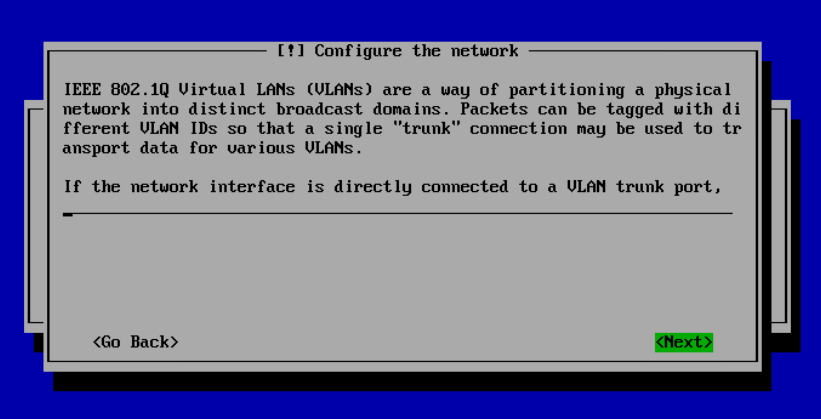
If your network interface is directly connected to the VLAN trunk port, choose YES on the Configure the network screen. Enter the VLAN ID and select Next.
 .
.
Select the Linux Kernel
Select a Linux kernel to install.
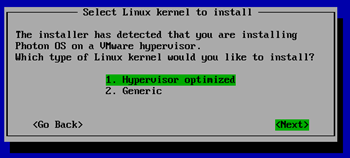
- Hypervisor optimized means that any components that are not needed for running under a VMware hypervisor have been removed for faster boot times.
Generic means that all components are included.
Choose Next and press the Enter key.
Specify the Hostname
The installer prompts you for a hostname and suggest a randomly generated, unique hostname that you can change if you want.
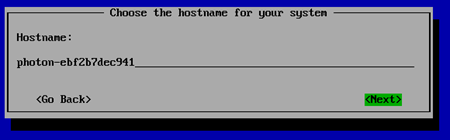
Press the Enter key.
Specify the System root Password
Note : Photon OS will not permit commonly used dictionary words to be set as a root password.
The installer prompts you to enter the system root password. Type the password and press the Enter key.
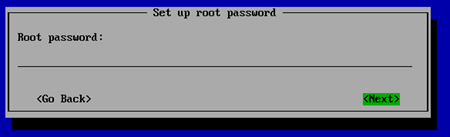
The installer prompts you to confirm the root password by typing it a second time.
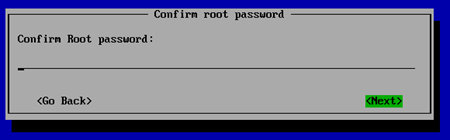
Press the Enter key. The installer proceeds to install the software. Installation times will vary based on the system hardware and installation options you selected. Most installations complete in less than one minute.
Reboot the VM and Log In
Once finished, the installer displays a confirmation message (which includes how long it took to install Photon OS) and prompts you to press a key on your keyboard to boot the new VM.

Press any key on the keyboard and the virtual machine will reboot into Photon OS.
As the initial boot process begins, the installer displays the Photon splash screen, and then a login prompt.
At the login prompt, type root as the username and provide the password chosen during the installation.

You can now use your container runtime environment and deploy a containerized application.