ML Pipelines
Introduction
The official Kubeflow Documentation explains the recommended workflow for creating a pipeline. It is well worth reading and helps you understand how pipelines are constructed. In this section, we take a shortcut and use one of the Kubeflow testing pipelines.
Prerequisites
Before getting started, make sure below requirements are fulfilled:
Have Python3 installed
Have the proper
pippackage installer for Python installed
Get Started
Install pipeline compiler
First, use pip to install kfp, the Kubeflow Pipelines SDK:
pip3 install kfp
Note
Depending on your operating system, you may need to use pip instead of pip3 here. Just make sure the package is installed for Python3.
Get a pipeline example
Next, fetch the Kubeflow repository:
git clone https://github.com/canonical/bundle-kubeflow.git
The example pipelines are Python files, but to be used through the dashboard, they need to be compiled into a YAML file. The
dsl-compile command can be used for this usually, but for code which is part of a larger package, this is not always straightforward.
A more reliable way to compile such files is to execute them as a Python module in interactive mode, and then use the kfp tool
to compile the file.
Compile pipeline
Change to the right directory:
cd bundle-kubeflow/tests
Then, execute the pipelines/mnist.py file as a module:
python3 -i -m pipelines.mnist
Now in terminal in interactive mode, import the kfp module:
import kfp
Execute below function to compile the YAML file:
kfp.compiler.Compiler().compile(mnist_pipeline, 'mnist.yaml')
In this case, mnist_pipeline is the name of the main pipeline function in the code, and mnist.yaml is the file to be generated to define the pipeine.
Add the compiled pipeline
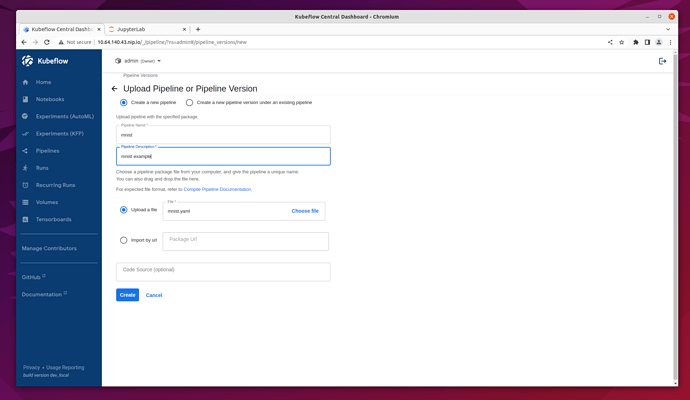
Once you have the compiled YAML file, download it. In Kubeflow on vSphere web UI, go to pipelines dashaborad by clicking the Pipelines on the left-side navigation. And then click the + Upload pipeline button.
In the upload page, choose Upload a file, and upload the mnist.yaml file. Then, click the Create button.
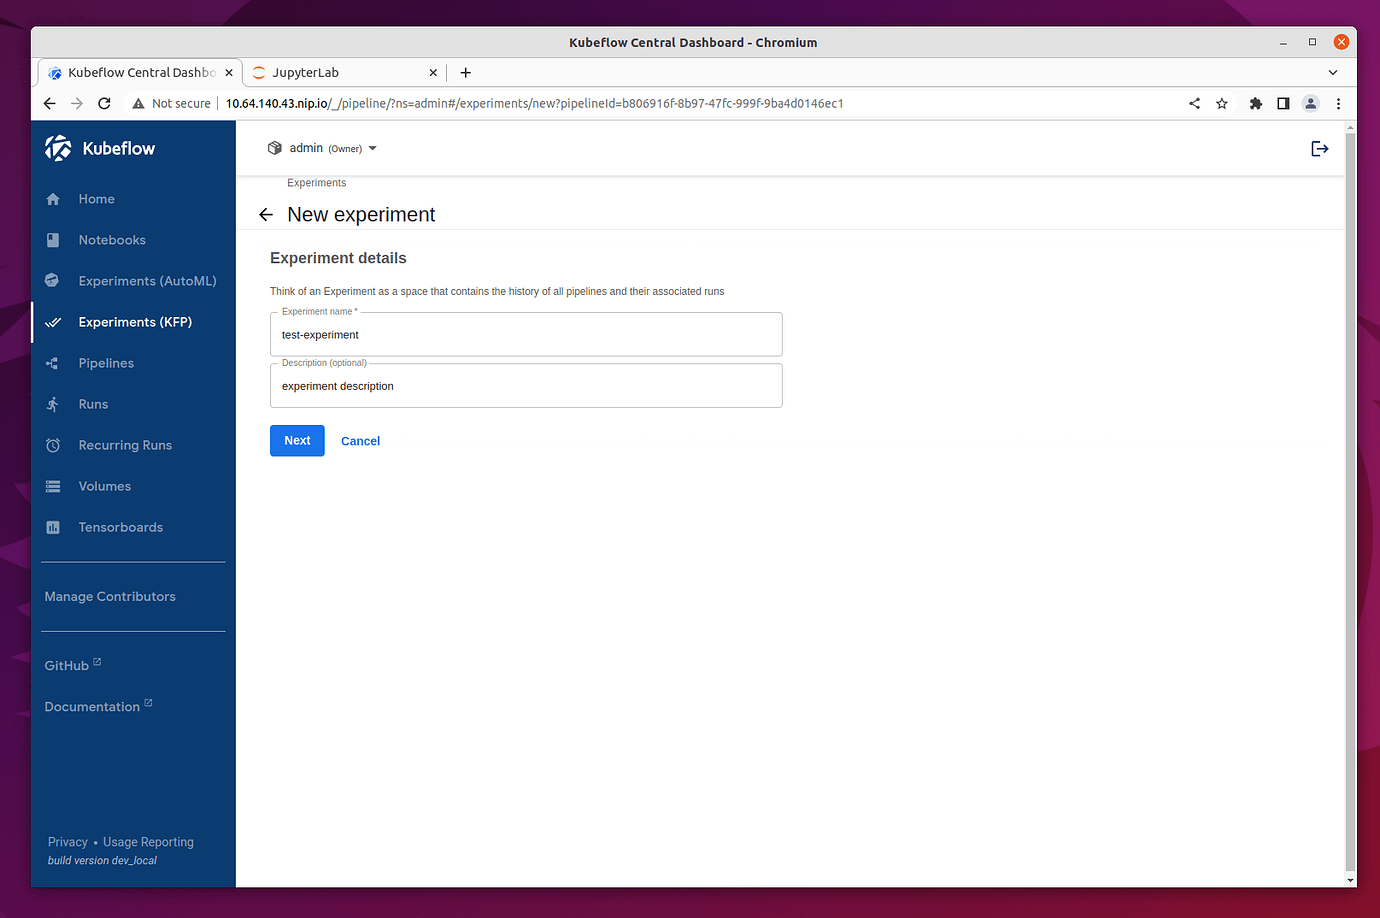
Once the pipeline is created, you are redirected to the pipelines Dashboard. Before running the pipeline, create an experiment first:
Execute the pipeline
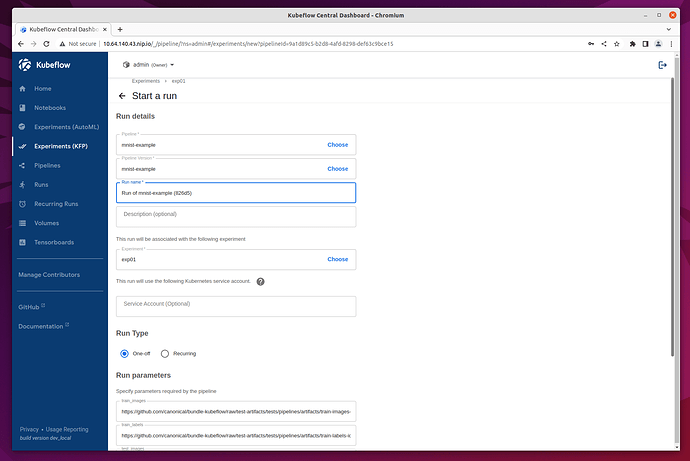
Once the experiment is created for your pipeline, you are redirected to Start a Run page. For this test, select One-off run and leave all the default parameters and options unchanged. Then, click Start to create your first Pipeline run.
View results
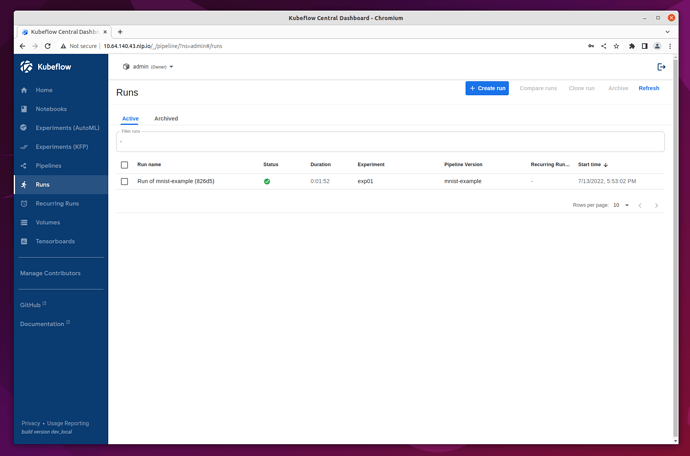
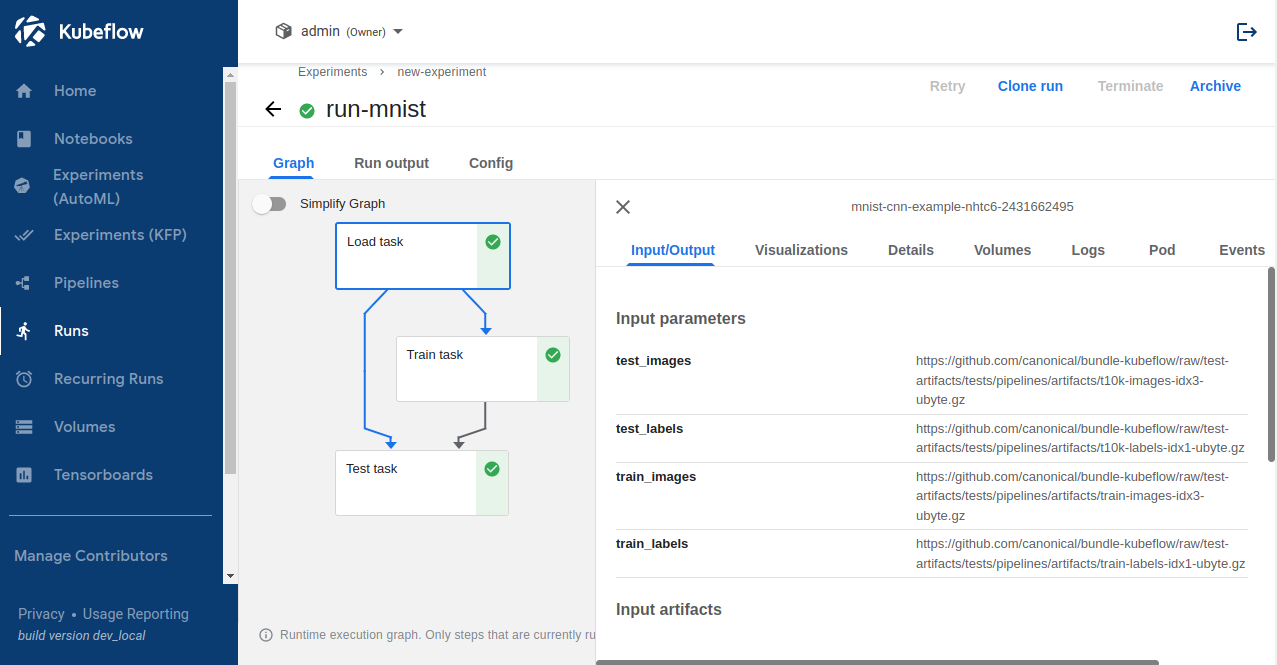
Once the run is started, you are redirected to Runs page, showing details of all the steps of the pipeline run. After a few minutes, there is a green checkpoint showing that it has been executed successfully.
In order to see more details, you click on the pipeline run and you are navigated to a page which shows all steps of the pipeline that have been executed. Click on each step of the pipeline, a new window will pop up on the right side, showing you the detailed information of the corresponding pipeline step, such as its pod, logs, YAML, etc.
Delete pipeline
To delete the pipeline, select it by checking the tick box on the left side of the pipeline name. Go to the top right corner, and click “Delete”.
A new window pops up and asks you to confirm the pipeline deletion.
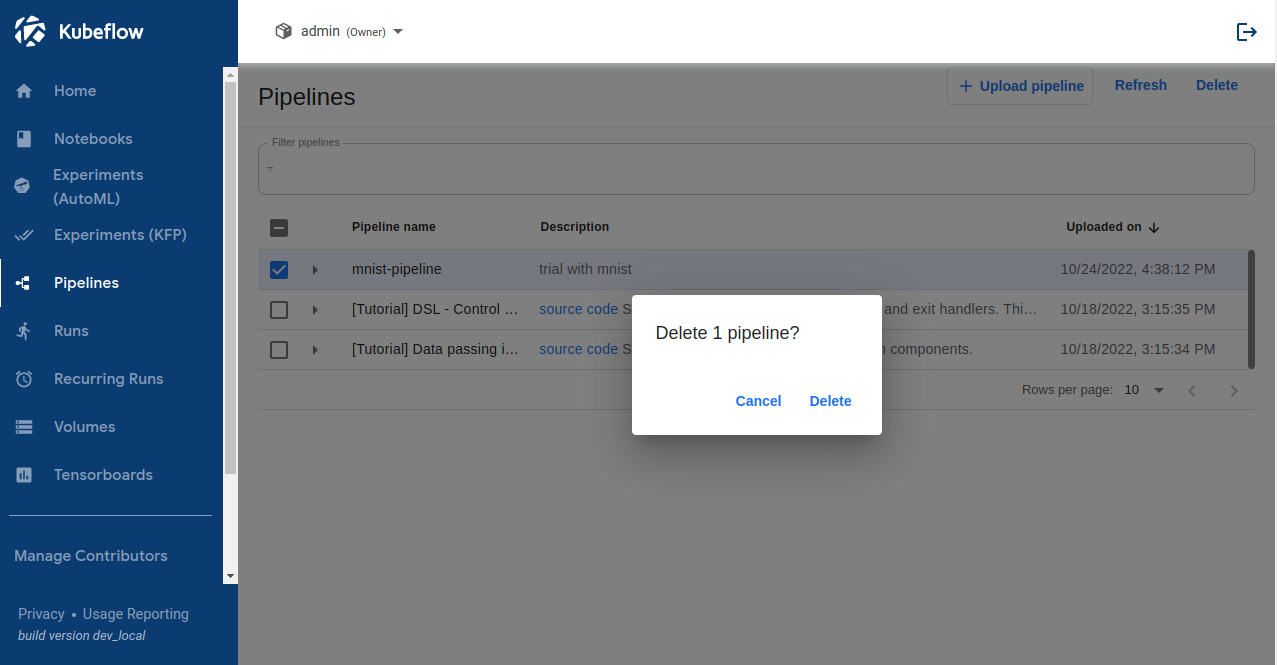
That’s it, your pipeline is now deleted!