Hyperparameter Tuning
Introduction
We use Katib for hyperparameter tuning. Katib is a Kubernetes-native project for automated machine learning (AutoML). It supports hyperparameter tuning, early stopping and neural architecture search (NAS). It tunes hyperparameters of applications written in any language of the your choice and natively supports many machine learning (ML) frameworks, such as TensorFlow, MXNet, PyTorch, XGBoost, and etc. In this section, you use Katib to automate the tuning of ML hyperparameters which control the AI learning way and rate. Katib is also used to offer neural architecture search features in order to help you find your model’s optimal architecture. If you are unfamiliar with hyperparameters tuning or Katib, please refer to Introduction to Katib for more information.
You use Katib to get the most effective configuration for the current task by running multiple experiments, each representing a single tuning operation. An experiment consists of an objective specifying what to be optimized, a search space representing the constraints used for the optimization, and an algorithm used to find the optimal values.
In this section, there are two ways to run Katib experiments.
Get Started
Run Katib experiments from CLI
You can run Katib experiments through Kubeflow on vSphere UI.
First download an example to create a Katib experiment:
curl https://raw.githubusercontent.com/kubeflow/katib/master/examples/v1beta1/hp-tuning/grid.yaml > grid-example.yaml
Note
if you use a different namespace from kubeflow, make sure to change it in the downloaded file grid-example.yaml.
As Istio sidecar is incompatible with Katib experiments, disable it using yq. To install yq, please refer to its
installation document.
yq -i '.spec.trialTemplate.trialSpec.spec.template.metadata.annotations."sidecar.istio.io/inject" = "false"' grid-example.yaml
Now you are ready to apply the YAML file to start your experiment:
kubectl apply -f grid-example.yaml
Katib experiment then starts running. You can inspect experiment progress using kubectl by running the following command:
kubectl -n kubeflow get experiment grid-example -o yaml
Run Katib experiments from Kubeflow on vSphere UI
You can also use Kubeflow on vSphere UI to run Katib experiments.
Again, first save the following content as grid-example.yaml which is used to generate Katib experiment.
---
apiVersion: kubeflow.org/v1beta1
kind: Experiment
metadata:
  namespace: <YOUR_NAME_SPACE>
  name: grid
spec:
  objective:
    type: maximize
    goal: 0.99
    objectiveMetricName: Validation-accuracy
    additionalMetricNames:
      - Train-accuracy
  algorithm:
    algorithmName: grid
  parallelTrialCount: 3
  maxTrialCount: 12
  maxFailedTrialCount: 3
  parameters:
    - name: lr
      parameterType: double
      feasibleSpace:
        min: "0.001"
        max: "0.01"
        step: "0.001"
    - name: num-layers
      parameterType: int
      feasibleSpace:
        min: "2"
        max: "5"
    - name: optimizer
      parameterType: categorical
      feasibleSpace:
        list:
          - sgd
          - adam
          - ftrl
  trialTemplate:
    primaryContainerName: training-container
    trialParameters:
      - name: learningRate
        description: Learning rate for the training model
        reference: lr
      - name: numberLayers
        description: Number of training model layers
        reference: num-layers
      - name: optimizer
        description: Training model optimizer (sdg, adam or ftrl)
        reference: optimizer
    trialSpec:
      apiVersion: batch/v1
      kind: Job
      spec:
        template:
          metadata:
            annotations:
              sidecar.istio.io/inject: "false"
          spec:
            containers:
              - name: training-container
                image: docker.io/kubeflowkatib/mxnet-mnist:latest
                command:
                  - "python3"
                  - "/opt/mxnet-mnist/mnist.py"
                  - "--batch-size=64"
                  - "--lr=${trialParameters.learningRate}"
                  - "--num-layers=${trialParameters.numberLayers}"
                  - "--optimizer=${trialParameters.optimizer}"
            restartPolicy: Never
Open the grid-example.yaml file and edit it, changing .metadata.namespace to your own. Note that here we also disable Istio
sidecar using sidecar.istio.io/inject: "false", under .spec.trialTemplate.trialSpec.spec.template.metadata.annotations.
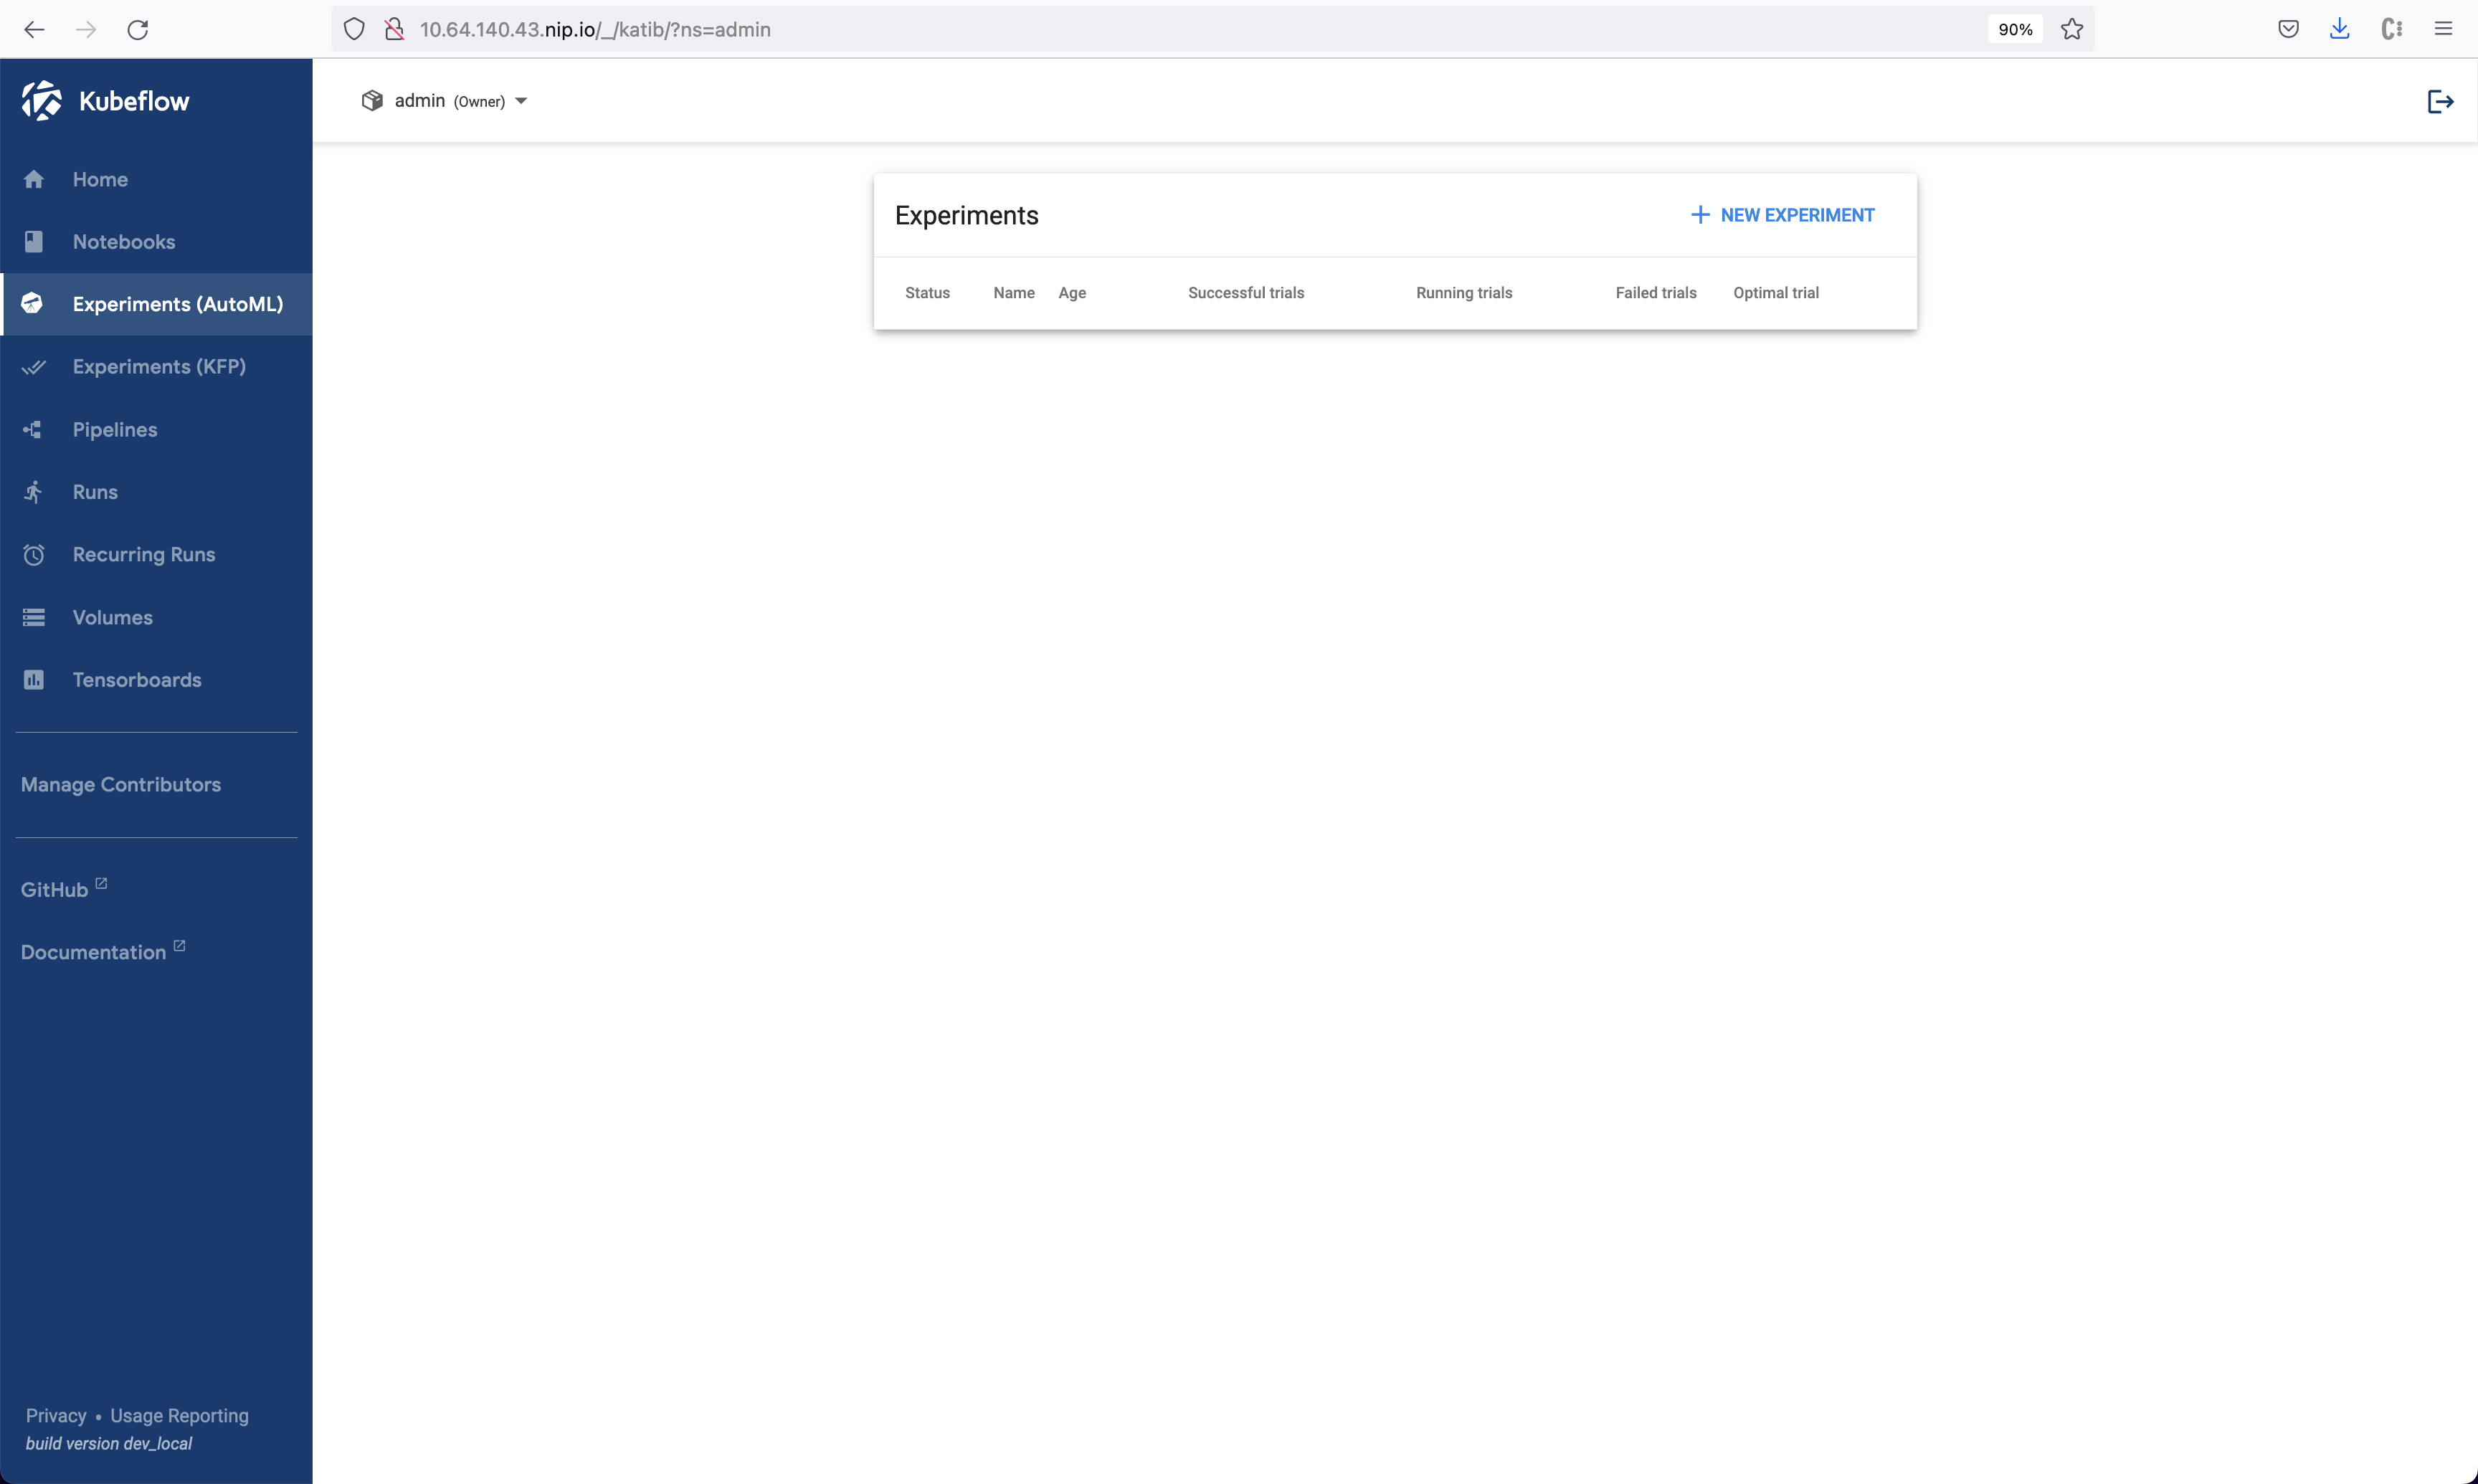
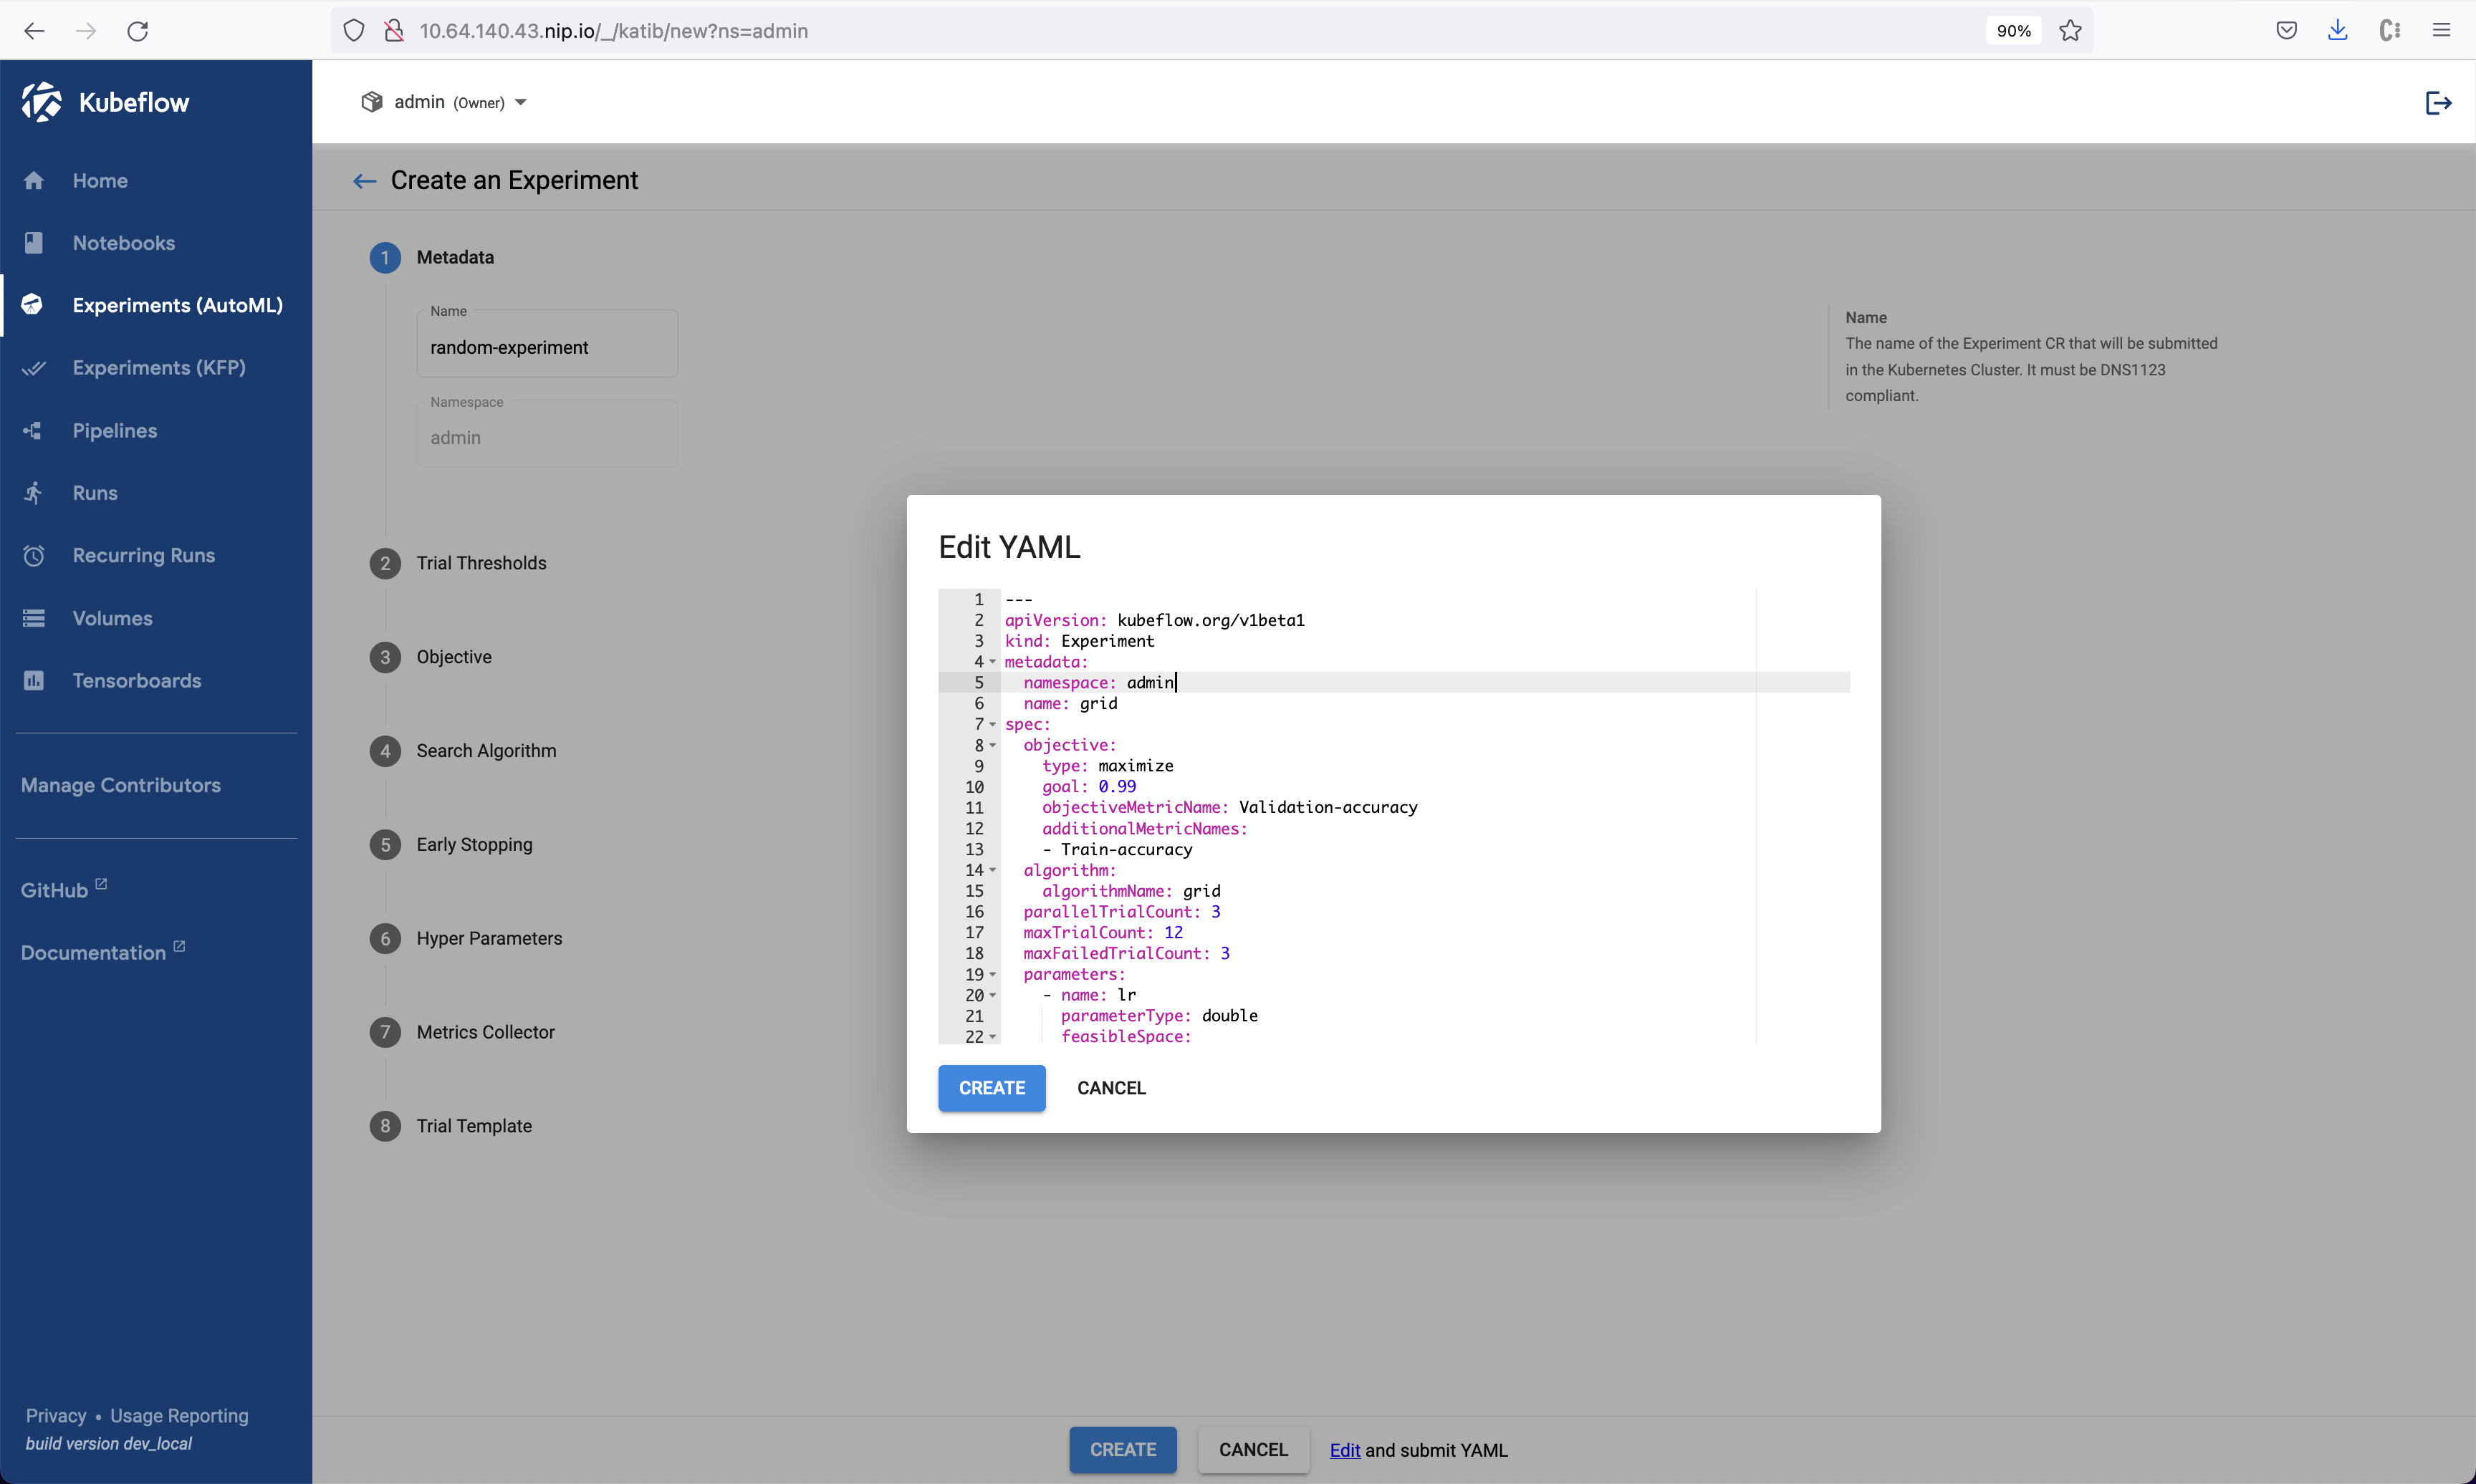
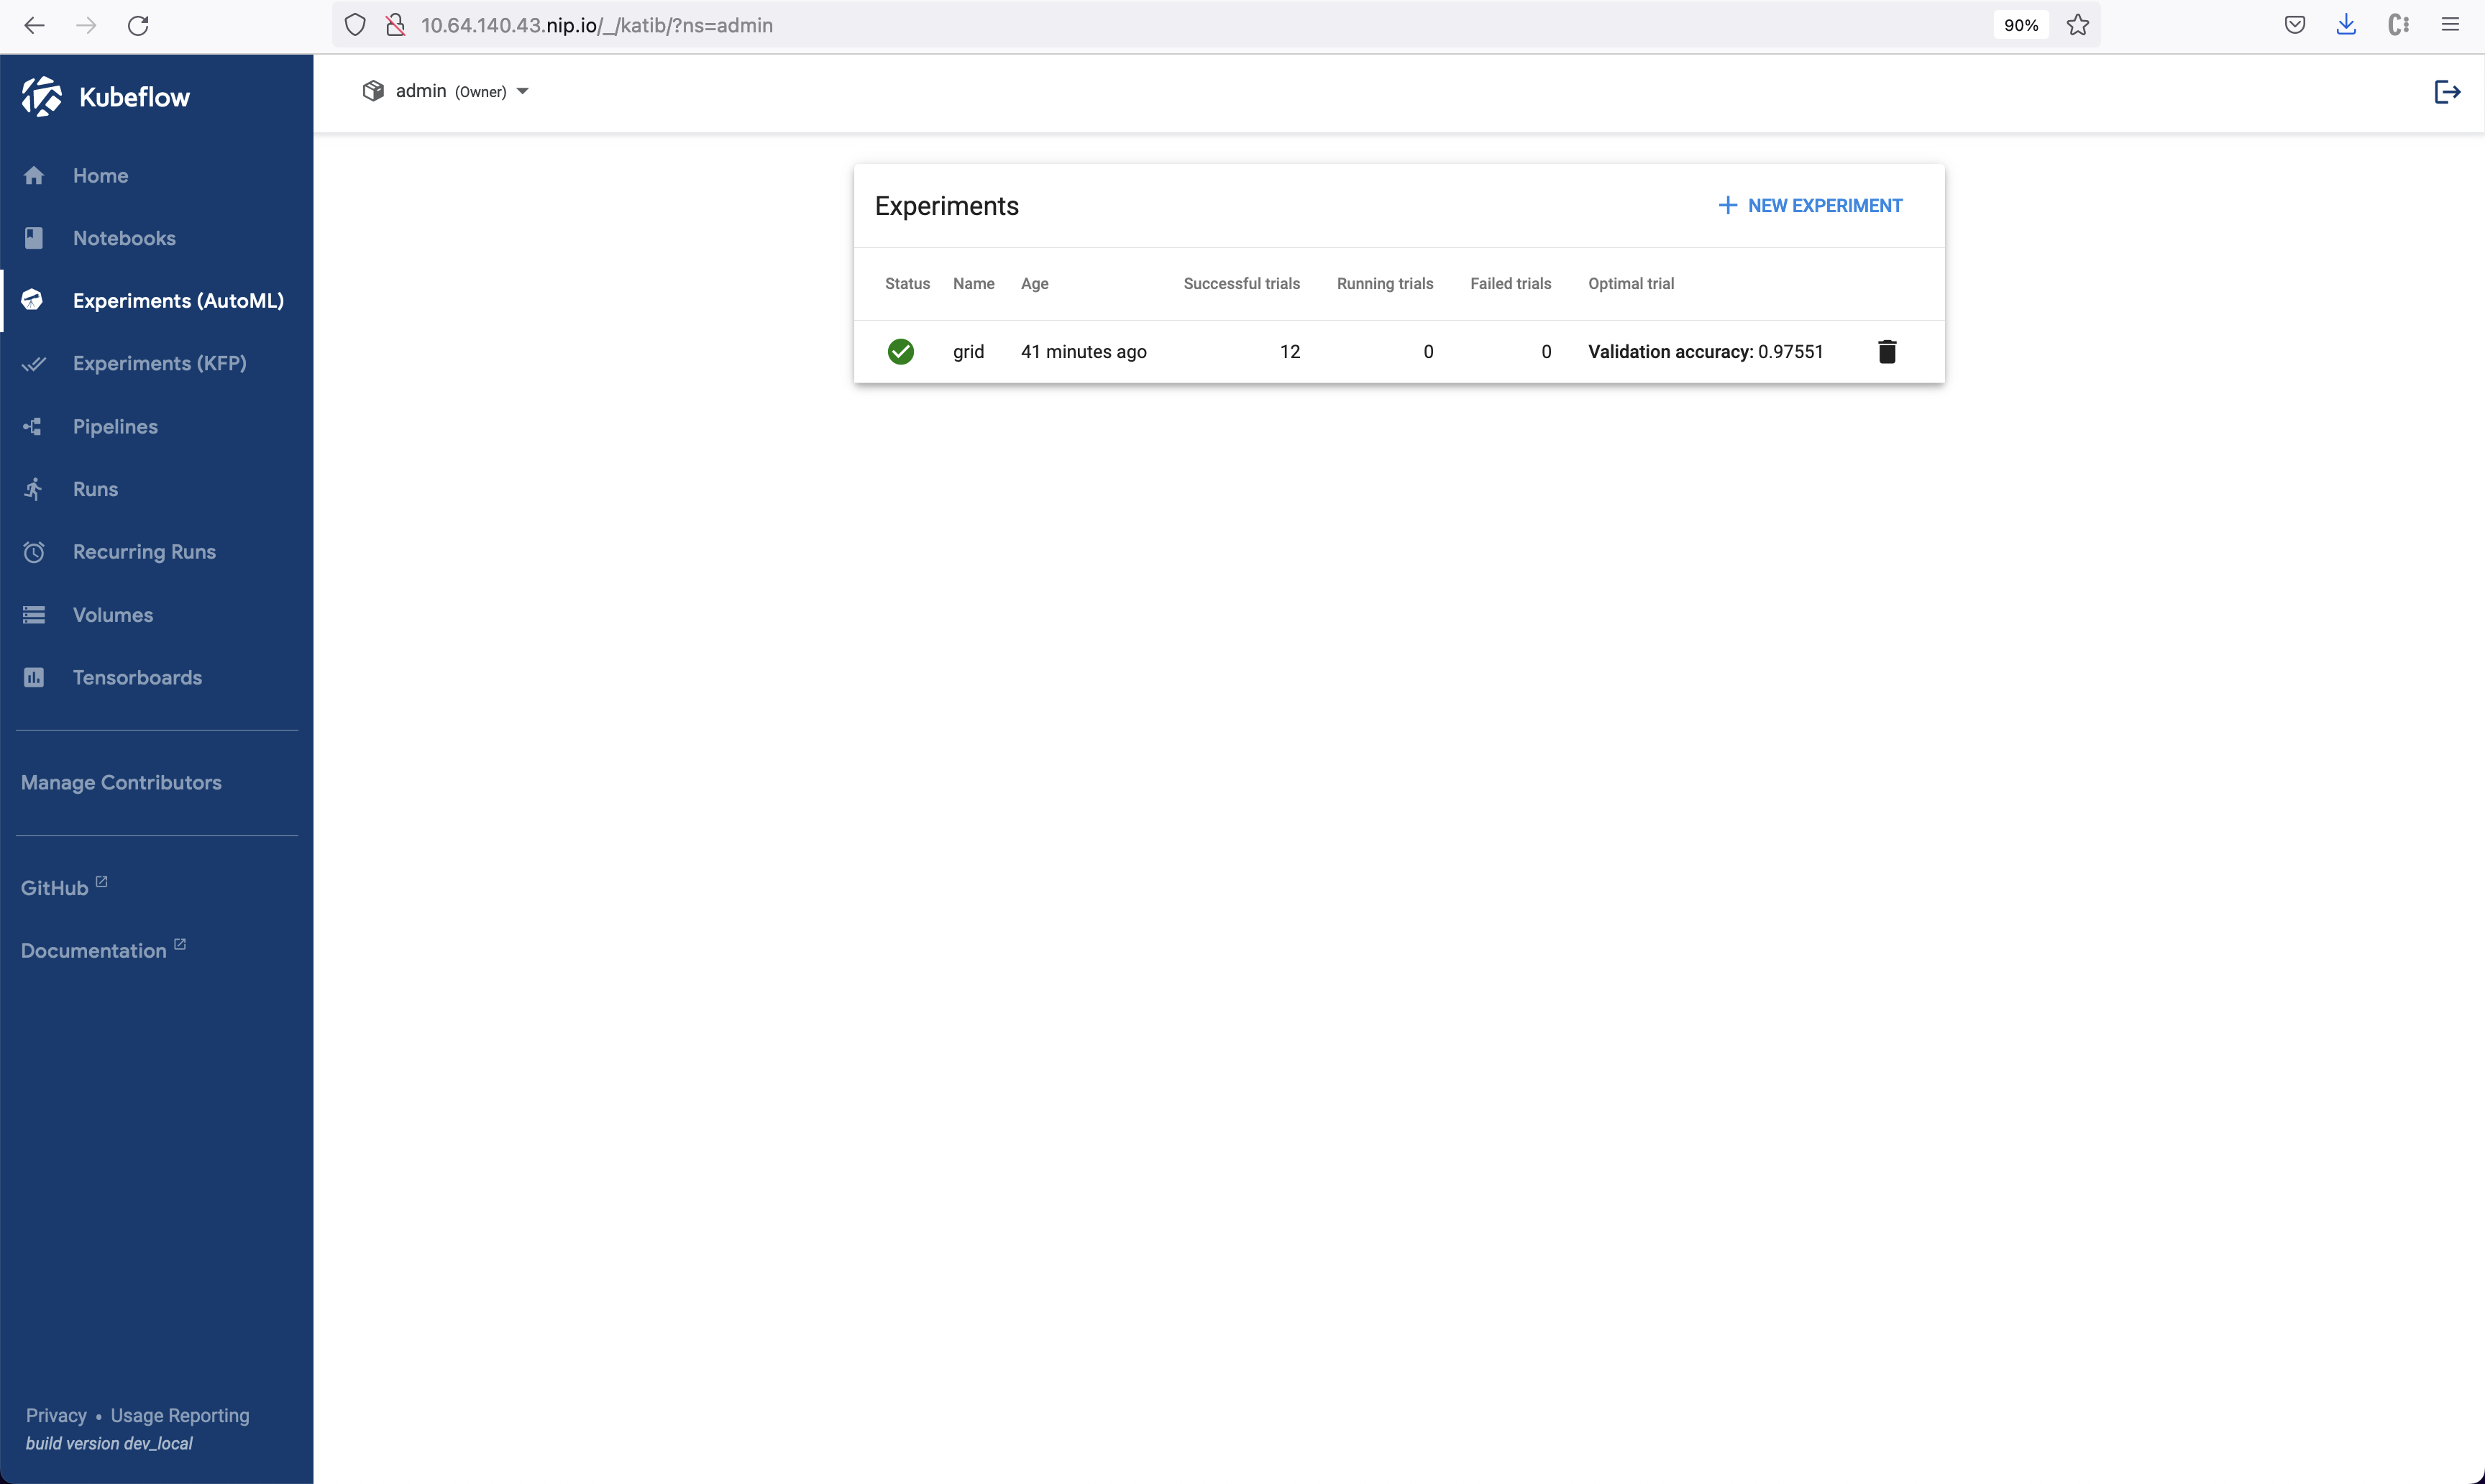
Open Kubeflow on vSphere UI in your browswer, go to Experiments (AutoML) on the left panel, and select New Experiment.
Click the link labelled Edit and submit YAML at the bottom, and paste the content of the file grid-example.yaml you just saved and edited.
Then click CREATE.
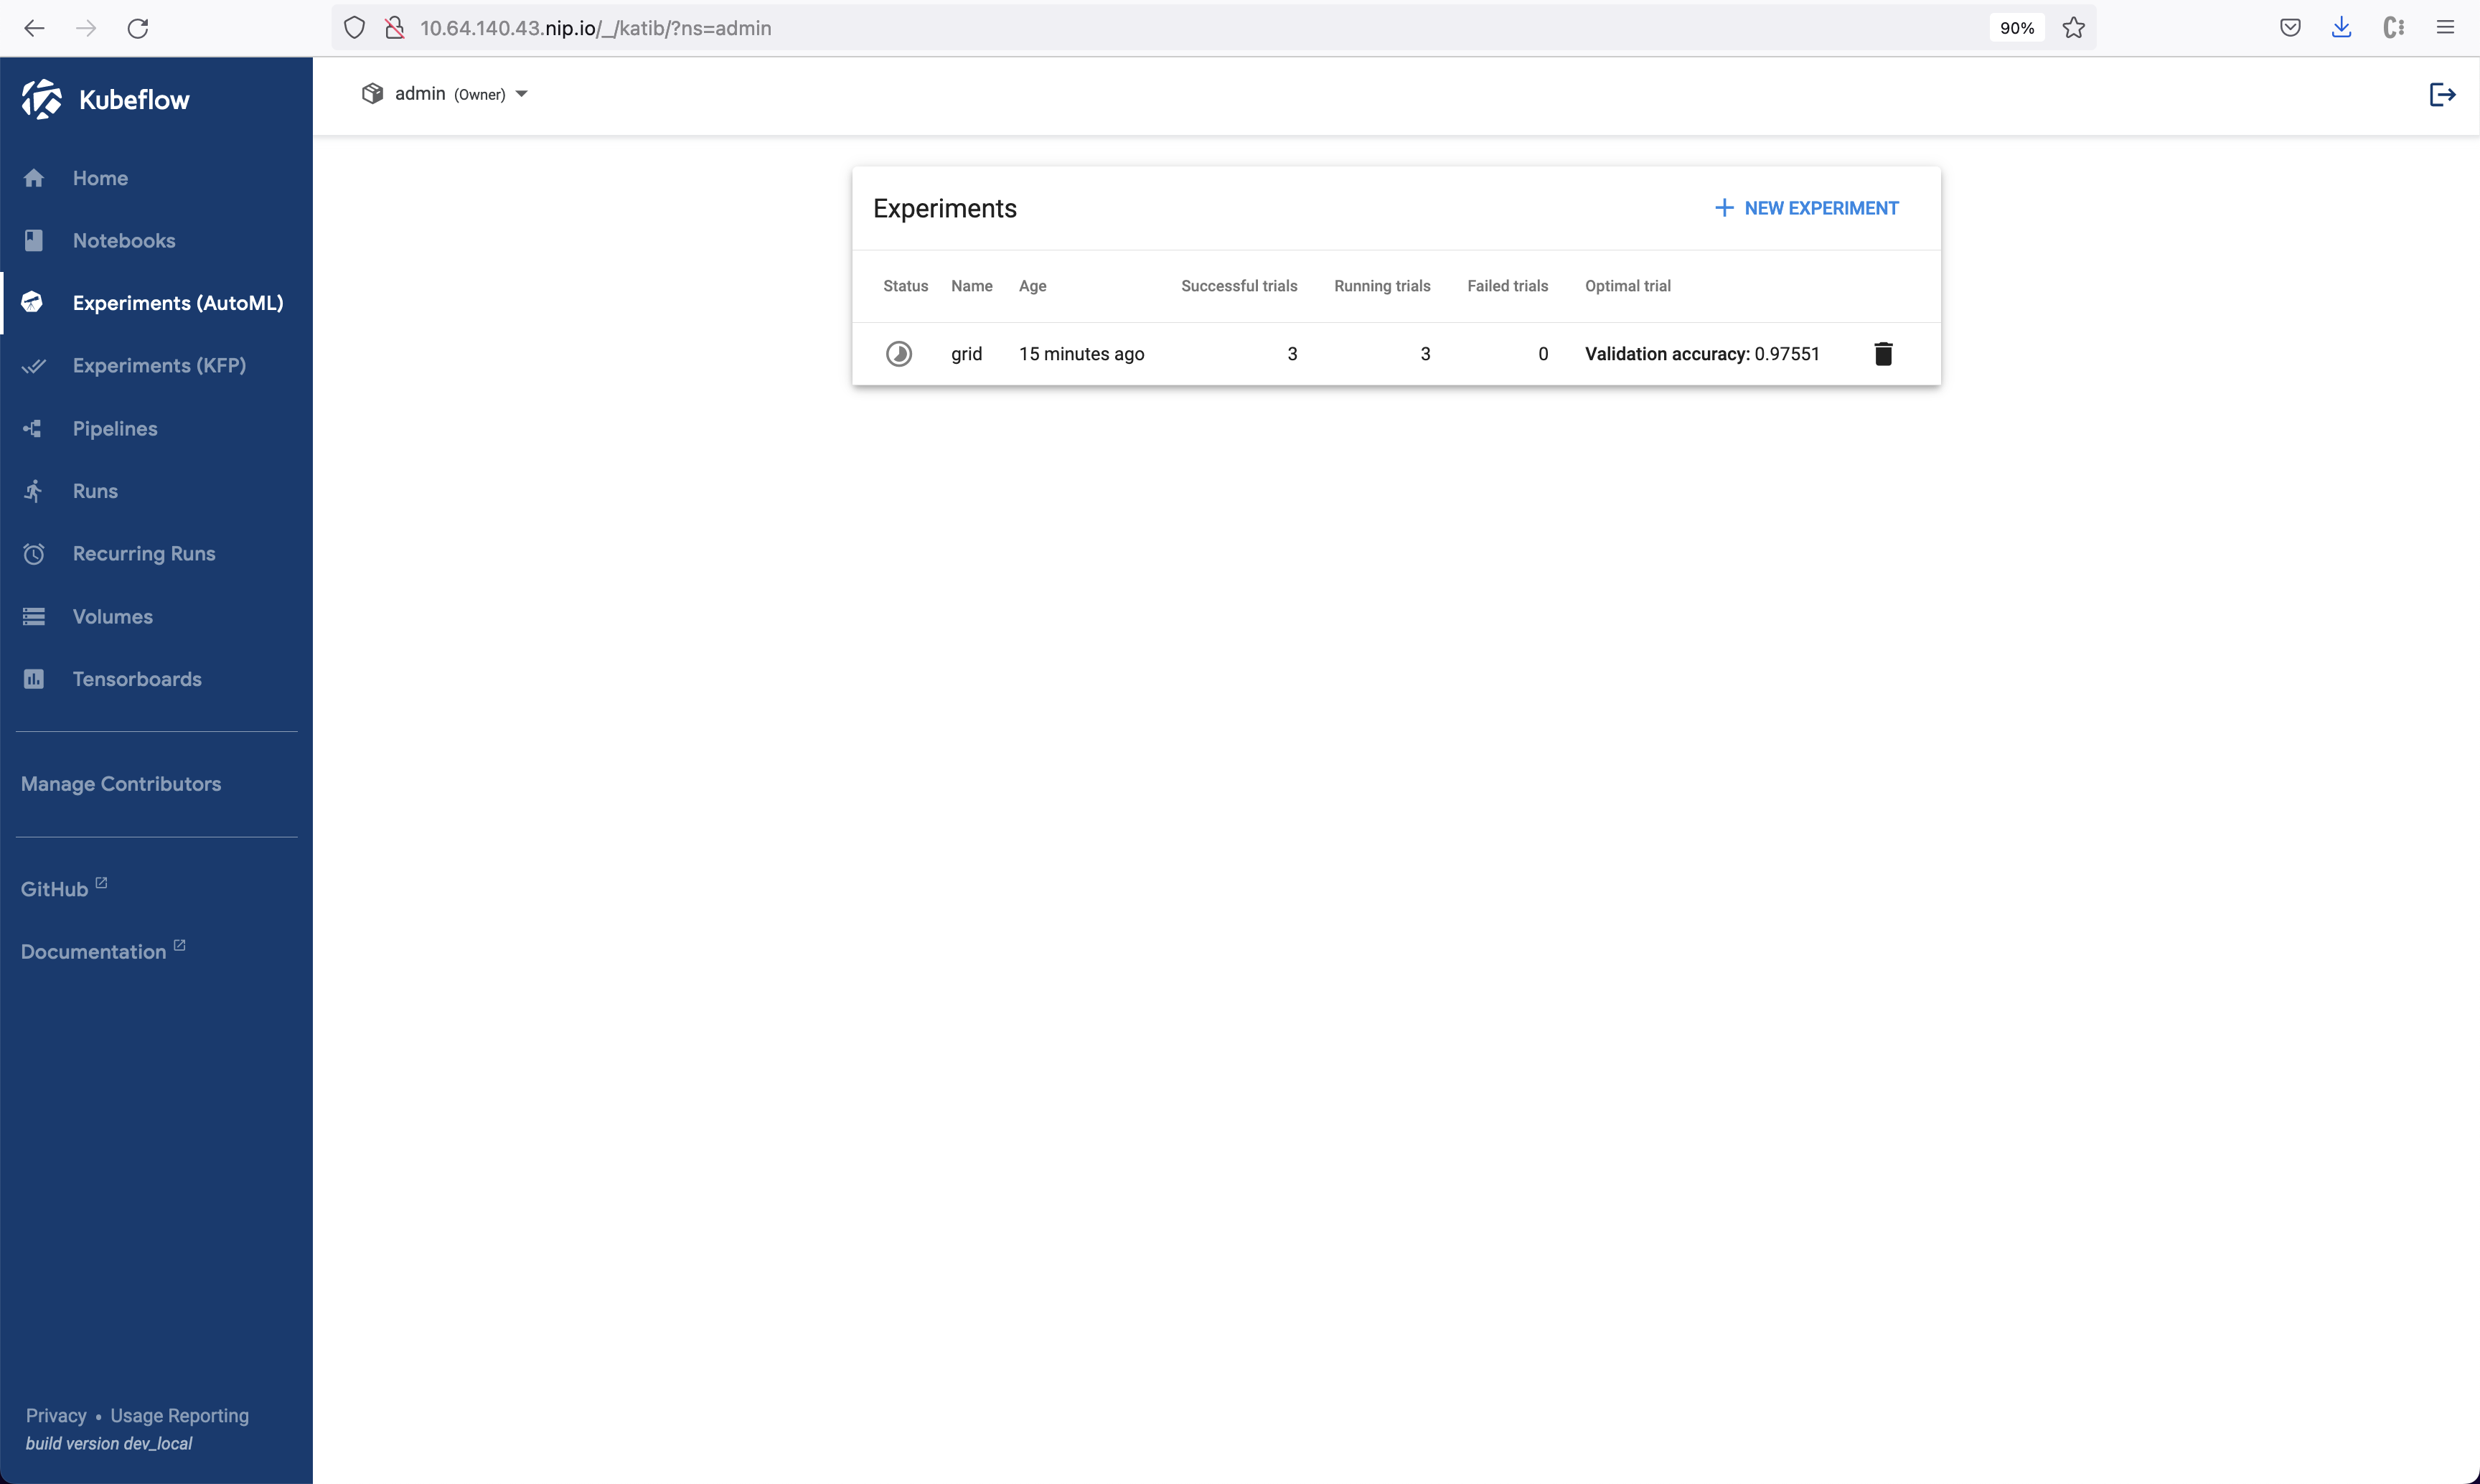
Once the experiment is created and submitted, in the Katib dashboard under Experiment (AutoML), you see the experiment starts running. To inspect the experiment for more details, click on the experiment.

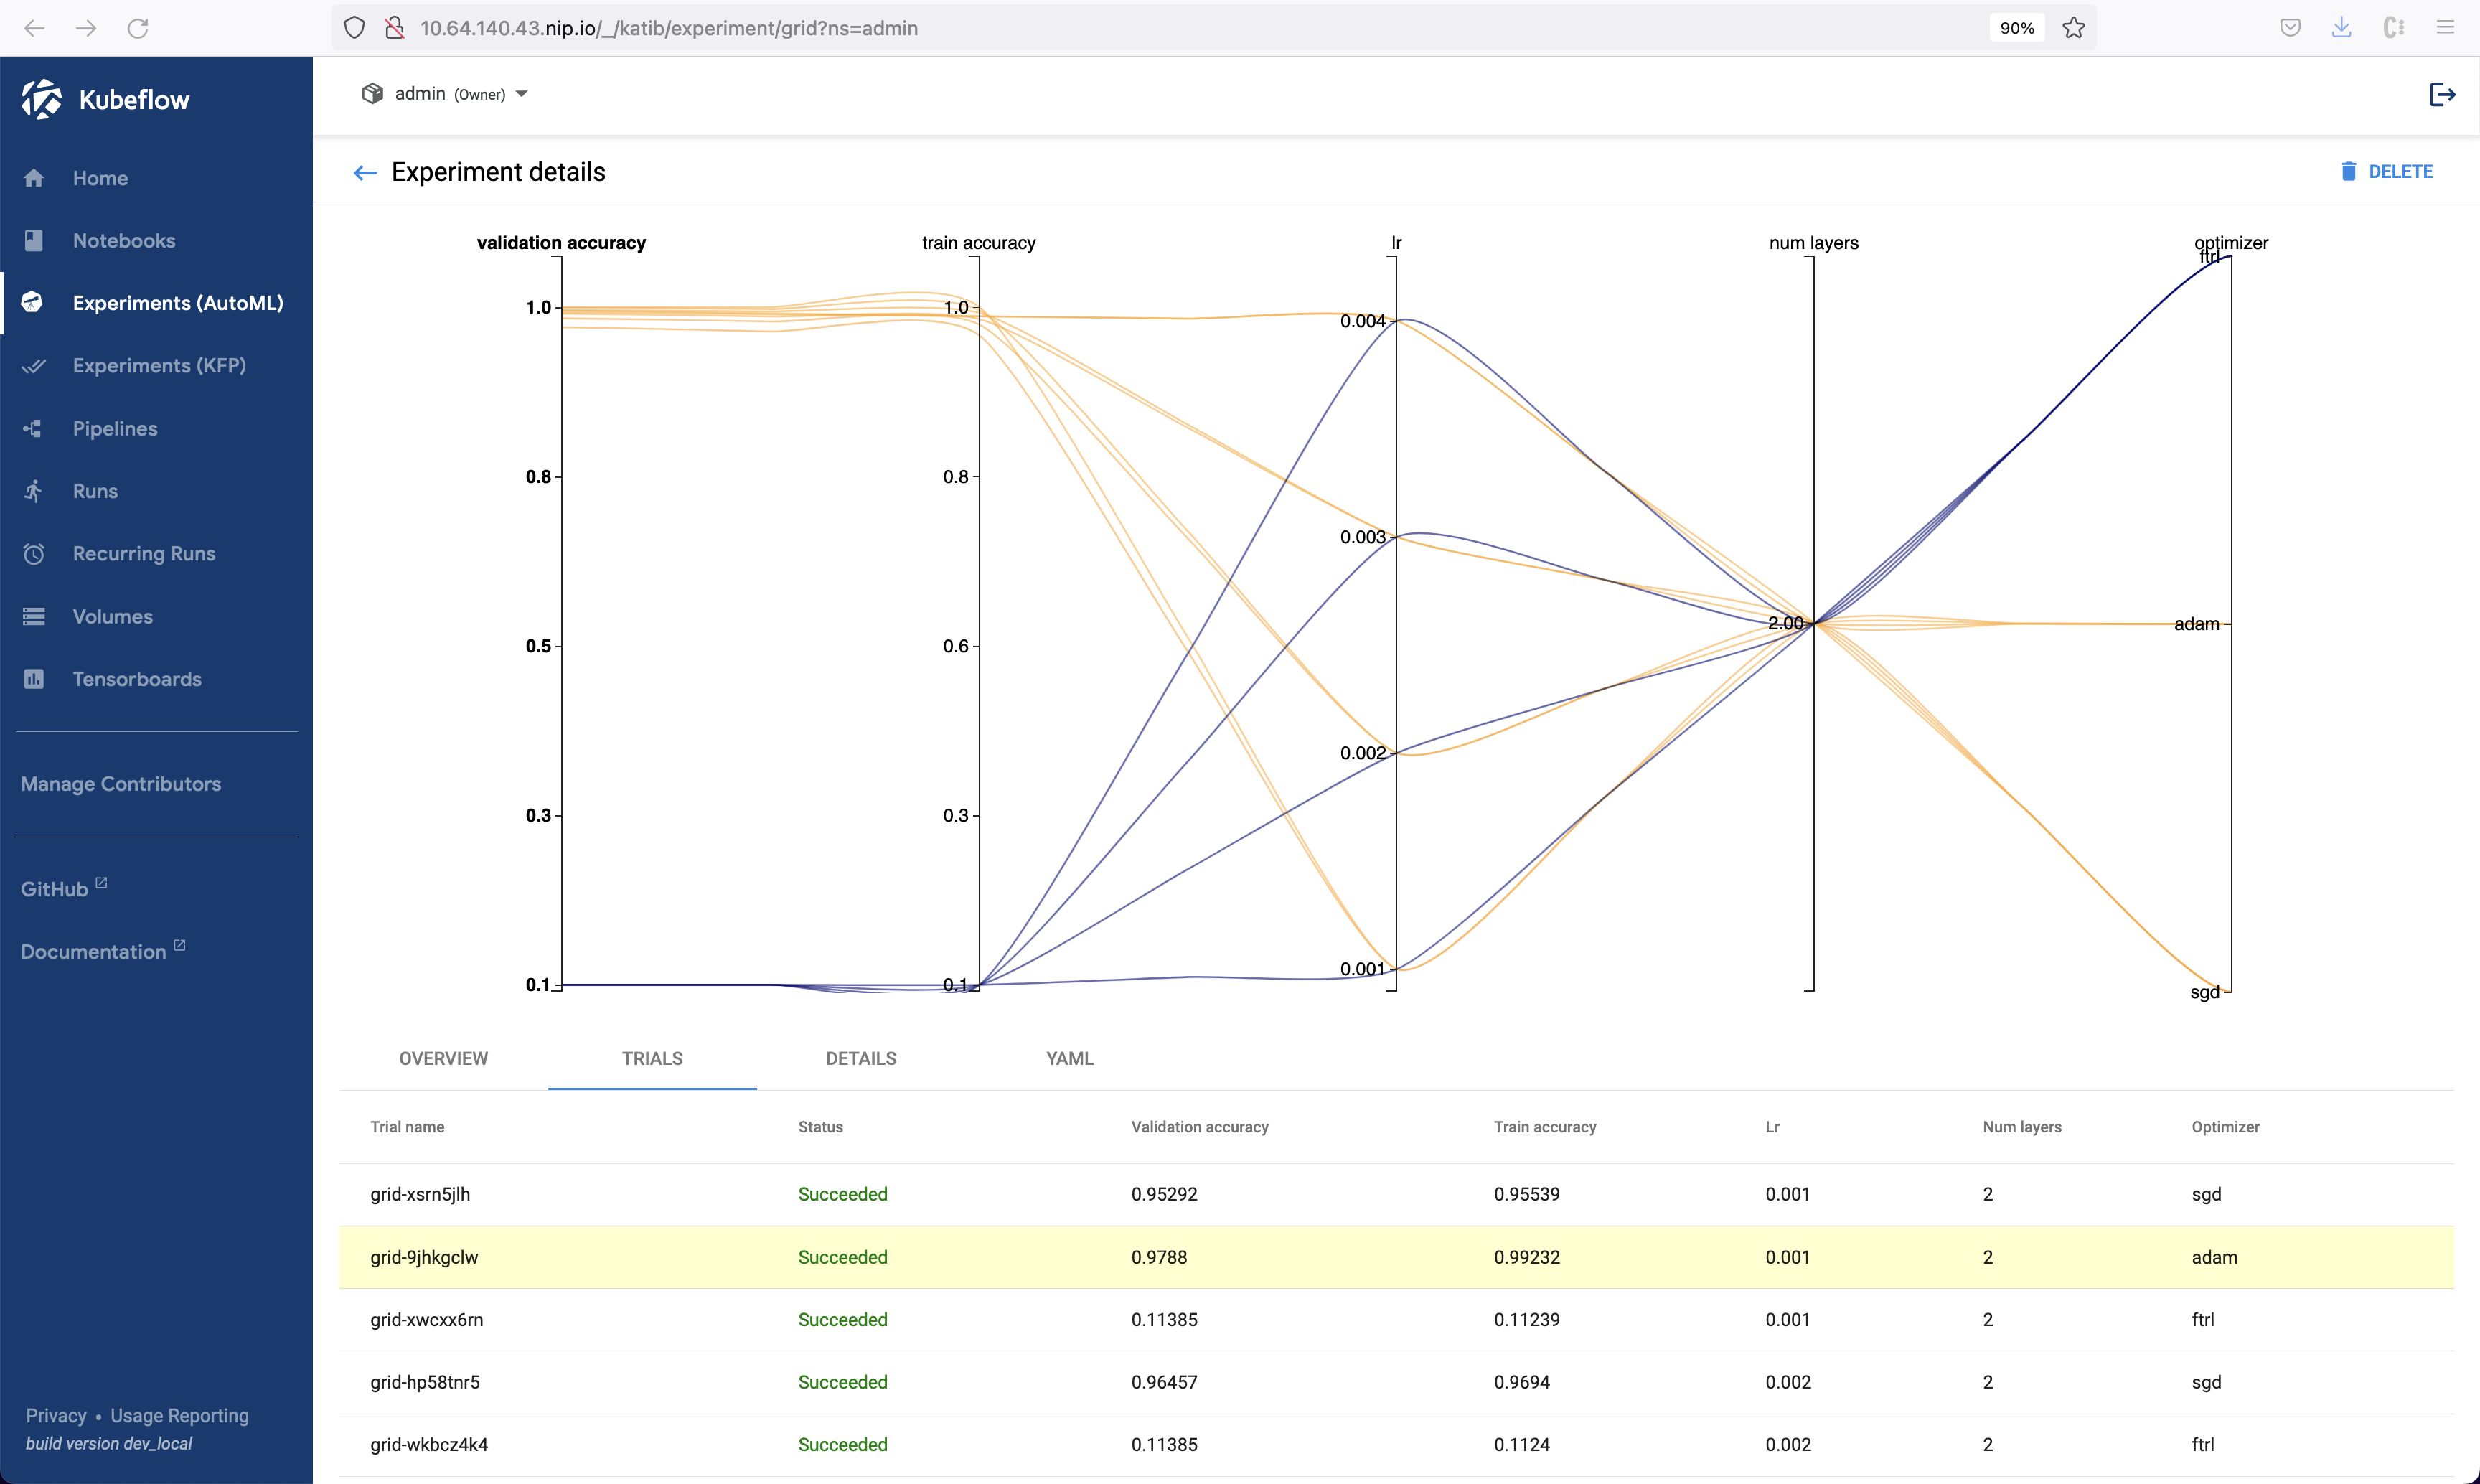
In the Experiment Details view, you can see how your experiment is progressing, such as information of each running trial, the experiment’s YAML file, and a plot recording parameters and metrics related to your experiment.
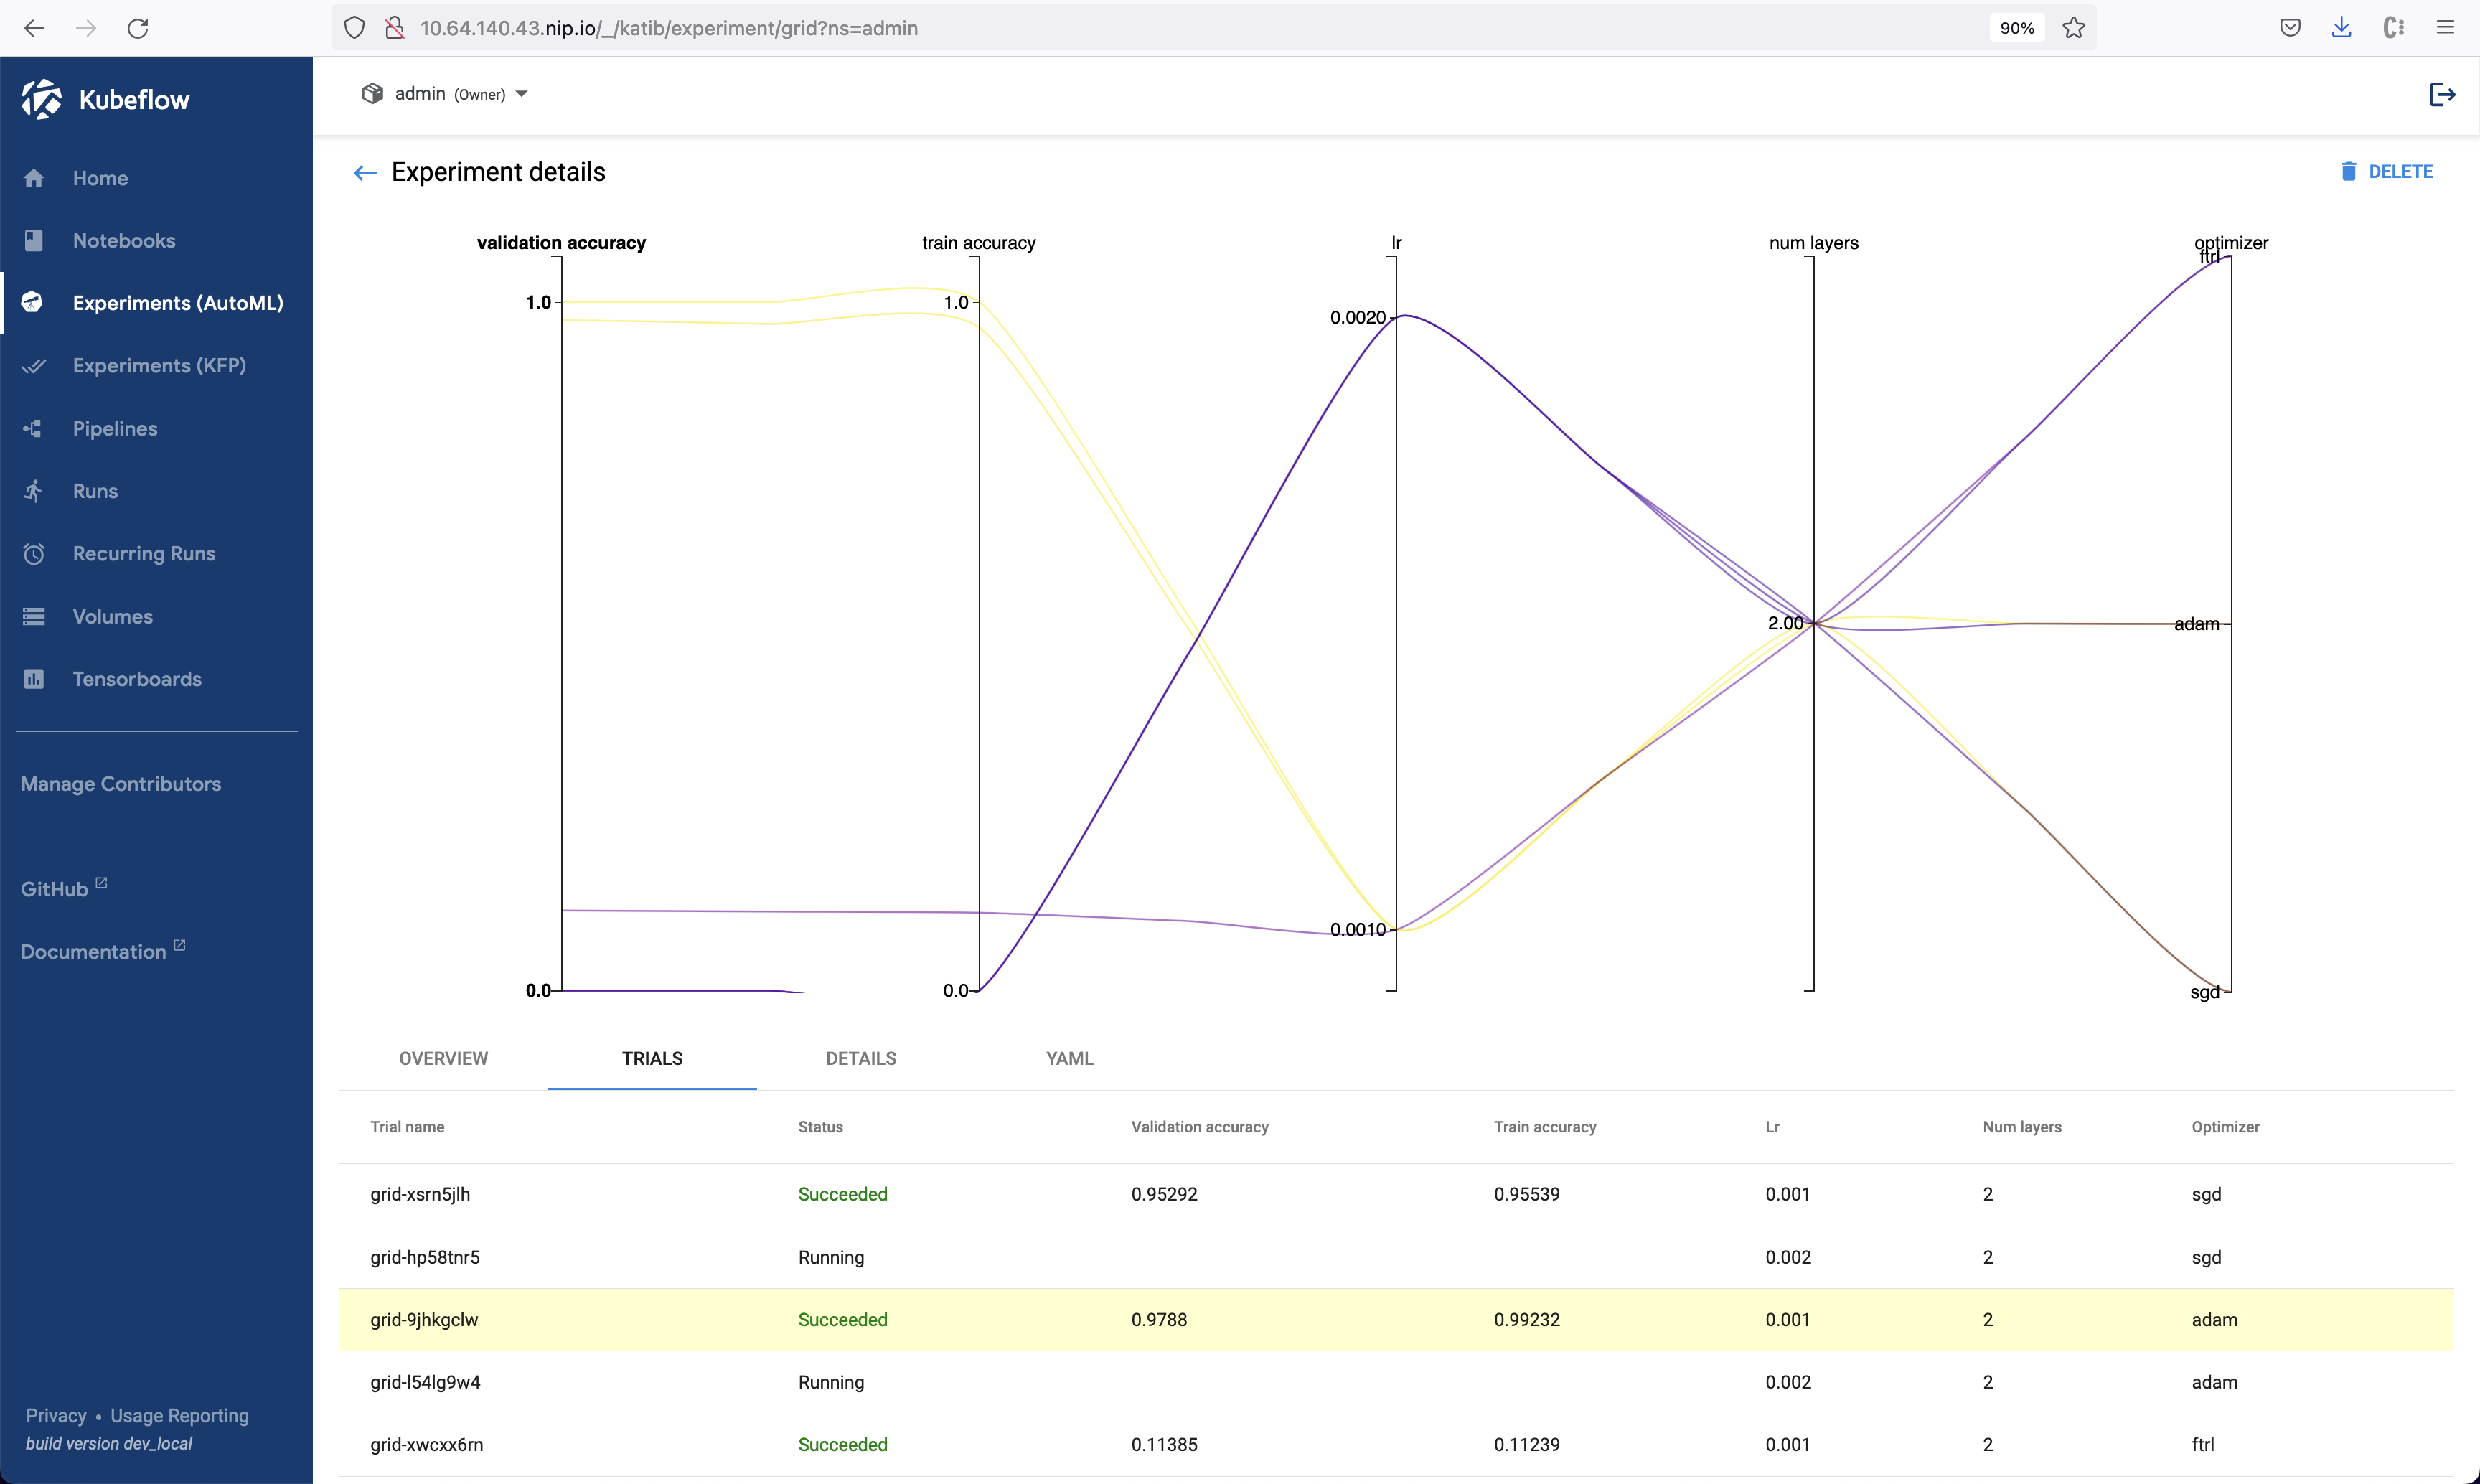
The experiment keeps running until the objective you set in the YAML file gets realized, or it’s timed out. In this example, when the experiment finishes, you see the recommended hyperparameters information, as well as the results of all trial and the optimal metrics.
Note
The experiment takes some time to finish, from about 30 minutes to 2 hours.