Running Photon OS on Amazon Elastic Cloud Compute
This guide describes how to get Photon OS up and running on Amazon Web Services Elastic Cloud Compute (EC2), customize Photon with cloud-init, connect to it with SSH, and run a containerized application.
About Photon OS?
Photon OS™ is an open source Linux container host optimized for cloud-native applications, cloud platforms, and VMware infrastructure. Photon OS provides a secure run-time environment for efficiently running containers. For an overview, see https://vmware.github.io/photon/.
Prerequisites
Using Photon OS within AWS EC2 requires the following resources:
- AWS account. Working with EC2 requires an Amazon account for AWS with valid payment information. Keep in mind that, if you try the examples in this document, you will be charged by Amazon. See Setting Up with Amazon EC2.
- Amazon tools. The following examples also assume that you have installed and configured the Amazon AWS CLI and the EC2 CLI and AMI tools, including ec2-ami-tools.
See Installing the AWS Command Line Interface, Setting Up the Amazon EC2 Command Line Interface Tools on Linux, and Configuring AWS Command-Line Interface. Also see Setting Up the AMI Tools. This article uses an Ubuntu 14.04 workstation to generate the keys and certificates that AWS requires.
Downloading the Photon OS Image for Amazon
VMware packages Photon OS as a cloud-ready Amazon machine image (AMI) that you can download for free from Bintray.
Download the Photon OS AMI now and save it on your workstation. For instructions, see Downloading Photon OS.
Note: The AMI version of Photon is a virtual appliance with the information and packages that Amazon needs to launch an instance of Photon in the cloud. To build the AMI version, VMware starts with the minimal version of Photon OS and adds the sudo and tar packages to it.
Getting Photon OS Up and Running on EC2
To run Photon OS on EC2, you must use cloud-init with an EC2 data source. The cloud-init service configures the cloud instance of a Linux image. An instance is a virtual server in the Amazon cloud.
The examples in this article show how to generate SSH and RSA keys for your Photon instance, upload the Photon OS .ami image to the Amazon cloud, and configure it with cloud-init. In many of the examples, you must replace information with your own paths, account details, or other information from Amazon.
Step 1: Create a Key Pair
The first step is to generate SSH keys on, for instance, an Ubuntu workstation:
ssh-keygen -f ~/.ssh/mykeypair
The command generates a public key in the file with a .pub extension and a private key in a file with no extension. Keep the private key file and remember the name of your key pair; the name is the file name of the two files without an extension. You'll need the name later to connect to the Photon instance.
Change the mode bits of the public key pair file to protect its security. In the command, include the path to the file if you need to.
chown 600 mykeypair.pub
Change the mode bits on your private key pair file so that only you can view it:
chmod 400 mykeypair
To import your public key pair file (but not your private key pair file), connect to the EC2 console at https://console.aws.amazon.com/ec2/ and select the region for the key pair. A key pair works in only one region, and the instance of Photon that will be uploaded later must be in the same region as the key pair. Select key pairs under Network & Security, and then import the public key pair file that you generated earlier.
For more information, see Importing Your Own Key Pair to Amazon EC2.
Step 2: Generate a Certificate
When you bundle up an image for EC2, Amazon requires an RSA user signing certificate. You create the certificate by using openssl to first generate a private RSA key and then to generate the RSA certificate that references the private RSA key. Amazon uses the pairing of the private key and the user signing certificate for handshake verification.
First, on Ubuntu 14.04 or another workstation that includes openssl, run the following command to generate a private key. If you change the name of the key, keep in mind that you will need to include the name of the key in the next command, which generates the certificate.
openssl genrsa 2048 > myprivatersakey.pem
Remember where you store your private key locally; you'll need it again later.
Second, run the following command to generate the certificate. The command prompts you to provide more information, but because you are generating a user signing certificate, not a server certificate, you can just type Enter for each prompt to leave all the fields blank.
openssl req -new -x509 -nodes -sha256 -days 365 -key myprivatersakey.pem -outform PEM -out certificate.pem
For more information, see the Create a Private Key and the Create the User Signing Certificate sections of Setting Up the AMI Tools.
Third, upload to AWS the certificate value from the certificate.pem file that you created in the previous command. Go to the Identity and Access Management console at https://console.aws.amazon.com/iam/, navigate to the name of your user, open the Security Credentials section, click Manage Signing Certificates, and then click Upload Signing Certificate. Open certificate.pem in a text editor, copy and paste the contents of the file into the Certificate Body field, and then click Upload Signing Certificate.
For more information, see the Upload the User Signing Certificate section of Setting Up the AMI Tools.
Step 3: Create a Security Group
The next prerequisite is to create a security group and set it to allow SSH, HTTP, and HTTPS connections over ports 22, 80, and 443, respectively. Connect to the EC2 command-line interface and run the following commands:
aws ec2 create-security-group --group-name photon-sg --description "My Photon security group"
{
    "GroupId": "sg-d027efb4"
}
aws ec2 authorize-security-group-ingress --group-name photon-sg --protocol tcp --port 22 --cidr 0.0.0.0/0
The GroupId is returned by EC2. Write it down; you'll need it later.
By using 0.0.0.0/0 for SSH ingress on Port 22, you are opening the port to all IP addresses--which is not a security best practice but a convenience for the examples in this article. For a production instance or other instances that are anything more than temporary machines, you should authorize only a specific IP address or range of addresses. See Amazon's document on Authorizing Inbound Traffic for Linux Instances.
Repeat the command to allow incoming traffic on Port 80 and on Port 443:
aws ec2 authorize-security-group-ingress --group-name photon-sg --protocol tcp --port 80 --cidr 0.0.0.0/0

aws ec2 authorize-security-group-ingress --group-name photon-sg --protocol tcp --port 443 --cidr 0.0.0.0/0
Check your work:
aws ec2 describe-security-groups --group-names photon-sg
Step 4: Extract the Tarball
Next, make a directory to store the image, and then extract the Photon OS image from its archive by running the following tar command. (You might have to change the file name to match the version you have.)
mkdir bundled
tar -zxvf ./photon-ami.tar.gz
Step 5: Bundle the Image
The next step is to run the ec2-bundle-image command to create an instance store-backed Linux AMI from the Photon OS image that you extracted in the previous step. The result of the ec2-bundle-image command is a manifest that describes the machine in an XML file.
The command uses the certificate path to your PEM-encoded RSA public key certificate file; the path to your PEM-encoded RSA private key file; your EC2 user account ID; the correct architecture for Photon OS; the path to the Photon OS AMI image extracted from its tar file; and the bundled directory from the previous step.
You must replace the values of the certificate path, the private key, and the user account with your own values.
$ ec2-bundle-image --cert certificate.pem --privatekey myprivatersakey.pem --user <EC2 account id> --arch x86_64 --image photon-ami.raw --destination ./bundled/
Step 6: Put the Bundle in a Bucket
Next, make an S3 bucket, replacing <bucket-name> with the name that you want. The command creates the bucket in the region specified in your Amazon configuration file, which should be the same region in which you are using your key pair file:
$ aws s3 mb s3://<bucket-name>
Now upload the bundle to the Amazon S3 cloud. The following command includes the path to the XML file containing the manifest for the Photon OS machine created during the previous step, though you might have to change the file name to match the version you have. The manifest file is typically located in the same directory as the bundle.
The command also includes the name of the Amazon S3 bucket in which the bundle is to be stored; your AWS access key ID; and your AWS secret access key.
$ ec2-upload-bundle --manifest ./bundled/photon-ami.manifest.xml --bucket <bucket-name> --access-key <Account Access Key> --secret-key <Account Secret key>
Step 7: Register the Image
The final step in creating an AMI before you can launch it is to register it. The following command includes a name for the AMI, its architecture, and its virtualization type. The virtualization type for Photon OS is hvm.
$ ec2-register <bucket-name>/photon-ami.manifest.xml --name photon-ami --architecture x86_64 --virtualization-type hvm
Once registered, you can launch as many new instances as you want.
Step 8: Run an Instance of the Image with Cloud-Init
Now things get a little tricky. In the following command, the user-data-file option instructs cloud-init to import the cloud-config data in user-data.txt.
The command also includes the ID of the AMI, which you can obtain by running ec2-describe-images; the instance type of m3.medium, which is a general purpose instance type; and the name of key pair, which should be replaced with your own--otherwise, you won't be able to connect to the instance.
Before you run the command, change directories to the directory containing the mykeypair file and add the path to the user-data.txt.
$ ec2-run-instances <ami-ID> --instance-type m3.medium -g photon-sg --key mykeypair --user-data-file user-data.txt
Here are the contents of the user-data.txt file that cloud-init applies to the machine the first time it boots up in the cloud.
#cloud-config
hostname: photon-on-01
groups:
- cloud-admins
- cloud-users
users:
- default
- name: photonadmin
   gecos: photon test admin user
   primary-group: cloud-admins
   groups: cloud-users
   lock-passwd: false
   passwd: vmware
- name: photonuser
   gecos: photon test user
   primary-group: cloud-users
   groups: users
   passwd: vmware
packages:
- vim
Step 9: Get the IP Address of Your Image
Now run the following command to check on the state of the instance that you launched:
$ ec2-describe-instances
Finally, you can obtain the external IP address of the instance by running the following query:
$ aws ec2 describe-instances --instance-ids <instance-id> --query 'Reservations[*].Instances[*].PublicIpAddress' --output=text
If need be, check the cloud-init output log file on EC2 at /var/log/cloud-init-output.log to see how EC2 handled the settings in the cloud-init data file.
For more information on using cloud-init user data on EC2, see Running Commands on Your Linux Instance at Launch.
Deploy a Containerized Application in Photon OS
This section shows you how to connect to the Photon instance by using SSH and to launch a web server by running it in Docker.
Step 1: Connect with SSH
Connect to the instance over SSH by specifying the private key (.pem) file and the user name for the Photon machine, which is root:
ssh -i ~/.ssh/mykeypair root@<public-ip-address-of-instance>
For complete instructions, see Connecting to Your Linux Instance Using SSH.
Step 2: Run Docker
On the minimal version of Photon OS, the docker engine is enabled and running by default, which you can see by running the following command:
systemctl status docker
Step 3: Start the Web Server
Note: Please make sure that the proper security policies have been enabled on the Amazon AWS side to enable traffic to port 80 on the VM.
Since Docker is running, you can run an application in a container--for example, the Nginx Web Server. This example uses the popular open source web server Nginx. The Nginx application has a customized VMware package that the Docker engine can download directly from the Docker Hub.
To pull Nginx from its Docker Hub and start it, run the following command:
docker run -p 80:80 vmwarecna/nginx
The Nginx web server should be bound to the public DNS value for the instance of Photon OS--that is, the same address with which you connected over SSH.
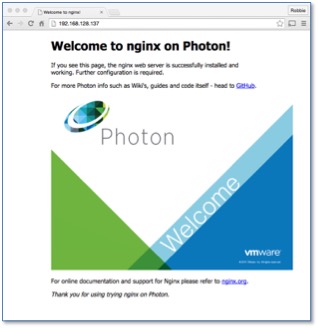
Step 4: Test the Web Server
On your local workstation, open a web browser and go to the the public address of the Photon OS instance running Docker. The following screen should appear, showing that the web server is active:
When you're done, halt the Docker container by typing Ctrl+c in the SSH console where you are connected to EC2.
You can now run other containerized applications from the Docker Hub or your own containerized application on Photon OS in the Amazon cloud.
Launching the Web Server with Cloud-Init
To eliminate the manual effort of running Docker, you can add docker run and its arguments to the cloud-init user data file by using runcmd:
#cloud-config
hostname: photon-on-01
groups:
- cloud-admins
- cloud-users
users:
- default
- name: photonadmin
   gecos: photon test admin user
   primary-group: cloud-admins
   groups: cloud-users
   lock-passwd: false
   passwd: vmware
- name: photonuser
   gecos: photon test user
   primary-group: cloud-users
   groups: users
   passwd: vmware
packages:
- vim
runcmd:
- docker run -p 80:80 vmwarecna/nginx
To try this addition, you'll have to run another instance with this new cloud-init data source and then get the instance's public IP address to check that the Nginx web server is running.
Terminating the AMI Instance
Because Amazon charges you while the instance is running, make sure to shut it down when you're done.
First, get the ID of the AMI so you can terminate it:
$ ec2-describe-instances
Finally, terminate the Photon OS instance by running the following command, replacing the placeholder with the ID that the ec2-describe-images command returned. If you ran a second instance of Photon OS with the cloud-init file that runs docker, terminate that instance, too.
$ ec2-terminate-instances <instance-id>