Installing a host against default server repository
RPM-OSTree Host default server repo installation option in Photon 3.0 will setup a profile similar to Photon Minimal, with the added benefit of being able to self-upgrade.
Who is this for?
The RPM-OSTree ‘default host’ is the easiest way to deploy a Photon RPM-OSTree host from ISO/cdrom, without the need to deploy and maintain an RPM-OSTree server. It is targeted at the user who relies on VMware Photon OS team to keep his or her system up-to-date, configured to get its updates from the official Photon 3.0 OSTree repository.
This is also the fastest way to install a host, as we’ve included in the ISO/cdrom an identical copy of the Photon 3.0 “starter” RPM-OSTree repository that is published online by VMware Photon OS team. So rather than pulling from the online repository, the installer pulls the repo from cdrom, which saves bandwidth and also reduces to zero the chances of failing due to a networking problem. After successful installation, any updates are going to be pulled from the official online repository, when Photon OS team will make them available.
Note: It is also possible to install an RPM-OSTree host against the official online repo via PXE boot, without the benefit of fast, local pull from cdrom. This will be covered in the PXE boot/kickstart chapter, as it requires additional configuration.
Installing the ISO
User will first download Photon OS ISO file that contains the installer, which is able to deploy any of the supported Photon installation profiles.
There are some steps common to all Photon installation profiles, starting with adding a VM in VMware Fusion, Workstation or ESXi, selecting the OS family, then customizing for disk size, CPU, memory size, network interface etc. (or leaving the defaults) and selecting the ISO image as cdrom. The installer will launch, that will go through disk partitioning and accepting the license agreement screens, followed by selecting an installation profile. These steps are described at the page linked below, so I won’t repeat them, just that instead of setting up a Photon Minimal profile, we will install a Photon OSTree host:
Running Project Photon on Fusion.
Select the Photon OSTree Host option.
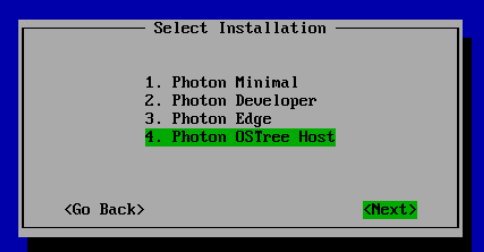
Continue with setting up a host name like photon1-def and a root password, re-confirm. Then, select “Default OSTree Server” and continue.

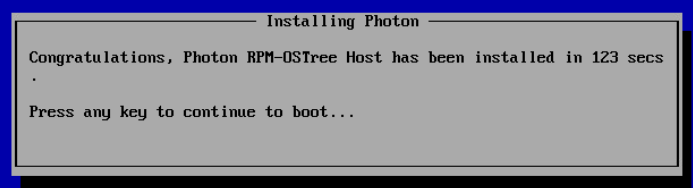
When installation is over, the VM will reboot and will show in grub VMWare Photon/Linux 3.0_minimal (ostree), which will reassure that it’s booting from an OSTree image!

Boot, login and you are ready to use it.
To upgrade your host, see Host updating operations.